9.1 Installing DAS
This section covers the following topics:
9.1.1 Overview
DAS provides a way to execute selective and configurable lists of user operations from virtually any scripting or programming medium on the Microsoft Windows operating system. This allows you to change the behavior of the workstation based on how you work, instead of how a computer works. This provides you the best and most flexible computing experience while saving time and mouse clicks, and adding some productivity improvements.
You can install, configure, and use DAS in Novell eDirectory environment.
The ARS.exe is the center of DAS. You can configure this object with an independent set of instructions by using an XML document that is obtained through an entry in the Windows registry. The XML document can be obtained either locally on the workstation or through the directory services. The XML document is called the action file and the file is named actions.xml.
Each action is a set of configurable user-level operations such as mapping a drive, testing for establishing an authenticated connection to a directory, and running or shutting down an application. The flexibility of the code to test for conditions or have the action triggers such as hot keys provides tremendous flexibility to change the behavior of the workstation to fit your needs.
You can start ARSControl.exe either by using the Run prompt or by running ARSControl.exe, directly. The ARSControl.exe then parses the actions.xml file and stores the configuration in memory. All actions performed by the ARS.exe and ARSControl.exe are recorded in a DASlog.txt log file at different configurable levels of details.
After you have configured the ARS.exe object, its actions are available individually or in combination from any scripting interface that is available on Windows, for example, VBScript*, JavaScript*, login scripts, and batch files.
With this release of Novell SecureLogin, you can choose to install DAS (DAS) along with Novell SecureLogin.
Previously, DAS (DAS 2.0) was released as a standalone component and you had to downloaded it separately for use with Novell SecureLogin. With this release, you can install DAS during the installation process of Novell SecureLogin.
is one of the options displayed on the Installation Features during the installation of Novell SecureLogin.
If you have installed earlier version of DAS or ARS installed on your workstations, uninstall these versions prior to installing the new version of DAS, which is available with the Novell SecureLogin installer package. The install location of DAS has changed as a sub directory of Novell SecureLogin.
9.1.2 Prerequisite
If you are installing DAS on Microsoft Windows 2000, ensure that you have Microsoft XML Parser (MSXML) 3.0 SP7
9.1.3 Changes from the Previous Version
In comparison to the previous version of DAS (version 2.0, which was a standalone release), some of the install options: and are handled internally in this release.
9.1.4 Installing in Novell eDirectory Environment
-
Log in to the workstation as an administrator.
-
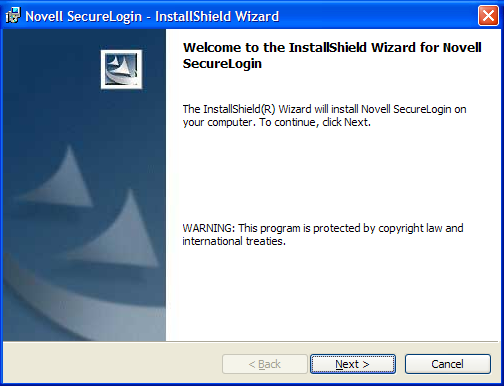
Run Novell SecureLogin.msi, found in the Securelogin\Client directory of the installer package.
-
Accept the license agreement, then click .
-
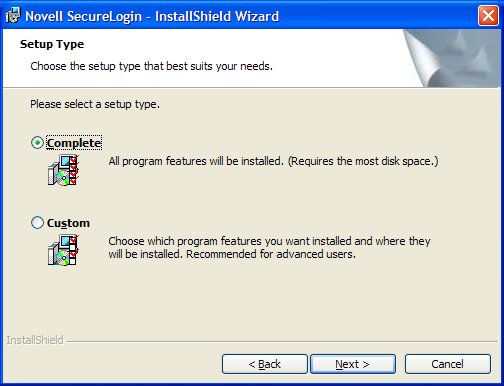
Select the setup type.
We recommend that you select .
NOTE:If you select , you are prompted to choose a destination folder to install Novell SecureLogin.
-
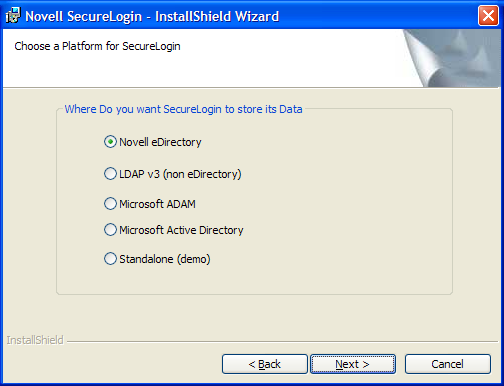
Select as the platform where Novell SecureLogin will store its data, then click .
-
Select how you want Novell SecureLogin to access eDirectory.
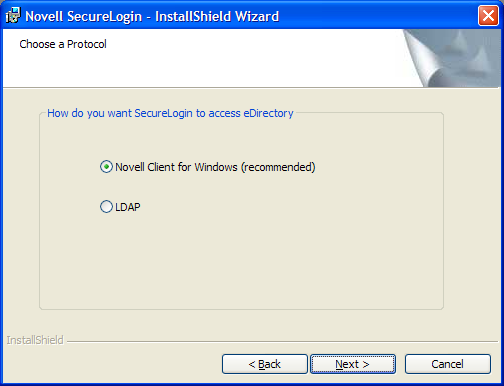
If the Novell Client™ is installed, the installation program recommends the Novell Client for Windows option. Otherwise, LDAP is recommended.
NOTE:The above dialog box is displayed only if you have Novell Client for Windows installed on your machine. Otherwise, LDAP is auto-selected as the protocol.
Proceed to Step 7.
-
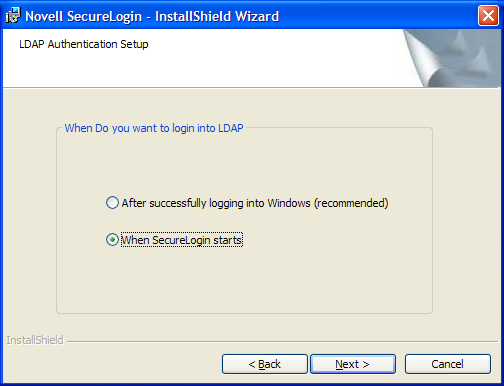
If you have selected LDAP, choose when you want to log in to LDAP.
-
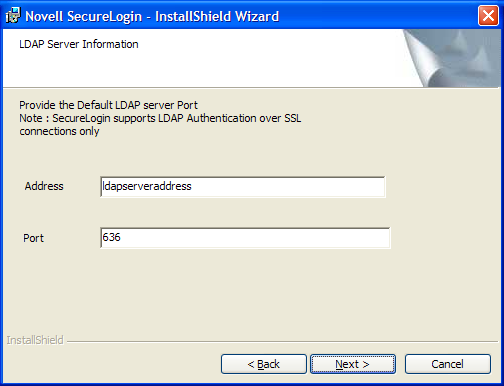
Specify the LDAP server information.
-
Proceed to Step 7.
-
-
Click . The smart card option page is displayed.
-
Click if you want to use smart card. Else, proceed with Step 10.
-
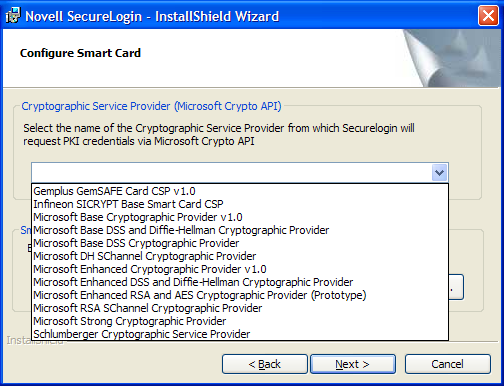
Select a cryptographic service provider from which Novell SecureLogin requests PKI credentials through a Microsoft Crypto API.
-
Select a PKCS#11 compatible library required for accessing the smart card, then click .
NOTE:This specifies the location of the Cryptographic Token Interface installed as part of the smart card vendor’s software. These API files are used by Novell SecureLogin to communicate with the smart card.
Manually configuring the third-party smart card PKCS library assumes a high level of understanding the Cryptographic Service Provider’s product.
-
-
Click if do not want to use smart card support. Proceed with Step 10.
-
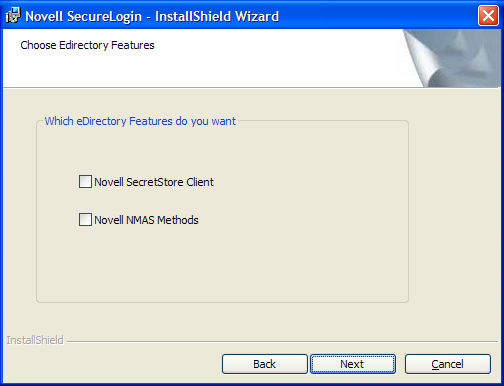
Select the eDirectory features that you want to install, then click .
You can select both Novell SecretStore Client and Novell NMAS Methods.
-
Click . Select the client login pcProx method.
-
Select the NMAS Methods .
-
Click . The installation features page is displayed.
-
Select .
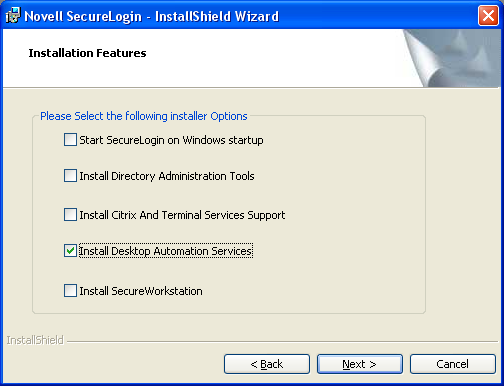
NOTE:If you are installing DAS on a kiosk or shared desktop, de-select . By default, this option is selected.
DAS handles starting and stopping of Novell SecureLogin.
-
Click . The location for DAS configuration file page displayed.
-
Select the location for the configuration file.
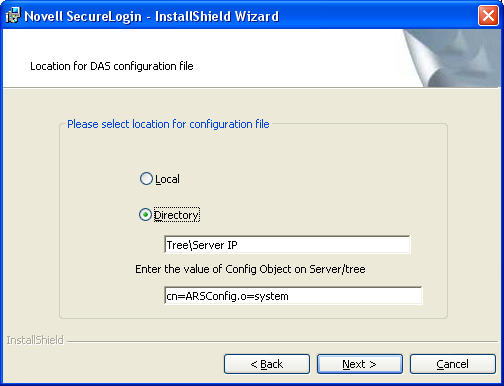
If you choose Local, the registry settings set for ARS.exe use the actions.xml file located in the Program Files\Novell\SecureLogin\Desktop Automation Services folder of the workstation.
If you choose eDirectory, the actions.xml file is managed through eDirectory as described in Section 9.2.3, Managing the actions.xml File Through eDirectory and iManager.
-
Click . The program is ready to install.
-
Click .
-
Click . By default, the option is selected
-
You are prompted to restart your system. Select to restart the system for Desktop Automation Services to take effect.
9.1.5 Installing in Other LDAP Environment
-
Log in to the workstation as an administrator.
-
From the , select the appropriate install package and double-click it to begin the install process. The InstallShield Wizard is Novell SecureLogin is displayed.
-
Click . The License Agreement page is displayed.
-
Select the setup type.
We recommend that you select .
NOTE:If you select , you are prompted to choose a destination folder to install Novell SecureLogin.
-
Select as the directory where Novell SecureLogin stores its data.
-
Click . The protocols page is displayed
-
Select how you want Novell SecureLogin to access LDAP directory.
If the Novell Client™ is installed, the installation program recommends the Novell Client for Windows option. Otherwise, LDAP is recommended.
-
Click . The smart card option page is displayed.
-
Click if you want to use smart card. Else, proceed with Step 11.
-
Select a cryptographic service provider from which Novell SecureLogin requests PKI credentials through a Microsoft Crypto API.
-
Select a PKCS#11 compatible library required for accessing the smart card, then click .
NOTE:This specifies the location of the Cryptographic Token Interface installed as part of the smart card vendor’s software. These API files are used by Novell SecureLogin to communicate with the smart card.
Manually configuring the third-party smart card PKCS library assumes a high level of understanding the Cryptographic Service Provider’s product.
-
-
Click if do not want to use smart card support. Proceed with Step 11.
-
Select the install features that you want to install, then click .
You can select both Novell SecretStore Client and Novell NMAS Methods.
-
Click . Select the client login pcProx method.
-
Select the NMAS Methods .
-
Click . The installation features page is displayed.
-
Select as the feature that you want to install.
NOTE:If you are installing DAS on a kiosk or shared desktop, de-select . By default, this option is selected.
DAS handles starting and stopping of Novell SecureLogin.
-
Click . The location for DAS configuration file page displayed.
-
Select the location for the configuration file.
If you choose Local, the registry settings set for ARS.exe use the actions.xml file located in the Program Files\Novell\SecureLogin\Desktop Automation Services folder of the workstation.
If you choose eDirectory, the actions.xml file is managed through eDirectory as described in Section 9.2.3, Managing the actions.xml File Through eDirectory and iManager.
-
Click . The program is ready to install.
-
Click .
-
Click . By default, the option is selected
-
You are prompted to restart your system. Select to restart the system for Desktop Automation Services to take effect.
9.1.6 Installing In Active Directory, ADAM, Or Standalone Mode
With this release of Novell SecureLogin, you can install DAS in Active Directory* mode.
-
Log in to the workstation as an administrator.
-
From the , select the appropriate install package and double-click it to begin the install process. The InstallShield Wizard is Novell SecureLogin is displayed.
-
Click . The License Agreement page is displayed.
-
The Destination Folder page is displayed. By default, the program is saved in C:\Program Files\Novell\SecureLogin\.You can accept the default folder or choose to change. To change, click and navigate to your desired folder.
-
Select the directory where Novell SecureLogin stores its data.
In this example, Microsoft Active Directory is selected.
-
Click . The LDAP Authentication Setup page is displayed.
NOTE:As an Active Directory user, you can use DAS only with local configuration. The default value for the configuration file is, Local.
-
Select when you want to log in to LDAP.
-
If you select , you are prompted to associate the login user with your LDAP distinguished name.
-
If you select , you are prompted to specify the LDAP server information.
-
-
Click . The smart card option page is displayed
-
Click if you want to use smart card. Else, proceed with Step 10.
-
Select a cryptographic service provider from which Novell SecureLogin requests PKI credentials through a Microsoft Crypto API.
-
Select a PKCS#11 compatible library required for accessing the smart card, then click .
NOTE:This specifies the location of the Cryptographic Token Interface installed as part of the smart card vendor’s software. These API files are used by Novell SecureLogin to communicate with the smart card.
Manually configuring the third-party smart card PKCS library assumes a high level of understanding the Cryptographic Service Provider’s product.
-
-
Click if do not want to use smart card support. Proceed with Step 10.
-
Select as the install feature that you want to install.
NOTE:If you are installing DAS on a kiosk or shared desktop, de-select . By default, this option is selected.
DAS handles starting and stopping of Novell SecureLogin.
-
Click Next. The location for the DAS configuration file page displayed.
-
Select a location for the configuration file.
If you choose Local, the registry settings set for ARS.exe use the actions.xml file located in the Program Files\Novell\SecureLogin\Desktop Automation Services folder of the workstation.
If you choose eDirectory, the actions.xml file is managed through eDirectory as described in Section 9.2.3, Managing the actions.xml File Through eDirectory and iManager.
-
Click . The program is ready to install.
-
Click .
-
Click . By default, the option is selected
-
You are prompted to restart your system. Select to restart the system for Desktop Automation Services to take effect.
9.1.7 Installing Using the Modify Option
-
Launch Novell SecureLogin after you have successfully upgraded or installed afresh version 6.1.1 The Program Maintenance page appears.

-
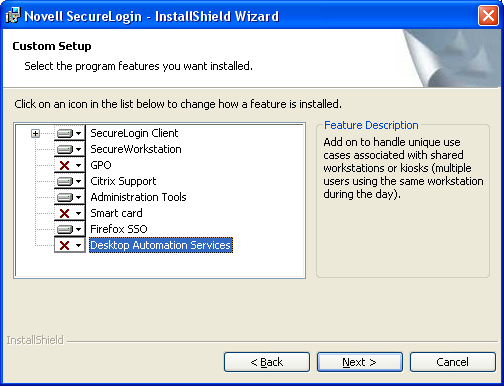
Select then click . The Custom Setup page appears.
-
Select then click .
-
Click . DAS is installed.
NOTE:DAS is installed in the same folder as of Novell SecureLogin. It is typically installed at C:\Program Files\Novell\SecureLogin\Desktop Automation Services unless you choose a different destination folder for the installation.
After you have successfully installed DAS through the option, DAS initializes the ConfigObject and ConfigTree registry keys, which are related to DAS network configuration.
To use the DAS XML script from the network, you must modify these registry keys.
-
For information on modifying the ConfigObject registry key, see ConfigObject.
-
For information on modifying the ConfigTree registry key, see ConfigTree.