2.6 Configuration
2.6.1 Configuration Management
The objective of Configuration Management is to provide a logical model of the IT infrastructure. It identifies, controls, maintains and verifies the versions of all Configuration Items (CIs) that form an organization’s IT infrastructure.
The fully embedded Configuration Management Database (CMDB) provides access to up-to-the-minute information regarding the state of any infrastructure item. It includes:
-
Fully customizable Configuration Item Templates
-
Configuration Item Lifecycles
-
Problem Classifications.
The power of the CMDB is obtained by the quality and details of the CI relationships stored within it, which can be used by the Service Catalog. The Service Catalog maps the relationships between individual CIs and allows the Service Desk to assess the real impact of a loss of a service as opposed to an individual asset being off-line. (See: Service Catalog.)
Once the CMDB has been successfully implemented, Configuration Management will help the Service Desk by:
-
Reducing the time required to log a request
-
Improving the accuracy of fault diagnosis and request allocation to Support Teams, thereby minimizing the overall resolution time
-
Preventing outages caused by poorly planned changes by revealing the full impact and risk of any change to a CI inside the control of the CMDB
-
Aiding recovery after a disaster by providing a rollback facility
-
Listing the authorized software for given desktop
-
Recording and reporting on previous, current and planned states of the CI.
The benefits of the CMDB are immense, especially when combined with other Service Management disciplines of Request Fulfillment, Incident, Problem, Change and Service Management.
2.6.2 Service Portfolio Management
The Service Portfolio details the commitments and investments made by a Service Provider to its customers and within the markets they service. It contains current contractual obligations, services under development and continuing service improvement programs.
The Portfolio represents all engaged resources and resources being released during the different phases of the Service Lifecycle. It includes the Service Pipeline that consists of services under development and the Service Catalog, which includes customer visible active services that have the potential to recover costs or earn profits for the Services provided.
Service Portfolio Management is a dynamic and ongoing process that covers the following stages in work practices:
-
Define - list services, confirm business cases and verify portfolio data
-
Analyze - maximize portfolio value, set priorities
-
Approve - finalize portfolio proposal, authorize services and resources
-
Charter - communicate decision and allocate resources.
The service management system includes Service Portfolio Management, with Service Pipeline and Service Catalog functionality, as part of the base product. Combining the Service Item Lifecycle stored in the embedded CMDB, with assigned Service Level Agreements and service Teams, the system enables organizations to manage their Service Offerings from strategy to design through to transition, operation and retirement.
Service Portfolio Management in the system allows organizations to create Service Categories that include business-related attributes, such as business processes supported, business owners and business users. This ensures organizations record all relevant information against the Service.
Organizations can further optimize their Service Portfolio Management by tracking and reporting on Service Offering and Service Component usage, Service Level performance and costs. This includes the functionality to calculate break-even points (B.E.P.) for offering a service, which allows support organizations to charge the appropriate cost for offering the service to their internal or external customers. This is achieved by recording of financial attributes against services, including service cost, service charges and service revenue.
The service management system SPM capability also allows organizations to easily record the technical aspects of services such as applications used, IT Owners, supporting services, dependent services, SLAs and OLAs, Contracts and Agreements by defining Relationship Maps.
Working with SPM
Using the SPM functionality, organizations can create and publish all Service Offerings throughout the Service Lifecycle, which include the phases of:
-
Services under development, that are being considered but are not yet released (Service Pipeline)
-
Services in production/operation, that would be included in the Service Catalog
-
Retired/discontinued Service Offerings.
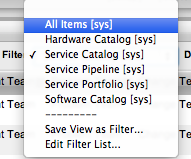
Service Items are recorded against the different stages of the Lifecycle and easily accessed through the filter views, available within the Configuration>Items screen:
|
Filter |
Relationship |
|---|---|
|
All Items |
All Items stored within the CMDB, regardless of the assigned Lifecycle State. |
|
Hardware Catalog |
All Items that use the Hardware Category Template stored within the CMDB, regardless of the assigned Lifecycle State. |
|
Service Catalog |
All Items that use the Service Category Template stored within the CMDB that are in an active Lifecycle State. |
|
Service Pipeline |
All Items that use the Service Category Template stored within the CMDB that are assigned a Pre-production Lifecycle State. |
|
Service Portfolio |
All Items that use the Service Category Template stored within the CMDB, regardless of the assigned Lifecycle State. |
|
Software Catalog |
All Items that use the Software Category Template stored within the CMDB, regardless of the assigned Lifecycle State. |
Consistent with the Lifecycle model used for all Configuration Items (CIs) throughout the application, Service CIs are created using the Service Category template, with a series of Lifecycle States customized to represent the different phases a CI can transition through (i.e., inception, design, implementation, operation or retirement phases).
Within each State of the Service Lifecycle, the relevant Users included in the Service Portfolio Team can be assigned, allowing them to manage Service Item information when the Item is allocated the State.
Using the SPM Functionality
The following outlines how the SPM Team define, analyze, authorize and charter a Service Offering in the system. This is achieved as a Supervisor User with Configuration and Service Level Management privileges enabled.
To begin:
-
Create the Service Portfolio Team in the Service > Teams tab, and assign all the relevant Users
Then within the Group tab, create the work and management groups associated with the Service Lifecycle and assign the relevant Users. (See: SPM Teams.)
-
Within the Configuration>Categories Tab, edit the existing Service Category
Duplicate and edit an existing Service Category or click New, to create a new Service Category. (See: Categories.)
-
In Edit mode, click the Service Category option and assign the Service Portfolio Team
Set field labels for the Item, including any relevant business related attributes. Save and move to the Lifecycle tab.
-
Edit the default Lifecycle, to include all the applicable States defined by the SPM Team
Some example States include requirements, defined, analyzed, approved, chartered, designed, developed, built, test, released, operational, retired. (See: Categories Lifecycle.)
-
Within each stage of the Lifecycle define the following State options:
Description
Status
Name
Enter the name of the Lifecycle State.
Active State
Stipulates if the Item is Active, when assigned this State.
Offline State
Only visible when Active is set to No. Indicates if the Item is offline and inactive. Items moved into states where this is enabled, have availability metrics calculated.
Pre-production State
Only visible for Service Category lifecycle states. Items that use this state are available within the Service Pipeline filter view of the Configuration>Items tab.
Entry Point
An Entry Point is used to indicate the start of a Lifecycle. To make the state a Workflow Entry Point, select the Entry Point checkbox.
As the Entry Point is the first state, the Previous States field will be removed.
Exit Point
Select whether the state will be an Exit Point. An Exit Point is used to indicate the end of a Lifecycle.
Service Team Group
Assign a Group within the associated Service Portfolio Team, to allow these Users to edit the Item details when it is assigned this stage of the Category Lifecycle.
-
Continue to configure the Category like any other Category and Save
-
Within the Configuration > Types tab, create an Item Type using the Service Category (See: Item Types.)
-
Assign one or more SLAs
Multiple SLAs can be associated with the Type template as it allows the User to calculate the service costs for all Items that apply the Type template but that may need to be associated with different SLAs.
-
Move to the Costs tab and complete known details
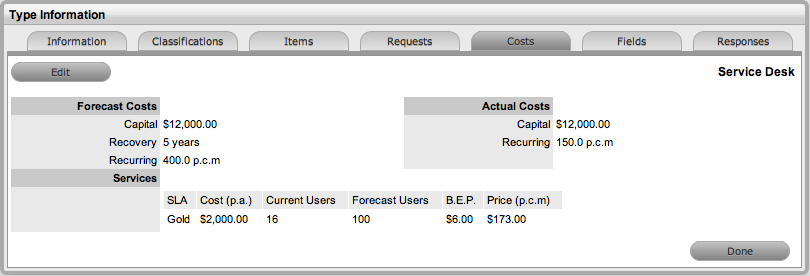
Within the Costs tab, organizations can calculate the Break-Even Point (BEP) of a Service based on forecasting the number of Customers of that Service. This enables the organization to account for the per calendar month price of the Service, which is used to calculate the ongoing revenue figures within the Item Costs tab that uses the Service Type template.
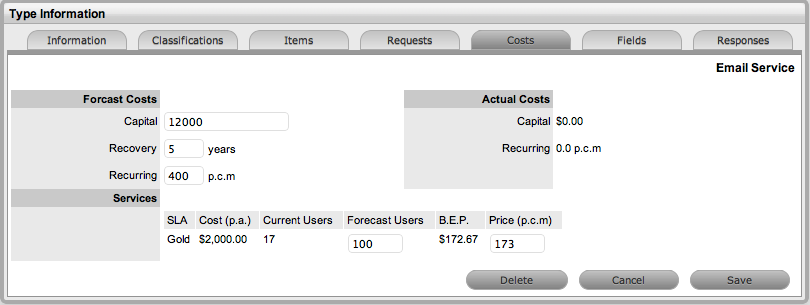
Forecast Costs
Capital
Enter the proposed total cost to be invested in the Service.
Recovery
Complete the field with the expected number of years designated to recover the costs of implementing the Service.
Recurring
Enter the proposed ongoing cost, on a per calendar month basis, for offering the Service.
Services
Using the details entered in the Costs fields and the cost per annum of the SLA, enter the forecast number of Customers/Users to calculate the break even point (B.E.P) of the Service. Using the auto-calculated B.E.P., enter a per calendar month Price for the Service to recover costs. This figure is used in the Service Item Costs tab to calculate the ongoing Revenue figures.
Actual Costs
Capital
Content for this field is derived from the Cost field within then Costs tab of the Item created using this Type.
Recurring
Content for this field is derived from the Monthly Cost field within the Costs tab of the Item created using this Type.
-
Create the Item and assign the relevant State, which in turn associates the relevant Users included in the SPM Team.
Assign the Users and/or Org Units to set the number of affected Users, and set the appropriate SLA.
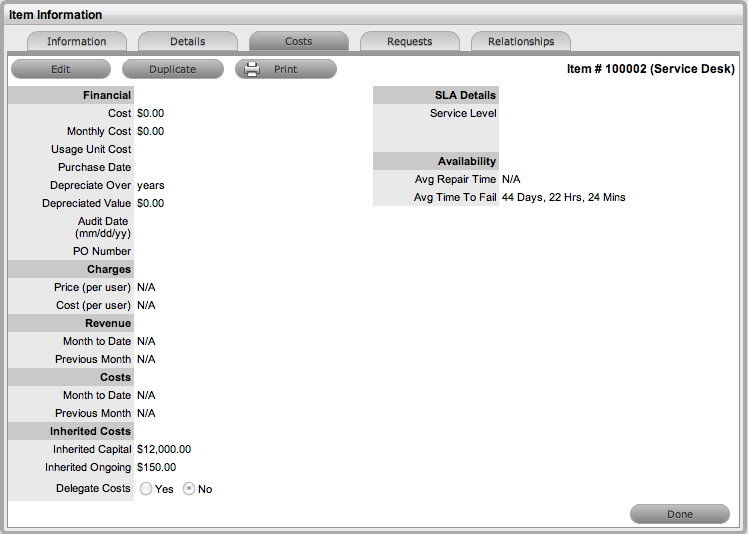
The Costs tab of a Service Item includes information related to the financial and contractual details associated with the Item. The information more specifically related to the Service Item is recorded in the Charges and Revenue fields, as this information allows service and support organizations to calculate the costs of offering a service and if appropriate, recover the costs from the customers.
Charges
Price (per user)
Draws the figure from the Service Item Type Costs tab and displays this as a daily amount. This figure is then multiplied with the number of Users/Customers assigned to the Item, to calculate the Revenue costs.
Cost (per user)
Draws the figure from the Inherited Costs and displays this as a daily amount. This figure is then multiplied with the number of Users/Customers assigned to the Item, to calculate the actual Costs.
Revenue
Month to Date
Uses the Charges figure, multiplied with the number or Users and days of month passed, to calculate the month to date figure.
Previous Month
A reference figure for an average monthly cost, based on the previous months revenue for the Service Item.
Availability
Avg Repair Time
Entries displayed here are automatically calculated based on the average length of time an Item is offline.
Avg Time To Fail
Figures displayed here are automatically calculated based on the average time between an Item being moved to an offline State.
2.6.3 Service Item Costs Tab
Service Item Costs Tab
The Costs Tab of a Service Item includes information related to the financial and contractual details associated with the Item. The information more specifically related to the Service Item is recorded in the Charges and Revenue fields, as this information allows service and support organizations to calculate the costs of offering a service and if appropriate, recover the costs from the relevant parties.
As with other Item Types, the screen includes general Item details such as:
-
Base cost
-
Purchase date and related information
-
Depreciation data
-
SLA and Contract details.
The Information recorded on the Costs Tab includes:
|
Financial |
Description |
|---|---|
|
Cost |
The financial investment made to purchase the Item. This figure is also used when the Delegate Costs is enabled for allocating costs across related Items. NOTE:Typically for Service Items, the infrastructure costs would be zero as this would be derived from the associated Parent Items. |
|
Monthly Cost |
The amount invested on a monthly basis to maintain the running of an Item. This figure is also used when the Delegate Costs option is enabled for allocating costs across related Items. |
|
Usage Unit Cost |
This is used as a reference field, where the User can enter base unit cost, for example per Megabyte data charge, which can be used for calculating costs in custom reports. |
|
Purchase Date |
The date the Item was purchased. |
|
Depreciate Over |
Enter the number of years the Item is to be depreciated over, if required. |
|
Depreciated Value |
The system calculates the current value of the Item based on the Purchase Date and the number of years the Item is to be Depreciated Over. |
|
Audit Date |
Set the date the Item is next to be audited. |
|
PO Number |
If Purchase Orders are enabled for the system, the field is visible and automatically populated with the PO number generated by a User within the Finance>Purchase Orders tab, when the Item order was recorded in the system. |
|
Charges |
|
|
Price (per user) |
Draws the figure from the Service Item Type Costs tab and displays this as a daily amount. This figure is then multiplied with the number of Users/Customers assigned to the Item, to calculate the forecasted Revenue. |
|
Cost (per user) |
Draws the figure from the Inherited Costs and displays this as a daily amount. This figure is then multiplied with the number of Users/Customers assigned to the Item, to calculate the actual Costs. |
|
Revenue |
|
|
Month to Date |
Uses the Charges Price figure, multiplied by the number of Users and days of month passed, to calculate the month to date figure. |
|
Previous Month |
A reference figure for an average monthly revenue figure, based on the previous month's revenue for the Service Item. |
|
Costs |
|
|
Month to Date |
Uses the Charges Cost figure, multiplied by the number of Users and days of month passed, to calculate the month to date Cost. |
|
Previous Month |
A reference figure for an average monthly cost, based on the previous month's cost for the Service Item. |
|
Inherited Costs |
|
|
Inherited Capital |
Total infrastructure costs of parent CI's that directly contribute to the cost of the Service Item. This figure is derived from all the Cost fields within the Item Information>Costs tab of related Parent Items. |
|
Inherited Ongoing |
Running costs of all associated Items that enable the Service Item to continue to function. This figure is derived from all the Monthly Cost fields within the Item Information>Costs tab of related Parent Items. |
|
Delegate Costs |
To enable cost delegation across the relationship map allowing associated Items to inherit the costs of the current CI, select Yes. This will take the figures from the Cost and Monthly Cost fields for the Item and apply them across related Child Items. Define the technique to be used to evaluate the cost split: Child Count:Costs are split by percentage based on the number of child CI's the costs are being delegated across. User Count:Costs are split proportionally based on the number of users of the child CI's the costs are being delegated across. Custom %: The relationship itself allows for the % cost to be assigned |
|
Availability |
|
|
Avg Repair Time |
Entries displayed here are automatically calculated based on the average length of time an Item is offline. |
|
Avg Time To Fail |
Figures displayed here are automatically calculated based on the average time between an Item being moved to an offline State. |
The figures displayed within the Availability fields are automatically calculated by the application, using the Item Lifecycle as it moves between online and offline States.
Completing the Depreciate Over field allows the application to automatically keep track of the Item depreciation over the specified number of years. The current value of the Item after depreciation is displayed at Depreciated Value. The Audit Date field is used to record the date when the Item was last audited.
Billing Enabled
When Billing is enabled, a Service Level hyperlink is available within the Costs screen. This provides access to the Service Level Agreement details that govern the lifecycle for Requests logged against the Item.
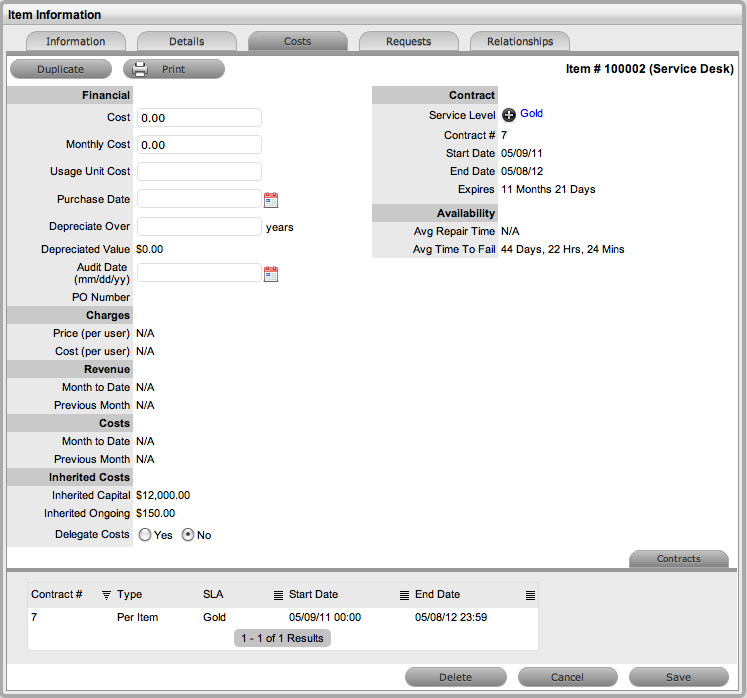
If Invoices are also enabled, an Invoice Number hyperlink is available and when selected, will display the invoice details for the Contract that covers the Item. The Start Date and End Dates stipulate the contract length covered for the Item. It is summarized by the days or hours recorded in the Expires field.
The Contract tab within the Item Information Costs tab summarizes the contract details that cover the Item. Further Contract details can be found within the relevant Contract Number within the Finance>Invoices screen.
Create a Contract
Through the Item Costs tab, Contracts with an associated Invoice Number (if relevant) can be generated for an Item, after it has been logged in the system.
To add a Contract to an Item, within the Configuration>Item screen:
-
Select the Item Number
-
Move to the Costs tab
-
Click Edit
The Add and Delete button are made available within the Contracts tab

-
Click Add
(If Invoices are enabled in the system, an Invoice number will be automatically generated and assigned to the Contract).
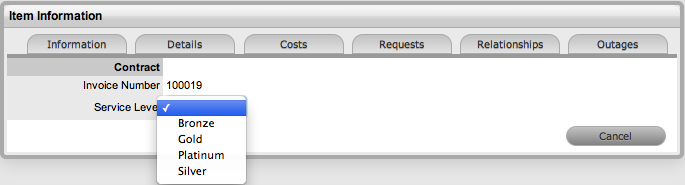
-
Select an SLA from the drop-down option
The screen will display the SLA details and the Contract Type locked to Per Item.
-
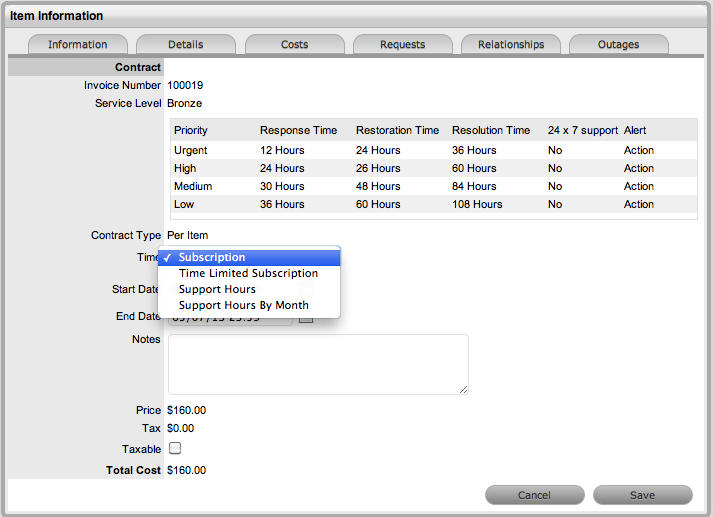
Assign the Time period to be covered by the Contract
If Subscription is selected, the Start and End Dates are automatically completed by the system, but can be edited if required.
If Time Limited Subscription is selected, the Support Hours field is displayed and the number of support hours purchased by the Customer should be entered. Also, the Start Date and End Date fields should be completed manually, entering the length of time for the subscription period.
If Support Hours is selected, the number of support hours purchased by the Customers should be entered.
If Support Hours by Month is selected, set the number of hours purchased per month and define which day of the month contract is to rollover to start the new month. The Total Support Hours will automatically be calculated based on the Start and End Dates set for the Contract.
(If a Contract is forward dated with a Start Date set in the future, the Pending Contract status is assigned. See Pending Contracts.)
IMPORTANT:Subscription - a contract that covers a specified period of time
Time Limited Subscription - a contract that covers either a specified period of time or number of support hours, whichever limit is reached first
Support Hours - a contract that defines the number of support hours covered.
-
Add any relevant Invoice Notes
-
Check the Taxable box, if the Contract is to be taxed
-
Click Save.
(If Invoices are enabled in the system, an Invoice number will be automatically recorded for the Contract and made available within Finance>Invoices.)
2.6.4 Service Catalog
The Service Catalog can be accessed as a filter view within the Items sub-menu screen of the Configuration tab. It is part of the Service Portfolio made available to Customers, displaying information regarding Live IT Services. The Service Catalog may include information about service deliverables, any associated costs, contact points, ordering and request procedures.
For an IT service organization, the Service Catalog may include the following options:
-
Email
-
Network Monitoring
-
Security
-
Video Conference
-
Remote Access
-
Mobile Communications (Cell Phones/PDAs)
-
Wireless
-
Laptop Computing
-
Desktop Computing
-
File Sharing
-
Printing/Scanning.
Items included in the Service Catalog can be included as standalone Items or underpinned by physical Items stored within the Configuration Management Database (CMDB). Within the CMDB, relationships can be mapped between Configuration Items (Items) in the Relationships tab of an Item. This map is then available within the Impact tab of a request, to allow for the impact of a request on the Organization to be assessed.
Service Catalog Relationships are defined and visible within the Relationships tab of an Item.
To view the Service Catalog:
-
Within the Configuration>Items tab
-
Select the Service Catalog (sys) filter
Create a Service
To create a new Service, such as Email or Printing, create an Item Type template using the Service Category Template, which has the Service Category option enabled within the Categories tab (See: Category). As part of the Service Category template, define relevant attribute fields as being Customer Visible, which will display information recorded on the Details tab of the Service within the expanded view of a Service in the Customer Portal.
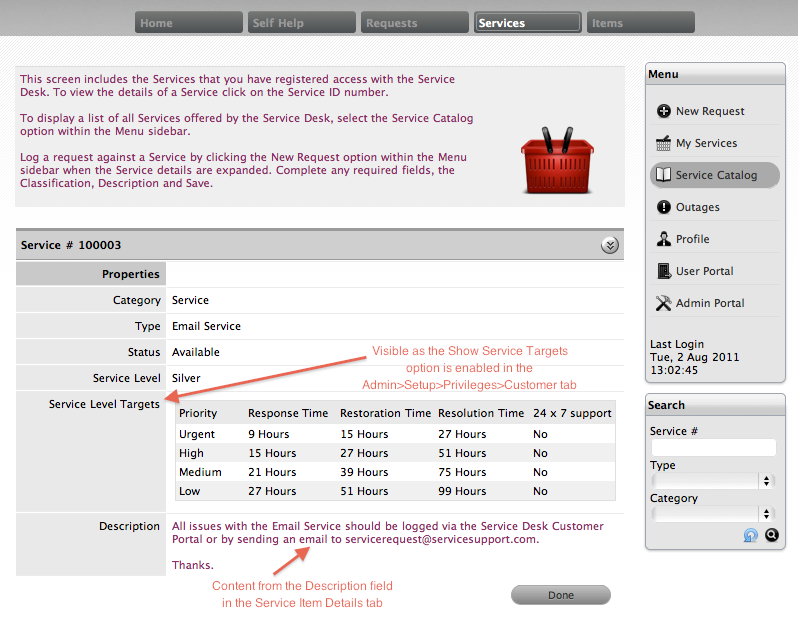
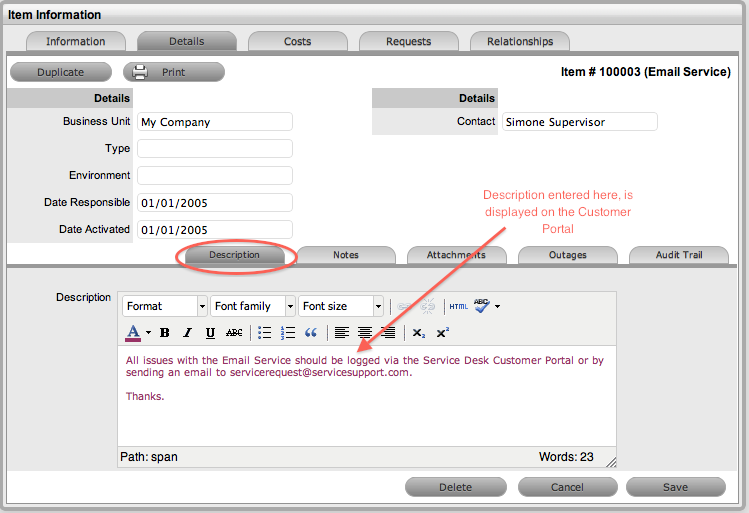
Then create an Item using the newly created Type template. Within the Details tab of the Service Item, complete the Description to provide information about the Service within the Customer Portal Services tab. (See: Item Details)
Within the Item Relationship tab, define the underpinning infrastructure of the new Service Item, if relevant. (See: Relationships.)
Managing Service Costs
Users with the Finance Role are able to manage the information related to Service Item Costs. Items created with the Category Template that have the Service Category option enabled, allow organizations to calculate and recover costs for offering services. At the Item Type level, the costs for offering a service can be calculated against multiple service level agreements. (See: Item Types.) Within the Cost Tab of a Service Item, figures based on the Item Type associated with the Item are provided, to allow the support organization to recover costs for providing the Service. (See: Service Item Cost Tab.)
View Service Relationships
Within the Relationships tab of the Item Information screen, a Relationship Map visually displays the connections that have been defined for an Item. All Item Relationships are listed in the Relationships Table beneath the Map. The Relationship Map can display up to 48 Child Items and 16 Parent Items in the one diagram.
The central icon of a Map is a visual representation of the selected Item. Scroll over an Item label to view any information recorded on the Information and Details tabs of the Item. To drill-down through the relationships, click on an Item icon label. To change the focus of the Relationship Map to another Item, click on the Item icon label and the system will request that OK be selected before updating the central node of the Map.
The Relationship Table data displayed at the base of the map can be filtered using the Direction filter view of Parent-Child or Child-Parent.
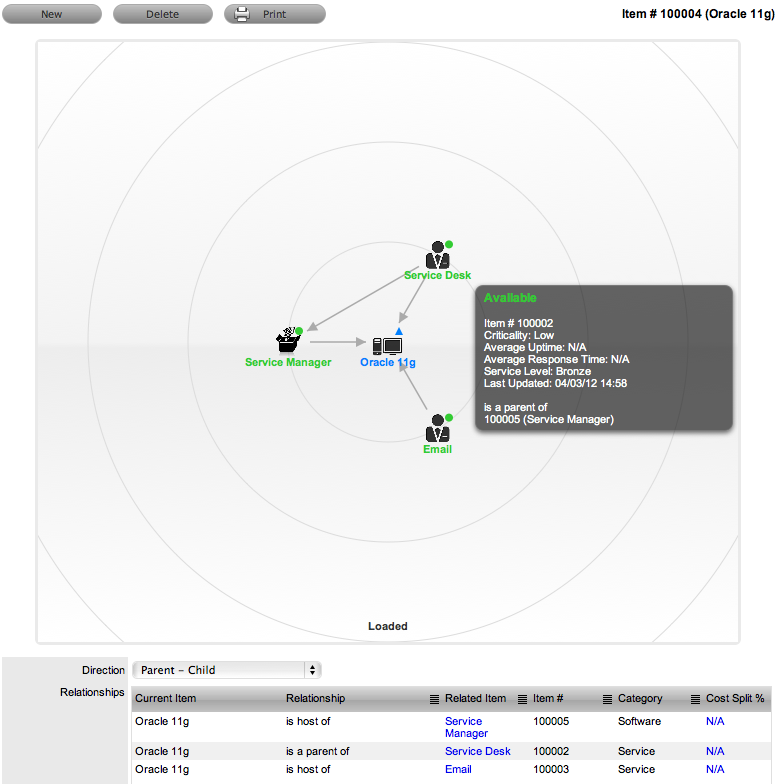
The map displays the relationship between each Lifecycle State by using different colors to represent the type of Lifecycle State.
|
Color |
|
|---|---|
|
Green Circle |
CI is assigned an online status. |
|
Red Square |
CI is assigned an offline status. |
|
Blue Triangle |
Service CI is assigned a pre-production status. |
The Lifecycle State name can be accessed by scrolling over the Item icon within the Map.
Delete a Relationship:
To remove the Relationship between Items:
-
Select the relevant Item within the Configuration tab
-
Move to the Relationships tab
-
Click Edit
-
Select Delete
A table with the Relationship details is displayed
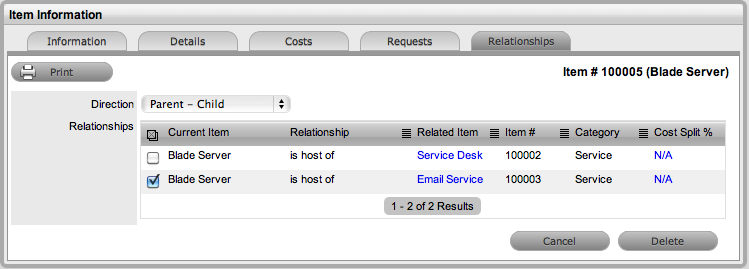
-
Select the Relationship Direction to display the relevant Relationship table
-
Mark the checkbox next to the Relationship that is to be removed
-
Select Delete
-
Click Done to return to the Item list.
Managing the Service Catalog
The portfolio of services offered within an organization can be managed by the Service Portfolio Team. See: Service Portfolio Team.
2.6.5 Items Tab
Items

Configuration Items within the system are referred to as Items. Items have multiple connections with other elements throughout the application, these may include Customers, Organizational Units and Service Level Agreements. The table below outlines how Items interact with other system elements:
|
Element |
Relationship |
|---|---|
|
Customers |
Each Item must be assigned to one or more Customers who are the Owners of the Item. This Customer may be Everyone, making the Item a Global Item. Only Item Owners are able to raise requests against an Item. See Creating Items. |
|
Service Level Agreements (SLAs) |
Service Level Agreements can be linked as follows:
|
|
Teams |
Within Item Types, Default Teams are assigned to Items. When requests are raised for an Item, they will be assigned to the Default Team. |
|
Technicians |
Technicians can be associated with Skills based on Items, Item Types and Classifications. When a request is raised with the combination of Item Type and issue Classification, it is assigned to that Technician. SeeClassification Tab. |
|
Outages |
Where states in the Lifecycle of an Item Type are defined as Off-line, when an Item is in an Off-line state, it will appear in the Outages page. See Categories LifeCycle. |
An Item record consists of the following attributes:
Options available within the Items screen include:
Filter views that are available within the Configuration>Items screen include:
|
Filter |
Relationship |
|---|---|
|
All Items |
All Items stored within the CMDB, regardless of the assigned Lifecycle State. |
|
Hardware Catalog |
All Items that use the Hardware Category Template stored within the CMDB, regardless of the assigned Lifecycle State. |
|
Service Catalog |
All Items that use the Service Category Template stored within the CMDB that are in an active Lifecycle State. |
|
Service Pipeline |
All Items that use the Service Category Template stored within the CMDB that are assigned a Pre-production Lifecycle State. |
|
Service Portfolio |
All Items that use the Service Category Template stored within the CMDB, regardless of the assigned Lifecycle State. |
|
Software Catalog |
All Items that use the Software Category Template stored within the CMDB, regardless of the assigned Lifecycle State. |
View an Item
Within the Item sub-menu option, Users can view a list of Items created within the system. To view the details of an Item, select the Item Number hyperlink and the Item Information screen is displayed. The Item Information screen includes tabs for the following information:
-
Attribute details
-
Relevant costs
-
Requests created against the Item
-
Relationships associated with the Item
-
Planned Outages associated with the Item..
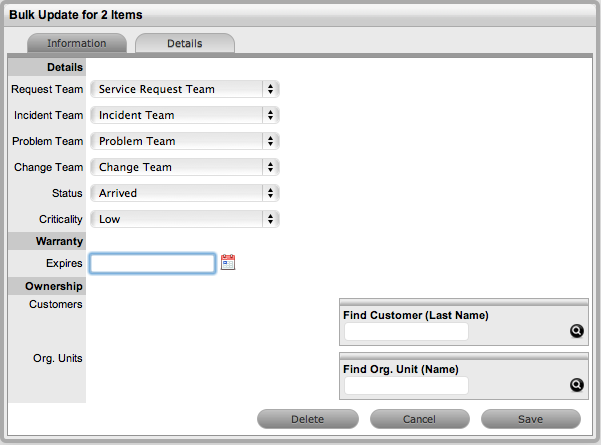
Bulk Item Update
Bulk Item Update
The new ownership details for multiple Items can be added using the Bulk button within the Items list view. This functionality allows Users to add one or more Customers or Organizational Units to multiple Items within one screen. If the Items have mixed ownership before the update, and these details are no longer relevant, the current ownership details need to be adjusted within each individual Item.
If Parent/Child Relationships are configured for the Items, only the Parent Items' ownership details can be updated. The related Child Items will automatically adopt the amended Parent ownership details.
Multiple Items can also be deleted using the Bulk Item button.
To update multiple Items:
-
Go to Configuration > Items
The Items List View is displayed.
-
Check the boxes next to the Items numbers that need to be updated

-
Click

The Bulk Update screen is displayed with the Details and Ownership fields available for amending. The only Owners displayed within the Ownership field, are those who are assigned ownership to all Items included in the bulk update.
-
Amend the relevant Details
The options include Team, Status, Criticality, Warranty or Ownership for the Items, as required, or select the Delete option to remove the Items from the Items List.
-
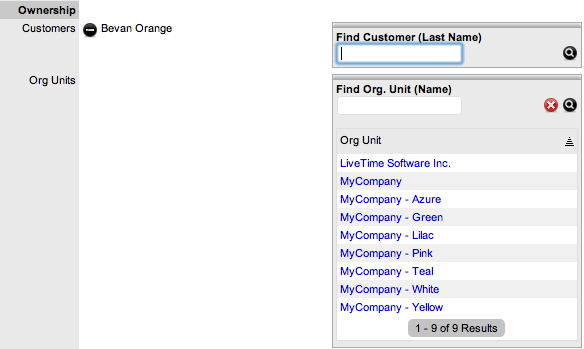
For Items that require Ownership adjustments, click
 next to the Owner details if the relationship is to be deleted

-
Use the Find options for the Customer and Organizational Unit owner information to be added
Click
 without entering names in the Search Fields to return a complete list of Customers or Org Units.
-
Click on the relevant new owner link within the Find box to add the owner
-
Select Save.
The Details and Ownership information of all Items are updated.
Item Information
Create an Item
When an Item is created within the system it takes the generic settings of an Item Type and binds them to a Customer or Customers and/or Organizational Unit. The Item information uses the details defined in the Item Type template, however these can be adjusted to suit the requirements of the specific Item.
To create an Item:
-
Select Configuration > Items
-
Click New
The Item Information screen appears
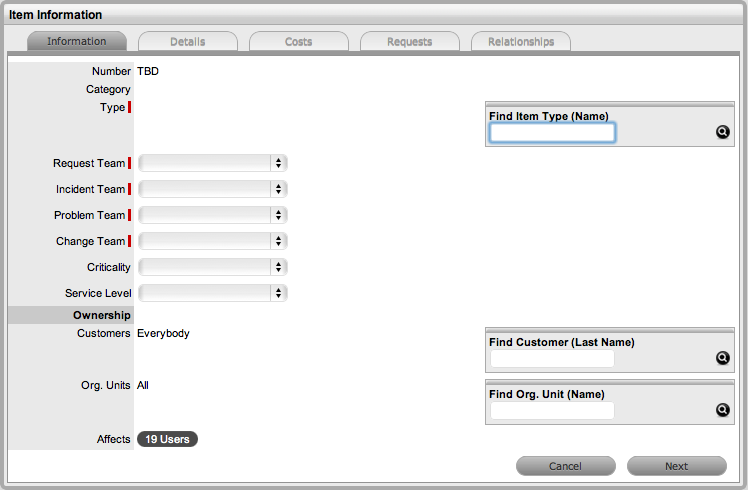
*Denotes mandatory fields.
Item
Description
Item Number*
If the Administrator has set the Item Numbers Editable option in Setup> Privileges> System to Yes, the User will have the option of entering a customized Item number. It may contain numbers and/or letters, and be between 1 and 64 characters in length.
As no two Item Numbers can be the same, the User will be prompted to change the value they have entered if it is already in use. If the Item Number field is left blank, the system will automatically create an Item Number.
If the Administrator has set the Item Numbers Editable option to No, an Item Number will be generated automatically and cannot be edited.
Category*
This is auto-filled, based on the assigned Item Type.
Type*
This is the Item Type that the Item represents. Click the Search button to view the list of available Item Types.
Team*
This is the Technician Team that will be assigned to support the Item.
Status*
Select the status from the drop-down options displayed after the Item Type has been assigned.
Criticality*
Rates the degree of importance of an Item Type within an organization. The 'Impact' of a request is initially pulled from the Criticality of the Item, but can be adjusted within the request Information screen if required. Requests logged through the Customer Portal, use the Criticality of the Item to determine the Priority of the request. (See additional information below.)
Service Level
Select the Service Level Agreement from the drop-down list, if required.
Ownership
Customers
These are the Customers who own the Item. A single Customer, a group of Customers or all Customers in the application can be assigned to an Item.
-
Enter a Customer last name, or leave blank then click the Search button to view a list of all available Customers.
-
Click on the hyperlink for the relevant Customer name or names to assign them to the Item.
If no specific Customer is allocated to the Item, it becomes a Global Item and is assigned to Everyone.
Org Units
These are the Org Units who own the Item. The Item can be assigned to one or multiple Organizational Units.
To assign an Org Unit:
-
Enter an Org Unit name, or leave blank then click the Search button to view a list of available Org Units.
-
Click on the hyperlink for the relevant Org Unit name or names to assign them to the Item.
NOTE:If Billing is enabled an owner must be assigned to the Item. The owner can be either a Customer or an Org Unit, but only Org Units that have a Primary Contact, will be displayed in the Org Unit Search list. (See: Primary Contact.)
Notification
Method
This field is visible when an active Item moves into an offline State and allows the User to define who (Primary Contact or All Owners of the Item) and how (Email or SMS), Customers will be notified that the Item is not available.
-
-
Search and select an Item Type
-
Define a support Team for each process
-
Select the Item's Status and Criticality
(Refer below for further details about Item Criticality.)
-
Assign a Service Level
If Contracts are enabled for the system, the assignment of an SLA will result in an annual service contract automatically being applied to the Item. If an SLA is not assigned, a Contract can be created for the Item within the Costs tab.
-
Search and select a Customer and/or an Organizational Unit owner
-
Click Next to view the Details tab
Item Criticality
The Item Criticality is used to identify the degree of importance of an Item to an Organization.
When the Incident Priority is set to Derived in the Administrator Setup, the Impact of a request is mapped from the Criticality of the Item associated with the request and then combined with the selected Urgency, which derives the Priority of the request. If required, the Impact can be manually adjusted within the request Information screen. Requests logged through the Customer Portal, use the Criticality of the Item to determine the Priority of the request, which can be manually adjusted by the Technician User.
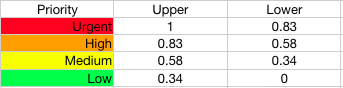
The following table displays the calculations applied by the system to the Item Criticality, which is mapped to a request's Impact to determine a request's Priority:

The above calculations result in the following Priorities:
The Incident Analyzer, if enabled by the Administrator in Setup>CMS>Incident Analyzer, can apply the Criticality to automatically detect Problems. The minimum Criticality level can also be used to determine which off-line Items are displayed on the Outages pages, when the Outages pages are enabled by the Administrator in Setup>Privileges>System.
Primary Contact
Primary Contact
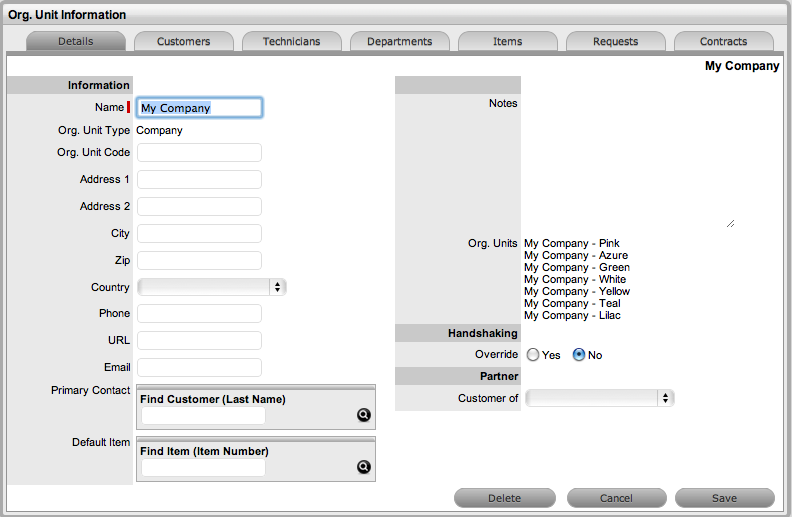
When multiple Customers are assigned to an Organizational Unit, a Primary Contact person can be assigned to the Org Unit. This is the preferred person that will be contacted regarding issues related to the Org Unit.
NOTE:When Billing is enabled, a Primary Contact must be assigned to the Org Unit if the Org Unit is to be allocated to an Item. If a Primary Contact has not been assigned to an Org Unit, the Org Unit will not be displayed as an option in Org Unit search results of the Item Information screen.
To assign a Primary Contact:
-
Select User>Organizational Units
-
Select an Org Unit Name
The Details tab is displayed. If Customers have been assigned to the Org Unit a Primary Contact field will be visible.
-
Within the Details tab, click Edit
The Find Customer box is displayed. (Note that this search is only visible when Customers have been assigned to the Org Unit

-
Search for the Customer
To view all available customers click Search without entering a customer last name in the search field
-
Click the Customer name to assign them as the Primary Contact
-
Click Save.
Details Tab
Once the basic information for an Item has been completed, additional details can be defined for the Item. The Details tab displays a list of custom fields set for the Item's Category. The information to be completed within this section is configured by the Supervisor when customizing the Item Type templates in Configuration > Categories. Fields marked as Required, must be completed for the Item Details of the Item to be saved successfully.
For more information about Item custom fields, see: Categories.

Clicking Save at the far bottom of the page after the Details tab has been completed, will create the Item and save it to the database.
NOTE:Items can be duplicated at any time by clicking the Duplicate button. A new Item is created with properties that are identical to the original Item (with the exception of the Item Number, as this must be unique and is generated automatically).
Item Description
Content entered in the Description field is made available on the Customer Portal in the expanded information window of an Item. For Service Items included in the Service Catalog tab of the Customer Portal, information about the Service can be included within the Item Description field. The Service Item information can be further defined by completing Item attribute fields that are configured as Customer Visible within the Category Information screen, and therefore also displayed in the Customer Portal.
To add an Item Description, within the Item's Details tab:
-
Click Edit
-
Move to the Description tab
-
Add information in the Description field

-
Click Save.
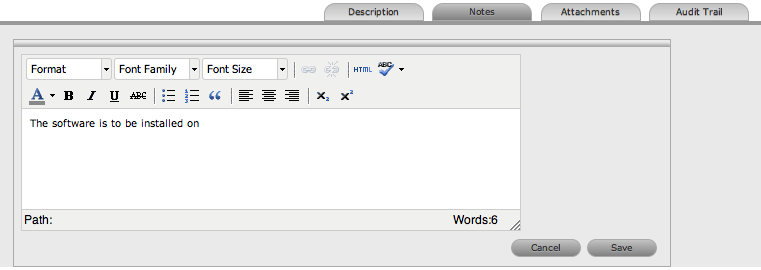
Item Notes
To add Notes to an Item, under the Item's Details tab:
-
Click Edit
-
Select the Notes tab

-
Click New
-
Enter details in the Notes field
-
Click Save.
The Note will be allocated an identification number hyperlink for access. It will also be time- and date-stamped.
Item Attachments
To add Attachments to an Item, within the Item's Details tab:
-
Click Edit to display the Attachment tab New button
-
Click New

-
Browse and select a file
-
Enter a Description, if required
-
Adjust Private and Public option, if relevant
Selecting Public will make it accessible on the Customer Portal, when the Item is in a Customer Visible state.
-
Click
 .
.
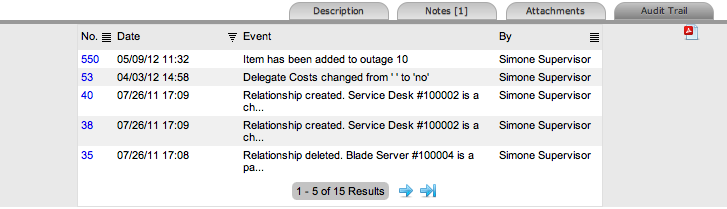
Item Audit Trail
The Audit Trail tab records all changes that are made to fields within the Item Information and Details screens. These entries are made to record all the alterations made to Items and the CMDB.
To view an audit trail entry, under the Item Details tab:
-
Select the Audit Trail tab
-
Click on the identification number hyperlink to display the entry details.
Rollback Option
All changes recorded in the Audit Trail can be rolled back to reinstate information recorded against an Item.
To return Item details to previously saved information:
-
Click Edit
-
Select the identification number hyperlink of the entry to be reversed
-
Click the Rollback button
-
Save the Item.
The Item details will revert to information recorded before an update was made.
Costs Tab
For Users who are not assigned the Finance Role, the Costs Tab displays SLA Details and Item Availability information. Users who are assigned the Finance Role, also have access to the Item's financial and contractual details. The following Item Costs details include:
-
Base cost
-
Purchase date and related information
-
Depreciation data
-
Inherited costs
-
SLA and Contract details
-
Availability statistics.
Completing the Depreciate Over field causes the application to automatically keep track of the Item depreciation over the specified number of years. The current value of the Item after depreciation is displayed at Depreciated Value. The Audit Date field is used to record the date when the Item was last audited.
For Service Items see: Service Item Costs Tab
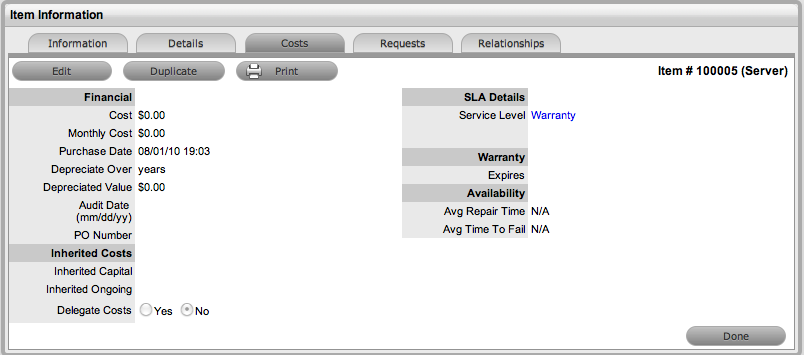
The Financial Costs and Inherited Costs fields allow the support organization to assign costs across related Items and charge Users and/or Organizational Units appropriately.
|
Financial |
Description |
|---|---|
|
Cost |
The financial investment made to purchase the Item. This figure is also used when the Delegate Costs is enabled for allocating costs across related Items. |
|
Monthly Cost |
The amount invested on a monthly basis to maintain the running of an Item. This figure is also used when the Delegate Costs option is enabled for allocating costs across related Items. |
|
Purchase Date |
The date the Item was purchased. |
|
Depreciate Over |
Enter the number of years the Item is to be depreciated over, if required. |
|
Depreciated Value |
The system calculates the current value of the Item based on the Purchase Date and the number of years the Item is to be Depreciated Over. |
|
Audit Date |
Set the date the Item is next to be audited. |
|
PO Number |
If Purchase Orders are enabled for the system, the field is visible and automatically populated with the PO number generated by a User within the Finance>Purchase Orders tab, when the Item order was recorded in the system. |
|
Inherited Costs |
|
|
Inherited Capital |
Total infrastructure costs of parent CI's that directly contribute to the cost of the current CI. This figure is derived from all the Cost fields within the Item Information>Costs tab of related Parent Items. |
|
Inherited Ongoing |
Running costs of all associated Items that enable the current CI to continue to function. This figure is derived from all the Monthly Cost fields within the Item Information>Costs tab of related Parent Items. |
|
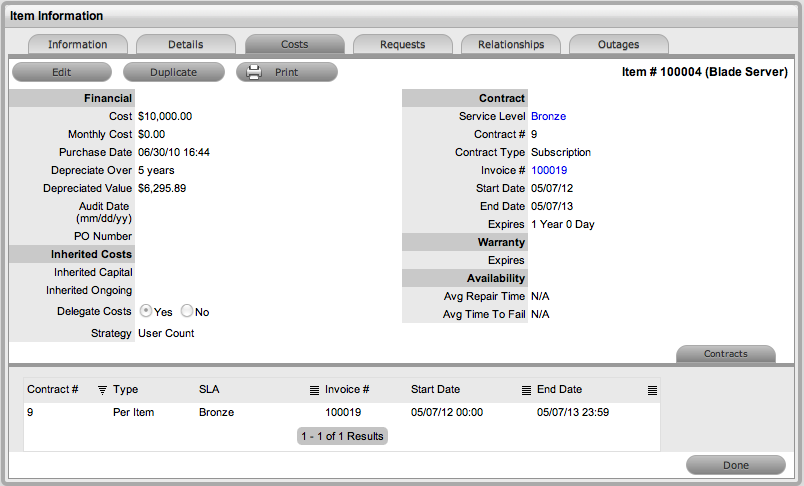
Delegate Costs |
To enable cost delegation across the relationship map allowing associated Items to inherit the costs of the current CI, select Yes. This will take the figures from the Cost and Monthly Cost fields for the Item and spread them across related Child Items. Define the technique to be used to evaluate the cost split: Child Count:Costs are split by percentage based on the number of child CI's the costs are being delegated across. User Count:Costs are split proportionally based on the number of users of the child CI's the costs are being delegated across. Custom %: The relationship itself allows for the % cost to be assigned |
The figures displayed within the Availability fields are automatically calculated by the application, using the Item Lifecycle as it moves between online and offline States:
|
Availability |
|
|---|---|
|
Avg Repair Time |
Entries displayed here are automatically calculated based on the average length of time an Item is offline. |
|
Avg Time To Fail |
Figures displayed here are automatically calculated based on the average time between an Item being offline. |
Billing Enabled
When Billing is enabled, a Service Level hyperlink is available within the Costs screen. This provides access to the Service Level Agreement details that govern the lifecycle for Requests logged against the Item.
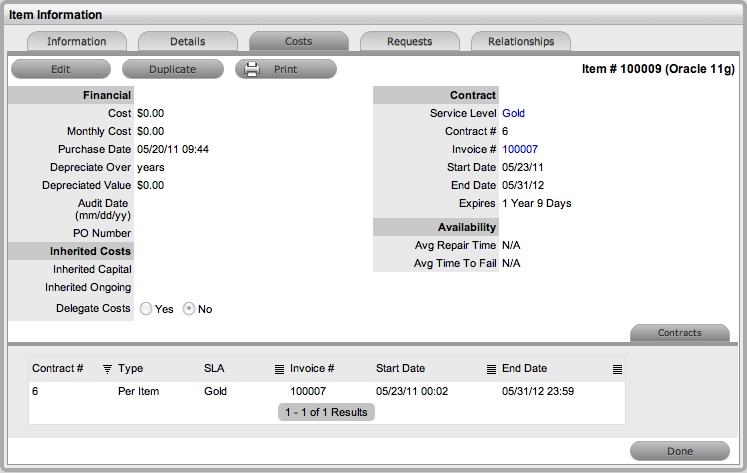
If Invoices are also enabled, an Invoice Number hyperlink is available and when selected, will display the invoice details for the Contract that covers the Item. The Start Date and End Dates stipulate the contract length covered for the Item. It is summarized by the days or hours recorded in the Expires field.
The Contract tab within the Item Information Costs tab summarizes the contract details that cover the Item. Further Contract details can be found within the relevant Contract Number within the Finance>Invoices screen.
Create a Contract
Through the Item Costs tab, Contracts with an associated Invoice Number (if relevant) can be generated for an Item, after it has been logged in the system.
To add a Contract to an Item, within the Configuration>Item screen:
-
Select the Item Number
-
Move to the Costs tab
The Contracts tab is visible in the bottom right corner of the screen
-
Click Edit
The Add and Delete buttons are made available within the Contracts tab
-
Click Add
(If Invoices are enabled in the system, an Invoice number will be automatically generated and assigned to the Contract).
-
Select an SLA from the drop-down option
The screen will display the SLA details and the Contract Type locked to Per Item.
-
Assign the Time period to be covered by the Contract:
If Subscription is selected, the Start and End Dates are automatically completed by the system, but can be edited if required.
If Time Limited Subscription is selected, the Support Hours field is displayed and the number of support hours purchased by the Customer should be entered. Also, the Start Date and End Date fields should be completed manually, entering the length of time for the subscription period.
If Support Hours is selected, the number of support hours purchased by the Customers should be entered.
If Support Hours by Month is selected, set the number of hours purchased per month and define which day of the month contract is to rollover to start the new month. The Total Support Hours will automatically be calculated based on the Start and End Dates set for the Contract.
(If a Contract is forward dated with a Start Date set in the future, the Pending Contract status is assigned. See Pending Contracts.)
-
Add any relevant Invoice Notes
-
Check the Taxable box, if the Contract is to be taxed
-
Click Save.
If Invoices are enabled in the system, an Invoice number will be automatically generated for the Contract and made available within Finance>Invoices. Payment will need to be processed by a Finance User before the Contract can be enabled in the system. If invoice payment is required before the contract can be enabled in the system the following Warning message is displayed:

-
Click Next
The Contracts information is only populated after the Invoice has been processed. To process the Invoice, as a Finance User move to the Finance>Invoices tab. Once the relevant Invoice payment has been processed the Contract details will be visible in the Costs >Contracts tab.
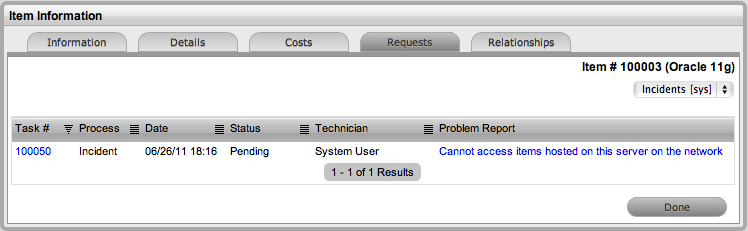
Requests Tab
This section lists all the requests that have been logged against an Item.
Use the system list filter to display the relevant type of request or task. To expand and view the request in full, select the Task # or Problem Report hyperlink.
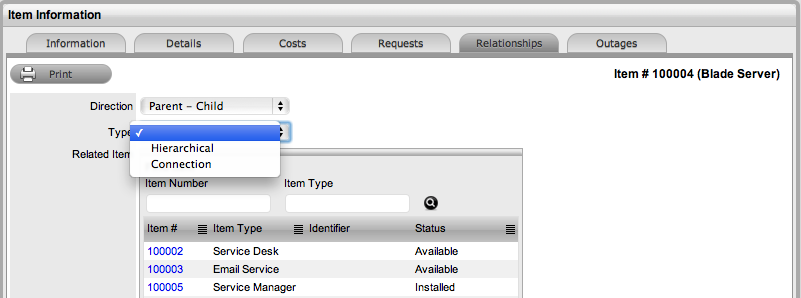
Relationships Tab
The Relationship Tab allows Users to view and/or create a Relationship Map for the current Item, with other Items within the CMDB.
The Relationship direction can be defined as:
-
Service Oriented - Parent-Child Relationship
-
Component Oriented - Child-Parent Relationship.
Within each view the Relationship Class can be defined as:
-
Hierarchical Relationship
-
Connection - an association between the selected Items.
For a Service, such as the Email or Web Site Service, it is recommended that the Hardware be defined as the Parent for the Software Items and the Software be defined as the Parent of the Email or Web Site Service.
Create a Relationship
To create a new Item Relationship:
-
Select Configuration>Items
-
Select an Item
-
Select the Item's Relationship tab
-
Click Edit
-
Click New
-
Select the Relationship Direction and Class from the drop-down menus
-
Define the Relationship by selecting a description from the drop-down list
NOTE:If the Relationship Type has the Inherit Parent Ownership option enabled, Child Items that use this relationship will inherit the Parent Item's owners. The ownership will not be editable and no other Parent Item can be assigned to the Child Item. A warning will be displayed if a relationship type has the Inherit Parent Ownership option enabled.
-
Use the Find Item field to locate the relevant Item
-
Click on the Item Number hyperlink to create the Relationship
-
Click Save to default to the Relationship Map view.
Relationship Map
Within the Relationships tab of the Item Information screen, a Relationship Map visually displays the connections that have been defined for an Item. All Item Relationships are listed in the Relationships Table beneath the Map. The Relationship Map can display up to 48 Child Items and 16 Parent Items in the one diagram.
The central icon of a Map is a visual representation of the selected Item. Scroll over an Item label to view any information recorded on the Information and Details tabs of the Item. To drill-down through the relationships, click on an Item icon label. To change the focus of the Relationship Map to another Item, click on the Item icon label and the system will request that OK be selected before updating the central node of the Map.
The Relationship Table data displayed at the base of the map can be filtered using the Direction filter view of Parent-Child or Child-Parent.
The map displays the relationship between each Lifecycle State by using different colors to represent the type of Lifecycle State.
|
Color |
|
|---|---|
|
Green Circle |
CI is assigned an online status. |
|
Red Square |
CI is assigned an offline status. |
|
Blue Triangle |
Service CI is assigned a pre-production status. |
The Lifecycle State name can be accessed by scrolling over the Item icon within the Map.
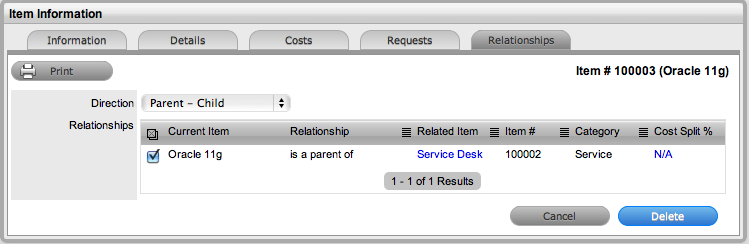
To delete a Relationship:
To remove the Relationship between Items:
-
Select the relevant Item within the Configuration tab
-
Move to the Relationships tab
-
Click Edit
-
Select Delete
A table with the Relationship details is displayed.
-
Select the Relationship Direction to display the relevant Relationship table
-
Mark the checkbox next to the Relationship that is to be removed
-
Select Delete
-
Click Done to return to the Item list.
AMIE Item Imports and Relationships
Items with Item relationships that have been imported using the AMIE engine, retain the relationships that exist within the Asset Management Tool. A visible map of the relationships is recorded within the Relationships tab.
Outages Tab
Planned outages can be created for an Item under the Outages tab. This is a period of time an Item will not be available for a Customer's use.
If an Item has an SLA with a specified Blackout Period, Outages should be planned to fall within this time. The Blackout Period is an agreement between the Customer and the Service Desk regarding a period of time when the Customer has no service expectations. This can also be the preferred time for Item upgrades and maintenance without affecting service availability.
When an Outage is being created, the Blackout Periods times are displayed to ensure the User creates a new Outage that does not breach the Item's SLA.
Creating an Outage
To create an Outage:
-
Select Configuration > Items
-
Select the Item Number
-
Go to the Outages tab
-
Click Edit

-
Click New
The screen will expand to display the Outage Editor screen including the Blackout Period, if defined for the Item associated SLA.
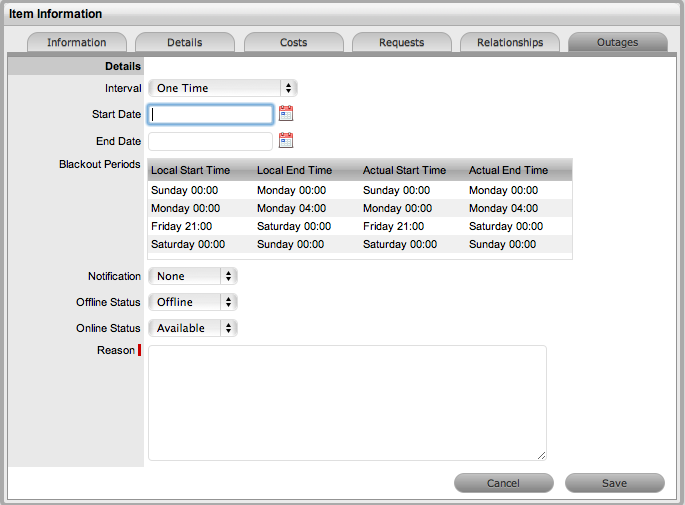
Planned Outages
Details
Description
Interval
Select One Time if the Outage is a one off, or set regular outages based on a weekly or monthly basis.
Start Date
Select the Start Date within the calendar, and modify the Time accordingly inside the calendar pop-up.
End Date
Select the End Date within the calendar, and modify the Time accordingly inside the calendar pop-up.
Notification
Select Email or SMS Notification about the Outage is to be sent to the Primary Contact of the Org. Unit, or All Customers/Owners associated with the Item.
Reminder
This option is displayed when a Notification is set for the Outage.
If a Reminder notification is to be applied to the Outage, check the box and define the period of time prior to the Planned Outage period that the reminder is to be issued.
Reason
Enter a description that details why a Planned Outage is being scheduled.
Within the table the Start and End Time is displayed as Local Time and Actual Time.
-
Local Time is based on the time zone of the logged in User
-
Actual Time is based on the SLA time zone.
-
-
Define the Interval for the Outage
Select One Time if the Outage is a one off, or set regular outages based on a weekly or monthly basis.
-
Enter the Outage details
Select the Start/End Date within the calendar, and modify the Time accordingly inside the calendar pop-up
-
Set the Notification method and recipients, for when the Outage is saved
-
Set Reminders, if required
Tick the Reminder Email field, if a reminder is to be emailed to defined recipients prior to the Outage time. Define the length of time before the Outage occurs that the reminder is to be sent.

-
Define the Offline Status and Online Status for the Item
These are the States the Item will be automatically assigned in the CMDB when the Planned Outage commences and ends.
-
Complete the Reason for the Outage
-
Click Save.
The Outage notification is sent to the defined recipients upon save.
-
Click Save and Done.
To view the details of the Outage, select the Outage No. link in the Outage List View.
See: Outages for more information on setting up and viewing Item Outages.
AMIE Snapshots Tab
(This tab is only visible when two or more asset management tools are synched within AMIE as configured in Admin>Setup> AMIE tab.)
The Item Information AMIE Snapshots tab displays a list of Snapshots that apply to the Item Information being displayed, and provides a search and remove functionality. Click on the Snapshot Id to view what information was imported from the various asset management tools.

About Snapshots
As different asset management tools may not record the same information for an Item, the most relevant information from different sources can be combined against one Item within the CMDB, by merging snapshots created by the different tools using the Category Map configured for an Item Category.
When the application is configured to synchronize with multiple asset management tools and the automatic Item creation option is disabled in Admin>Setup>AMIE Import, the system creates an image or Snapshot of the asset information which is made available for management within the Configuration>AMIE Snapshot screen for all Items, or viewed within the AMIE Snapshots tab for a specific Item that uses a federated source for Item Details.
The information source that is applied to the fields in the Details tab, is defined in the Federation tab of the Category associated with the Item. (See: Federation Tab.) Based on the map built in the Federation tab, fields within the Item Details tab are populated when AMIE snapshots are applied to new or updated Items. (See: AMIE Snapshots.)
2.6.6 Item Types
Item Types are templates used to create Items. Items are specific instances of Item Types with individual asset detail information.
In this section, Item Types and their manufacturers can be created and edited. The Item Types default support Team is assigned here, as well as Criticality, service level and other default information.

For Item Types that use a Category with the Service Category functionality enabled, a Costs tab is also displayed that allows a User with the Finance Role to forecast the costs for offering the Service Item that applies the Item Type.
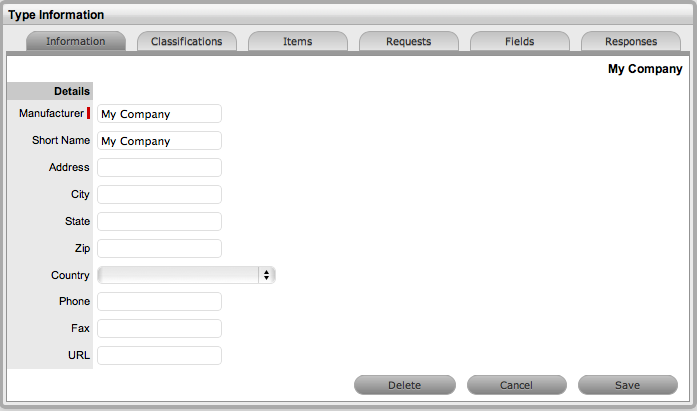
Create a New Item Type
To enter a new Item Type:
-
Select Configuration>Types
-
Click New
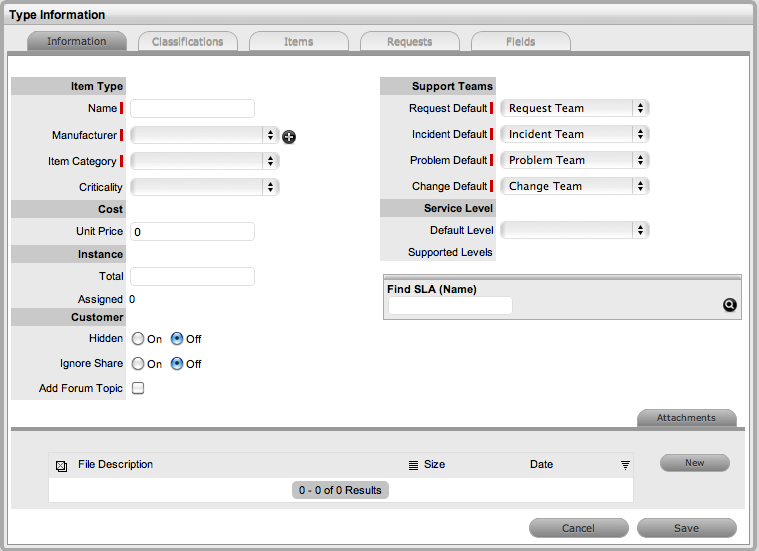
The Type Information screen appears.
-
Enter the Name of the Item Type
-
Enter a Manufacturer using the drop-down list
Or, select
 to add a Manufacturer. The Manufacturer screen appears. See: Create a Manufacturer
Type Information
Name
Name of the Item Type.
Manufacturer
The manufacturer of the Item Type. New manufacturers can be created and existing manufacturers can be edited and deleted by using the Edit and New buttons that appear beside the drop-down menu of manufacturers.
-
Using the drop-down list, select the relevant Item Category
-
Select the Criticality for the Item Type
Item Type
Item Category
This signifies the type of Item. (Hardware, Software or Service are the default Types, but Users with the Supervisor Role can create more if required).
Identifier
The drop-down list that appears is drawn from the fields defined for the Item Category selected. Although this information is not required, the Identifier is used to differentiate similar Items that may be in use throughout an organization. For example, if an organization uses the same printers for all departments, an Item Category field of "Location" could be configured for the Item Details and this could also be used as a secondary Identifier for Printer Item.
Criticality
Rates the degree of importance of an Item Type within an organization, which can be adjusted on a per Item basis. The 'Impact' of a Request is initially pulled from the Criticality of the Item, but can be adjusted within the request Information screen if required. Requests logged through the Customer Portal, use the Criticality of the Item to set the Priority of the request.
The Incident Analyzer, if enabled by the Administrator in Setup>CMS>Incident Analyzer, can apply the Criticality to automatically detect Problems.
The minimum Criticality level can also be used to determine the off-line Items that appear on Outages pages, if the Outages pages are enabled by the Administrator in Setup>Privileges>System.
Icon
When the Type details are saved, the Icon selected for the Item Category will be displayed. To customize the icon for the specific Item Type, select the Icon to access the Upload
or Cancel  options. The icon must be 128 x 128 pixels.
Unit Price
The per-unit price of the Item Type.
Instance Total
Number of instances owned by the organization.
Assigned
Number of instances assigned to Customers as Items.
Hidden
Select 'On' to ensure Customers cannot view this Item Type within the list in the Customer Portal. If all Item Types use this selection, the Item Type list will be completely removed from the Portal.
Items created using Item Types with Hidden enabled, will not allow Customers to generate requests against them in the Customer Portal, nor will they be able to view or receive updates about requests logged by the User against Items with this functionality enabled.
Creation
Enabling this option gives Customers using the portal the ability to create new Items using this Item Type (if they have been granted the ability to create Items by the Administrator in Setup>Privileges>Customer>Create Item. (This option is not displayed when the Hidden option is enabled.)
Ignore Share
Enabling this option overrides the system level option for sharing requests raised against Items of this Type. Requests raised against Items of this Type will not appear in the customer portal when viewing shared requests is enabled.
Add Forum Topic
Create a forum topic using the Item Type Name. This option is only displayed when a new Type is being created.
Incident Default
The Team of Technicians assigned to support Incidents received related to the Item Type. See: Teams
Problem Default
The Team of Technicians assigned to support Problems received related to the Item Type. See: Teams
Change Default
The Team of Technicians assigned to support Change Requests received related to the Item Type. See: Teams
Request Default
The Team of Technicians assigned to support Service Requests received related to the Item Type. See: Teams
Service Level Default
The default service level for the Item Type. When Billing is enabled, service levels without a cost are listed as an option. The service level with an associated cost can be applied when the Item created, this ensures Item contract payment is processed.
Support Levels
All Service Level Agreements assigned to the Item Type, which will be displayed as options when a request is created applying Item that uses this Type template. SLAs listed here, are used within the Costs tab of Service Types to forecast break even points on the Service relative to the number of Users.
Find SLA (Name)
To assign multiple SLAs use this option. Click
to view all SLAs or refine the search by entering a specific name. Select the SLA hyperlink to assign the SLA to the Type Information. Click to clear the search field.
-
Enter the Unit Price for the Item Type. This is an optional field that is used for asset management
See Finance Role.
-
Set the Customer options
-
Assign the default support Teams
-
Assign one or multiple SLAs, as required
-
Click Save
The Type Screen moves out of Edit mode.
-
Click the icon if the generic Item Category icon image is to be changed for the Item Type
This icon is used as the visual representation of the Item Type in the Relationship Map.

NOTE:The dimensions of the uploaded icon must be exactly 128 x 128 pixels
-
Move to the Classification tab to create classifications for issues related to Item of this Item Type.
SLAs and Item Types
When an Item Type is created with a defined SLA, any Item created using this Item Type automatically inherits the SLA. The lifecycle of a request raised against this Item is determined by the SLA milestones. However, it should be noted that the SLA can be adjusted within the Item if it is relevant to do so.
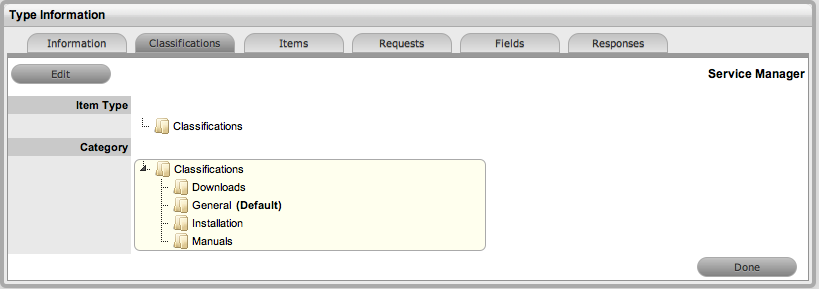
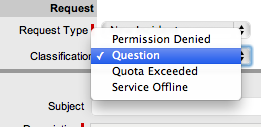
Classification
Category Classifications are used as generic problem classification for sorting requests. These are refined within the Item Type Classification to make them more relevant to the actual Item Type. For example, the Item Type category Hardware needs the Category Classification to be refined differently for hardware Item Types such as desktops and servers. To refine the problem types, Item Type Classifications are used.
Editing an Item Type Classification listing
To edit the Item Type Classification entry:
-
Within the Item Type>Classification tab
-
Select Edit
A New button is displayed within the Item Type Classification section.
-
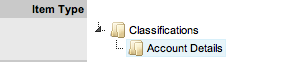
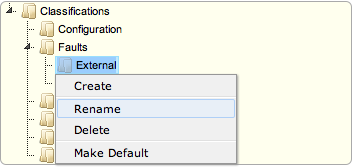
Right-click on the Classifications link
The Create option is displayed.
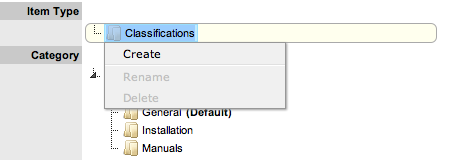
-
Select Create
A New node field is displayed in Edit mode.
-
Complete the details of the new list entry

-
Click outside the text field to save the entry
-
To re-name an entry, highlight the field
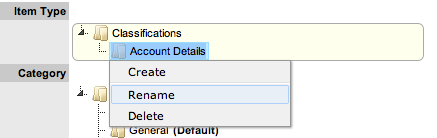
-
Select the Rename option
The field opens in edit mode
-
Change the details
-
Click outside the text field to save the changes
-
Repeat the above process to create all required list entries
-
Move existing Classifications to a new position, if required
Highlight the entry, then drag and drop the entry into its new location.
-
Click Save.
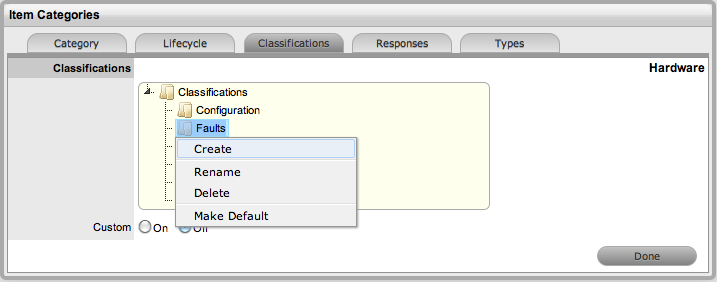
Creating Sub-Classifications
Classifications can be expanded to include sub-categories.
To create sub-classifications:
-
Select the relevant Classification header
The Classification header is highlighted.
-
Right-click the Classification Entry
The Create, Rename and Delete options are displayed
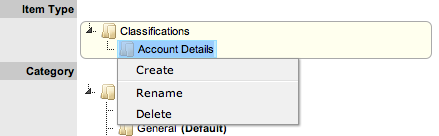
-
Click Create
-
Complete the details of the new node

-
Click away from the text field to save the change
-
The above steps can be repeated until the Sub-Classification list is completed.
To move an existing entry to a new position, select the entry, then drag and drop the entry into its new location
Items
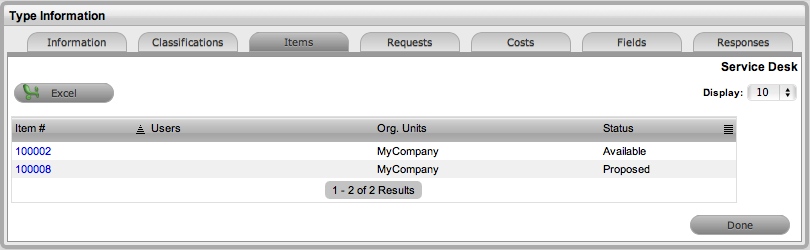
The Items tab lists the Items created using this Item Type. Individual Item details can be viewed by clicking on an Item Number. The list of Items can be exported using the Excel button.
Requests
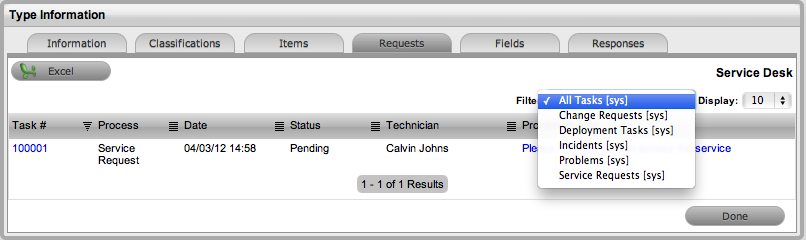
The Requests tab lists all requests that have been created for this Item Type.
Use the Filter to switch between Incident, Problem, Change and Service Requests views. Requests can be viewed from this screen by clicking on the Task# or Problem Report hyperlink. The list of Requests can be exported using the Excel button.
Costs
NOTE:This is only visible to Users with the Finance Role.
The Costs tab is only available within the Service Type Information screens and allows organizations to calculate the Break-Even Point (BEP) of a service based on forecasting the number of Customers of that Service. This allows the service organization to account for the per calendar month price of the Service, which is used to calculate the ongoing revenue figures within the Item Costs tab that uses the Service Type template.
|
Forecast Costs |
|
|---|---|
|
Capital |
Enter the sum total to be invested in hardware and software infrastructure that will underpin the Service. |
|
Recovery |
Complete the field with the expected number of years designated to recover the costs of implementing the Service. |
|
Recurring |
Enter the proposed ongoing cost, on a per calendar month basis, for offering the Service. |
|
Services |
Using the details entered in the Costs fields and the cost per annum of the SLA, enter the forecast number of Customers/Users to calculate the break even point (B.E.P) of the Service. Using the auto-calculated B.E.P., enter a per calendar month Price for the Service to recover costs. This figure is used in the Service Item Costs tab to calculate the ongoing Revenue figures. NOTE:If an SLA with an Internal Cost is assigned to the Type, the B.E.P will be the SLA cost divided by 12 plus the cost of recovering the Capital expenditure over the number of years defined for the Capital to be recovered. For example, where the SLA cost is $240 for the year, the B.E.P will never be less than $20 per month. |
|
Actual Costs |
|
|
Capital |
Content for this field is derived from the Cost field within then Costs tab of the Item created using this Type. |
|
Recurring |
Content for this field is derived from the Monthly Cost field within the Costs tab of the Item created using this Type. |
Fields
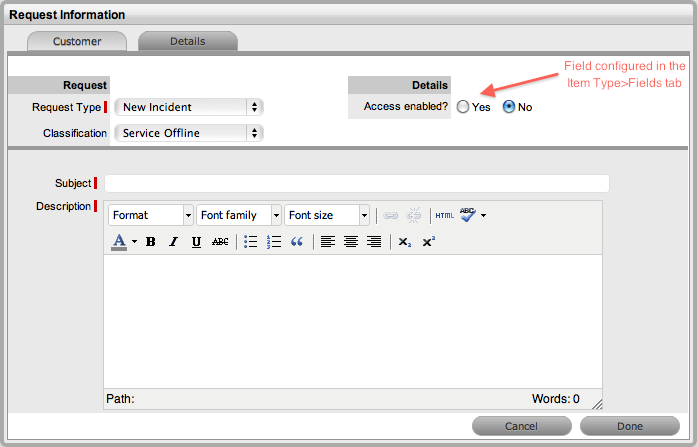
Within the system, service organizations can refine custom fields made available during the request creation process based on the Item assigned to the request. In the Fields tab a User can create custom fields that apply to the Item Type. Therefore, when a request is logged against an Item that uses an Item Type with custom fields configured within the Fields tab, the Fields are made available within the Details tab of the request creation process.
These fields are in addition to the fields created by the Administrator within the Admin>Setup>Custom Fields, which are created for the specific Process, such as Incident, Problem, Change and Service Requests.
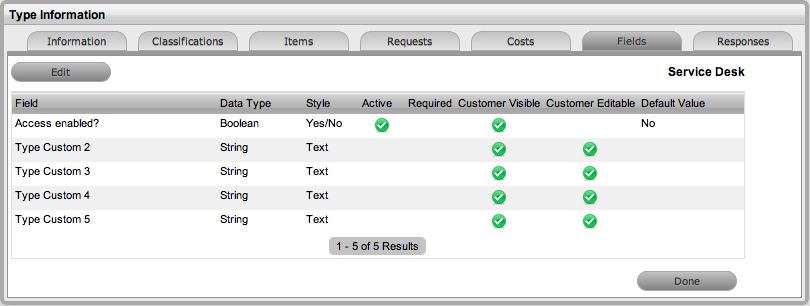
To create Field labels within the Type Information screen:
-
Click the Fields tab
-
Click Edit
-
Select a Field hyperlink
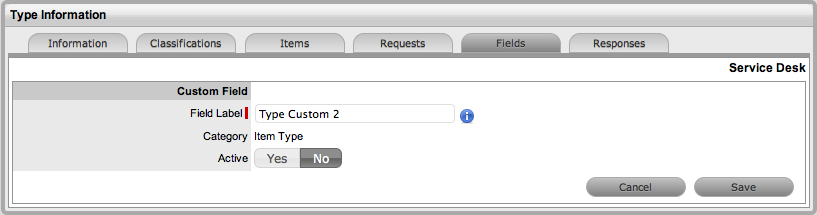
The Custom Field screen is displayed
-
Click Yes to activate the Field
-
Complete the following details:
Categories Fields
Description
Category
Field Label
The name of the field.
Active
Indicates if the field is active.
Required
Indicates if the field is required or mandatory field.
Customer Visible
Defines if the Customer can see the field within the
Customer Portal.
If Yes is selected, define if the Customer can edit the field information on the Customer Portal.
Data Type
Dictates the field's Data Type. The options available include :
-
String - List or Free Text
-
Number
-
Boolean - radio buttons for Yes/No and True/False
-
Date - creates a date field
-
Currency- creates a currency field
-
Hyperlink.
Style
States the style of the field.
eg. String- List or Free Text field. SeeLists for more information on creating a list field type.
Unique Value
When active, the system prevents the duplication of data within the customized field.
Default Value
Value entered is the default system entry for the field, when the field is not completed manually.
Input Validation
When enabled the Input Mask and User Mask can be defined.
Input Mask : A regular expression to use for data validation of values entered by a User (i.e., Zip/Post Code, telephone no.)
User Mask: A User Friendly representation of the Input Mask that Customers can understand should it appear in a validation error message.
Enable Description
When enabled a Description field appears, allowing the User to enter details of what information is the field is expected to capture. These details are accessible next to the custom field on the relevant screen.
-
-
Click Save.
The active Field will now be available during the request creation process, for all Items that use the Item Type.
Responses
The Responses tab within an Item Type displays the templates configured within the Item Category>Response tab, which can be used as content for Notes sent for requests received against the Item Category. In addition to saving time for customer responses that are sent on a regular basis, these ensure the service desk responds to issues in a consistent manner, in line with the support organization's policies and protocol. Within the Types>Responses tab, additional Note templates can be configured, that will only be available for requests logged against that Item Type.
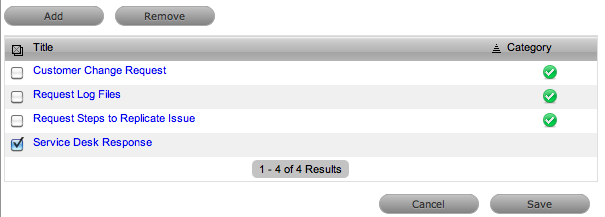
The following screen displays a list of default template options available within the Notes tab of a request:

Adding a Template for Item Types
To add a Note template:
-
Go to the Responses tab
-
Click Edit
-
Click Add

-
Enter the Template Title
-
Complete the content for the Note, inserting any relevant parameters
-
Click Save.
Removing a Template
Within the Types>Response tab, only templates created for the Item Type can be deleted. Templates created at the Category level must be deleted within the Category>Responses tab.
To delete a template within an Item Type:
-
Go to the Responses tab
-
Click Edit
-
Check the box in the column next to the template Title
-
Click

-
Click Save.
2.6.7 Create a Manufacturer
Create a Manufacturer
Manufacturers are created and assigned to an Item Type to establish the distributor of the Type.
Creating a New Manufacturer
To create a new Manufacturer when creating a new Item Type:
-
Leave the Manufacturer field blank
-
Click the
button
-
Enter the Manufacturer name as well as any other details
-
Click Save.
The screen will return back to the Item Type Information window and display a confirmation that the Manufacturer has been created successfully.
Editing a Manufacturer
Existing Manufacturers can be modified within the Item Type screen.
To edit a Manufacturer:
-
Select the Manufacturer from the list provided
-
Select
 to open the Manufacturer information screen in Edit mode
The system will inform the User that any changes made to the Manufacturer will undo any unsaved Item Type changes. Click OK to continue.
-
Make the required changes
-
Click Save
The screen returns to the Item Type screen.
-
Click Save and Done.
The screen reverts to the Item Type list view.
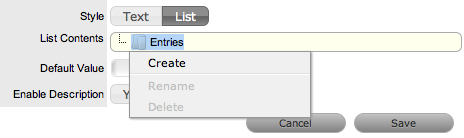
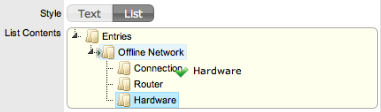
Creating Custom Field Lists
Lists can be created as a data type option within custom fields across the application. The can be created for Item Category and Item Type custom fields, Classifications for requests and system-wide custom fields activated by an Administrator. Lists allow a User to create a series of entries for a custom field that will appear as a drop-down option list.
Creating a New List Entry
To create a new list entry within the List Contents field:
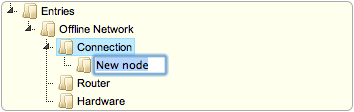
-
Right click the Entries link
The Create option is displayed
-
Click Create
A New node link displayed

-
Enter the name of the field
-
Click outside the field to save the entry

-
Repeat this process until all list entries have been added
To create a nested list, right click on the relevant list entry and repeat the above process.
-
To move an existing entry to a new position, select the entry, then drag and drop the entry into its new location
-
When all the relevant details have been defined for the custom field, click Save.

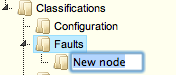
Creating Nested List Entries
List entries can be expanded to include nested options.
To create a nested list:
-
Right-click the relevant list entry header
The Create, Rename, Delete and Make Default options are displayed.
-
Select Create
A text box will appear under the list entry.
-
Enter the name for the list entry
-
Click away from the text box to commit and save the change
-
Move an existing list entry to a new position, if required
Select the entry, then drag and drop the entry into its new location
-
The above steps can be repeated until the nested list is complete.

Renaming a List Entry
Any list entry can be renamed.
To rename a list entry:
-
Right-click the list entry link
-
Click Rename
-
Edit the field content
-
Click away from the text field to save the change.
Deleting a List Entry
To delete a list entry:
-
Right-click the relevant list entry
-
Click Delete
-
Click Done when the list is complete.
2.6.8 Categories Tab
Configuration Categories
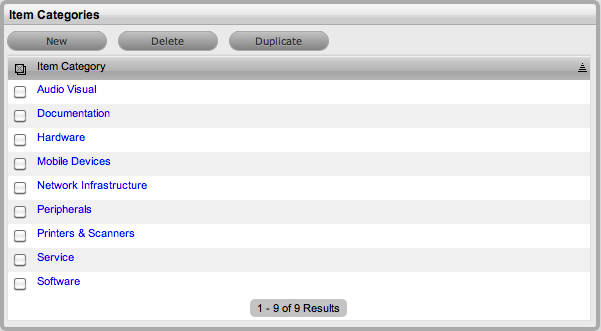
Within the application the number of Item Categories that can be defined is unlimited. By default the following Categories are included:
-
Audio Visual
-
Documentation
-
Hardware
-
Mobile Devices
-
Network Infrastructure
-
Peripherals
-
Printers & Scanners
-
Software
-
Service.
Within each Category the Lifecycle and Classifications associated with the Category can be defined.
Categories Tab
The default templates set at the Category level are used to cover a broad range of Item Types. Within each default Category the following have been configured, but can be customized as required:
-
The Field Labels that will be available on the Details tab of Items using the Category
-
The broadest level of Classifications that are assigned as part of the request creation process.
-
The Lifecycle stages an Item will move through from being proposed or ordered to decommissioned
-
Template responses that Technicians can use when entering a Note for a request that is assigned an Item that uses a Category.
The following table illustrates how Categories can be represented as Manufacturer Models within the Configuration>Types tab:
|
Category |
Proposed Item Type |
|---|---|
|
Hardware |
PCs, Servers, Notebooks |
|
Networking Infrastructure |
Routers/Switches, UPS, Cabinets, Racks |
|
Mobile Devices |
iPhones, PDAs, Windows MDs |
|
Peripherals |
Monitors, External Storage Devices, Docking Stations, Barcode Scanners |
|
Audio Visual |
Projectors, Electronic Whiteboards |
|
Printers/Scanners |
Printer, Scanner |
|
Digital Cameras |
Digital Still, Digital Video, Thermal Image |
|
Software |
Operating Systems, Databases, Applications |
|
Service |
Email, Website. |
The easiest way to create additional Categories, is to duplicate a default Category and tailor it to the organizational requirements.
A Service Portfolio Team can be assigned to the default Service Category by creating the Team within the User>Teams screen, then selecting Edit within the Categories tab of the Service Item Category.
Creating a Category
-
Select Configuration>Categories
The Item Categories screen appears.
-
Click New
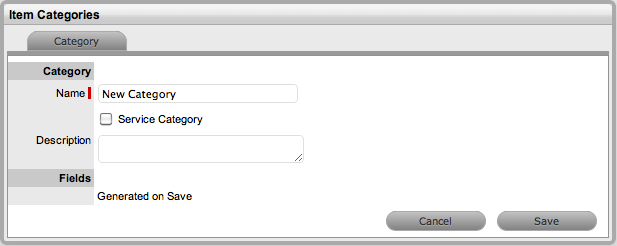
-
Enter the name of the new Category
-
Complete the Description
Content entered in this field is visible when the User scrolls over the Category Name in the Item Category list.
-
Click Save
The Item Categories screen expands to display the options to upload an Item Category icon and customize Field labels.
NOTE:The Item No. Validation option is displayed, if the Admin>Setup>Privileges>System> Edit Item Numbers is set to Yes
This displays the Input Mask and User Mask fields, which are explained in the Categories Fields table below.
-
Check the Service Category field if the template is to be used for a Service Item
Ticking this option displays the Portfolio Team drop-down list, ifService Portfolio Teams have been created within the application. This allows Groups within the Service Portfolio Teams to be assigned to the different stages of the Item Lifecycle, and activates Service Catalog Management functionality within the Cost Tabs of Types and Items that use the template.
NOTE:Customers cannot create Items using Item Categories that have the Service Category option enabled

-
Select the icon to be replaced, to change the Icon image for the Item Category
This icon is used as the generic visual representation of the Item Category in the Relationship Map. This can also be refined at the Item Type level.
Use the
to upload a new image or to cancel the upload.
NOTE:The dimensions of the uploaded icon must be exactly 128 x 128 pixels
-
Customize the Field Labels
Custom fields are visible in the Details tab of Items that use the Category.
Click the Field Label link to open it in Edit mode and display the following options:
Categories Fields
Description
Category
Field Label
The name defines what attribute information is to be recorded in the field.
Active
Indicates if the field will be visible in the Details tab of an Item.
Required
Indicates if the field is required or mandatory field.
Customer Visible
Defines if the Customer can see the field within the
Customer Portal.
If Yes is selected, define if the Customer can edit the field information on the Customer Portal.
Data Type
Dictates the field's Data Type. The options available include :
-
String - List or Free Text
-
Number
-
Boolean - radio buttons for Yes/No and True/False
-
Date - creates a date field
-
Currency- creates a currency field
-
Hyperlink.
Style
States the style of the field.
eg. String- List or Free Text field. SeeLists for more information on creating a list field type.
Unique Value
When active, the system prevents the duplication of data within the customized field.
Default Value
Value entered is the default system entry for the field, when the field is not completed manually.
Input Validation
When enabled the Input Mask and User Mask can be defined.
Input Mask : A regular expression to use for data validation of values entered by a User (i.e., Zip/Post Code, telephone no.)
User Mask: A "User Friendly" representation of the Input Mask that Customers can understand should it appear in a validation error message.
Enable Description
When enabled a Description field appears, allowing the User to enter details of what information is the field is expected to capture. These details are accessible next to the custom field on the relevant screen.
-
-
Click Save to complete the field label configuration
Continue to customize all fields as required.
-
Define the ordering preference
The option defined here dictates how the fields appear on the Item Details tab.
To move a field, select the checkbox beside the field label followed by the

 to move the label up and down the list. To multi-select fields, tick the checkboxes beside the label name and click
  to activate or
  to deactivate the fields.
The field order can be set to:
-
Alphabetical - the fields will be presented according to the alphabet order of the first letter.
-
System - the fields will appear in the order they are entered into the system.
-
User Defined - the fields can be manually adjusted by the User using the system buttons.
-
-
Click Save.
Modify the Category Lifecycle,Classifications, Responses and, if the system is synched with more than one asset management discovery tool the Federated templates, if necessary.
Duplicating a Category
To fast track the creation of an Item Category, each can be duplicated.
To duplicate an existing Category:
-
Select Configuration>Categories
-
Tick the box to the left of the Category name

-
Click Duplicate
A new Category hyperlink is added to the Category list. The new Category will contain the same custom fields, lifecycle and classifications of the original Item Category.
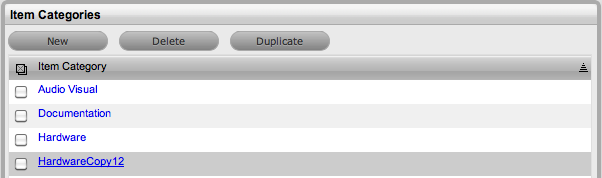
-
Modify the new Category as required.
Editing and Configuring an Item Category Template
After an Item Category has been duplicated it can be modified to represent the new Item Category.
To edit a Category:
-
Select Configuration>Categories
-
Click on the appropriate hyperlink
The screen defaults to the Categories>Categories tab.
-
Click Edit
-
Enter the name of the new Category
-
Complete the Description
Content entered in this field is visible when the User scrolls over the Category Name in the Item Category list.
-
Click Save
The Item Categories screen expands to display the options to upload an Item Category icon and customize Field labels.
NOTE:The Item No. Validation option is displayed, if the Admin>Setup>Privileges>System> Edit Item Numbers is set to Yes. This displays the Input Mask and User Mask fields, which are explained in the Categories Fields table at Point 9.
-
Check the Service Category field if the template is to be used for a Service Item
Ticking this option, displays the Portfolio Team drop-down list, ifService Portfolio Teams have been created within the application. This allows Groups within the Service Portfolio Team to be assigned to the different stages of the Item Lifecycle, and activates Service Catalog Management functionality within the Cost Tabs of Types and Items that use the template.
NOTE:Customers cannot create Items using Item Categories that have the Service Category option enabled
-
Select the icon to be replaced, to change the icon image for the Item Category
This icon is used as the generic visual representation of the Item Category in the Relationship Map. This can be refined at the Item Type level.
Use the
to upload a new image or to cancel the upload.
NOTE:The dimensions of the uploaded icon must be exactly 128x128 pixels
Version 7.0 will not apply these icons in the Relationship Map, but they will be used in a future release
-
Customize the Field Labels
Custom fields are visible in the Details tab of Items that use the Category.
Click the Field Label link to open it in Edit mode and display the following options:
Categories Fields
Description
Category
Field Label
The name of the field.
Active
Indicates if the field is active.
Required
Indicates if the field is required or mandatory field.
Customer Visible
Defines if the Customer can see the field within the
Customer Portal.
For a Service Category, if it is relevant to display costs or other specific details regarding a Service on offer in the Services Tab of the Customer Portal, then set relevant attribute fields to being Customer Visible.
Data Type
Dictates the field's Data Type. The options available include :
-
String - List or Free Text
-
Number
-
Boolean - radio buttons for Yes/No and True/False
-
Date - creates a date field
-
Currency- creates a currency field
-
Hyperlink.
Style
States the style of the field.
eg. String- List or Free Text field. SeeLists for more information on creating a list field type.
Unique Value
When active, the system prevents the duplication of data within the customized field.
Default Value
Value entered is the default system entry for the field, when the field is not completed manually.
Input Validation
When enabled the Input Mask and User Mask can be defined.
Input Mask : A regular expression to use for data validation of values entered by a User (i.e., Zip/Post Code, telephone no.)
User Mask: A "User Friendly" representation of the Input Mask that Customers can understand should it appear in a validation error message.
Enable Description
When enabled a Description field appears, allowing the User to enter details of what information is the field is expected to capture. These details are accessible next to the custom field on the relevant screen.
-
-
Click Save to complete the field label configuration
Continue to customize all fields as required.
-
Define the ordering preference
The option defined here dictates how the fields appear on the Item Details tab.
To move a field, select the checkbox beside the field label followed by the
to move the label up and down the list. To multi-select fields, tick the checkboxes beside the label name and click to activate or to deactivate the fields.
The field order can be set to:
-
Alphabetical - the fields will be presented according to the alphabet order of the first letter.
-
System - the fields will appear in the order they are entered into the system.
-
User Defined - the fields can be manually adjusted by the User using the system buttons.
-
-
Click Save.
Modify the Category Lifecycle,Classifications, Responses and, if the system is synched with more than one asset management discovery tool, the Federated templates, if necessary.
Category Lifecycle
The Lifecycle details the stages of life for a Configuration Item. This allows Items to be tracked from the conceptualization/purchase stage through to being decommissioned/discarded, and can be used to indicate availability levels throughout the Lifecycle.
The States configured here are used within the Item information screen and allow the User to easily see if an Item is at a start or end point of its life, whilst also indicating if the Item is available or not. If an Item is moved to an Offline state, this information is also used on the Outage pages, for easy reference.
By default, the system is installed with some pre-defined Lifecycles, which are displayed with the three types of States:- Previous, Current and Next. Based on the configuration of the Current State, the listings displayed in the Previous or Next column show where an Item can move to from the Current State.
If the default Lifecycles do not match the requirements of the service and support organization, they can be customized. To avoid confusion, it is suggested that the default Lifecycle States be erased completely if they are not relevant to your organization.
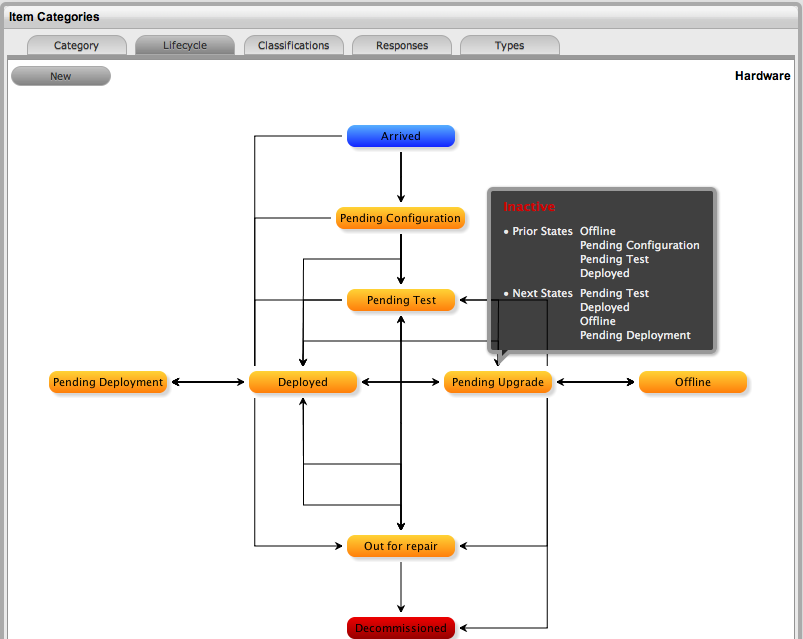
Creating a Lifecycle
NOTE:It is recommended that all Lifecycle States be written down and mapped before this process is started.
-
Select Configuration>Categories
-
Click on the Item Category hyperlink
-
Move to the Lifecycle tab
-
Click the Current State hyperlink to edit the State, or, click New to create a new transitional State
The States/Status screen appears.
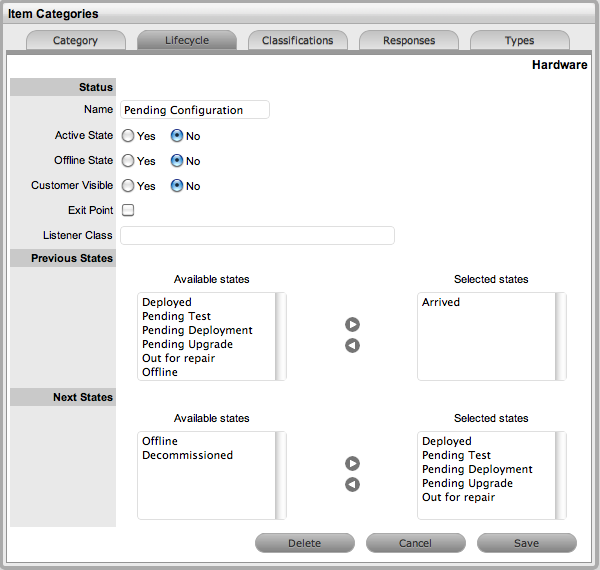
-
Rename the State as required
-
Complete the State configuration:
Description
Status
Name
Enter the name of the Lifecycle State.
Active State
Stipulates if the Item is Active, when assigned this State.
Offline State
Only visible when Active is set to No. Indicates if the Item is offline and inactive. Items moved into states where this is enabled, have availability metrics calculated.
Customer Visible
When selected, Items in this State are visible in the Customer Portal
Pre-production State
Only visible for Service Category lifecycle states. Items that use this state are available within the Service Pipeline filter view of the Configuration>Items tab.
Entry Point
An Entry Point is used to indicate the start of a Lifecycle. To make the state a Workflow Entry Point, select the Entry Point checkbox.
As the Entry Point is the first state, the Previous States field will be removed.
Exit Point
Select whether the state will be an Exit Point. An Exit Point is used to indicate the end of a Lifecycle.
Listener Class
This field is visible if the Outbound Webservices option is enabled in the Admin>Setup>Privileges>System tab.
Complete this field, if assigning an Item to this State is to trigger an event in an external system.
This field should contain the name of a Java class that implements the interface com.livetime.ws.listen.LifecycleListener that has been compiled into a jar file and added to the LiveTime classpath. Please contact support for further details.
NOTE:It is advised Users enter the list of all States, before defining any relationships to Previous or Next States
-
To return to the Lifecycle Current State list, save the updated State information
-
Continue editing, adding or deleting States until all relevant transitional States exist within the Lifecycle
After each Lifecycle State has been configured, the Lifecycle itself should be mapped.
-
Select a Current State hyperlink to configure the Previous State or Next State options,
Using all Available States entered in the Lifecycle, define the status direction options of an Item that uses this Item Category template.
Description
Status
Previous States
If the State is not an Entry Point, use the arrow button to select Previous States from the Available States.
Next States
If the State is not an Exit Point, use the arrow button to select the Next States.
Available States
Lists all the possible States that can be included in the Lifecycle.
Selected States
Lists the states that have been included as a Next or Previous State of the Lifecycle.
NOTE:When a State is used as a Previous or Next State, it allows an Item to move forward and backward in a Lifecycle
An Entry Point State cannot have any previous States and an Exit Point State cannot have any Next States.
-
Highlight the relevant States in the Available States box
-
Click the arrow pointing towards the Selected States box
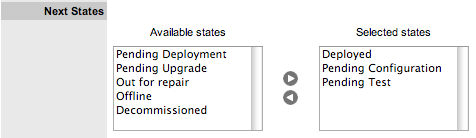
-
When all States have been allocated, click Save
-
Save the assignment, and complete the process for all stages of the Item Lifecycle
-
Customise settings if editing a Service Category
Assign a Group within the associated Service Portfolio Team, this will allow these Users to edit the Item details when assigned this stage of the Category Lifecycl

-
Click Save.
Move to the Classifications tab, to define request Classifications for the Item.
Deleting a State
It may be necessary to delete a system default State or a State that is no longer in use. Note that a State cannot be deleted if it has been assigned to an Item.
To delete an unused State:
-
Select Configuration>Categories
-
Click on the Item Category hyperlink
-
Move to the Lifecycle tab
-
Select the Current State link
-
Click Delete.
Item Lifecycle Example
In this example the Item Category Hardware has a Lifecycle State of Arrived. This State is inactive and an entry point. Items assigned this State would not be visible on the Customer Portal.
After this State is assigned to an Item, the next State that the Item can move to is any of the States listed within the Selected States list (i.e., Deployed, Pending Configuration, Pending Test, Pending Deployment or Out for Repair).
Setting up the Lifecycle Status "Arrived"
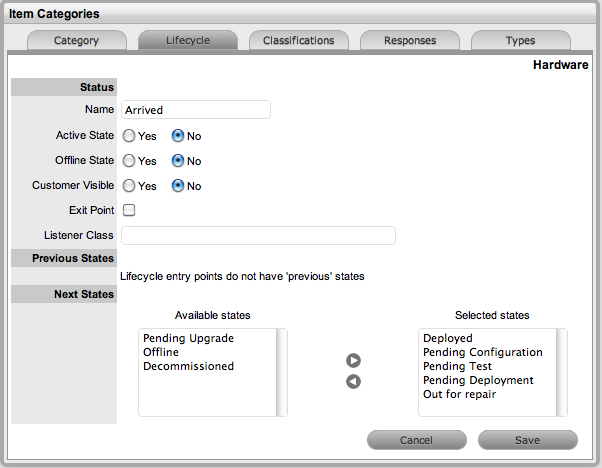
Assigning the Lifecycle Status of Arrived to an Item with the Category Hardware
NOTE:The Item Status list contains all the States defined as Next States for the Arrived Status.
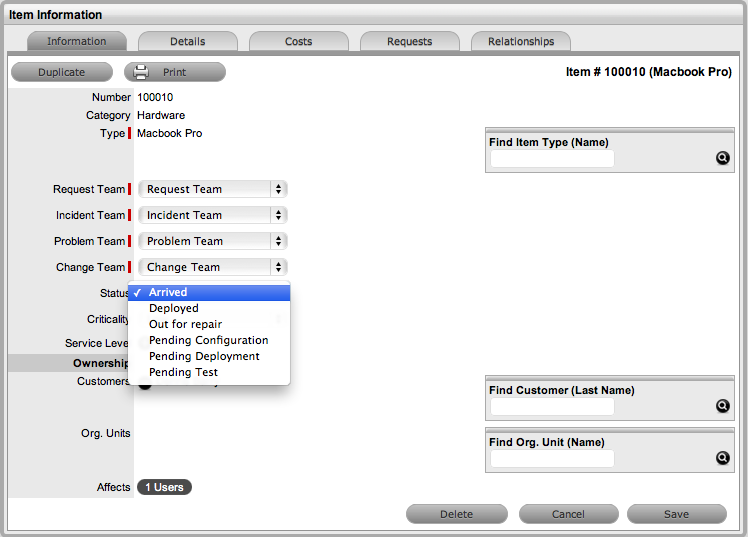
Classifications Tab
Category Classifications that are used to define and group issues are created within this tab. These are applied to requests that are logged against Items based on the Item Type Category template. The Classifications are also used by the system for proactive Incident analysis when automatically identifying Problems.
Category Classifications are used for generic grouping of issues relevant across all Item Types that use a Category. Supervisor Users can define additional Classifications for specific Item Types, within the Configuration>Categories>Item Categories>Classification tab.
The system is installed with several default Classification Type Categories, which can be edited as required.
NOTE:The General Classification is owned and used by the system and cannot be deleted. It is also advised that this Classification not be renamed, as this is the Classification assigned to requests when they are created via email.
Classifications Tab
Additional Classifications can be created for each Item Category, while the system provided Classifications can be renamed or deleted. The Custom facility, when enabled, allows Users to add Classifications during the request creation process.

Creating a New Item Category Classification
To add a new Classification:
-
Select the Classification tab of an Item Category
-
Right-click on the Classifications header
-
Select Create
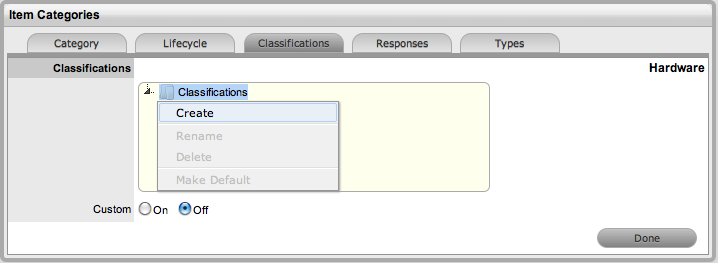
-
Enter the details in the newly created node
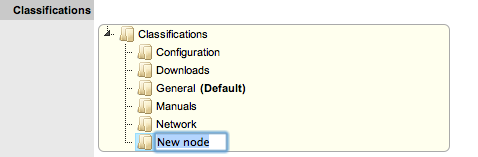
-
Click outside the text box to commit the entry listing
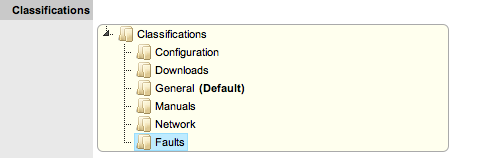
-
Repeat the above process to create all required list entries
-
Move an existing Classification to a new position, if required
Select the entry, then drag and drop the entry into its new location.

-
Click Save.
Creating Sub-Classifications
Classifications can be expanded to include nested Classifications.
To create Sub-Classifications:
-
Right-click the relevant Classification header
The Create, Rename, Delete and Make Default options are displayed.
-
Select Create
A text box will appear under the Classification.
-
Enter the name for the list entry
-
Click away from the text box to commit and save the change
-
Move an existing Classification to a new position, if required
Select the entry, then drag and drop the entry into its new location
-
The above steps can be repeated until the sub-category list is completed.
Renaming a Classification
Any Item Category Classification can be renamed.
To rename a Classification:
-
Right-click the Classification
-
Click Rename
-
Edit the field content
-
Click away from the text field to save the change.
Deleting a Classification
To delete a Classification:
-
Right-click the relevant list entry
-
Click Delete
-
Click Done when the Classification Categories are complete.
Responses Templates
The Responses tab within an Item Category allows the Supervisor to define template replies for Notes sent related to requests received against the Item Category. This ensures the service desk responds to issues in a consistent manner, and in line with the support organization's policies and protocol. Additional templates can be configured within the Item Type>Responses tab. These templates are only available for requests related to the Item Type.
The following screen displays a list of default template options available within the Notes tab of a request:
Editing a Template
To edit a Response template:
-
Go to Configuration>Categories
-
Select the hyperlink for the relevant Category
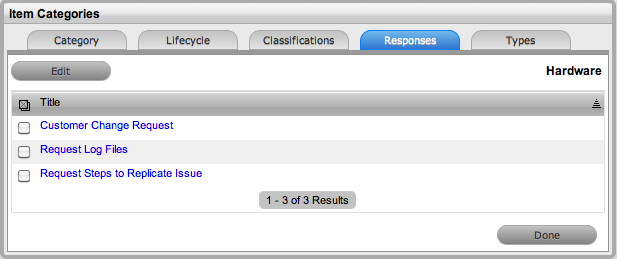
-
Move to the Responses tab
-
Click Edit
-
Select the relevant Title hyperlink
The template contents are displayed.
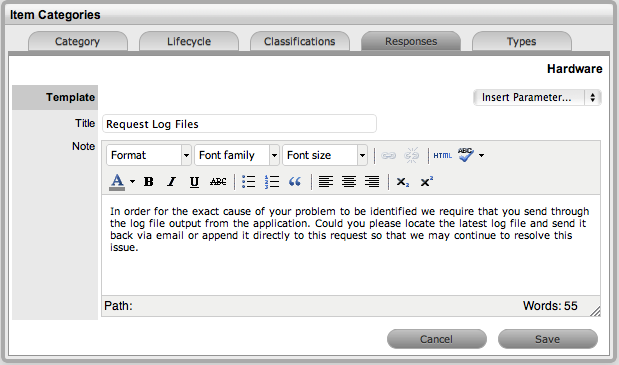
-
Amend the Note template and insert any relevant parameters
-
Click Save.
Adding a Template
To add a Note template:
-
Go to Configuration>Categories
-
Select the hyperlink for the relevant Category
-
Move to the Responses tab
-
Click Edit
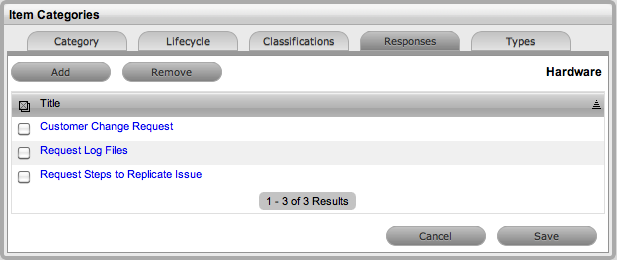
-
Click the Add button
-
Enter the template Title
-
Complete the content for the Note and Save.
Deleting a Template
To delete a template:
-
Go to Configuration>Categories
-
Select the hyperlink for the relevant Category
-
Move to the Responses tab
-
Click Edit
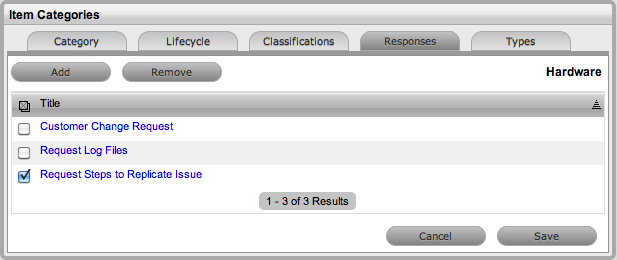
-
Check the box in the column next to the template Title
-
Click the Remove button.
Item Category Types
The Types tab lists all Item Types that have been created using the selected Category.
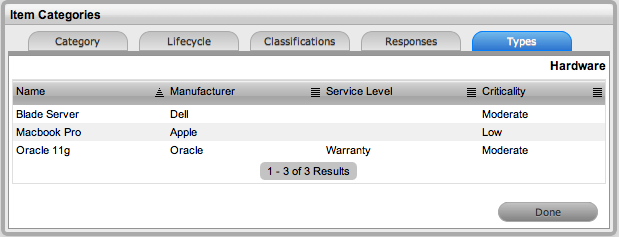
Federation Tab
(This tab is only visible when two or more asset management tools are synched within AMIE as configured in Admin>Setup> AMIE tab.)
The Federation tab is used to build the Category Map, which allows for information sourced from multiple asset management systems for a single asset to be recorded against one Item in the CMDB. Based on the map built here, fields within the Item Details tab are populated when AMIE snapshots are applied to new or updated Items.
Creating a Category Map
Within the relevant Category:
-
Go to the Federation tab
-
Click Edit
The system will open each field to display the asset management tools that are configured within AMIE, in the Admin>Setup>AMIE tab.
-
Assign the asset tool source from the pop-up options for each field
The Item Number, Item Type and Manufacturer are included for Categories.
NOTE:Defining a source for the Item Type and Manufacturer is mandatory
-
Complete one or two of the Snapshot Merge fields
The Snapshot Merge fields are used by the system to verify the identity of an Item across the asset management tools configured in AMIE, when synchronizing Item Details from multiple sources.
-
Click Done.
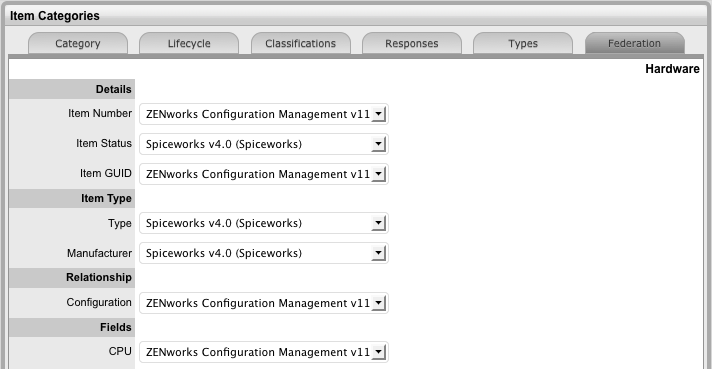
2.6.9 Vendors
A summary of Supplier and Service Provider details is displayed within the Vendor List.
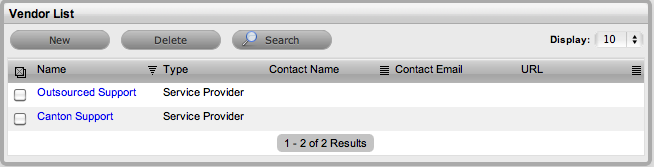
The following types of Vendors are defined within the system:
-
Service Provider: Vendors who supply a service and whose details are used within the Underpinning Contracts functionality of the application
-
Supplier: Vendors who provide goods to the organization and whose details are used within the Purchase Order functionality of the application. This may differ from the Manufacturer of an Item, as the Supplier may not necessarily be the company that makes the Item.
Creating a Vendor
To create a new Vendor:
-
Select Configuration
-
Select Vendors
-
Select New to display the Vendor Details screen
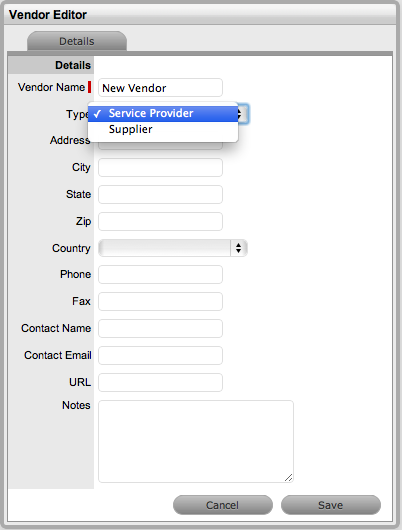
-
Enter the Vendor Name, required
-
Define the Vendor Type, Service Provider or Supplier
-
Enter other relevant contact information, optional
-
Click Save.
Vendor - Service Provider
When a Service Provider Vendor details are saved, a Contracts tab becomes visible. All Underpinning Contracts assigned to a Service Provider are listed within the Contracts tab.

Vendor - Supplier
When a Supplier Vendor details are saved, an Orders tab is displayed. All Purchase Orders for the Supplier are listed within the Orders tab.
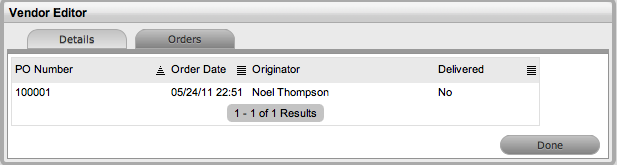
2.6.10 Manufacturers
The details of suppliers who manufacture goods used within the organization can be configured within the Manufacturers tab. The list of Manufacturers configured here form the drop-down list options within the Type Information screen.
Manufacturer details that are created when a new Item Type is entered into the system, are also displayed within this screen.
Creating Manufacturers
To create a Manufacturer within the Manufacturers tab:
-
Go to Configuration > Manufacturers
-
Click New
-
Complete the Details fields as required
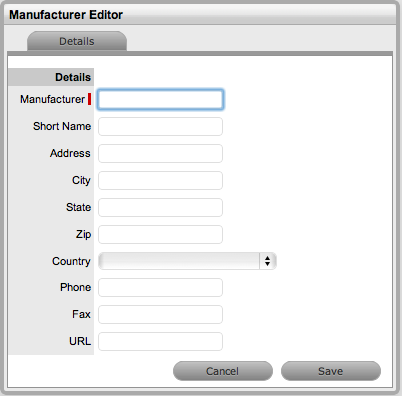
-
Select Save.
Edit Manufacturer Details
To edit the details recorded within a Manufacturer information screen:
-
Go to Configuration > Manufacturers
-
Select the relevant Manufacturer name hyperlink
-
Click Edit
-
Amend details
-
Click Save.
Deleting Manufacturers
To delete a Manufacturer:
-
Go to Configuration > Manufacturers
-
Select the relevant Manufacturer name hyperlink
-
Select Edit
-
Click Delete if the Manufacturer information is no longer required
A system warning window will be displayed.
-
Click OK.
Manufacturer details that are not in use in the system can be deleted. To delete one or more Manufacturer records within the Manufacturer list:
-
Go to Configuration > Manufacturers
-
Check the field next to the Manufacturer names that are no longer required
-
Click Delete.
2.6.11 Outages
An Outage is when an Item Status is unavailable due to expected or unexpected events. For example, the Item may be out for repair or faulty. To move an Item into an unavailable State, and therefore list it as inactive, the Item Status selected for the Active State option within the Item Category Lifecycle must be set to No, and the Offline State option set to Yes.
Planned Outages
Planned Outages are used to manage Items' proposed unavailability. This is useful for informing Customers and Users about planned changes to infrastructure that may cause an Item to be taken offline or out of service.
If an Item has an SLA with a specified Blackout Period, ideally Outages should be planned to fall within this time. The Blackout Period is an agreement between the Customer and the service provider regarding a period of time when the Customer has no service expectations. This can also be the preferred time for Item upgrades and maintenance without affecting service availability. To access the Blackout Period details for an SLA associated with an Item, create the Planned Outage within the Outages tab of the Item Information screen.
Creating a Planned Outage
To create an Outage:
-
Select Configuration > Outages
-
Click New
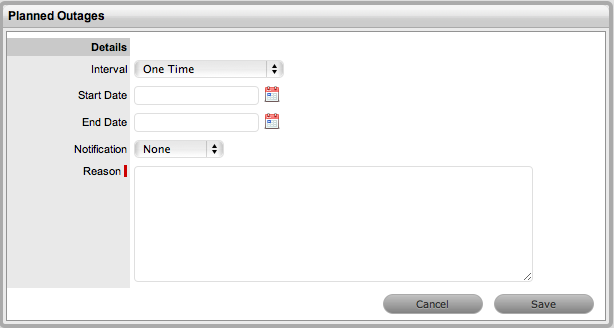
-
Planned Outages
Details
Description
Interval
Select One Time if the Outage is a one off, or set regular outages based on a weekly or monthly basis.
Start Date
Select the Start Date within the calendar, and modify the Time accordingly inside the calendar pop-up.
End Date
Select the End Date within the calendar, and modify the Time accordingly inside the calendar pop-up.
Notification
Select Email or SMS Notification about the Outage is to be sent to the Primary Contact of the Org. Unit, or All Customers/Owners associated with the Item.
Reminder
This option is displayed when a Notification is set for the Outage.
If a Reminder notification is to be applied to the Outage, check the box and define the period of time prior to the Planned Outage period that the reminder is to be issued.
Reason
Enter a description that details why a Planned Outage is being scheduled.
-
Define the Interval for the Outage
The options of One Time, Weekly and Monthly are available.
-
Set the Outage Start and End dates
-
Set the Notification method and recipients
These are applied when the Outage is saved.
-
Tick the Reminder Email field
If a reminder is to be emailed to defined recipients prior to the Outage time. Define the length of time before the Outage occurs that the reminder is to be sent.
-
Enter the Reason for the Outage
-
Click Save
The add Items option is displayed.

-
Click
The Find Item/Item Type field is displayed.
-
Enter the known Item Number or Type and click
-
Click the Item Number hyperlink to add the Item to the Outage
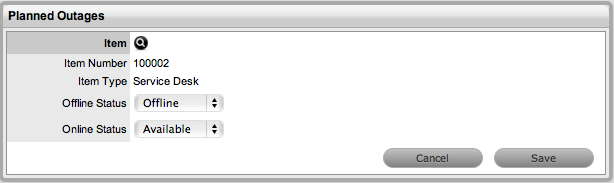
-
Define the Offline Status and Online Status for the Item
These are the States the Item will be automatically assigned in the CMDB when the Planned Outage commences and ends.
-
Click Save
Repeat Steps 9 to 12 to add more than one Item to the Outage. Click
to remove Item details from the Outage.
-
Click Save and Done.
The Outage details are visible in the Planned Outage page, if the Criticality of the Item is equal to or greater than the Minimum Criticality set by the Administrator within the Setup>Privileges>System tab.
Viewing Outages
Planned Outages can be viewed from the Login Page and the Customer Portal, if the Administrator has toggled the Setup>Privileges>System Outages Page option to Yes. This enables the Planned and Unplanned Outage links in the Customer Portal and Login Page.
Customer Portal View
In the Customer Portal the Planned Outages information is accessible in the side bar menu of the Items and Services tab.
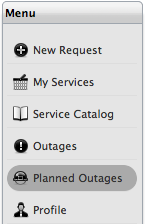
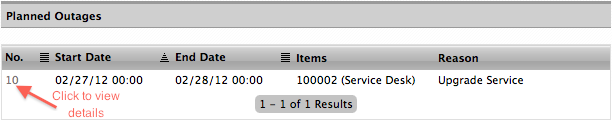
To view the Outage details, click the Outage No. link. To close the window, click Done.
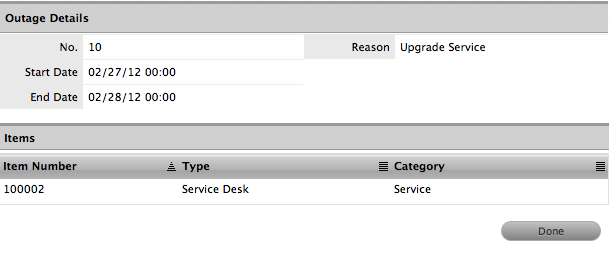
Login Page View
Planned Outage information can also be accessed from the Login page, Click the View Outages link to display a complete list of current outages. Select the View Planned Outages link to access planned downtime details.
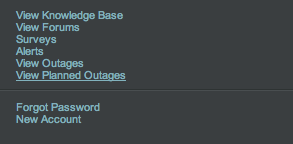

Planned Outage Page Options
-
Search for Outages based on the Item Type
This functionality is enabled by the Administrator in Setup>Privileges>System Search Outages.
-
Within the Outage Details window, click on the Item Number link to show the Item Relationship Map
To enable this feature, the Show Affected Relationships option must be activated by the Administrator in Setup>Privileges>System Outages.
-
To return to the Planned Outage list, click the Done.
2.6.12 AMIE Snapshots
(The AMIE submenu option is only visible when two or more asset management tools are configured to be synched within AMIE as defined in Admin>Setup> AMIE>Setup tab.)
The AMIE Snapshot submenu is also known as the staging area for building a federated CMDB, which is a CMDB that uses information sourced from multiple asset management repositories.
When the application is synchronized with multiple asset management tools and the automatic Item creation option is disabled in Admin>Setup>AMIE Import, the system creates an image or Snapshot of the asset information which is made available within the AMIE Snapshot tab. As different asset management tools may not record the same information for an Item, the Supervisor can combine the most relevant information from the different sources into the one Item within the CMDB, by merging snapshots created by the different tools using the Category Map configured for the Item Category. (See: Federation Tab.)
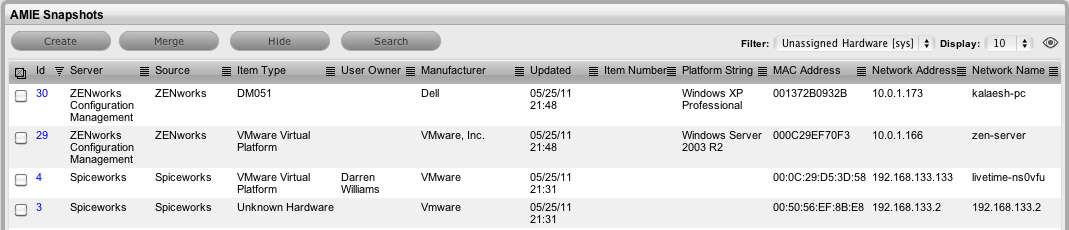
Item creation in the CMDB
When Item information is recorded in multiple AMIE Snapshots, the Supervisor can merge images into one Item within the CMDB by first conducting a search on key fields such as MAC Address or Network Name for Hardware, or Version Number and Parent Id for Software Items. To maintain relationship data between the Hardware and Software Items (i.e., Parent/Child relationships), the order of Item creation is important. Always create parents first, then children, or in other words, Hardware first then the Software.
After identifying and selecting the relevant Snapshots, by ticking the fields next to the Id#, click the Merge button to display a synthesized Snapshot Detail screen. The information displayed on the Snapshot Detail, and recorded against the Item, is based on the Category Map configured for the Item Category.
If the Control CMS via RFC is enabled in Admin>Setup>Privileges>System, merged or promoted Snapshots are not automatically created as Items in the CMDB, but generate a Change Request that will require approval before the Item is saved in the CMDB. If the option is disabled, when the Save button is selected, the Item is automatically created in the CMDB.
All AMIE Snapshots applied to an Item are removed from the AMIE Snapshot List View, when the list filter is set to display Unassigned Snapshots.
Merging Snapshots

Use the Merge button when multiple Snapshots of an Item are to be stored against a single Item record in the CMDB. Select the related Snapshots by checking the relevant boxes next to the Id Number, and click the Merge button.
Creating Items from Snapshots

Use the Create button to convert a single Snapshot into an Item record in the CMDB. If the Item already exists in the CMDB, the pre-existing details will be updated. If it is a new Item, a new Item record will be created. To promote a single Snapshot into an Item in the CMDB, check the box next to the Id Number, and click the Promote button.
Searching AMIE Snapshots
The search button within the Configuration>AMIE Snapshot screen allows the User to find related AMIE Snapshots using any Item attribute, including the fields created within Item Category templates.
|
Search Parameter Options |
|
|---|---|
|
Global Options |
|
|
Snapshot Status |
All : searches assigned and unassigned AMIE Snapshots. Unassigned : searches AMIE Snapshots that are not assigned to an Item. Assigned : searches AMIE Snapshots that have been assigned to an Item, and therefore not displayed in the List View. Hidden : searches through deleted AMIE Snapshots that have never been applied to an Item. |
|
Server |
Select a single server option to refine the search, or leave blank to search through all systems configured in AMIE. |
|
Manufacturer |
Enter Manufacturer details of the Item. This field supports partial text search. |
|
Owner Options |
|
|
Username |
Often the last logged in User for the Item. This field supports partial text search. |
|
Org Unit |
The Org. Unit owner for the Item. This field supports partial text search. |
|
Type Options |
|
|
Item Category |
Select a Category from the popup list to restrict AMIE Snapshots by the Item Category. A selection will display the custom fields for the chosen Category, which can be completed to refine the search. |
|
Item Type |
The Item Type of the Item. This field supports partial text search. |
|
Parent Options |
|
|
AMIE Snapshot Id |
Search on a parent AMIE Snapshot Id. This information is useful when merging children Items, such as Software. |
Deleting Snapshots

To ensure that a Snapshot is ignored in future AMIE imports, click the Delete button after checking the field next to the relevant Snapshot Id Number.
Enabling deleted Snapshots

If a search is conducted on deleted or hidden Snapshots, an Enable button becomes available and allows the User to re-enable a hidden Snapshot.