11.9 Performing a Folder to User Data Migration
-
Make sure you have completed the prerequisites and have created a migration proxy account. For more information on the prerequisites, see Section 11.3, Prerequisites. For more information on creating a migration proxy account, see Section 11.4, Creating the Migration Proxy Account.
-
In NSMAdmin, click the tab.
-
Click .
-
Click .
-
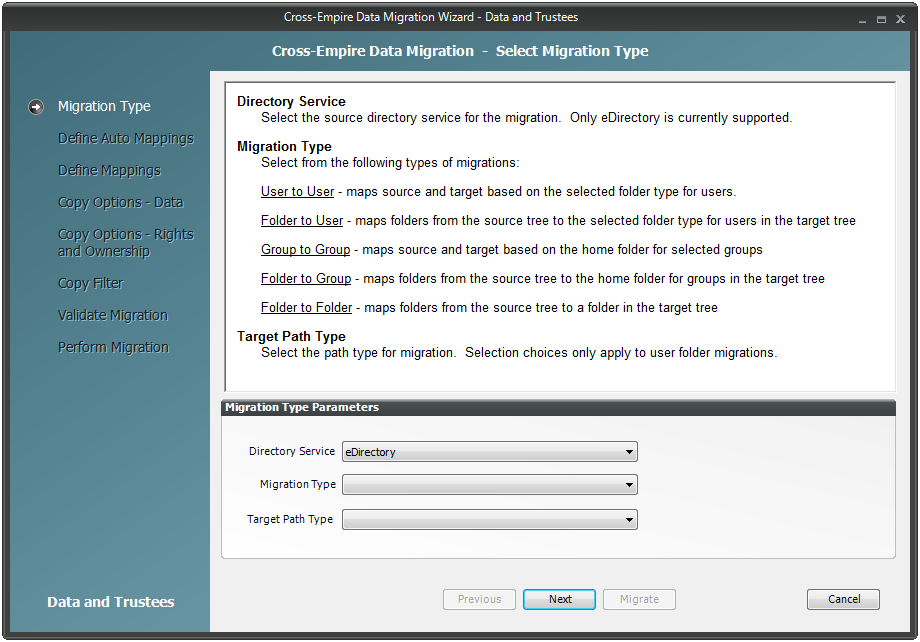
From the drop-down menu, select
-
From the drop-down menu, select the target path type for the data that you will migrate.
For example, if you select , the data is copied to each user’s home folder path as defined in directory services.
-
Click .
-
Do one of the following:
-
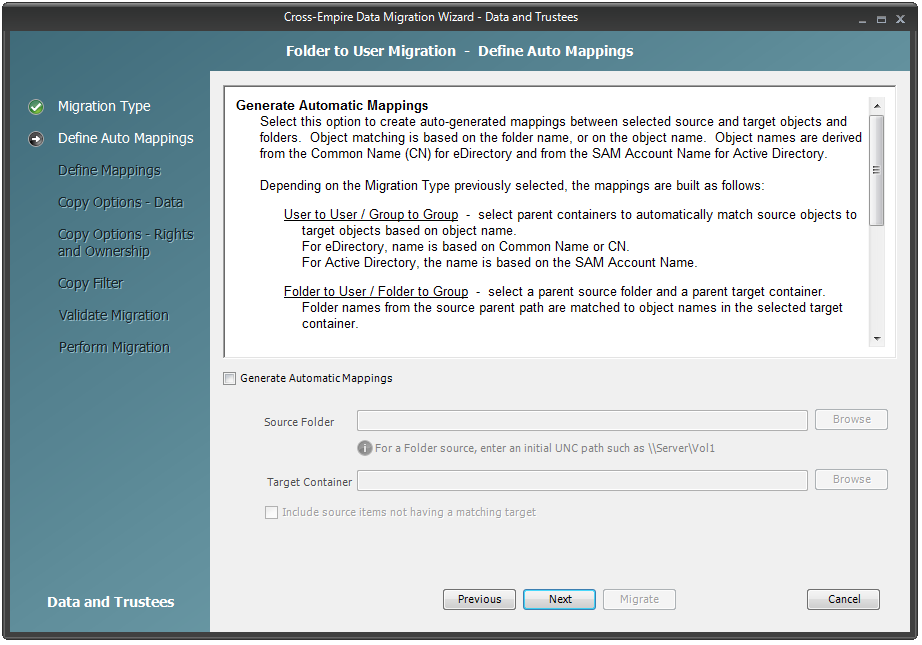
Fill in the following fields:
Generate Automatic Mappings: If you are migrating a large number of folders, select this check box to activate the other fields.
Source Folder: Specify an initial UNC path for a server and volume to browse.
For example, \\server_name\volume_name\ or \\ip_address\volume_name.
After a path is entered, you can click the button to browse to the folder you want.
Target Container: Browse to select the target container.
Include source items not having a matching target: Indicate if you want to identify source data not having a matching target.
-
If you are migrating only a few users, use the button on the next wizard page to add the users individually.
-
-
Click .
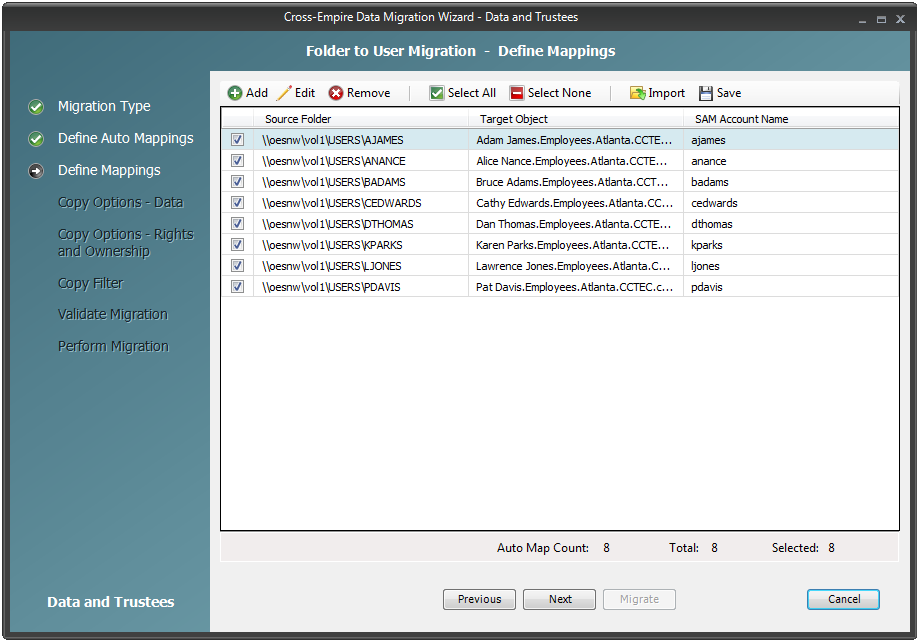
The Data Migration Wizard attempts to match the names of the subfolders of the source path with the SAM (Security Accounts Manager) Account Names in the Active Directory target. If there is a match, the listed folder in the field is selected and a corresponding match is listed in the Target Object column.
-
Specify a target object for each source object that is not automatically matched by double-clicking the name to bring up the Modify Data Map Entry dialog box.

-
Click , specify the target object, then click .
The target object is displayed in the Target Object column.
-
Click the check box corresponding to the listing with the new target.
-
Repeat Step 10 and Step 11 to specify all target objects that are not listed.
To change the specified target object, use the button.
To add an object to the Source Object column, use the button.
-
When all of the objects you want to migrate are selected and have an associated target object, click .
-
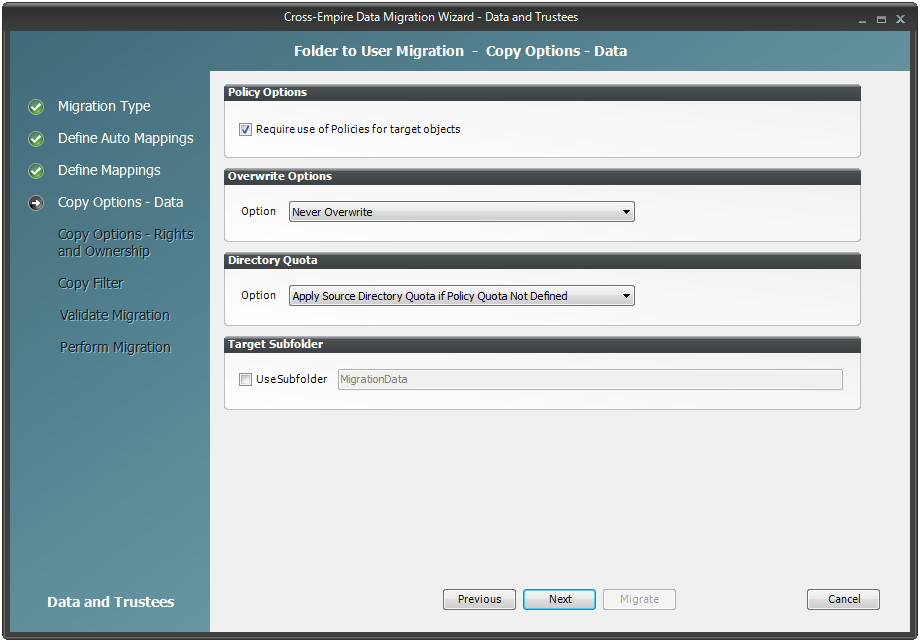
Fill in the following fields:
Require use of Policies for target objects: If you are migrating data for objects to an Active Directory container that has an associated Novell Storage Manager policy, leave this check box selected.
If this check box is selected and there is no associated Novell Storage Manager policy, the object’s data is not eligible for migration.
Additionally, if you are migrating a folder and the target user is not currently managed by an associated policy, but the user does have a policy that would apply to it, Novell Storage Manager automatically applies that policy to the target user.
If you are migrating folders to an Active Directory container that does not have an associated Novell Storage Manager policy, deselect this check box.
Overwrite Options: Indicate what you want to take place when duplicate filenames are encountered in the source and target.
Directory Quota: Specify how quota settings from the source Novell file system should be applied after the migration.
Target Subfolder: If you want migrated data to be placed in a subfolder, select the check box and specify the subfolder name in the field.
-
Click .

-
Fill in the following fields:
Owner for Target Folder: Use these settings to specify how ownership of the migrated folder is determined.
If you selected the check box in the previous wizard page, only the and options are available on the drop-down menu.
-
Use Operating System Defaults: This default setting allows the target Microsoft Windows Server to adjust the file ownership according to the settings on the target server.
-
Set to Target Object: Specifies the target object as the owner of the migrated files. If the policy specifies a different owner, the policy’s owner is applied.
-
Use Policy-Defined Path Owner: Ownership of the files is determined according to the settings in the Novell Storage Manager policy associated with the container where the object is managed.
-
Set Explicit Owner: Allows you to browse and select an object as the explicit owner of the migrated folder, unless the policy specifies another object as the owner. To override the policy’s configuration, select the check box.
Owner for Target Folder Contents: Use these settings to specify how ownership of the migrated folder contents is determined.
If you selected the check box in the previous wizard page, only the and options are available on the drop-down menu.
-
Use Operating System Defaults: This default setting allows the target Microsoft Windows Server to adjust the file ownership according to the settings on the target server.
-
Set to Target Object: Specifies the target object as the owner of the migrated files. If the policy specifies a different owner, the policy’s owner is applied.
-
Set Explicit Owner: Allows you to browse and select an object as the explicit owner of the migrated folder, unless the policy specifies another object as the owner. To override the policy’s configuration, select the check box.
Use the Identity Map: Selecting this check box indicates that you want Novell Storage Manager to utilize the identity map you created earlier and use the corresponding IDs to copy security rights and file ownership from eDirectory to Microsoft Active Directory.
-
Transfer Rights and Ownership: Selecting this option indicates that you want to transfer the file and folder security rights along with the ownership settings.
Be aware that when you transfer the ownership of a file or folder in a Windows network, you are granting the owner Full Rights, which you may not want to provide.
-
Transfer Rights Only: Selecting this option indicates that you want to transfer only the file and folder security rights.
-
Overwrite Trustees: Selecting this option indicates that you want any existing trustee assignments for a target file or folder, to be overridden by the established Novell eDirectory trustee assignments for those files and folders.
-
Merge Trustees: Selecting this option indicates that you want the established Novell eDirectory trustee assignments merged with those of the target files or folders in Active Directory.
-
-
Click .
-
(Conditional) If you want to use a filter to include or exclude specific files, select the check box and click the button.
-
Fill in the following fields:
Description: Specify a description of the filter.
Action: From the drop-down menu, select either or , based on whether the filter specifies to migrate files or folders or to ignore them.
Files, Folders: Specify if the filter applies to files or folders.
Masks: List the file types to migrate or ignore.
-
Specify any additional filter criteria in the menus and fields that remain.
For a detailed explanation of this region of the dialog box, see Section 5.5.8, Setting Vault Rules.
-
Click .
-
-
Click .
shows the result of certain checks that can be run prior to the migration. The column shows the status of the validation checks. If errors are displayed, you can choose to correct those errors prior to running the migration.

-
(Conditional) Take any necessary action in the Active Directory target and then re-run the Data Migration Wizard.
-
Click .
A page appears with details of the data migration events that are queued for processing. To view the status of migration events, click . For more information on Pending Events, see Section 12.1.6, Pending Events.
-
Click to close the Data Migration Wizard.