5.5 Setting Rights and Privileges on Managed Storage
Novell Storage Manager must have the proper rights set on each network share that it will manage; that is, shares that contain managed home folders or collaborative storage. In addition, certain privileges must be granted to Novell Storage Manager on each server where storage will be managed.
5.5.1 Granting Rights
Every share to be managed by Novell Storage Manager must have proper rights assigned to the NSMProxyRights group.
-
As a domain administrator, authenticate to the server where the storage is located.
-
Grant Full Control sharing privileges to the NSMProxyRights group for each share that Novell Storage Manager will manage.
-
Proceed with Section 5.5.2, Granting Privileges.
5.5.2 Granting Privileges
Every server that has storage managed by Novell Storage Manager must have certain privileges granted to the NSMProxyRights group. If you install the NSM Agent on a server, this privilege assignment is made automatically. If you use the NSM Agent on one server to act as a proxy agent on another server—rather than installing an NSM Agent on that server—you need to manually assign these privileges on that server.
-
Authenticate to a domain controller within the domain where the storage is located.
Be sure to log in as a domain administrator.
-
At any domain controller or any computer where the Admin or Remote Server administration tools are installed, click .
This brings up the Active Directory Users and Computers page.
-
In the left pane, select the container where the server is so that it is listed in the right pane.
-
In the right pane, right-click the server and select .
This brings up the Computer Management page.
-
In the left pane, expand .
-
Select .
-
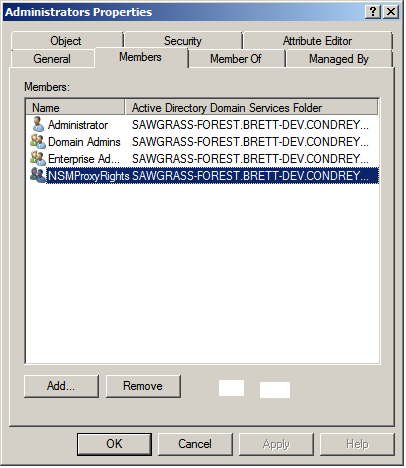
In the right pane, double-click .
This brings up the Administrators Properties dialog box.
-
Click .
This brings up the Select Users, Computers, or Groups dialog box.
-
In the field, type the following: domain_name\NSMProxyRights.
-
Click to save the setting.
-
Proceed with Section 5.6, Installing and Configuring the Event Monitor.