| SUSE LINUX – Administration Guide Chapter 9. Power Management / 9.6. The YaST Power Management Module | ||||
|---|---|---|---|---|
 | 9.5. powersave | Part III. System |  | |
| SUSE LINUX – Administration Guide Chapter 9. Power Management / 9.6. The YaST Power Management Module | ||||
|---|---|---|---|---|
| 9.5. powersave | Part III. System | | |
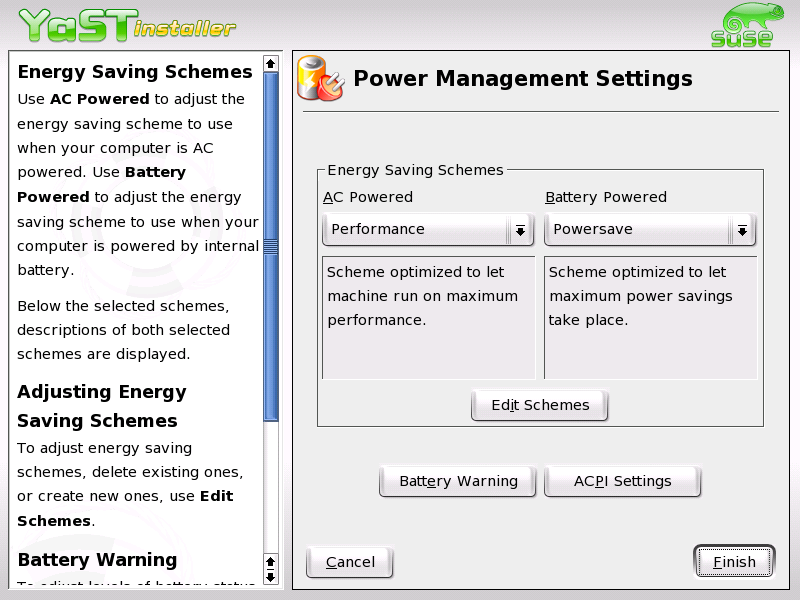
The YaST Power Management module serves the configuration of all power management settings described above. When starting the module from the YaST Control Center (->), the first dialog of the module is displayed (see Figure 9.1. “YaST Power Management: Scheme Selection”). In this dialog, select the schemes to use for battery operation and AC operation.
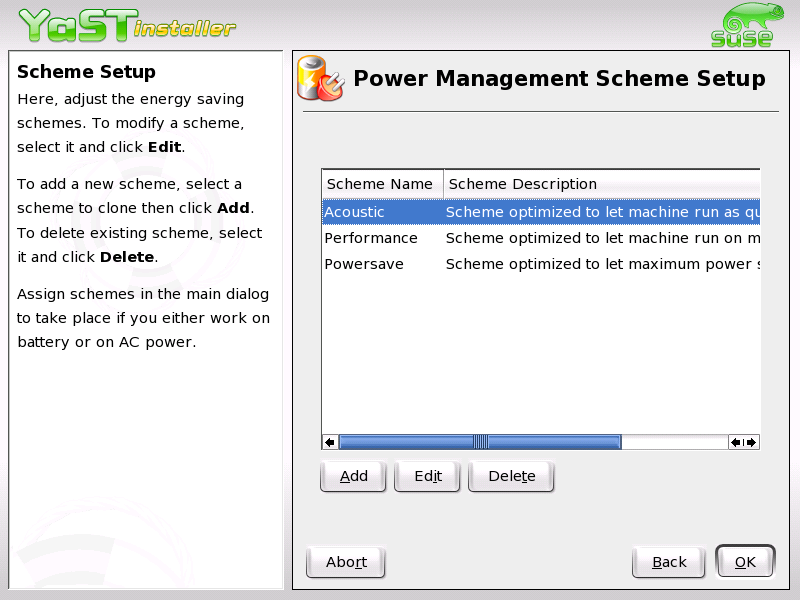
In this dialog, select one of the existing schemes or click to access an overview of the existing schemes. This is shown in Figure 9.2. “YaST Power Management: Overview of Existing Schemes”.
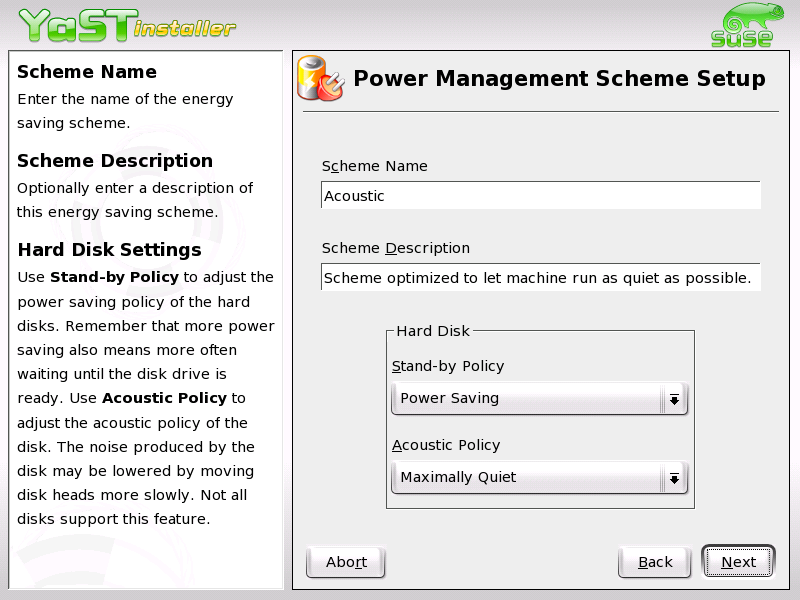
In the schemes overview, select a scheme and click to access the editing dialog (see Figure 9.3. “YaST Power Management: Adding a Scheme”). To create a new scheme, click . The subsequent dialog is the same in both cases.
First, enter a suitable name and description for the new or edited scheme. For the hard disk, define a for maximum performance or for energy saving. The controls the noise level of the hard disk. Click to enter the and dialog. comprises the options and . Use these options to define if and to what extent the CPU frequency may be throttled. The determines the cooling method. Complete all settings for the scheme and click to return to the start dialog (Figure 9.1. “YaST Power Management: Scheme Selection”). In the start dialog, assign the custom scheme to one of the two operating modes. To activate your settings, exit this dialog with .
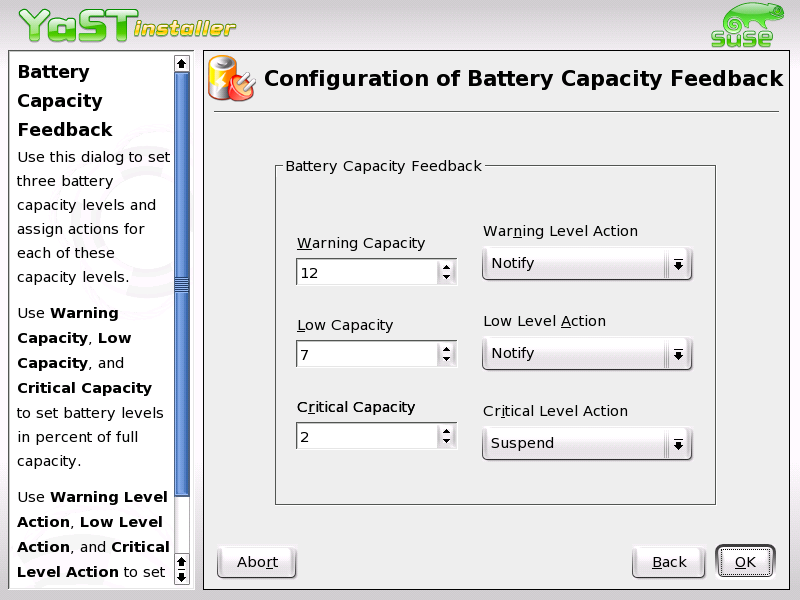
Apart from selecting schemes for various operating modes, global power management settings can also be made from the start dialog using the or buttons (see Figure 9.1. “YaST Power Management: Scheme Selection”). Click to access the dialog for the battery charge level, shown in Figure 9.4. “YaST Power Management: Battery Charge Level”.
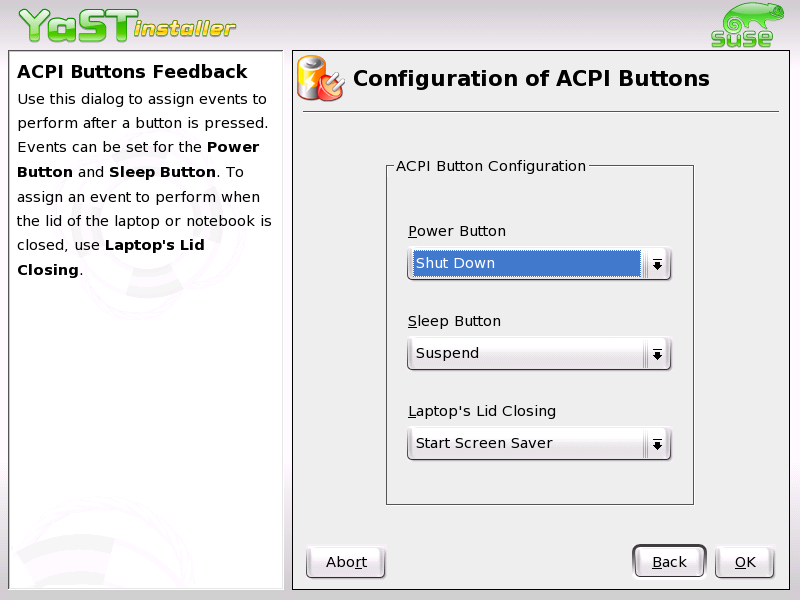
The BIOS of your system notifies the operating system whenever the charge level drops under certain configurable limits. In this dialog, define three limits: , , and . Specific actions are triggered when the charge level drops under these limits. Usually, the first two states merely trigger a notification to the user. The third critical level triggers a suspend, as the remaining energy is not sufficient for continued system operation. Select suitable charge levels and the respective actions then click to return to the start dialog. Access the dialog for configuring the ACPI buttons using the button. It is shown in Figure 9.5. “YaST Power Management: ACPI Settings”.
The settings for the ACPI buttons determine how the system should respond to the actuation of certain switches. Configure the system response to pressing the Power button, pressing the Sleep button, and closing the laptop lid. Click to complete the configuration and return to the start dialog (Figure 9.1. “YaST Power Management: Scheme Selection”). Click again to exit the module and confirm your power management settings.