4.1 Creating a Custom Entry
The following procedures show you how to create a custom entry with a custom form and view. The example used in these procedures show you how to create a Time Off custom entry that can be added to a team workspace so that members can alert their team about the days when they plan to be out.
The following procedures and topics are included in this section:
4.1.1 Creating the Custom Entry
-
From the portlet on the initial Liferay portal window, click the plus sign (+) to the left of to expand this section and view the available designers. To add the portlet to the Liferay portal window, click the link in the upper right corner. This brings up a panel of portlets along the left margin. Expand the section to add more Novell Teaming features, such as the portlet.
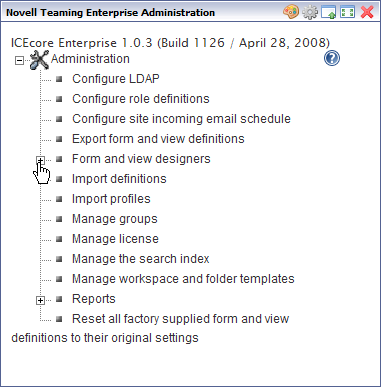
-
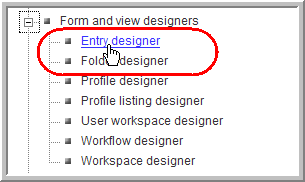
Click .
-
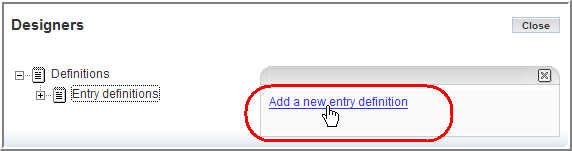
In the Designers window that appears, click .

-
On the right side of the window, click .
-
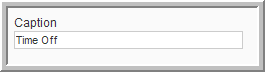
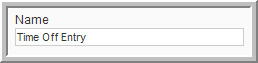
In the field, type the name for the entry that you want to see in Novell Teaming.
-
In the field, type the name for this entry type.
-
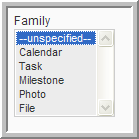
Select the family for this entry from the list box.
Select the item type that is closest to the function of the item you are creating. People can use the family type when performing filtered searches. This custom entry has an family.
-
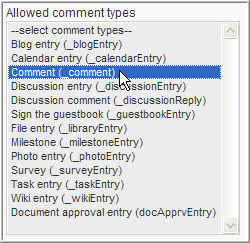
From the list box, select the comment types you want to allow for this new custom entry (use the Ctrl key to select multiple comment types).
-
Click at the bottom of the entry form.
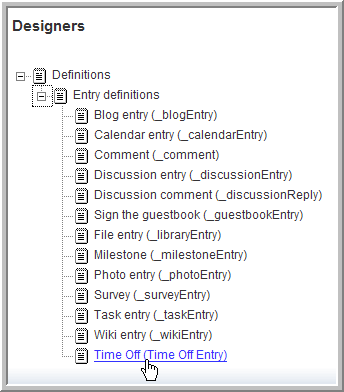
A custom entry named now exists, which you can view under in the Entry Designer window.
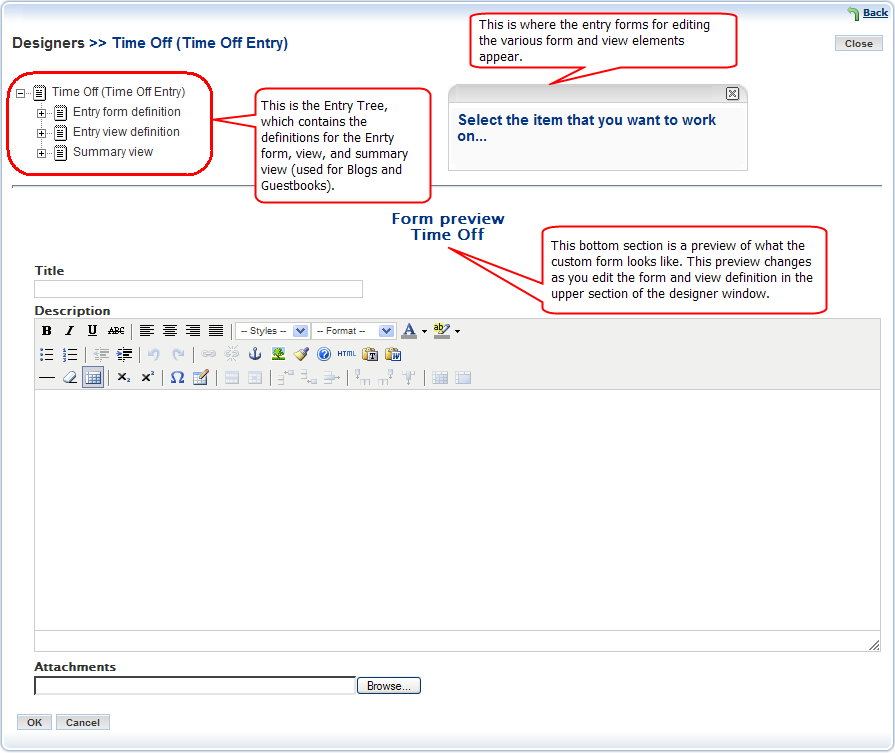
4.1.2 The Entry Designer Editing Window
The following image shows you the Designer window when working with a specific entry.
Figure 4-1 Entry Designer Window
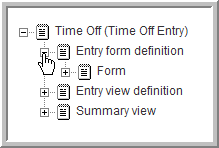
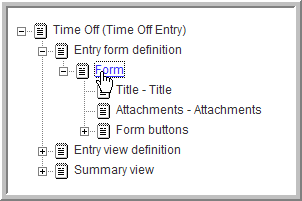
4.1.3 Creating a Custom Form for an Entry
-
Click the plus sign (+) to the left of to expand this section.
-
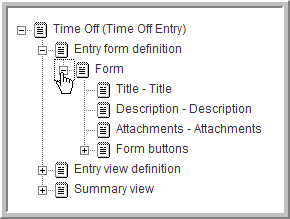
Click the plus sign (+) to the left of to expand this section and view the current elements in this form.
-
Delete an element:
-
Click the element ().
For this custom form, a simple text box element is going to be used instead of the element.
-
In the options dialog that appears to the right, click the option.
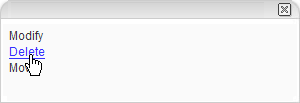
-
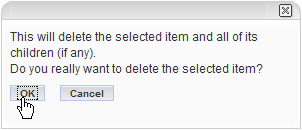
Click to confirm that you want to delete the element.
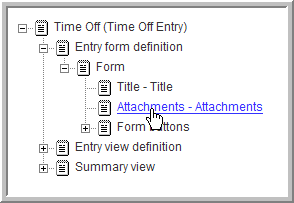
The element is deleted and is removed from the and the area.
-
-
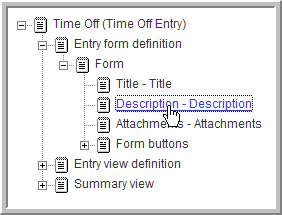
Hide an element from appearing in the form view:
-
Click the element you want to hide (such as ).
This custom entry is for entering your time off, so there is no need to attach files to these entries.
-
In the options dialog, click .

-
In the element form that appears, select the option.
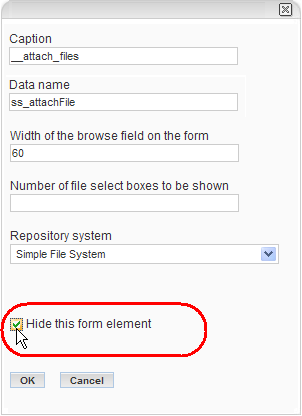
-
Click .
The element is removed from the area.
-
-
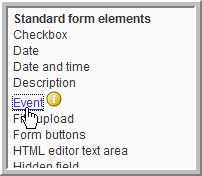
Add an element:
-
Click .
-
In the options dialog, click .
The and appear to the right.
-
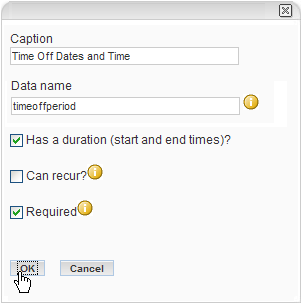
Click to add the element for entering the time off as an event with a start and end time.
-
Fill in the element form.
-
Type the name (the name used in Novell Teaming).
-
Type the .
This is an internal-use database name. Names for elements in one definition must be unique. The first character must be an alphabetic character (a-z, A-Z). For the rest, legal characters are alphanumeric characters (a-z, A-Z, 0-9), hyphens (-), and underscores (_).
-
Select the option.
-
Select the option.
-
Click .
The element appears under and in the area at the bottom (below the other elements).
-
-
-
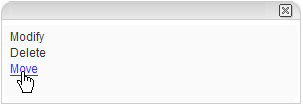
(Optional) Move an element:
-
Click the element.
-
In the options dialog, click .
-
If you want this element to appear below another element, click the element under that you want this element to appear under ().
-
Select the option and click .
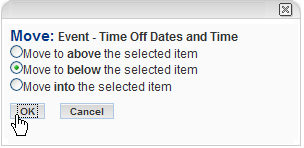
The element moves to below the element.
Or, if you want the element to appear above a selected element, click the option and click .
-
-
Add a required element named and move it below the element.
-
Add a required element named and move it to below the element.
-
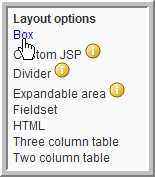
Add a container:
So far all the elements have been added below , which is itself a container. In this step you want to add a container below form and move the element into the box.
-
Click .
-
In the options dialog, click .
The and appear to the right. Every element under , except , is a container.
-
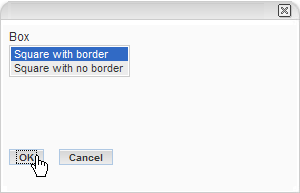
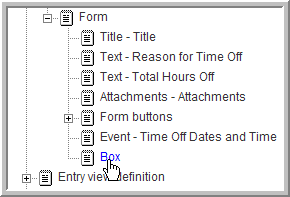
Click Box.
-
Select and click .
-
Click .
-
In the options dialog, click .
-
Click .
-
Select and click .
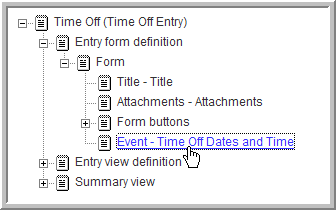
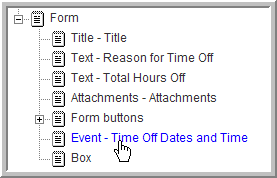
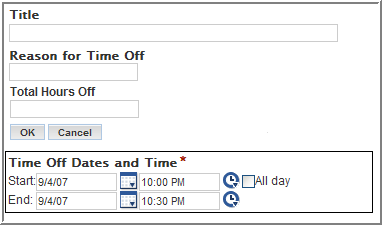
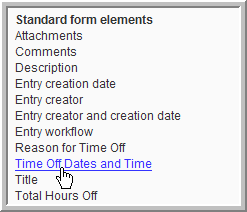
Your custom form should now look like this:
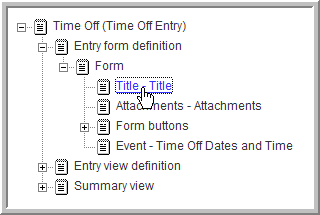
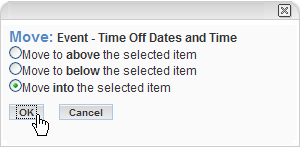
You can use the Move function to move the box above the field.
-
4.1.4 Creating a Custom View for an Entry
-
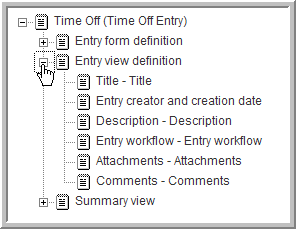
Expand .
-
Select and delete the and elements.
-
Click , click in the option dialog, and click .
Any elements you added to the custom form appear in the list when you are adding elements to the custom view.
-
Click .
-
Click in the option dialog, click , then click .
-
Move the element to below theelement, and move theelement to below the element.
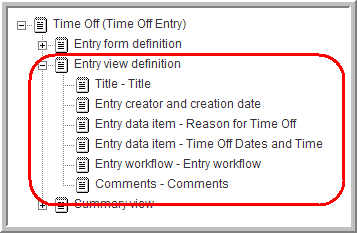
Your custom view for this custom entry should now contain these elements in the following order:
NOTE:The Summary view is used for Blogs or Guestbooks. You can create a custom Summary view in the same manner as the custom view in this procedure.