1.3 Navigating Workspaces and Folders
Your Novell Teaming site administrator provides you with the Web address (URL) used to access Novell Teaming, and your Novell Teaming username and password.
After you sign in, you see a portal page:
Figure 1-1 The Portal Page
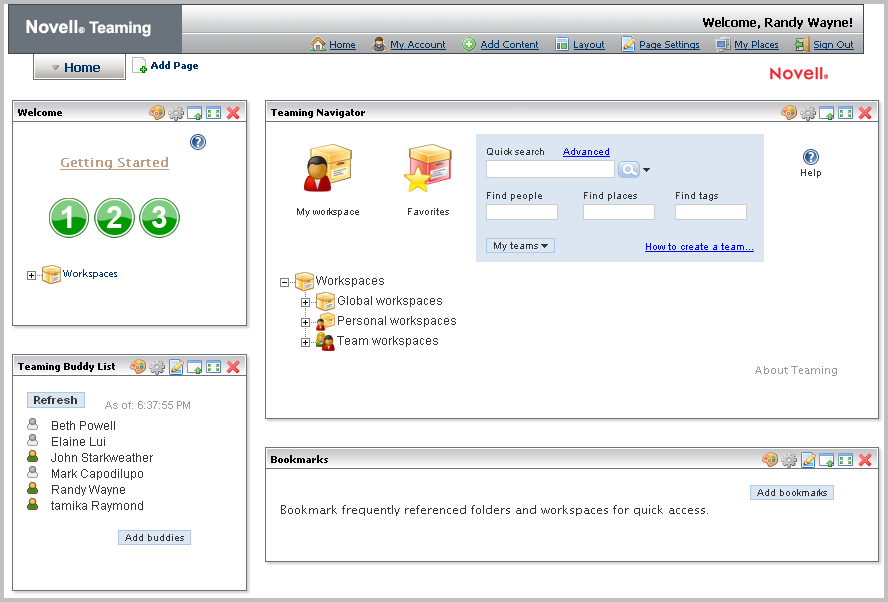
A portal page is a Web page that presents different applications in sections within the larger page. On the Internet, you might have seen pages (for example, Google* and Yahoo*) that have sections presenting a weather report that is local to your area, stock quotes that are of interest to you, the local time, and more.
By default, Novell Teaming ships with Liferay* portal software. (From this point forward, references to portal features apply to Liferay software.) Portal software contains a set of tools that allow you to create new portlets, that allow you to control the look and feel of the page outside of the portlets, and more. To use Novell Teaming, you do not need to use the portal’s tools; we recommend that you use only Novell Teaming tools designed to affect the look and feel of Novell Teaming information.
If your organization chooses, it can replace the default Liferay software with different portal software. The tools provided by most portal programs are very similar. However, if your organization is using portal software other than Liferay, and if you require additional assistance, contact your Novell Teaming site administrator or your IT department for more information.
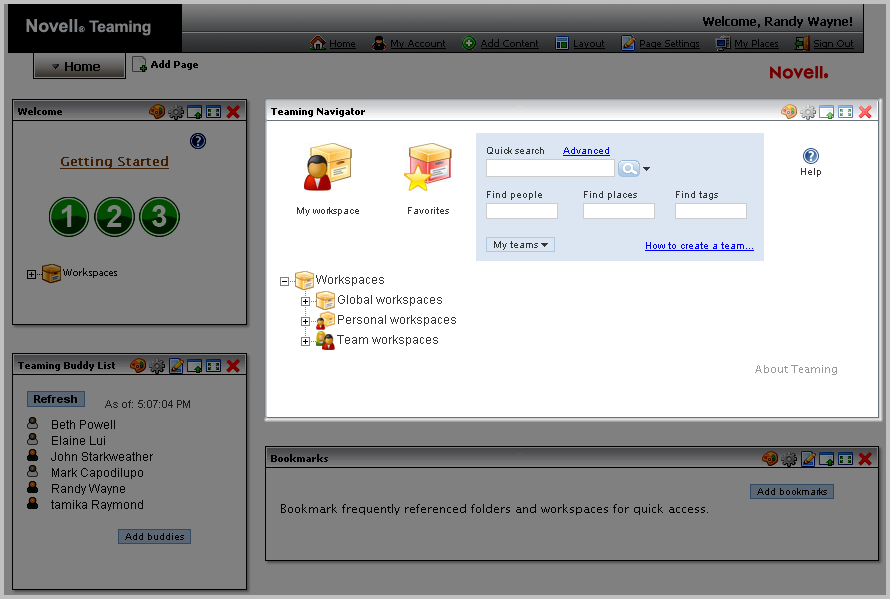
Within the portal page, separate applications can run within page sections called portlets. Here is one highlighted portlet on the portal page, as shown in the following graphic:
Figure 1-2 A Portlet Within the Larger Portal Page
This section contains the following subsections:
1.3.1 The Default Portlets
By default, when you sign in for the first time, Novell Teaming presents four portlets:
-
The welcome portlet: Provides quick access to getting-started PDF manuals, including a PDF version of this manual. (The welcome portlet also contains a workspace tree, which is explained later in this topic.)
-
The navigator portlet: Gives you quick access to any workspace or folder you want to view in Novell Teaming, such as access to your personal workspace, your favorite places, items that match search criteria, or Help for the current page.
-
The buddy-list portlet: Displays the presence of people you designate as your buddies, and provides tools you can use to contact your buddies.
-
The bookmarks portlet: Provides links to important workspaces and folders, and can provide a count of new or changed entries in folders.
Novell Teaming provides additional portlets that you can add to your portal page. To add another portlet, click the link, as follows:
Figure 1-3 The Add Content Link
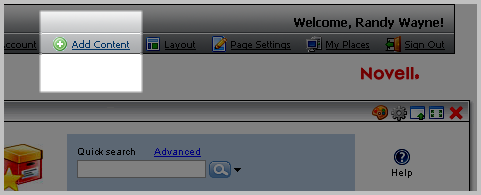
The portal software displays a list of all available portlets. Click thelink to see a list, which includes the non-default Novell Teaming portlets, as follows:
-
Administration tools: Displays tools for Novell Teaming site administrators.
-
Blog summary: Provides a snapshot of journal entries from a blog of your choice within the Novell Teaming installation.
-
Guestbook summary: Provides a snapshot of entries from your choice of Novell Teaming guest books.
-
Photo gallery: Presents pictures from the Novell Teaming photo gallery of your choice.
-
Search: Presents items, potentially anywhere within Novell Teaming, that match search criteria.
-
Wiki home page: Displays a summary of the home page of the Novell Teaming wiki folder of your choice.
-
Workspace tree: Allows you to go to any place you want within Novell Teaming. (The navigator portlet also contains a workspace tree.)
1.3.2 The Navigator Portlet
The following is a graphic showing the navigator portlet:
Figure 1-4 The Navigator Portlet
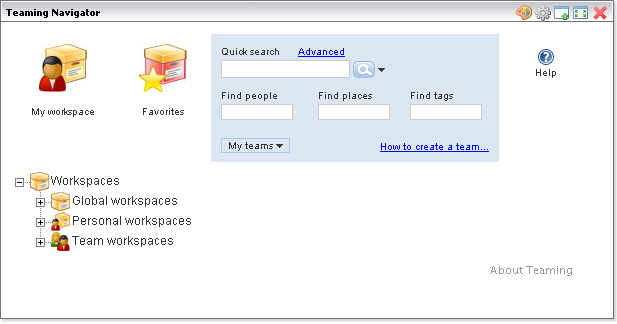
The navigator portlet provides the following tools:
-
My-workspace icon: Displays your personal workspace, which contains your contact information, pictures, a personal blog, and much more.
-
Favorites icon: Displays a tool that you can use to list links to your favorite workspaces and folders, and that you can use to access them quickly.
-
Search: Allows you to perform different types of searches, either for any items or for specific types of items (people, places, and , which are category labels that you can apply to items in Novell Teaming).
-
Help: Displays Help about various sections of the portal page, and provides access to the getting-started PDF books.
-
My-teams drop-down list: Lists links to all of the workspaces and folders in which you are designated as being a team member.
-
Workspace tree: Allows you to view any workspace or folder within the Novell Teaming installation. Clicking a plus sign () expands a portion of the tree, and clicking a minus sign () hides that portion of the hierarchy.
Notice the items in the workspace tree. By default, there are four workspaces in the tree. Workspaces are starting places for individuals and teams who want to do a certain type of work. By default, there are four organizational workspaces in the workspace tree: the page, and sub-workspaces entitled , , and .
Global workspaces are containers for information available to anyone in your organization. Personal workspaces are pages of personal information (such as contact information, a personal blog, a personal calendar, and more) for everyone in your organization. Team workspaces are work areas designed to help small groups of people to work together efficiently and reach team goals.
1.3.3 Viewing a Workspace or Folder
There are numerous ways to view a workspace or folder in Novell Teaming. When getting started, the two most common methods are using the search tools or the workspace tree, both of which are located in the navigator portlet.
For example, if you know the title of the workspace or folder you want to view, type a few of the initial letters of a word in the title in the text box:
Figure 1-5 Using Type to Find to View a Folder or Workspace
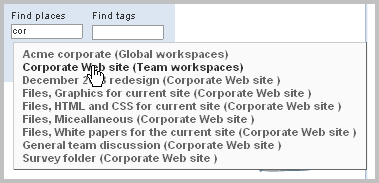
In the previous graphic, after you type the three letters cor, Novell Teaming displays links to all workspaces and folders whose titles include a word that begins with those letters. Then, you can click the linked title of the place you want to visit (for example, ).
As another example, you can click the plus sign () next to the link in the workspace tree to see team workspaces. Using our sample installation, clicking on the plus sign next to the link causes the workspace tree to appear as follows:
Figure 1-6 Expanding the Team Workspaces Portion of the Tree

The workspace displays a single sub-workspace, whose title is . Novell Teaming displays links only to those workspaces for which you are a team member.
Again, using our example installation, clicking on the plus sign next to the link displays the contents of that workspace:
Figure 1-7 The Folders Contained Within a Team Workspace
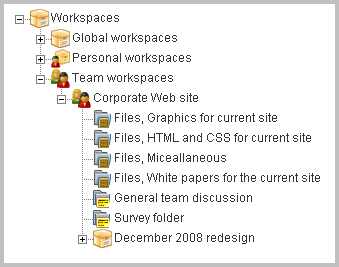
The team workspace contains six folders and a project workspace; a subsequent topic explains these items in more detail (see Section 3.2, Folder Types). Folders can, in turn, contain subfolders, which further organize information. None of the folders in the previous graphic contain subfolders; if folders have subfolders, their titles in the workspace tree are preceded with a plus sign (+). The project workspace contains sub-workspaces or sub-folders.
To view a folder, click its linked title. In our example, if you open the project workspace and click , the project’s discussion folder appears in a maximized portal page (in which the entire page is dedicated to displaying the folder’s contents), as follows:
Figure 1-8 A Folder Displayed in Maximized View
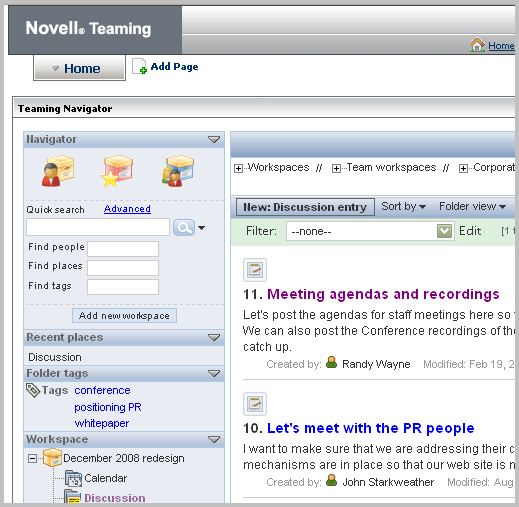
Notice that Novell Teaming displays most of the navigator-portlet tools in the top left corner of a workspace or folder page:
Figure 1-9 The Folder Navigation Bar
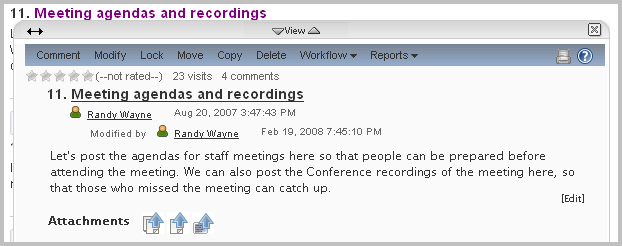
By default, a folder lists only a summary of each discussion entry. To view the entire entry, click its title:
Figure 1-10 A Linked Entry Title Within a Folder Listing

By default, Novell Teaming displays the discussion entry as an overlay, on top of the current page:
Figure 1-11 Entry Contents Displayed in an Overlaid Panel
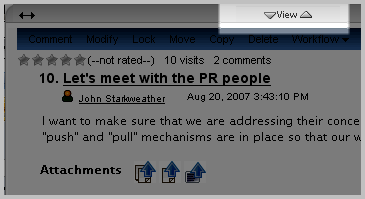
The overlay provides additional tools for reading entries. For example, you can click the and icons to see the previous and next entries:
Figure 1-12 Previous and Next Icons Used For Viewing Other Entries
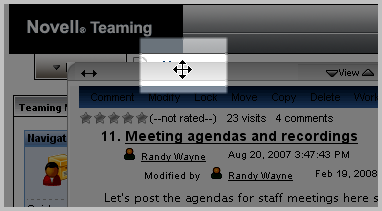
To adjust the width of the overlaid panel, click and hold the (double-headed-arrow) icon, move your cursor left or right, and release the click when the panel’s width is as you desire. To move the entire panel, click and hold the panel’s tool bar (which changes the cursor), and drag the panel to another position on the page. This picture shows a repositioned overlay:
Figure 1-13 Dragging the Entry Overlay to a New Position on the Page
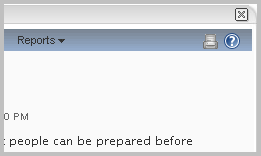
Click the Close icon () in the upper right corner of the overlay to close it, displaying only the folder listing again:
Figure 1-14 The X Icon that Closes an Entry Overlay
1.3.4 Using More Navigational Tools
Novell Teaming provides several different ways for you to go from one place to any other place within your installation, quickly and easily. For example, the previous section showed how to use the workspace tree to navigate to a team workspace page. Also in the navigator portlet, you can see a list of all the teams to which you belong:
Figure 1-15 The My Teams Link in the Navigator Portlet
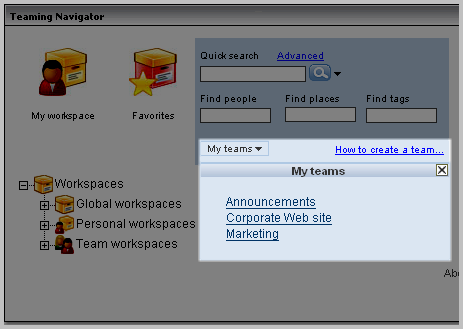
Given the previous graphic, if you click , Novell Teaming then displays the “Corporate Web site” team workspace page.
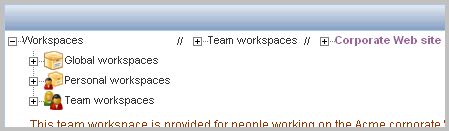
Toward the top of Novell Teaming pages, there is a workspace tree that shows all of the workspaces and folders that contain the currently displayed page. This type of workspace tree is often called “breadcrumbs,” because it displays links to all the places that precede the currently displayed place.
Consider the workspace tree at the top of the team workspace:
Figure 1-16 The Workspace Tree at the Top of a Workspace Page

The workspace contains the workspace. The page contains the team workspace.
When you are finished working with the current page, you can use this workspace tree to navigate to other places:
Figure 1-17 Opening the Workspace Tree at the Top of a Workspace Page
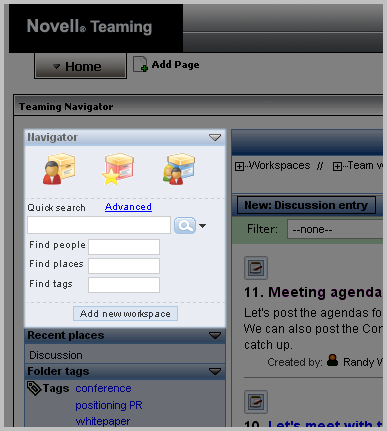
When displaying maximized Novell Teaming pages, such as a workspace or folder page, Novell Teaming includes a tools sidebar, which provides additional navigational tools:
Figure 1-18 The Tools Sidebar
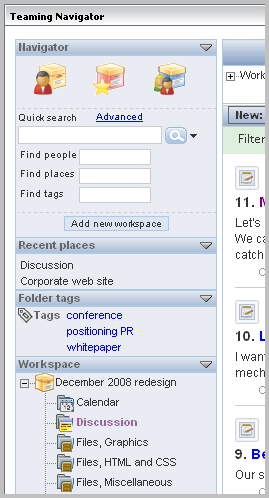
The tools sidebar for a workspace includes these sections:
-
Navigator -- Provides the same features as those found in the navigator portlet, allowing you to go to your personal workspace, use links to your favorite places, go to workspaces in which you are a team member, and search.
-
Recent places -- Provides links to a few of the pages you viewed recently.
-
Folder tags -- Displays a list of tags that have been applied to items in the currently displayed place. Tags are category labels that you create and apply to items to make them easier to find later.
-
Workspace -- Shows links to all places contained within the current workspace. The workspace tree at the top of the page shows you the path to the current place, but this workspace tree provides a path to the contents of this place. In this example, the team workspace contains eleven folders.
The sections in the tools sidebar can vary by folder type. For example, blogs include a section that enables you to see journal entries in a previous month (the monthly list of blog entries is called an archive).
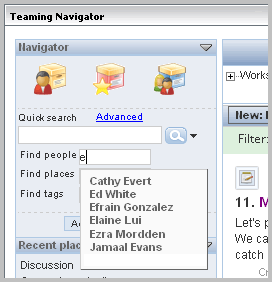
Continuing with our example, assume that the viewer of the team workspace wants to view the personal workspace of a coworker. First, he can type just a few letters of his coworker’s name in the text box of the Navigator. The following graphic shows the letter typed into the text box, and the list of all people in the installation whose first or last names begin with that letter:
Figure 1-19 The Find People Text Box in the Tools Sidebar
After the user clicks the username of , Novell Teaming displays that person’s personal workspace:
Figure 1-20 Displaying a Personal Workspace Page
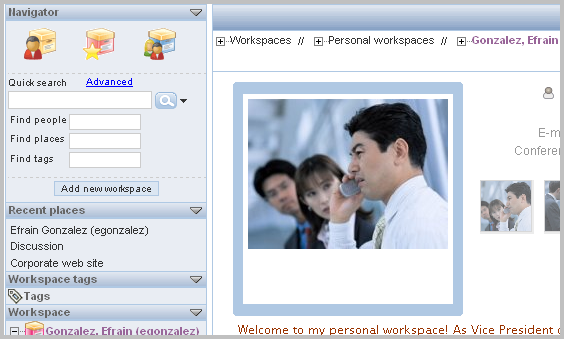
Notice that Novell Teaming now includes Efrain’s personal workspace in the list of , shown on the tools sidebar on the left side of the page.
1.3.5 Returning to the Portal Page
To return to the portal page you saw when you first signed in, click the left-arrow, icon toward the upper-right corner of the workspace or folder page, as follows:
Figure 1-21 Moving From the Workspace Page Back to the Portal Page