3.1 Tools
This section describes various tools that enhance navigation, usability, knowledge management, and other aspects of Novell Teaming.
This section contains these subsections:
3.1.1 Accessories
Accessories are subsections of a workspace or folder page that enhance the use of Novell Teaming pages in various ways. Accessories do not contain new information; instead, they point to existing information, organizing and presenting it in a summarized way that can be helpful to you. This section presents examples of accessories to help you understand how you can use them.
This section includes the following subsections:
Creating and Deleting an Accessory
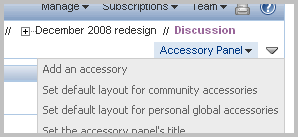
To create an accessory, click > , which is located in the upper-right corner of the workspace or folder page:
Figure 3-1 The Accessories Icon and Drop-Down List
If you currently have no accessories, then the first menu item, , is the only one that appears in the menu. The remaining menu items affect default settings and the appearance of accessories.
In addition to the various types of accessories (photo gallery, search results, blog, and so on), there are categories that determine the scope of the accessory, as follows:
-
Personal accessory for this page only: This accessory appears only to you and only on the currently displayed workspace or folder page.
-
Personal accessory for all workspaces and folders: This accessory appears only to you, but it appears on all workspace and folder pages that you view.
-
Community accessory for this page: This accessory appears only on this page, and it appears to everyone who views the current page. Only workspace and folder owners are allowed to establish community accessories.
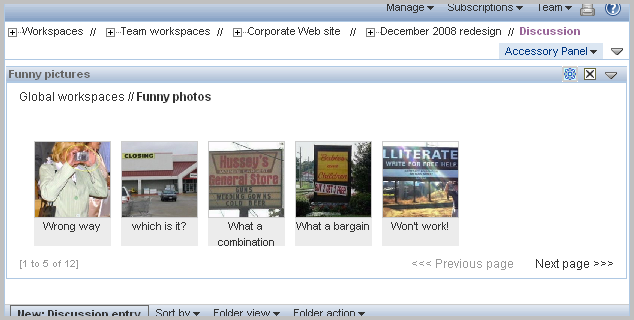
For folders, accessories appear above the folder content:
Figure 3-2 A Photo Gallery as an Accessory
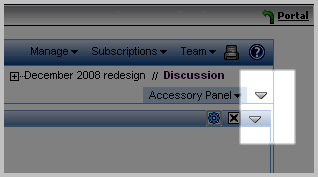
To close an accessory or the entire accessories panel, click the appropriate (down-arrow) icon:
Figure 3-3 Currently Displayed Icons for an Accessory and Its Panel
To delete an accessory, click the icon (). Remember that accessories do not contain information; they merely point to and summarize information that exists elsewhere. When you delete an accessory, you delete the pointer, not the source information. It is very easy to add the accessory again, if you mistakenly delete it.
Adding an Accessory Visible on All Pages
For example, assume that the company provides a photo gallery of amusing pictures in the area, and one of the people in the installation, Randy Wayne, wants to have access to these pictures, no matter where he is within Novell Teaming. So, the user creates this accessory as a “personal accessory for all workspaces and folders.”
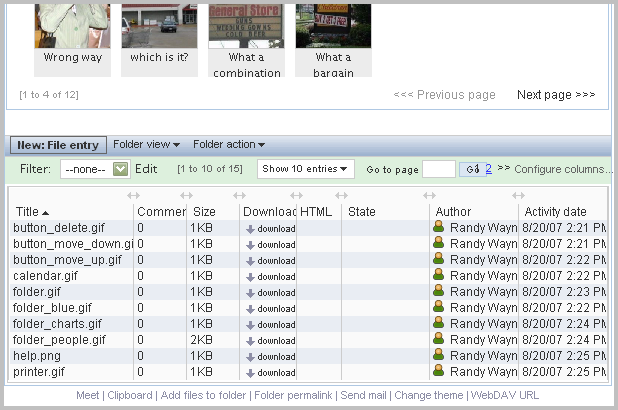
Now, the photo-gallery accessory appears when he views the file folder containing graphics for his Web site redesign work:
Figure 3-4 A Global Accessory Seen on a File Folder Page
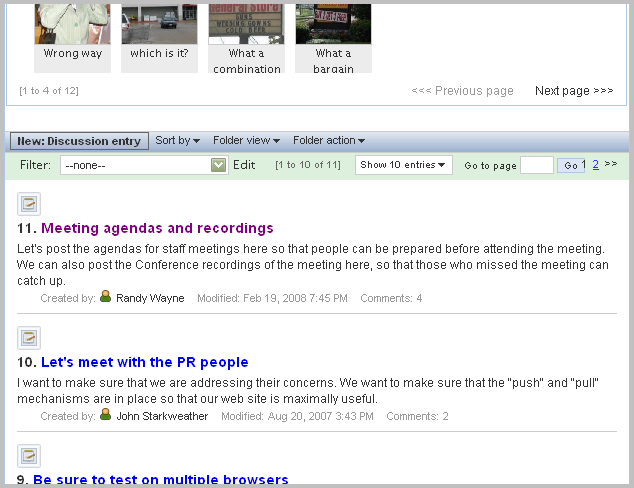
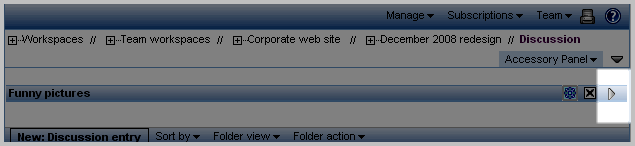
And it appears when he views the discussion folder for the Web site redesign effort:
Figure 3-5 A Global Accessory Seen on a Discussion Folder Page
To save room for viewing the content of the folder, Randy can close either just the photo-gallery accessory or the entire accessory panel. This close setting is “sticky”; it remains in effect for every page that this person views:
Figure 3-6 A Closed Accessory
Adding an Accessory for One Page
Suppose Randy Wayne continually wants to be able to review all of the entries that he authored in a discussion folder. He can create a Search-results accessory applicable to only that folder:
Figure 3-7 A Search-Results Accessory for One Folder
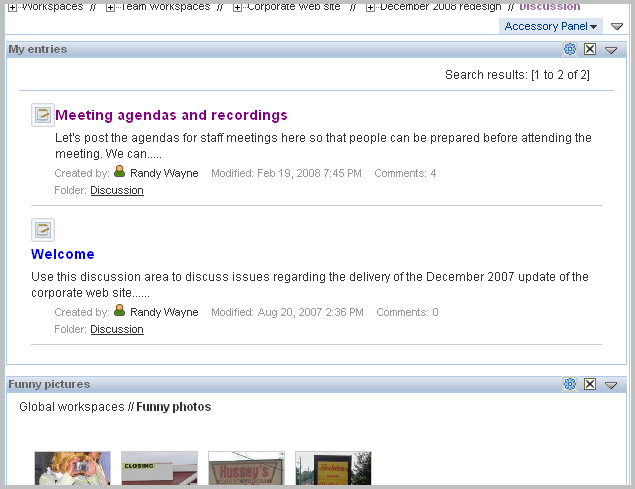
Randy can close the search-results accessory (or the entire accessories panel) to see the folder contents displayed closer to the top of the page. Finally, suppose that Randy wants to fine-tune the search criteria. To reconfigure an accessory, click the icon:
Figure 3-8 The Configuration Icon for an Accessory

Positioning Accessories
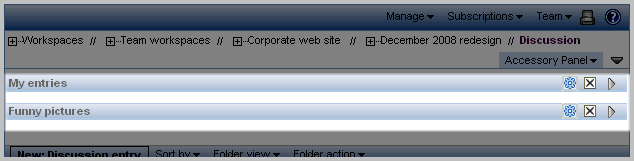
While viewing Novell Teaming pages, you can drag and drop accessories within the accessories panel. Consider closed versions of the two accessories created in previous examples:
Figure 3-9 Two Closed Accessories
To move the accessory below the accessory, click and hold the title bar and drag it below the other accessory until you see a full-width, bright line indicating the new position (portals other than Liferay may display differently):
Figure 3-10 Positioning an Accessory

Drop the accessory in place by releasing the mouse button, and the accessory appears in its new position:
Figure 3-11 The Two Accessories After Positioning

You can also position accessories in two columns. To do so, click the title bar of one accessory, and drag it to the bottom of the accessories panel until you see a bright line whose width is half the panel:
Figure 3-12 Positioning an Accessory in One Column

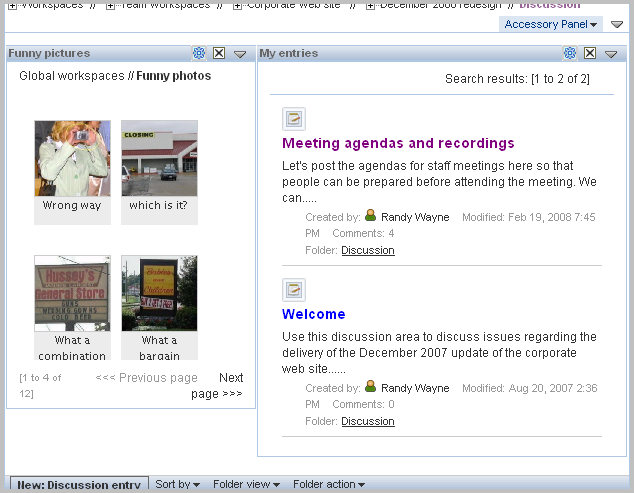
Drop the accessory into place by releasing the mouse button. Click and drag the second accessory so that a bright line appears in the next column:
Figure 3-13 Positioning an Accessory in the Other Column

After you open the two accessories, they now appear side-by-side:
Figure 3-14 Accessories Appearing in Two Columns
Establishing a Default Layout
When you create accessories for every page that you view or for a community-accessories panel, Novell Teaming provides a tools for arranging the order of the accessories within the panel. Using these tools, you can determine an optimal default order in which the defined accessories appear within the panel. (You can also personalize the order by dragging and dropping accessories within a community panel, as described in Positioning Accessories.)
To affect the layout of a personal-global or a community accessory panel, use either the or tool:
Figure 3-15 Menu Items Affecting Accessory Layout
Novell Teaming displays the accessories in the reverse order in which they were created. Click the title bar of an accessory, drag it, and drop it into the position you want it to have. Repeat this action until the accessories are in the order that you want, and close the form.
Creating a “What’s New?” Accessory
Accessories have applications whose functions can expand beyond the default list of Novell Teaming folder types.
For example, after your installation contains a sizable number of workspaces, folders, and entries, you might want a streamlined way to keep track of the most recently entered information in the installation, without checking each workspace and folder individually. You can create an accessory to achieve this goal:
-
Add a Search Results accessory visible on all pages that you view.
After you specify that you want to create a Search Results accessory, Novell Teaming displays a form.
-
In the section, select a number of days (for example, 3 or 7 days).
-
Click .
-
Click .
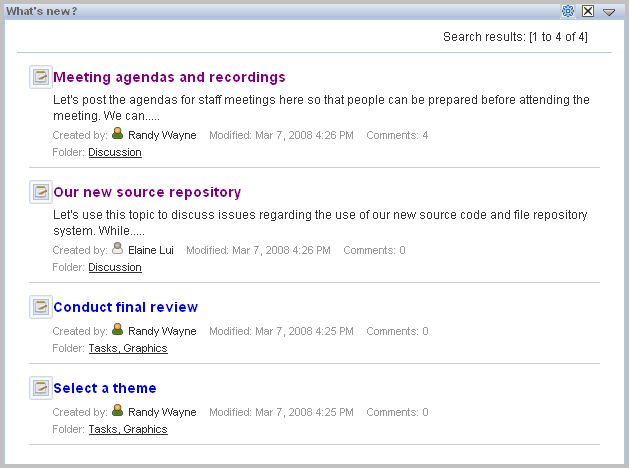
Novell Teaming displays in the accessory a “What’s new?” list, summarizing new or changed workspaces, folders, entries, comments, or attachments:
Figure 3-16 Example of a “What’s New?” Accessory
In an installation containing a large amount of information, you might want to track new activity in specific workspaces and folders. In this case, when you define the Search Results accessory, use the workspace tree to limit the search to specific places.
Also, in keeping with the Novell Teaming goal providing you with choices that match your work style, there are other ways to track the latest activity in the installation. If you prefer, you can:
-
Use the bookmarks portlet on the main portal page, which lists workspaces and folders you want to track, and which lists the number of new and changed items in tracked folders.
-
Create a Search Results portlet on the main portal page that performs the same search as described in this section.
If you want to check tracked workspaces and folders only when you first log in, then using a portlet is a better solution for you. If you want to track the latest changes no matter where you are in the installation, or if you want to be aware of changes moment-to-moment as you work within Novell Teaming, then the accessory is a better solution for you.
3.1.2 Favorites
The panel allows you to save links to your favorite pages. Because almost all Novell Teaming pages display the navigator tools (including the icon), you can access your favorite pages from almost anywhere.
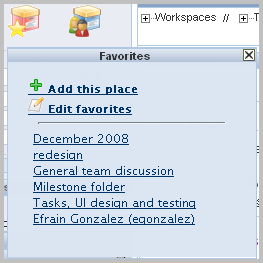
The following graphic shows the panel after someone clicks the icon in the Navigation portion of the tools sidebar. Using this panel, you can click to add the currently displayed page to the list of favorites, click to delete or position items in the list, or click a link in the list to view a favorite page:
Figure 3-17 The Favorites Panel
3.1.3 Tags
Tags provide an alternative way to categorize items, making it easier to navigate to and search for them later. Given our sample installation, there is a file folder that contains all of the graphics used in a Web site redesign. It might be helpful to tag the folder as containing artwork and icons.
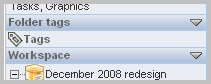
After viewing the file folder, locate the section of the tools sidebar, and click the (right-arrow) icon. As a result, this is how the open section appears:
Figure 3-18 The Folder Tags Section of the Tools Sidebar
Next, click the icon, which displays the panel. Finally, enter the personal tag name (in this example, icons), and click :
Figure 3-19 Adding Tags to a Folder
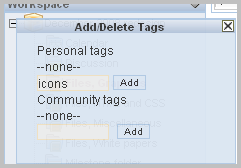
When you are finished adding all the tags you want, click the icon () in the upper-right corner of the panel.
The section of the tools sidebar now includes a list of linked tag names, which is called a tag cloud:
Figure 3-20 Tag Links
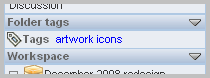
Both of the tag names ( and ) are links. Click a tag name, and Novell Teaming searches for all items that have that tag applied to them and displays a search results page. Use your browser’s function to return to the folder.
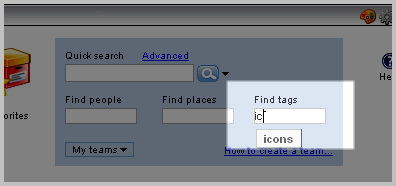
Also, in the text box in the navigator portlet, you can now search for items that have the tags you just created:
Figure 3-21 Searching for Tagged Items
To remove a tag from an item, view the item, click the link and icon, and click the icon () next to the tag name.
If you are a workspace or folder owner, you can create community tags, which other people can use to search for items.
3.1.4 Filters
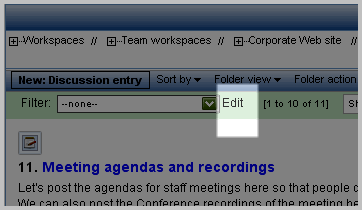
Filters allow you to see only the subset of folder entries that most interest you. To create a filter, view a folder, and click the link next to the drop-down list:
Figure 3-22 Creating a New Filter
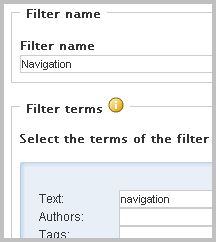
For example, someone can create a filter that displays all of the Web site redesign entries in the discussion folder that contain the word navigation:
Figure 3-23 Search Criteria for the Filter
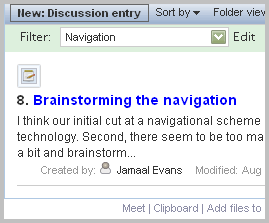
In the drop-down list, you see only the filters that you create. When you select a filter, Novell Teaming displays only those entries that match that filter’s search criteria. Notice in the following graphic that, after applying the filter, Novell Teaming displays only one entry, and it contains the words and in its title and description:
Figure 3-24 Applying the Filter
3.1.5 E-mail Notifications
Novell Teaming lets you use several ways to monitor activity in a folder. For example, you can see a count of unread entries in the bookmarks portlet, and you can set up an RSS feed. The most popular way of tracking activity in a folder is to receive e-mail notifications.
When you establish e-mail notifications, Novell Teaming sends an e-mail message to you, on a schedule determined by the owner of the folder, which summarizes changes to the entry and provides you with links to those entries. When you establish e-mail notification for a folder, the messages automatically include summaries of changes to all of its subfolders.
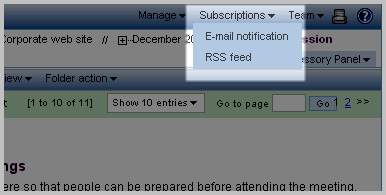
After viewing a folder for which you want to receive or modify e-mail notifications, click > :
Figure 3-25 The Subscriptions Menu
Novell Teaming dims the page and offers you several styles of e-mail notification:
-
Digest: Novell Teaming sends one message that summarizes all of the activity in the folder and its subfolders (available for folders only).
-
Individual messages: Novell Teaming sends one message for every new or changed entry. The e-mail messages do not include files that might be attached to the new or changed entries.
-
Individual messages with attachments: Novell Teaming sends one message for every new or changed entry, and messages include attached files.
3.1.6 The Clipboard
The Novell Teaming clipboard is a tool that allows you to gather people’s names as you visit places (workspaces and folders) within Novell Teaming. Later, when using a tool that requires people’s names, you can retrieve names from the clipboard.
NOTE:The Novell Teaming clipboard is different than the windowing system’s Clipboard that stores items until you paste them in another location. The rest of this section explains how the Novell Teaming clipboard works.
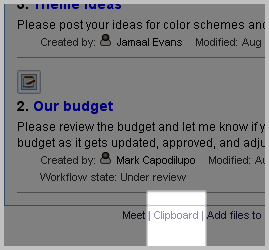
For example, someone can visit the discussion folder within a team workspace, scroll to the bottom of the folder page, locate the tools in the footer, and click :
Figure 3-26 The Clipboard Link
Novell Teaming then displays the panel. You can use buttons on this panel either to add the names of everyone who authored an entry or comment on the currently displayed page, or you can use them to add the names of all team members associated with the currently displayed page.
After adding and editing names, the clipboard might look like this:
Figure 3-27 The Clipboard Panel
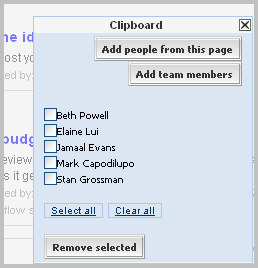
When you select the box next to names and then click the button, Novell Teaming removes the checked names from the list and closes the panel. You can also close the panel by clicking the icon () in the upper right corner of the panel.
Subsequently, a person can visit any number of places, possibly adding additional names to the clipboard as desired.
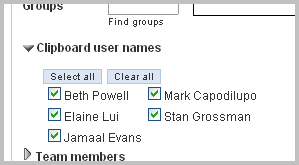
Finally, before signing out, someone can use the collected names and apply them to a task. The following graphic shows how you can retrieve some or all clipboard names while using the Novell Teaming tool:
Figure 3-28 Clipboard Names on the Send Mail Form
3.1.7 Entry-Reference Markup
When creating or modifying an entry, you can create a link to any other entry within Novell Teaming. The easiest way to create this link is to use a tool in the HTML editor. In our sample installation, in the wiki folder for the Web site redesign project, you can reference other wiki pages. You can select text in the body of the entry, and click the icon in the HTML editor toolbar:
Figure 3-29 The Entry Reference Markup Icon
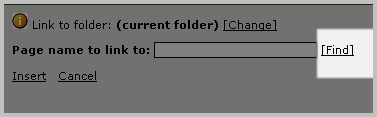
Novell Teaming displays a new window. In that new window, click the link:
Figure 3-30 The Find Link
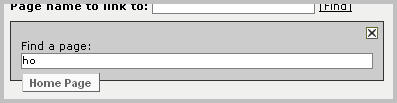
Novell Teaming displays the panel:
Figure 3-31 The Find a Page Panel
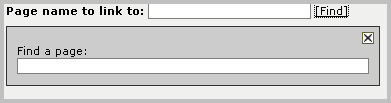
Next, use type-to-find to specify the title of an entry:
Figure 3-32 Specifying a Page Name Using Type to Find
Select the correct entry title, and click the link. Novell Teaming inserts the link into the body of your entry.
This entry-reference markup tool also allows you to look for entry titles in other folders. To do so, click the link.
Finally, if you want to type the reference to another entry in the same folder, you can use the HTML editor to enclose the exact title of the entry within double brackets, as follows:
[[home page]]
Although you can use entry-reference mark-up in any folder, it is used heavily in wiki folders (see Section 3.2.10, Wikis).
3.1.8 The Five Star Ratings Tool
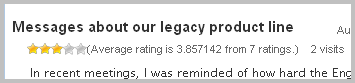
Novell Teaming provides a rating system that allows you to see how other people have evaluated the content of an entry, on a scale of one star (not impressive or relevant) to five stars (very impressive or relevant).
To evaluate an entry, click the star that represents your evaluation. For example, to give an entry a rating of three stars, click the third star (left to right).
Novell Teaming indicates the average rating and the number of people who have rated the entry so far:
Figure 3-33 The Five Star Ratings Tool
3.1.9 Workflow
A workflow process is an online version of a business process (for example, ordering supplies, hiring new employees, requesting paid time off, and getting expense reimbursements). By creating custom forms and applying workflow processes, your Novell Teaming site administrator can use Novell Teaming folders as application platforms. Consult with your site administrators to determine if you have common business practices that can be automated by using your Novell Teaming installation.
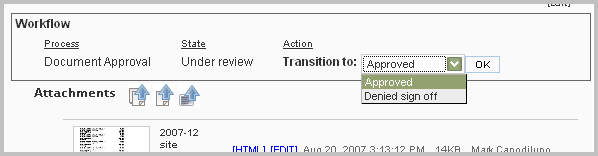
As a folder entry moves through a business process, it enters states that provide a brief status for the entry. For example, a paid-time-off workflow process can have states such as Submitted, Approved, Denied, and Being Processed by Human Resources.
When you are viewing an entry that is progressing through a workflow process, and if you have permission, you can change its state by using a drop-down list and an button:
Figure 3-34 Changing an Entry’s Workflow State
3.1.10 Novell Conferencing
Novell Conferencing is a real-time collaboration tool that allows you to send instant messages, schedule online meetings, and have instant online meetings with people participating in your Novell Teaming installation.
The features of Novell Conferencing are described in separate documentation. However, the synchronous features (Novell Conferencing) and asynchronous features of Novell Teaming are integrated in helpful ways. As mentioned, Novell Teaming provides you with a buddy list portlet. Also, anywhere you see a person’s name in Novell Teaming, you see that person’s presence icon. Finally, at the bottom of a workspace and folder pages, you can quickly start an instant meeting with all teammates for that particular page, or with all people who have authored entries and comments on the current page.
NOTE:Your presence icon requires that you run the Novell Conferencing Pidgin client on your computer. Running other IM or chat software will not enable your presence icon. If your presence icon does not display color properly, see your site administrator for more information.
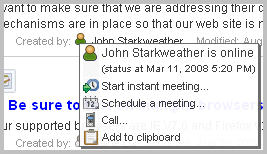
You are presented with contact options when you click someone’s presence icon. This graphic shows the presence panel displayed when someone clicks John Starkweather’s presence icon:
Figure 3-35 The Presence Panel
3.1.11 Accessibility Mode
Novell Teaming provides a mode of operation that is optimized for use with assistive devices, such as Web page readers that assist blind users. Accessibility mode complies with U.S. Section 508 and W3C international standards of accessibility.
To use Novell Teaming in accessibility mode, view your personal workspace. At the bottom of the page, click :
Figure 3-36 The Enable Accessible Mode Link on a Personal Workspace Page
