4.2 Examples of Custom Entries
This section provides examples of the two common approaches when using JSPs to customize an entry. Using the first approach, you use a JSP file to customize selected elements within the page segment; then, you can use the Novell Vibe designers to customize the remaining, non-JSP elements. Using the second approach, you use JSP files to define almost the entire page segment; you can use the designers to include desirable Vibe tools (such as the ability to subscribe to the entry, the send-mail feature, workflow, attachments, and comments), if desired.
This section contains these subsections:
4.2.1 A JSP That Defines Only One Data Element
Novell Vibe provides sample JSP files for you to apply as a way of learning about JSP customizations. These files create a custom text box on the form, and, after a user enters text and submits the form, these files display the text on the view page and in the mail message (sent using the tool in the footer tool bar).
This section contains these subsections:
Understanding the Form Customization
Let’s review the code in the /WEB-INF/jsp/custom_jsps/custom_jsp_form.jsp file. First, the file includes a tag that enables definition elements and building blocks for your JSP:
<%@ include file="/WEB-INF/jsp/definition_elements/init.jsp" %>
Because it is defining a page segment within a larger web page, the JSP does not include html, head,or body HTML tags.
Next, the sample JSP file for the form includes bolded text that makes the new element very noticeable on the form:
<div style="padding:10px 0px 10px 0px;">
<span class="ss_bold">This is a custom jsp form element</span>
<br/>
<br/>
If the caption property is not empty, then the code uses its contents as a title for the custom element:
<c:if test="${!empty property_caption}">
  <span class="ss_bold">${property_caption}</span>
  <br/>
</c:if>
Finally, the custom JSP file for the form displays the text box. It also displays the current value of the element (if it exists), which is applicable when a user modifies an existing entry. Consider the last portion of code in the custom JSP file for the form:
<input type="text" id="${property_name}" name="${property_name}"
  value="${ssDefinitionEntry.customAttributes[property_name].value}"/>
</div>
When the system performs a get for the customAttribites method, it uses the value of the property_name bean as a parameter. This action results in the specification of the appropriate custom attribute. Then, this code obtains the value property for that custom attribute, displaying it within the text box, if it exists. If it does not exist, the text box is empty.
To use this custom JSP in an entry, you use the designers in the administrative portlet. This section describes how you can add the custom-text customization to a standard discussion entry.
In the administration portlet, access the designer for entries, access the discussion entry, and click :
Figure 4-9 Accessing the Form for a Discussion Entry
To add the custom JSP to the form, click in the tools presented in the tools box on the right side of the page, and then click in the section:
Figure 4-10 Adding a Custom JSP to the Form
Complete the form located in the tools box:
Figure 4-11 Complete the Form for the Custom JSP
NOTE:Be sure to add the path to the filenames specified in the previous graphic. For example, the correct path for the form customization is samples/custom_jsp_form.jsp.
In the previous graphic, the caption for the custom text box is . The form in the previous graphic also specifies all three custom JSP files: three separate file specifications for the form, the view, and the mail message.
After you submit the form, position the custom element within the entry definition. The rest of this section assumes a position just below the description.
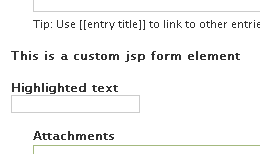
When a user adds a new entry for a discussion folder, the person sees this custom portion of the form:
Figure 4-12 The Custom Element on the Form
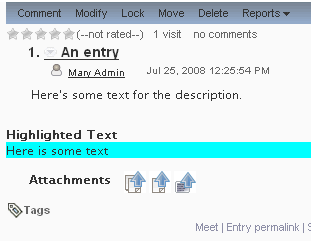
Assuming that the user entered in the box, then submitting the form results in the user seeing this in the completed entry:
Figure 4-13 The Custom Element in the View
The next section shows the JSP tagging that displays the custom element shown in the previous graphic.
Understanding the View Customization
First, the view JSP includes a tag that enables definition elements and building blocks for your JSP:
<%@ include file="/WEB-INF/jsp/definition_elements/init.jsp" %>
Then, the view JSP file uses the same code that the form JSP used to display the caption for the custom element, if it exists:
<div style="padding:10px 0px 10px 0px;">
<c:if test="${!empty property_caption}">
  <span class="ss_bold">${property_caption}</span>
  <br/>
</c:if>
Finally, the view JSP uses this code to provide a cyan background color and to display the custom data, if it exists:
<div style="background-color:cyan;">${ssDefinitionEntry.customAttributes[property_name].value}</div>
</div>
Understanding the Mail Customization
The mail JSP contains the same code as the view JSP:
<%@ include file="/WEB-INF/jsp/definition_elements/init.jsp" %>

<div style="padding:10px 0px 10px 0px;">
<c:if test="${!empty property_caption}">
  <span class="ss_bold">${property_caption}</span>
  <br/>
</c:if>

<div style="background-color:cyan;">${ssDefinitionEntry.customAttributes[property_name].value}</div>
</div>
Because of space limitations or the desire to summarize entry data in mail messages, you can include or exclude data from the mail JSP, or you can format it differently.
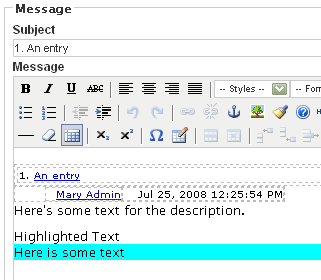
After viewing the entry with the custom element, click in the footer tool bar. The custom element appears on the form as follows:
Figure 4-14 The Custom Element on the Send-Email Form
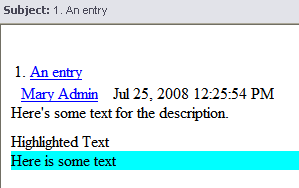
The person receiving the e-mail sees this message (different e-mail clients might display the message with slightly different formatting):
Figure 4-15 The Custom Element in the Received E-mail Message
4.2.2 A JSP-Defined Entry (W-4 Form)
Some custom entries require formatting that is either difficult or impossible to achieve using a separate JSP file for every custom element. For example, there may be an HTML form that you are already using in your organization, and you want to use a nearly identical form within Novell Vibe.
This section describes custom JSPs that implement a W-4-form application. (A W-4 form is a government form in the U.S.A. that is used to withhold federal taxes from an employee’s pay.) This application requires that the entry resemble the paper form, but it allows for the use of standard tools within Vibe. For example, this application allows users to add comments to the W-4 entry, to subscribe to the entry, to send e-mail upon creation of the entry, and to apply a workflow process to the entry. Finally, the application changes the styles of the buttons used to cancel or submit the form.
NOTE:It is possible to replace the entire, standard Novell Vibe form and to replicate coding for the Vibe tools (attachments, subscribing to the entry, and sending mail upon entry creation) using code in your JSP. However, doing so is significantly more difficult to code. The example in this section documents the best practice of using JSPs to generate most of the form while still enabling the Vibe tools for standard entries.
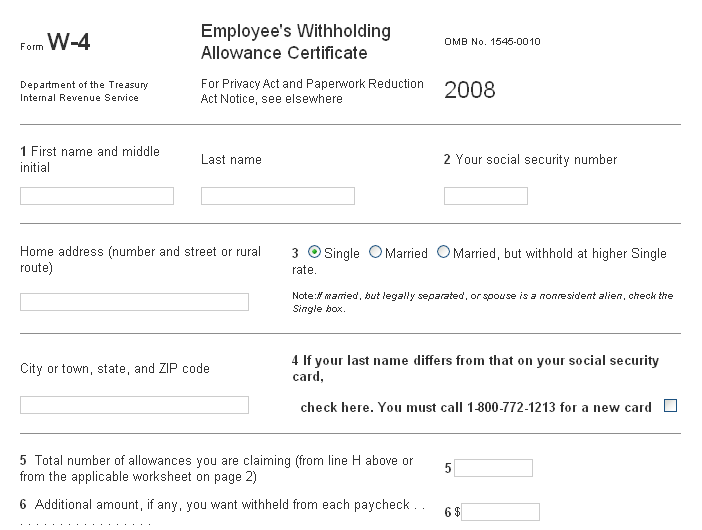
The graphic that follows shows the top portion of the W-4 form as it appears in a window sized to be narrow (note the lack of a “title” text box):
Figure 4-16 The Top Portion of the W-4 Form
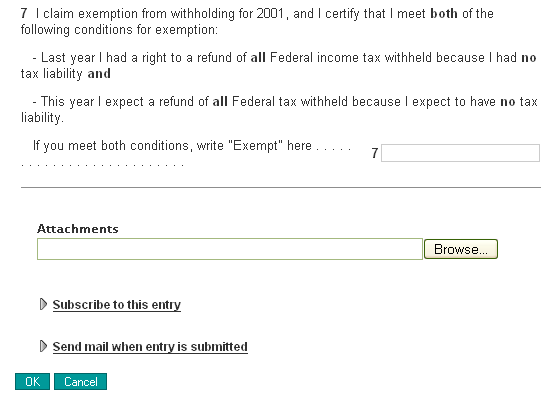
Here is the bottom portion of the W-4 form, which includes standard Vibe tools in between the W-4 content and the buttons:
Figure 4-17 The Bottom Portion of the W-4 Form
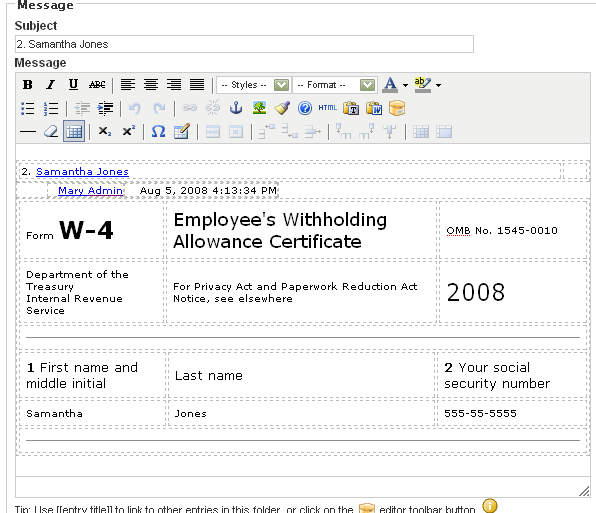
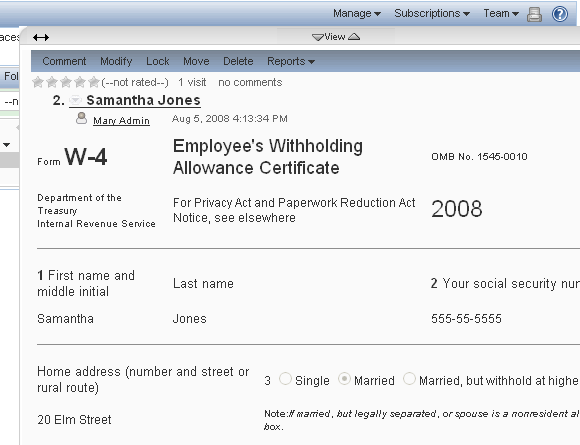
When a user creates an entry of this type, it appears as follows (note the title of the entry, comprised of two elements found on the form):
Figure 4-18 Example of a Created Entry for the W-4 Customization
This section contains these subsections:
Creating the Source Files
Because all JSP customizations are located in the /custom_jsps folders, it is recommended that you place application files in separate sub-folders. So, the W-4 application places source files here:
/WEB-INF/jsp/custom_jsps/samples/w4
These are the files required for the application:
w4_form_buttons.jsp
w4_form.jsp
w4_mail.jsp
w4_view.jsp
NOTE:When developing the W-4 example, it was helpful to begin with the form and view files containing only standard HTML tagging. For example, to begin, the w4_form.jsp file only contained the JSP tag that set definitions, and a standard HTML table containing input HTML tags. As the next step, use the instructions in the sections that follow to add one element at a time to both the form and view. In the UI, create or modify an entry of this custom type, provide a value for the custom element, submit the form, and check the view to be sure that Novell Vibe properly captured the data for the custom element. Proceed with your customization one element at a time, until learning this customization process and debugging are no longer issues.
Defining Custom Entries
Although it is possible to use a JSP file to add a single element to a standard entry, the more likely application is the creation of a new definition for a custom entry. When creating a custom entry, it is common for an application to require that a JSP contain more than one custom element.
To create a new entry definition, access the entry designer in the form and view designers, which are all located in the administrative portlet. Then, click :
Figure 4-19 Invoking Tools for Entry Definitions
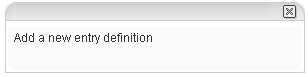
In the tools box on the right side of the designer, click :
Figure 4-20 Add a New Entry Definition
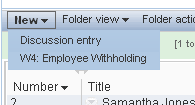
When providing a caption for your custom entry, remember that this text appears when the user clicks the drop-down menu:
Figure 4-21 The New Drop-Down Menu
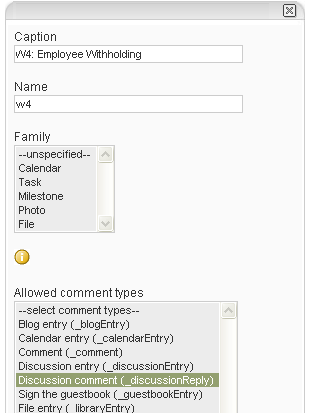
In the entry designer, complete the information for the custom-entry definition and click at the bottom of the form:
Figure 4-22 Complete the Form for the Custom-Entry Definition
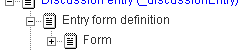
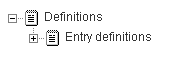
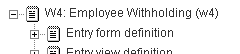
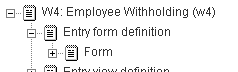
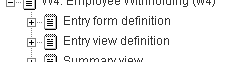
Next, you must provide the JSP file specifications for the form page, view page, and mail message. In the hierarchy to the left of the entry designer, click the plus sign () next to to expand it:
Figure 4-23 Access the Form Definition
Click :
Figure 4-24 Access Tools for the Form Definition
In the tools box on the right side of the designer, click :
Figure 4-25 Add an Element to the Form

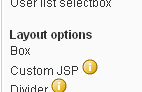
In the section of the tools box, click :
Figure 4-26 Add the Custom JSP to the Form
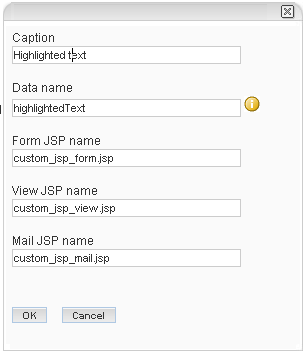
Complete the form, providing the file specifications for the custom JSPs:
Figure 4-27 Providing File Specifications for the JSP Files
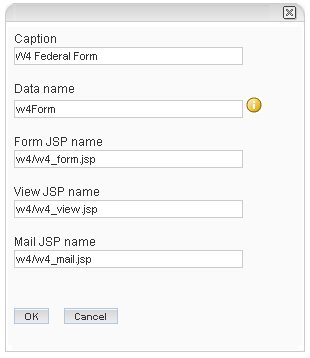
NOTE:Be sure to add the path to the filenames specified in the previous graphic. For example, the correct path for the form customization is samples/w4/w4_form.jsp.
Because Vibe assumes that directories are relative to the /WEB-INF/jsp/custom_jsps directory, the file specifications in the previous graphic begin with the samples/w4/ string, indicating that the files are located in the /custom_jsps/samples/w4 directory.
Click to submit the form shown in the previous graphic.
Because the W-4 application customizes the buttons for this form, and because standard tools appear in between the custom form and the buttons (for example, these tools include the form elements that upload and manage attachments), you need to specify the JSP file for the buttons as a separate step in the process.
Click again, click in the tools box, and, in the section, click . Fill out the form:
Figure 4-28 Complete the Form for the Buttons JSP
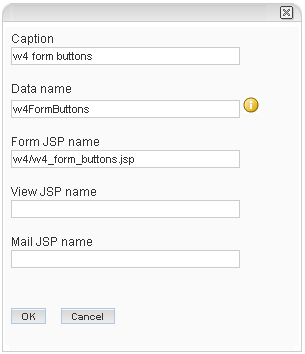
NOTE:Be sure to add the path to the filenames specified in the previous graphic. For example, the correct path for the buttons file is samples/w4/w4_form_buttons.jsp.
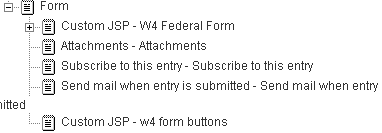
For the W-4 application, the standard title and buttons are not needed (the custom JSPs provide these elements). So, use the entry designer to delete the and elements from the form definition. Next, add the and elements. This is the appearance of the form definition when you are finished:
Figure 4-29 Customized Form Including Both JSP Files
NOTE:After you learn JSP tagging and debugging, you can continue using the form designer at this stage of the process to enable Novell Vibe tools, such as indexing custom data and making custom elements available on the advanced search form (see Identifying Multiple Data Items Defined in One JSP File). However, when you are first learning to do these types of customizations, it is recommended that you code and debug each custom element one at a time, ensuring that users can successfully specify data for the custom elements before working further within the designer for the form definition.
To begin the work needed to define the view definition, click :
Figure 4-30 Access the View Definition
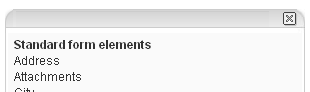
In the tools box on the right side of the designer, click . Vibe displays a list of elements that you can add to the view:
Figure 4-31 View Elements
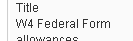
Deeper in the list, locate and click the caption you provided for the form definition (in this example, ):
Figure 4-32 Clicking the Caption for the Custom JSP
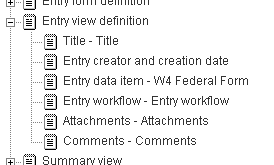
Use the designer tools to reposition the JSP within the view as desired. Here is one order that you can specify for your view (note the line):
Figure 4-33 Repositioning View Elements
At this point in the process, you have a formatted and minimally functioning custom entry; a user can create an entry, and Vibe can display it. However, users cannot supply values for custom elements until you edit and debug the JSP files for the form and view so that they store and display custom data properly.
Use the information in the next section (see Coding the Form Files) to guide the coding of your JSP files, activating custom elements in your form and view one element at a time. Continue until a user can create a complete entry, providing values for all custom elements on the form and ensuring that the view page displays values for all of the custom elements.
When you are finished debugging, you must go back into the form designer to further identify all custom elements in the form so standard tools in Vibe can access them (see Identifying Multiple Data Items Defined in One JSP File).
Coding the Form Files
Generally, when you are first learning to implement JSP customizations with Novell Vibe, you add one element, test it by creating an entry and reviewing the view, and then debug. For this reason, it can be helpful to have two windows open displaying Vibe pages: one in which to work within the designer and one in which to check a modified entry to see if the changes in the designer are taking effect.
Also, generally, many entries contain a title element. Vibe automatically uses the value of this element as the title for a created entry. For example, if you specify in the title element of a form for a new discussion topic, then appears as the title of the new entry.
However, the W-4 application does not include a title element on the form. It uses JavaScript and DOM coding to construct a title for the entry. For example, if the person filling out a W-4 form specified as a first name and as a last name, then the created entry combines the values of two form elements and uses as the entry title. This customization was included to illustrate possibilities for your JSP customizations.
So, in the W-4 customization, the first-name and last-name elements need to be added to the form before the view can properly display its entry title.
As mentioned, you include the JSP tag that establishes supporting definitions for Vibe customizations. Then, you specify HTML code needed for your specific customization. For the W-4 application, the form and view use a standard HTML table. Here are the first few lines of the W-4 form:
<%@ include file="/WEB-INF/jsp/definition_elements/init.jsp" %>


<table width="100%" cellpadding="6" cellspacing="0" summary="W4 form">
<tr>
<td><font size="-2">Form</font>
<b><font size="+2">W-4</font></b></td>
<td colspan="5"><font
size="+1">Employee's Withholding
Allowance Certificate</font></td>
<td><font size="-2">OMB No. 1545-0010</font></td>
</tr>
Because the JSP customization defines a page segment within a larger web page, it does not specify html, head, or body HTML tags.
The code that implements the first name and last name is the same syntactically as the code that implements single-element JSP files (see Section 4.2.1, A JSP That Defines Only One Data Element). You provide identifiers for the custom elements, and you use the ssDefinitionEntry object, its attributes, and their values, to place existing data into the form element (if it exists). This is the code for the firstName and lastName attributes:
<tr>
<td colspan="2"><input type="text" name="firstName" id="firstName"
size="25" value="${ssDefinitionEntry.customAttributes['firstName'].value}" /></td>
<td colspan="3"><input type="text" name="lastName" id="lastName"
size="25" value="${ssDefinitionEntry.customAttributes['lastName'].value}" /></td>
Generally, the process of coding all other form elements is the same. However, coding radio buttons, check boxes, and select boxes (there are no select boxes in the W-4 example) require the knowledge of some additional details (see Section 4.3, Examples of Complex, HTML Data Types).
The initial part of the JSP file for the buttons contains style information to be applied to the and buttons:
<style>
input.custom_submit {
  background-color: #009999;
  border: 1px solid #006666;
  color: #ffffff;
  font-size: 12px;
  padding: 0px 6px 0px 6px;
  cursor: pointer;
  white-space: nowrap;
}
</style>
The next section of code in the JSP file for the buttons contains the JavaScript that concatenates the first and last names, and assigns that string to the title form element:
<script language="JavaScript" type="text/javascript">
function mySubmit() {
    self.document.form1.title.value = self.document.form1.firstName.value + " " + self.document.form1.lastName.value;
}
</script>
When Vibe generates a form that creates an entry, the standard identifier for the form is form1.
Because this application required the removal of the title element of the form using the designers, the internal mechanism for recognizing and storing the data for a title has been removed. The next line in the JSP file for the buttons uses a “hidden” tag to replace the mechanisms removed by the deletions in the designer:
<input type="hidden" name="title" value="" />
Execution of the JavaScript routine mySubmit provides a value for the title element.
The final segment of code in the JSP file for the buttons contains HTML for the and buttons:
<input type="submit" class="custom_submit" name="okBtn" value="OK" onClick="ss_buttonSelect('okBtn');mySubmit();"/>
<input type="submit" class="custom_submit" name="cancelBtn" value="Cancel" onClick="ss_buttonSelect('cancelBtn'); " />
The HTML for the button includes an onClick specification that executes the mySubmit JavaScript routine, creating the value of the entry title.
Coding the View File
For the W-4 application, the JSP file for the view is a table identical to the one included in the form, except that it only displays values for each of the custom elements (if they exist).
First, include the tag that establishes the JSP definitions:
<%@ include file="/WEB-INF/jsp/definition_elements/init.jsp" %>
Here is a sample of the code from the view file that displays the first name, last name, and social security number:
<tr>
<td colspan="2">${ssDefinitionEntry.customAttributes['firstName'].value}</td>
<td colspan="3">${ssDefinitionEntry.customAttributes['lastName'].value}</td>
<td colspan="2">${ssDefinitionEntry.customAttributes['ssn'].value}</td>
</tr>
The identifiers firstName, lastName, and ssn map to the name and id elements for the HTML input tags in the JSP for the form.
Complete the table so that it displays all of the custom elements.
Coding for most of the elements is virtually identical to the code displayed in the last example. However, displaying data from radio buttons, check boxes, and select boxes (there are no select boxes in the W-4 example) require the knowledge of some additional details (see Section 4.3, Examples of Complex, HTML Data Types).
Identifying Multiple Data Items Defined in One JSP File
After adding and testing all custom elements, the custom entry for the W-4 application is complete, which means that someone can create and view an entry containing values for all custom elements. However, one of the desirable features ofNovell Vibe is the integration between features and tools. To enable this integration, you need to use the designers to report to the system that this entry includes custom data elements. As one example, after you report the existence of these elements, Vibe is able to index the custom data, which, in turn, allows users to perform advanced searches based on this custom data.
In summary, to report the custom elements to the system, use the form designer for the entry to add elements that use the same name and HTML data type (text box, radio button, and so on) as the element in the JSP files.
To report custom elements, access the definition of the custom entry (), and open the form definition by clicking the plus sign () next to both and . Then, click . Finally, add elements as children to .
The instructions that follow show you how to add the first-name element.
As a reminder, here is the HTML from the JSP for the form that establishes the first-name element, whose form element is a text box:
<input type="text" name="firstName" id="firstName"
size="25" value="${ssDefinitionEntry.customAttributes['firstName'].value}" />
In the tools box on the right side of the designer, click :
Figure 4-34 Adding a Text Element for Indexing Purposes

In the form, specify the same data name () as the name and id elements used in the HTML input tag found in the JSP file, and provide the same caption:
Figure 4-35 Match the Name with the One Found in the JSP File
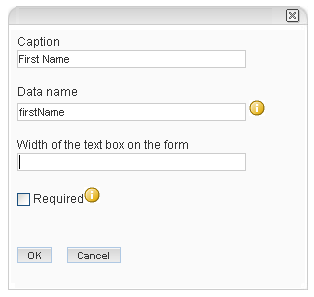
None of the other form values have an effect. Click the button to submit the form.
Repeat this action for all elements defined in the JSP file, including the hidden title element. The order of the elements does not have to match the order of the elements in the JSP file. When you are finished, the definition includes all of the elements shown in this graphic:
Figure 4-36 All Elements Specified for Indexing Purposes
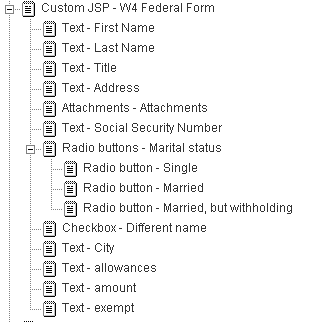
Notice that the elements appear as children to the custom JSP within the hierarchy (as opposed to peers).
Coding the Mail File
The W-4 application is a good example of a custom entry for which you might want to provide only a summary of the information in an e-mail message. For example, this is all of the code in the JSP for mail:
<%@ include file="/WEB-INF/jsp/definition_elements/init.jsp" %>

<table width="100%" class="border" cellpadding="6"
summary="W4 Information">
<tr>
<td><font size="-2">Form</font> <b><font size="+2">W-4</font></b></td>
<td colspan="5"><font size="+1">Employee's Withholding
Allowance Certificate</font></td>
<td><font size="-2">OMB No. 1545-0010</font></td>
</tr>
<tr>
<td><font size="-3">Department of the Treasury<br />Internal
Revenue Service</font></td>
<td colspan="5">For Privacy Act and Paperwork Reduction Act Notice, see
elsewhere</td>
<td><font size="+2">2008</font></td>
</tr>
<tr><td colspan="7"><hr size="1" noshade="noshade" /></td></tr>
<tr>
<td colspan="2"><font size="-1"><b>1</b> First name and
middle initial</font></td>
<td colspan="3"><font size="-1">Last name</font></td>
<td colspan="2"><font size="-1"><b>2</b> Your social security
number</font></td>
</tr>
<tr>
<td colspan="2">${ssDefinitionEntry.customAttributes['firstName'].value}</td>
<td colspan="3">${ssDefinitionEntry.customAttributes['lastName'].value}</td>
<td colspan="2">${ssDefinitionEntry.customAttributes['ssn'].value}</td>
</tr>
<tr><td colspan="7"><hr size="1" noshade="noshade" /></td></tr>

</table>
When a user views an entry of this type and clicks , that person sees:
Figure 4-37 Showing Partial Information in Mail