5.7 Disabling User Access to the Vibe Site on the Web
If you want users to have access to the Vibe system only through the Vibe desktop application, you can disable users’ ability to access the Vibe site via a web browser.
You can restrict access to the Vibe site on the web for all users, or for specific users and groups. Alternatively, you can disable access to the site for all users and then enable access for specific users and groups.
5.7.1 Disabling Access for All Users
Disabling access as described in this section disables access to Vibe on the web for all users in the Vibe system, except for the Vibe administrator.
-
Log in to the Vibe site as the Vibe administrator.
-
Launch a web browser.
-
Specify one of the following URLs, depending on whether you are using a secure SSL connection:
http://Vibe_hostname:8080
https://Vibe_hostname:8443
Replace Vibe_hostname with the hostname or fully qualified domain name of the Vibe server that you have set up in DNS. If you configured the HTTP ports correctly during installation, you do not need to include the port number in the Vibe URL.
Depending on how you have configured your Vibe system, you might not be required to enter the port number in the URL. If you are using NetIQ Access Manager, the Vibe login screen is not used.
-
-
Click the link in the upper-right corner of the page, then click the icon
 .
. -
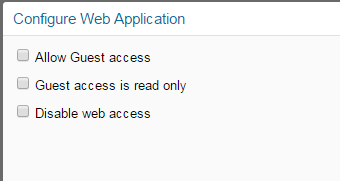
Under , click .
-
Select .
-
Click .
5.7.2 Disabling or Enabling Access for Individual Users
-
Log in to the Vibe site as the Vibe administrator.
-
Launch a web browser.
-
Specify one of the following URLs, depending on whether you are using a secure SSL connection:
http://Vibe_hostname:8080
https://Vibe_hostname:8443
Replace Vibe_hostname with the hostname or fully qualified domain name of the Vibe server that you have set up in DNS. If you configured the HTTP ports correctly during installation, you do not need to include the port number in the Vibe URL.
Depending on how you have configured your Vibe system, you might not be required to enter the port number in the URL. If you are using NetIQ Access Manager, the Vibe login screen is not used.
-
-
Click the link in the upper-right corner of the page, then click the icon
. -
Under , click .
The Manage Users page is displayed.
-
(Conditional) If you have not disabled access for all users (as described in Disabling Access for All Users), you can disable access for an individual user by clicking the drop-down arrow next to the user’s name and then clicking .
or
To disable access for multiple users, select the users whose access you want to disable, then click > .
-
(Conditional) If you have disabled access for all users, you can enable access for an individual user by clicking the drop-down arrow next to the user’s name and then clicking .
or
To enable access for multiple users, select the users whose access you want to enable, then click > .
5.7.3 Disabling or Enabling Access for Individual Groups
-
Log in to the Vibe site as the Vibe administrator.
-
Launch a web browser.
-
Specify one of the following URLs, depending on whether you are using a secure SSL connection:
http://Vibe_hostname:8080
https://Vibe_hostname:8443
Replace Vibe_hostname with the hostname or fully qualified domain name of the Vibe server that you have set up in DNS. If you configured the HTTP ports correctly during installation, you do not need to include the port number in the Vibe URL.
Depending on how you have configured your Vibe system, you might not be required to enter the port number in the URL. If you are using NetIQ Access Manager, the Vibe login screen is not used.
-
-
Click the link in the upper-right corner of the page, then click the icon
. -
Under , click .
The Manage Groups page is displayed.
-
(Conditional) If you have not disabled access for all users (as described in Disabling Access for All Users), you can disable access for users who belong to an individual group by clicking the drop-down arrow next to the group name and then clicking .
or
To disable access for multiple users, select the users whose access you want to disable, then click > .
-
(Conditional) If you have disabled access for all users, you can enable access for users who belong to an individual group by clicking the drop-down arrow next to the group name and then clicking .
or
To enable access for multiple users, select the users whose access you want to enable, then click > .