31.2 Generating Reports
Most Vibe reports are created in CSV format, so that you can import them into a spreadsheet and easily manipulate the data to suit your needs. The default CSV filename is report.csv. If you create multiple reports without manually renaming them, the default filename is incremented (report-n.csv).
The maximum report length is 10,000 rows, at which point the report is truncated.
The default location to save the report varies by platform:
|
Linux: |
/tmp |
|
Windows: |
Your current Windows default directory |
31.2.1 Login Report
The Login report lists the Vibe users who have logged in to the Vibe site during a specified period of time. In addition, it can include a dated list of every login by each user.
-
Log in to the Vibe site as the Vibe administrator.
-
Click your linked name in the upper right corner of the page, then click the icon
 .
. -
Under , click .
-
In the drop-down list, select .

-
Specify the date range for the Login report.
-
Leave the field blank to list all user logins.
or
In the field, begin typing the first name of a Vibe user, then in the drop-down list of names that match what you have typed, select a user whose logins you want to be reported. Repeat this process to include multiple users in the report.
-
Select the type of Login report that you want to generate.
Summarize Login Entries: Lists how many times the selected users have logged into the Vibe site. In the drop-down list, select , , or to organize the data.
List All Login Entries: Lists each individual user login and includes the following data about the action:
-
First name
-
Last name
-
User name
-
Date
-
Time
In the drop-down list, select or to organize the data most helpfully.
-
-
Click to generate the Login report.
-
Select a text editor to view the report in, then click .
For a short report, you might obtain the information you need by viewing the CSV file.
-
(Optional) Save the CSV file with a meaningful name in a convenient location, then retrieve it into a spreadsheet program for further examination.
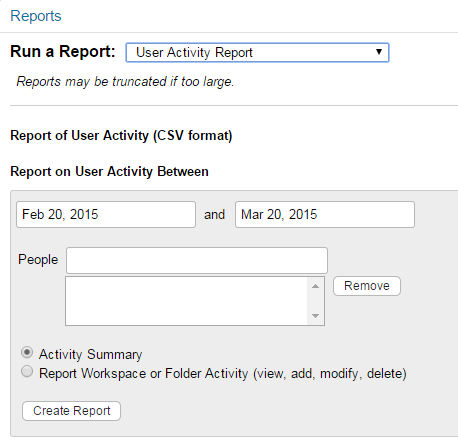
31.2.2 User Activity Report
The User Activity report lists how many times specified users have viewed, added, modified, or deleted content on the Vibe site during a specified period of time. In addition, it can include the date and time of each action, along with the location of the action.
-
Log in to the Vibe site as the Vibe administrator.
-
Click your linked name in the upper right corner of the page, then click the icon
. -
Under System, click .
-
In the drop-down list, select .
-
Specify the date range for the User Activity report.
-
Leave the field blank to list all user activity.
or
In the field, start typing the first name of a Vibe user.
In the drop-down list of names that match what you have typed, select a user whose activity you want to be reported. Repeat this process to include additional users.
-
Select the type of User Activity report that you want to generate.
Activity Summary: Lists how many times the selected users have performed the following actions in the Vibe site:
-
View
-
Add
-
Edit
-
Delete (purge)
-
Pre-Delete (delete but not purge)
-
Restore (restore a deleted item that has not been purged)
Report Workspace or Folder Activity: Lists each individual user action and includes the following data about the action:
-
User
-
Activity
-
Date
-
Time
-
Folder
-
Entry title
-
Entry type
-
-
Click to generate the User Activity report.
-
Select a text editor to view the report in, then click .
For a short report, you might obtain the information you need by viewing the CSV file.
-
(Optional) Save the CSV file with a meaningful name in a convenient location, then retrieve it into a spreadsheet program for further examination.
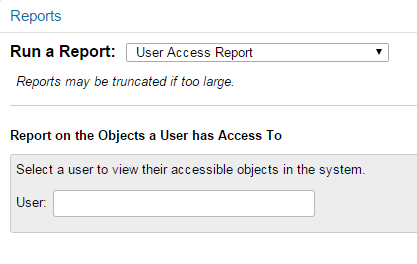
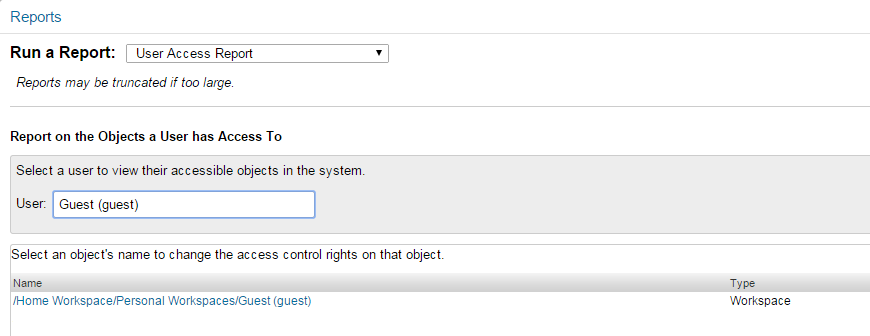
31.2.3 User Access Report
The User Access report lists the locations on the Vibe site where a specified user has access rights. In addition, you can view, and if necessary, change or remove the access rights for any location. This report is especially useful on Vibe sites where Guest user access has been granted, as described in Setting Up Guest Access for the Vibe Site.
-
Log in to the Vibe site as the Vibe administrator.
-
Click your linked name in the upper right corner of the page, then click the icon
. -
Under System, click .
-
In the drop-down list, select .
-
In the field, begin typing the first name of a Vibe user.
-
In the drop-down list of names that match what you have typed, select the user whose site access you want to be reported.
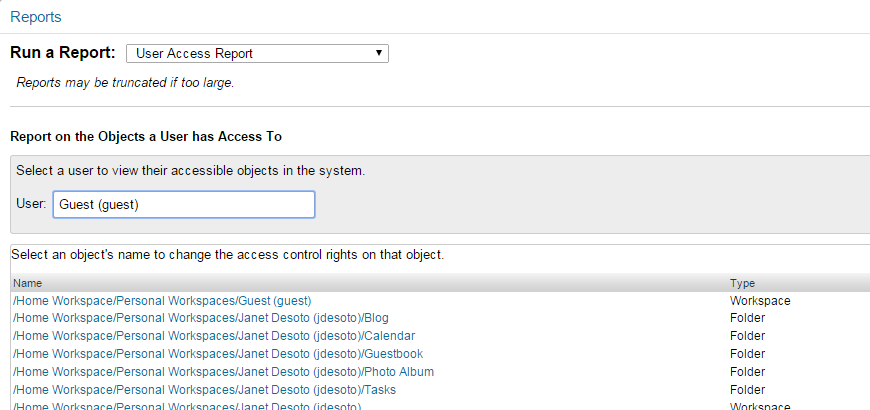
In this example, the Guest user has access to the Guest workspace and also to Janet DeSoto’s personal workspace. This could be appropriate if Janet DeSoto’s job is to maintain a publicly available workspace, but would not be appropriate if the Guest access has been granted in error.
-
(Conditional) If you want to change the current access:
-
Click the name of a location to display the Configure Access Control page for that location.
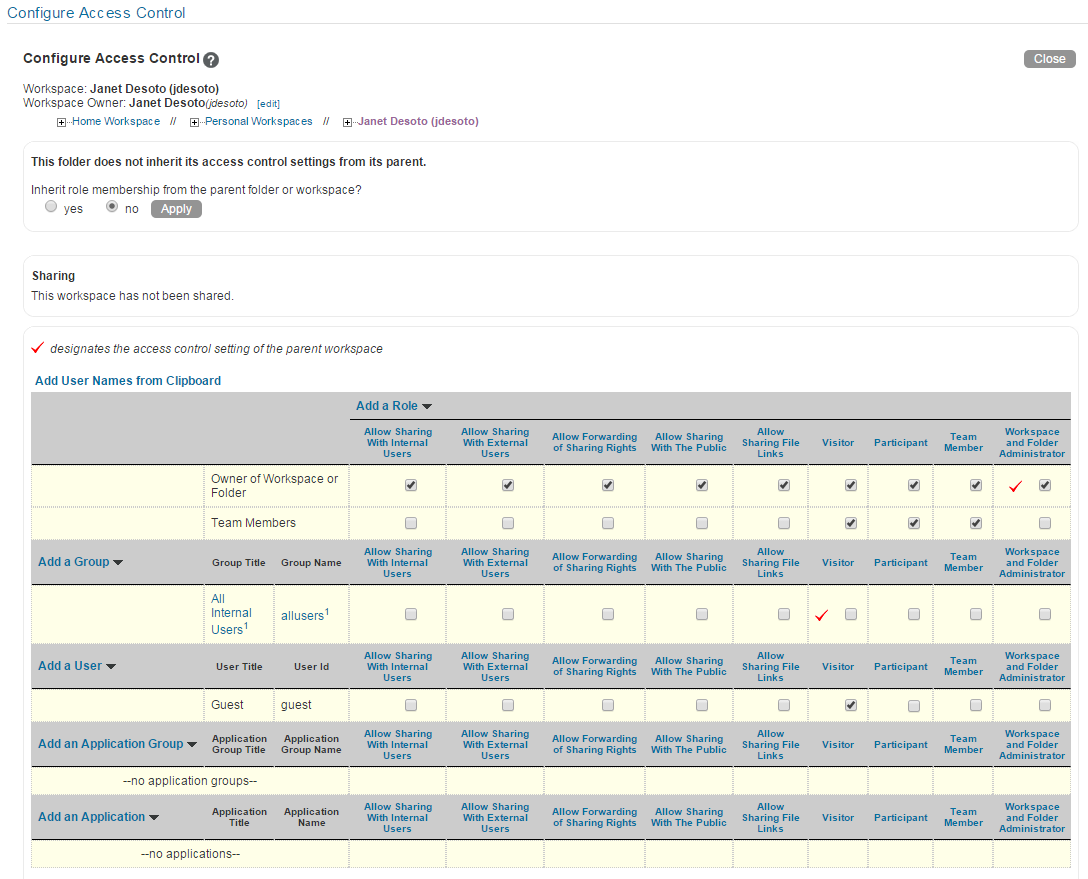
In this example, the Guest user has been granted Visitor access to Janet DeSoto’s personal workspace.
-
Select or deselect access rights as needed.
-
Click , then click to return to the User Access Report page
-
Rerun the report to view the results of your changes.
For example, if you removed the Guest access rights from Janet DeSoto’s personal workspace, her workspace is no longer listed in the User Access report for the Guest user.
-
-
(Conditional) If you want to save the user access information, select it and copy it into a text editor.
-
Click when you are finished checking user access rights.
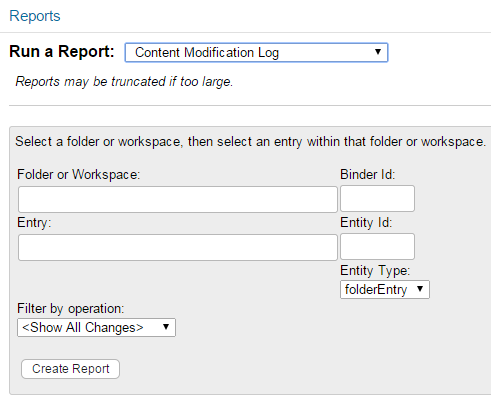
31.2.4 Content Modification Report
The Content Modification report lists changes to workspaces, folders, and folder entries, as well as users, groups, access rights, and workflows. By generating a Content Modification report, you can determine who has performed any of the following actions:
-
Added, modified, moved, or deleted a workspace
-
Added, modified, moved, or deleted a folder
-
Added, modified, renamed, or deleted a file or one of its versions
-
Added, modified, moved, or deleted an entry
For purposes of this report, users and groups are handled as if they are folder entries.
-
Started or modified a workflow
-
Modified or deleted access rights
The Content Modification report can also help you recover data that has been accidentally deleted.
-
Log in to the Vibe site as the Vibe administrator.
-
Determine the exact name of the workspace, folder, file entry, and so on where you want to check for content modifications.
-
Click your linked name in the upper right corner of the page, then click the icon
. -
Under System, click .
-
In the drop-down list, select .
-
Fill in the fields to specify where to check for content modifications and the type of modifications to check for:
Folder or Workspace: Start typing the name of a folder or workspace. In the drop-down list of names that match what you have typed, select the folder or workspace where you want to check for content modifications. The internal ID of the folder or workspace is displayed for reference.
Entry: (Optional) To restrict the content modification check to a specific entry in a folder, start typing text in the title of the entry. In the drop-down list of entry titles that match what you have typed, select the entry where you want to check for content modifications. The internal ID of the entry is displayed for reference.
Entity Type: (Optional) To further restrict the content modification check, select one of the following:
-
Workspace (not the contents of the workspace, but the workspace itself)
-
Folder (not the contents of the folder, but the folder itself)
-
Folder entry (the contents of the folder entry)
-
Profiles (the contents of the Personal Workspaces folder where there is a personal workspace for each user)
-
User (the contents of a user’s personal profile, such as the user’s name, email address, and locale)
-
Group (the contents of the group)
Filter by Operation: Further restrict the content modification check by selecting a specific action performed on the selected workspace, folder, or entry (add, modify, rename, delete, and so on).
-
-
Click to generate the Content Modification report.
The results are displayed as an XML file.

-
(Conditional) If the results are too extensive, restrict the scope of the content modification check until you locate the modification that you are seeking.
-
Click when you are finished checking for content modifications.
A specialized use of the Content Modification report is to restore accidentally deleted data. For example, you can use the following steps to recover an accidentally deleted folder entry:
-
Run the Content Modification report to list all entry deletions in the folder where the entry was accidentally deleted.
-
Record the entry ID of the deleted entry.
-
Run the Content Modification report on the entry ID, selecting in the field.
-
Use the modification history of the entry to reconstruct the accidentally deleted entry.
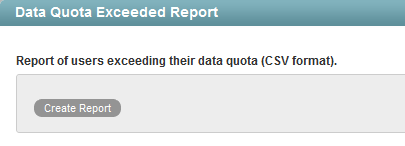
31.2.5 Data Quota Exceeded Report
The Data Quota Exceeded report lists individual users who have exceeded the data quota. The report provides a spreadsheet with the following information for each user:
-
Data Quota Used (MB): Displays the amount of disk space the user is currently using.
-
Data Quota: Displays the user’s individual quota if one has been set.
For information on how to set a quota for individual users, see Managing Workspace and Folder Data Quotas.
-
Max Group Quota (MB): Displays the largest data quota for any group that the user is a member of. Users are assigned the highest of all data quotas for any group for which they are a member.
-
Default Data Quota (MB): Displays the site-wide default quota.
For information on how to set a default data quota, see Managing Workspace and Folder Data Quotas.
To generate the Data Quota Exceeded report:
-
Log in to the Vibe site as the Vibe administrator.
-
Click your linked name in the upper right corner of the page, then click the icon
. -
Under , click .
-
In the drop-down list, select .
-
Click to generate the report.
The report is launched in a spreadsheet.
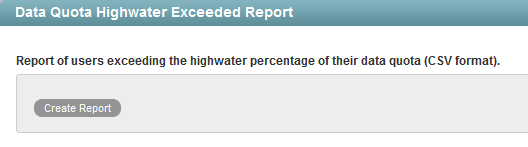
31.2.6 Data Quota Highwater Exceeded Report
The Data Quota Highwater Exceeded report lists individual users who have exceeded the data quota high-water mark. The report provides the following information for each user:
-
Data Quota Used (MB): Displays the amount of disk space the user is currently using.
-
Data Quota: Displays the user’s individual quota if one has been set.
For information on how to set a quota for individual users, see Managing Workspace and Folder Data Quotas.
-
Max Group Quota (MB): Displays the largest data quota for any group that the user is a member of. Users are assigned the highest of all data quotas for any group for which they are a member.
-
Default Data Quota (MB): Displays the site-wide default quota.
For information on how to set a default data quota, see Managing Workspace and Folder Data Quotas.
To generate the Data Quota Highwater Exceeded report:
-
Log in to the Vibe site as the Vibe administrator.
-
Click your linked name in the upper right corner of the page, then click the icon
. -
Under System, click .
-
In the drop-down list, select .
-
Click to generate the report.
The report is launched in a spreadsheet.
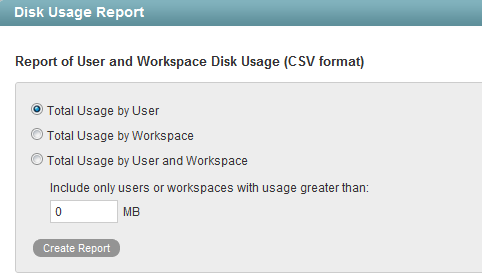
31.2.7 Disk Usage Report
The Disk Usage report lists the amount of disk space for workspaces on the Vibe site by user, by workspace, or by both. In addition, you can restrict the reporting to only those workspaces that exceed a specified number of megabytes.
-
Log in to the Vibe site as the Vibe administrator.
-
Click your linked name in the upper right corner of the page, then click the icon
. -
Under System, click .
-
In the drop-down list, select .
-
Select the type of Disk Usage report that you want to generate.
Total Usage by User: Lists all Vibe users whose disk space usage is above the amount specified in the field.
Total Usage by Workspace: Lists all workspaces where disk space usage is above the amount specified in the field. Disk space usage for each folder in each workspace is listed separately. The data is organized by workspace and folder ID.
Total Usage by User and Workspace: Combines the user and workspace data into a single report.
Include only users or workspaces with usage greater than: Specify the number of megabytes above which you want to list disk space usage. This eliminates smaller disk space usages from the report.
-
Click to generate the Disk Usage report.
-
Select a text editor to view the report in, then click .
For a short report, you might obtain the information you need by viewing the CSV file.
-
(Optional) Save the CSV file with a meaningful name in a convenient location, then retrieve it into a spreadsheet program for further examination.
-
Click when you are finished checking disk space usage.
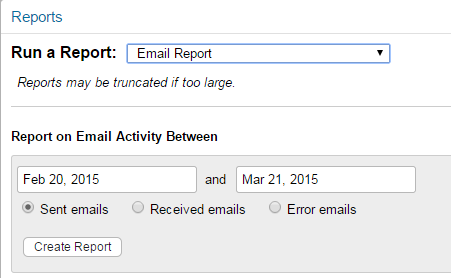
31.2.8 Email Report
The Email Report lists mail messages that have been sent from and into the Vibe site. It also lists email errors that have been encountered.
-
Log in to the Vibe site as the Vibe administrator.
-
Click your linked name in the upper right corner of the page, then click the icon
. -
Under System, click .
-
In the drop-down list, select .
-
Specify the date range for the Email report.
-
Select whether you want a report on email that was sent from Vibe, email that was sent into Vibe, or email errors that occurred.
-
Click .
The report contains the following information:
Send Date: Date when the email was sent.
From Address: Address that the email was sent from.
This is the email address that the user has defined in his or her user profile.
To Address: Address that the email was sent to.
This is the email address if the message was sent from Vibe, or it is the folder or workspace if the message was sent into Vibe.
Type: For messages that are sent from Vibe, this is the action that caused the message to be sent. For example, workflowNotification indicates that the email message was sent as a result of a workflow notification. For messages that are sent into Vibe, this is emailPosting, which indicates that the email message was converted to a Vibe entry via the internal Email Posting Agent.
Status: Status of the message, such as Sent or Received.
Subject Line: Subject line of the message.
Attached Files: Filename of any attachments that were included in the email message.
Errors: Any errors that are associated with the email message.
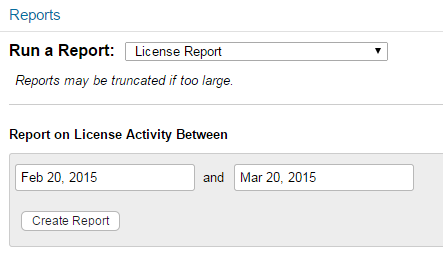
31.2.9 License Report
The License report lists information about your Vibe license, as well as information about the number of users in your Vibe site and how many of those users have accessed the site.
-
Log in to the Vibe site as the Vibe administrator.
-
Click your linked name in the upper right corner of the page, then click the icon
. -
Under System, click .
-
In the drop-down list, select .
-
Specify the date range for the License report, then click .
The License report lists the following information:
-
Vibe version
-
User access information
-
Current Number of Local Users: Number of local users accessing the system at the precise moment when you view the license report
-
Current Number of External Users: Number of external users accessing the system at the precise moment when you view the license report
-
Current Number of LDAP Synchronized Users: Number of LDAP-synchronized users accessing the system at the precise moment when you view the license report
-
Current Active User Count: Number of users who have accessed the Vibe system in the past 365 days.
-
Guest Access Enabled: Displays whether Guest access is currently enabled on the Vibe site.
-
-
License information
-
License key type
-
Date the license key was issued
-
Date range when the license key is valid
-
-
Allowed number of registered users during the date range
-
Allowed number of external users during the date range
-
List of dates in the date range with the following user license information:
-
Local and External Users: The user account was created within Vibe, and is not being synchronized from an LDAP directory.
-
Users Synchronized from LDAP: The user account was created from an LDAP source. (Only synchronized accounts that are not marked as Deleted or Disabled are counted.)
-
Users Who Used Vibe During the Previous 365 Days: Users who have logged in at least once in the past 365 days.
User logins are counted only after your Vibe system is upgraded to Vibe 3 or later. The number of users who have logged in is always 0 for dates prior to the upgrade to Vibe 3 or later.
To see how many people accessed the Vibe site prior to the upgrade to Vibe 3 or later, or just for more detailed information in this area, run the Login report. For more information about the Login report, see Login Report.
-
The Vibe software does not limit the number of Vibe users that you can create, but sites where Vibe licenses have been purchased and the Vibe software installed are periodically audited against their purchased number of licenses.
-
-
Click when you are finished reviewing the License report.
For information on how to install a new Vibe license, see Updating Your Vibe License
in Single-server (Basic) Installation
in the OpenText Vibe 4.0.8 Installation Guide.
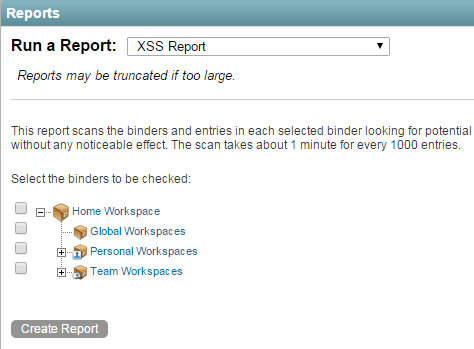
31.2.10 XSS Report
Cross-site scripting (XSS) is a client-side computer attack that is aimed at web applications. Because XSS attacks can pose a major security threat, Vibe contains a built-in security filter that protects against XSS vulnerabilities. For more general information about XSS, see Securing the Vibe Site against XSS.
The XSS report in Vibe lets you remove potentially harmful XSS threats from your Vibe site.
-
Log in to the Vibe site as the Vibe administrator.
-
Click your linked name in the upper right corner of the page, then click the icon
. -
Under System, click .
-
In the drop-down list, select .
-
Select the workspace or folder where you want to run the report. Any sub-workspaces or sub-folders of the workspace or folder that you select are included in the report.
-
Click .
IMPORTANT:Because XSS attacks often are designed to wait for users with extra privileges (such as the administrator) to view the page where the attack was set, it is important that you don’t navigate to the page after you run the report.
For information about how to run the XSS report and safely remove XSS threats, see
TID 7007381: Running the XSS Report in Vibe
in the OpenText Support Knowledgebase.