3.1 Setting Up the VM Server and Virtual Machines
This section provides basic instructions for setting up and managing a VM Server and virtual machines. It includes the following sections:
3.1.1 Before You Begin
Before you begin setting up the VM server, you should understand the concepts related to virtualization technology in Section 1.0, Introduction and Technology Overview. You should also review the following information resources that relate to your intended configuration.
|
Configuration |
Resource |
|---|---|
|
VM Server |
|
|
VMs running in paravirtual mode |
|
|
VMs running in fully virtual mode |
|
|
Specific operating systems running on a VM |
During and after installation, you might need to refer to the resources listed above for advanced configuration and troubleshooting information.
3.1.2 Setting up the Xen VM Server
-
Verify that the computer meets the system requirements (see Section 2.0, System and Software Requirements).
-
Install the VM Server software using one of the following methods:
- During the initial installation of the SLES 10, change the category to include the selection.
- After installation, run > > .

Click in the following dialog box and complete the on-screen instructions.
- After installation, enter yast2 xen from a command line interface. Complete the same instructions as listed above for the GUI version of YaST.
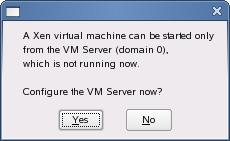
When the Xen packages are correctly installed, the computer must be rebooted for the GRUB boot loader to present as a boot option.
NOTE:Do not use other installation methods, such as > > or > because they do not perform the automatic configuration required to correctly run Xen VM Server.
-
Restart the computer.
-
During the computer startup, select from the GRUB boot loader menu.
3.1.3 Creating a Virtual Machine (Paravirtual Mode)
-
Make sure the computer has access to one of the following:
- OS installation program located on CD physical media or ISO image files. Before installing from CD, please review Section 5.1.12, Working with Virtual CD Readers.
- OS installation program configured as an installation source on the network.
- Disk image, partition, disk, or other type of block device with an already-installed operating system.
-
Click > > or enter yast2 xen from a command line interface.
The Manage Virtual Machines page displays all defined virtual machines.
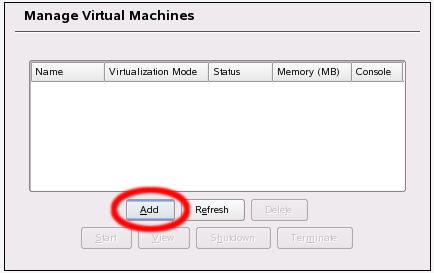
-
Click .
-
Choose the method to set up the VM’s operating system, then click .
-
Verify or change settings on the page.
HINT:To run the OS installation program in a remote graphical session, change to textmode=0 vnc=1.
-
Click to start the VM and launch the OS installation program.
- If you chose to run in a remote graphical session, a window displays the IP address and instructions for using the VNC viewer. To continue, open a terminal and enter vncviewer ip_address:1 where ip_address is the IP address of the VM.
- In text mode, a window displays the first screen of the OS installation program.
-
Complete the OS installation program following the onscreen instructions.
The OS installation program prompts for basic installation settings, formats the virtual disk, and copies OS files.
At the conclusion of the file copy, the VM shuts down and waits to be restarted to continue the second portion of the OS installation program (depending on the type of OS).
-
Verify or change settings on the page. If you ran an OS installation program, some categories are already completed and do not appear.
-
Click to start the VM from OS files on the virtual disk.
- If you chose to run in a remote graphical session, a window displays the IP address and instructions for using the VNC viewer. To continue, open a terminal and enter vncviewer ip_address:1 where ip_address is the IP address of the VM.
- In text mode, a window displays the text-based user interface of the OS.
If you have just installed the OS, the installation program continues.
-
Log in to the computer or follow the on-screen instructions to complete the OS installation.
Depending on the OS, the page automatically appears and displays the status of the VM. If the page does not appear, you can view the status of the VM by clicking > > .
3.1.4 Creating a Virtual Machine (Full Virtualization Mode)
-
Make sure the computer has access to one of the following:
- OS installation program located on CD physical media or ISO image files mounted in the VM server’s file system.
- Disk image, partition, disk, or other type of block device with an already-installed operating system.
-
Click > > or enter yast2 xen from a command line interface.
The Manage Virtual Machines page displays all defined virtual machines.
-
Click .
-
Choose the method to set up the VM’s operating system, then click .
-
Verify or change settings on the page.
-
Click to start the VM and launch the OS installation program.
A window displays the first page of the OS installation program.
-
Complete OS installation program by following the on-screen instructions.
The OS installation program prompts for basic installation settings, formats the virtual disk, and copies OS files.
At the conclusion of the file copy, the VM shuts down and waits to be restarted to continue the second portion of the OS installation program (depending on the type of OS).
HINT:To switch CD ISO images, press Ctrl+Alt+2 to open an HVMXen console. At the HVMXen console command line interface, enter change cdrom cd2.iso and replace cd2.iso with the name of the next CD ISO image file.
-
Verify or change settings on the page.
These are the settings that the OS recognizes when it boots. If you ran an OS installation program, some categories are already completed and do not appear.
-
Click to start the VM and boot the OS files on the virtual disk.
The first page of the OS displays. If you have just installed the OS, you might be prompted to continue the second portion of the installation program.
-
Log in to the computer or follow the on-screen instructions to complete the OS installation.
Depending on the OS, the screen automatically appears and displays the status of the VM. If the screen does not appear, you can view the status of the VM by clicking > > .
3.1.5 Managing Virtual Machines
The > > module lets you perform actions such as adding, viewing, starting, shutting down, and terminating VMs. The following information is also helpful.
File Locations
The xm Command
You can perform actions on VMs by using the xm command. In a terminal, log in as root and enter the desired command.
Other Useful Actions
You can perform other useful actions on VMs.