8.12 Setting Up Single Sign-On (SSO)
The SSO feature provides a method by which the Windows account password can be automatically saved and retrieved during a login to both eDirectory and Windows. This enables the user to achieve a transparent single sign-on to both eDirectory and Windows even in cases where a non-password-based Novell NMAS authentication method is being used for the eDirectory login, such as the Novell Enhanced Smart Card Method (NESCM). Without the SSO feature, even though a non-password-based login to eDirectory could be performed, the user would still be prompted to perform a password-based Windows account login.
To enable the SSO feature, you must first enable the SSO functionality in the Client Properties. Once enabled, SSO will be attempted during every login to both eDirectory and Windows. Note that the Client SSO functionality is only available in cases where an eDirectory login is being performed in addition to the Windows account login.
The SSO feature is provided through capabilities of the Novell NMAS client, and is only available when the NMAS Client 3.5.0 or later is installed.
HINT:To create a new Windows user, go to the user's Windows 7 workstation, log in as an administrator, then create a new Windows user with a password. For more information on creating users in Windows 7, see Create a user account.
8.12.1 Enabling SSO
-
At the user's Windows 7 workstation, right-click the
 icon in the notification area.
-
Click .
-
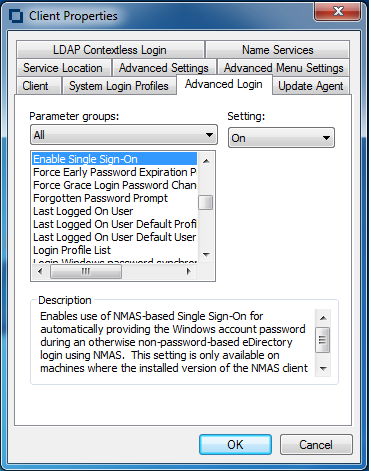
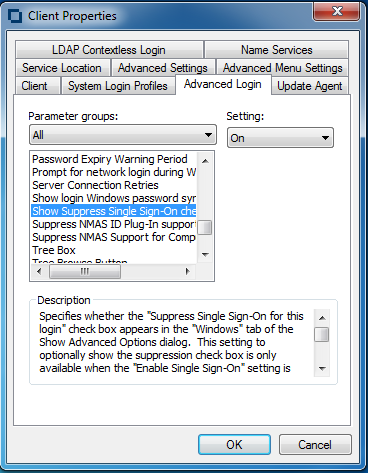
On the tab, select , then select in the list.
NOTE:By default, the value of is set to Off.
-
Click , then log out of the workstation.
You have successfully enabled SSO.
8.12.2 Enrolling the Windows User for SSO
-
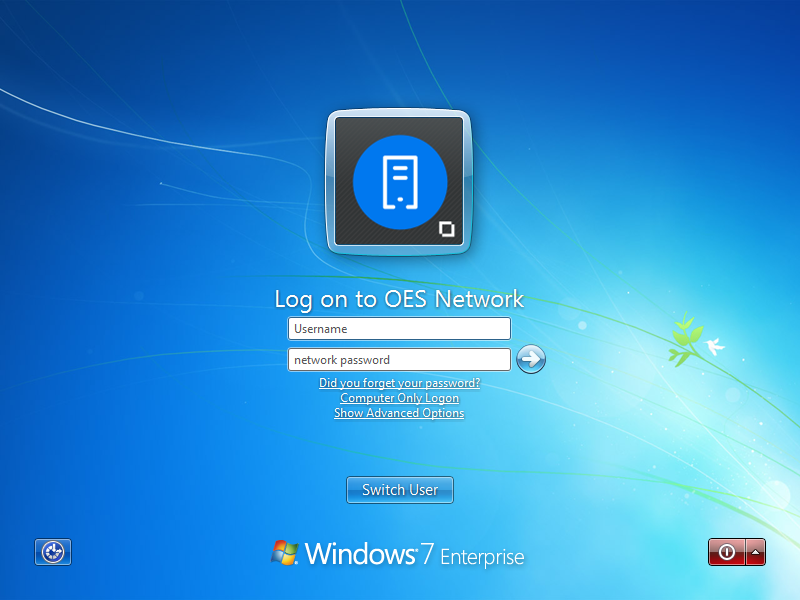
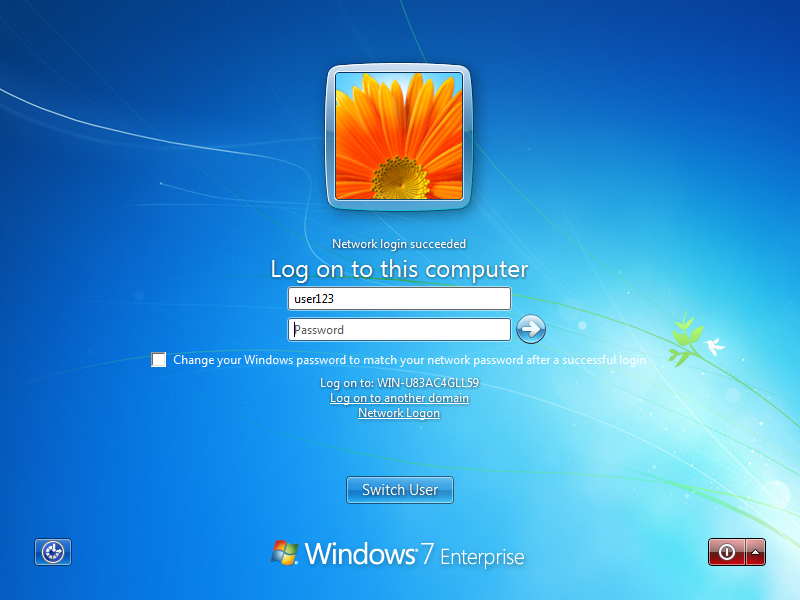
On the Windows 7 login page, click , then enter the eDirectory user credentials that you want to link to the Windows user.
-
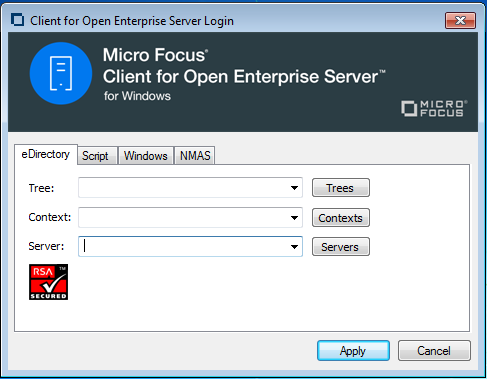
Click to display the dialog box.
-
On the tab, specify the tree name, tree context, and the server name.
-
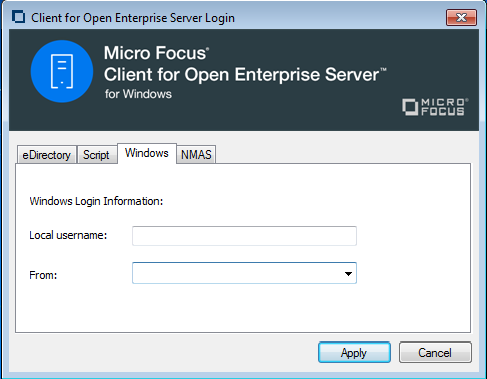
On the tab, specify the Windows user name that you want to enroll, then click .
-
Click the
 icon.
icon.
You are logged in to the network through the eDirectory credentials.
-
On the page, specify the Windows user credentials, then click the
icon.
You are logged on to the workstation through the Windows credentials.
-
Log out of the workstation.
For subsequent logins, it's enough to provide the eDirectory credentials, and you are automatically logged on to the workstation through the enrolled Windows credentials.
NOTE:You can link any number of Windows users to a single eDirectory user.
8.12.3 Enabling the Suppress Single Sign-On Option
-
Right-click the
icon in the notification area.
-
Click .
-
On the tab, select , then select in the list.
By default, the value of is set to .
You have successfully enabled the Suppress SSO option for all users of the workstation. For the next login attempt, the check box appears in the Login dialog box under the tab.
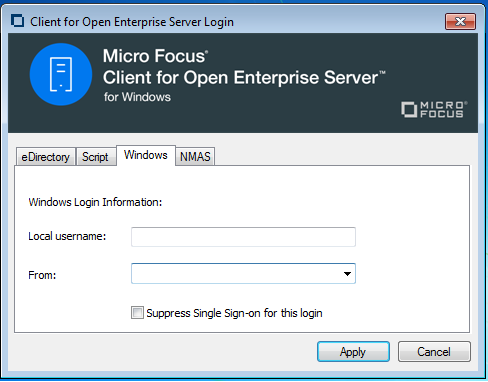
NOTE:Selecting the check box suppresses SSO only for the particular login attempt.