2.1 Configuring an Inventory Scan
An inventory scan allows you to collect data from managed devices in your Management Zone. By default, the inventory settings are preconfigured.
You can define the scan settings at three levels:
-
Management Zone: The settings are inherited by all device folders and devices. To configure a scan for the management zone, see Section 2.1.1, Configuring a Scan for the Management Zone.
-
Device Folder: The settings are inherited by all devices contained within the folder or its subfolders. Overrides the Management Zone settings
-
Device: The settings apply only to the device for which they are configured. Overrides the settings at the Management Zone level and the device folder level. To configure a scan for a device, see Section 2.1.3, Configuring an Inventory Scan for a Device.
2.1.1 Configuring a Scan for the Management Zone
-
In ZENworks Control Center, click , then in the Management Zone Settings panel, click .
-
Click in the category list.
-
In the Scan Now panel, configure how to run an on-demand inventory scan by using a Quick Task, device task, or by using the ZENworks Icon menu.
For more information on running an on-demand inventory scan, see Section 2.3, Running an Inventory Scan.

Collect Software Applications: Select this option if you want to scan for software applications. This setting is selected by default.
Collect Software File Information: Select this option if you want to scan for software file information that can be used to identify software products that aren’t recognized by the ZENworks Knowledgebase. If you plan to create Local Software Products and add them to the knowledgebase, this option must be selected. For more information, see Section 6.0, Creating Local Software Products.
Collect Hardware: Select this option if you want to scan for hardware data. This setting is selected by default.
Launch Collection Data Form: Select this option if you want to send out the Collection Data Form, which is used to collect demographic data. For more information, see Section 4.0, Scanning Demographic Data.
Run DMTF Translator: Select this option if you want to run the DMTF (Desktop Management Task Force) Translator. The DMTF translator converts the inventory data to formats that can be used by other tools and puts it on the local machine.
User Can Initiate Scan: Select this option if you want to allow the workstation user to initiate a scan by using the ZENworks Icon.
-
In the First Scan panel, configure how you want to run an initial inventory scan on a device.

Collect Software Applications: Select this option if you want to scan for software applications. This setting is selected by default.
Collect Software File Information: Select this option if you want to scan for software file information that can be used to identify software products that aren’t recognized by the ZENworks Knowledgebase. If you plan to create Local Software Products and add them to the knowledgebase, this option must be selected. For more information, see Section 6.0, Creating Local Software Products.
Collect Hardware: Select this option if you want to scan for hardware data. This setting is selected by default.
Launch Collection Data Form: Select this option if you want to send out the Collection Data Form, which is used to collect demographic data, when a scan is initiated. For more information, see Section 4.0, Scanning Demographic Data.
Run DMTF Translator: Select this option if you want to run the DMTF (Desktop Management Task Force) Translator. The DMTF translator converts the inventory data to formats that can be used by other tools and puts it on the local machine.
-
In the Recurring Scan panel, configure how you want to run scans based on a schedule.

Collect Software Applications: Select this option if you want to scan for software applications. This setting is selected by default.
Collect Software File Information: Select this option if you want to scan for software file information that can be used to identify software products that aren’t recognized by the ZENworks Knowledgebase. If you plan to create Local Software Products and add them to the knowledgebase, this option must be selected. For more information, see Section 6.0, Creating Local Software Products.
Collect Hardware: Select this option if you want to scan for hardware data. This setting is selected by default.
Launch Collection Data Form: Select this option if you want to send out the Collection Data Form, which is used to collect demographic data. For more information, see Section 4.0, Scanning Demographic Data.
Run DMTF Translator: Select this option if you want to run the DMTF (Desktop Management Task Force) Translator. The DMTF translator converts the inventory data to formats that can be used by other tools and puts it on the local machine.
-
In the Software Applications panel, configure which directories to skip.
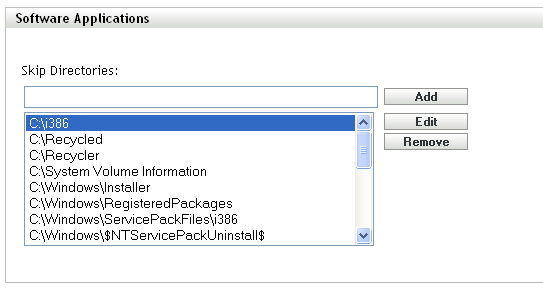
Skipping directories is useful in limiting the scope of the scan. Any entry added to the list skips that directory and all the subdirectories below it.
-
To add a directory, specify a directory in the field, then click .
-
To edit an existing directory, select the directory, click , edit the directory, then click .
-
To delete an existing directory, select the directory, then click .
-
-
In the Software Files panel, configure which types of files to scan for.
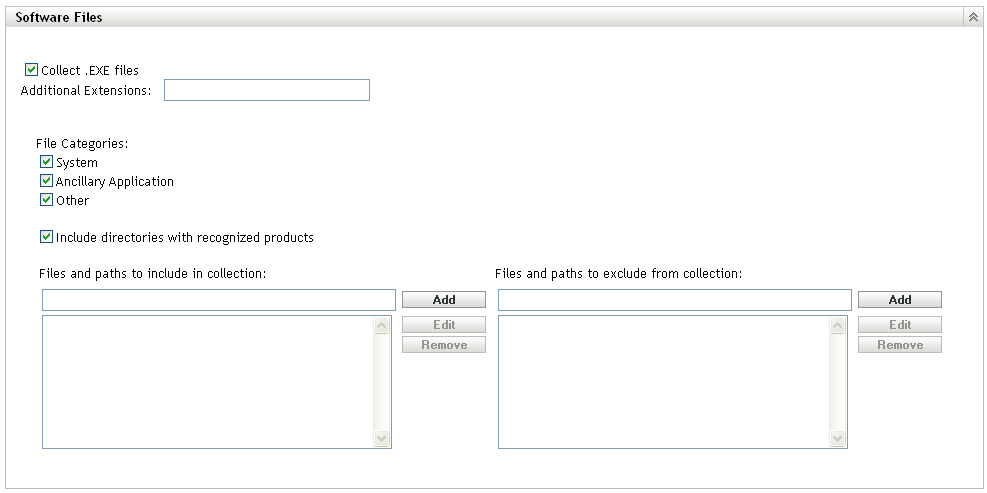
Software applications discovered in an inventory scan are identified by specific files associated with the product. These identifications are kept in the ZENworks Knowledgebase. To identify products that aren’t in the knowledgebase, you can search for files that are associated with an unrecognized product and use the file information to create a new product identification called a Local Software Product. This Local Software Product information can then be merged with the knowledgebase so that these new products are recognized in subsequent scans. For more information, see Section 6.0, Creating Local Software Products. To configure the file types, do the following:
-
To search for files with an .exe extension, select the option.
-
To search for files with a different extension, specify the extension in the field. Separate each extension with a + sign, for example, com+dll.
-
To scan for particular file types, select from the following:
-
System: Select this option to search for system files. This category is selected by default.
-
Ancillary Application: Select this option to search for files that are ancillary to, or associated with, a product that is recognized by the ZENworks Knowledgebase. This option is useful to create a comprehensive scan. This category is selected by default.
-
Other: Select this option to search for all other files. This category is selected by default.
-
-
To include directories with products that are recognized by the ZENworks Knowledgebase, select . This is useful to create a comprehensive scan.
-
To limit the scope of the scan by including and excluding files and paths, configure which files and paths to include or exclude from the collection by using and to specify which files and paths you want to include and exclude from the scan. You can edit the files and paths in the list by selecting the file or path and clicking . If you specify a file or path in the field, the scan is limited to just that file or path. If a file or path is specified in the field, all files and paths are searched except the specified file or path. Paths specified in the panel are also skipped.
NOTE:If you are specifying a path, you must include a trailing backslash (\). For example, if you want to include all .exe files in the dir directory, type C:\dir\.
-
-
In the Advanced panel, configure diagnostic settings.
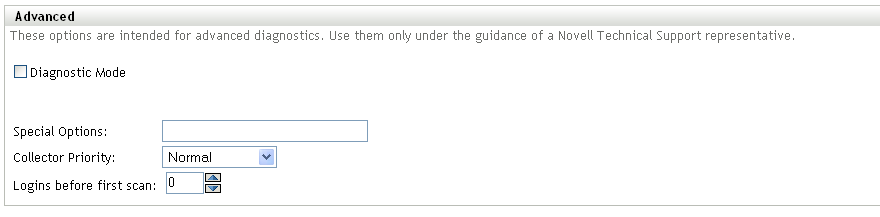
WARNING:These options are intended for advanced diagnostics. Use them only under the guidance of a Novell Support representative.
-
Click or .
2.1.2 Configuring a Scan for Devices in a Folder
-
In ZENworks Control Center, click the tab, then click the tab.
-
Click next to the folder containing the devices you want to configure a scan for.
-
Click the tab.
-
In the Settings panel, click .
-
In the list, click .
-
In the Inventory panel, click .
This overrides the Management Zone settings for these devices.
-
In the Scan Now panel, configure how to run an inventory scan
For configuring an inventory scan, perform steps from Step 3 through Step 9 listed in Section 2.1, Configuring an Inventory Scan.
2.1.3 Configuring an Inventory Scan for a Device
-
In ZENworks Control Center, click , then click the tab.
-
Click the folder containing the device you want to configure a scan for.
-
Click the device.
-
Click the tab.
-
In the Settings panel, click .
-
In the list, click .
-
In the Inventory panel, click .
This overrides the Management Zone and folder settings for this device.
-
In the Scan Now panel, configure how to run an inventory scan
For configuring an inventory scan, perform steps from Step 3 through Step 9 listed in Section 2.1, Configuring an Inventory Scan.