2.2 Creating File Bundles
A File bundle lets you copy or install files or directories to a device. For example, you can use a File bundle to include configuration files or data files. A File bundle is useful to distribute files that are not part of a Windows bundle.
You can use ZENworks Control Center or the zman command line utility to create bundles. The following procedure explains how to create a bundle using ZENworks Control Center. If you prefer the zman command line utility, see Bundle Commands
in ZENworks Command Line Utilities
.
For important information about creating File bundles, see Section 1.3, Packaging Considerations.
To create a File bundle:
-
In ZENworks Control Center, click the tab.
-
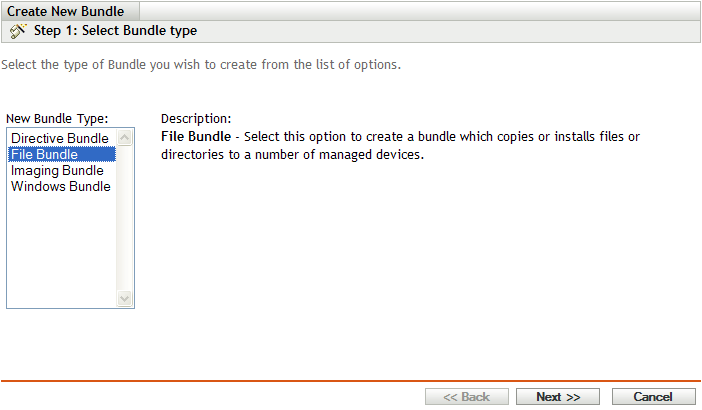
In the list, click , then click to display the Select Bundle Type page.
-
Select , then click to display the Select Bundle Category page.

-
Select the desired bundle category:
Empty Bundle: A bundle with no initial tasks. This bundle category is useful to quickly create a bundle without performing all of the tasks in the Create New Bundle Wizard. After you create the empty bundle, you can edit its details to add assignments, actions, and so forth, at a later time.
Copy Directory: Copies a directory (folder) onto a managed device (or from the device to somewhere else). The directory is copied from one location to another at the time this bundle is launched on the managed device. The directory is not uploaded to the ZENworks content system.
Copy Files: Copies one or more files onto a managed device (or from the device to somewhere else). The files are copied from one location to another at the time this bundle is launched on the managed device. The files are not uploaded to the ZENworks content system.
Create/Delete Directory: Creates or deletes a directory on the managed device.
Install Directory: Uploads the contents of a directory and all of its subdirectories to the ZENworks content system and then installs them to the destination path on the managed device. The content (by default) is replicated to all primary servers.
Install Files: Uploads selected files to the ZENworks content system and then installs them to the destination path on the managed device. The content (by default) is replicated to all primary servers.
NOTE:Copying a file or directory copies the file or directory from one location to another without uploading the files into the ZENworks content repository. Copying a file or directory is described as copying without using content. When copying a file or directory, the managed device performs the copy operation and must be able to resolve both the source and destination paths. Also, when copying a file or directory, the file or directory is not cached on the managed device.
Installing a file or directory uploads the file or directory to the ZENworks content repository before it is distributed to assigned devices. Installing a file or directory is described as copying using content. When installing a file or directory, the file or directory is cached on the managed device.
Installing an executable file does not launch or execute the file. To launch or execute the file, you must add a launch executable action (Launch Windows Executable, Launch Java Application, and so forth) to the bundle. For more information, see Section E.0, Actions.
-
Click to display the Define Details page, then fill in the fields:
Bundle Name: Provide a name for the bundle. The bundle name must be different than the name of any other item (bundle, group, folder, and so forth) that resides in the same folder. The name you provide displays in ZENworks Control Center and the ZENworks Adaptive Agent (on managed devices).
For more information, see
Naming Conventions in ZENworks Control Center
.Folder: Type the name or browse to and select the ZENworks Control Center folder where you want the bundle to reside. The default is /bundles, but you can create additional folders to organize your bundles.
Icon: ZENworks Configuration Management lets you select an icon that users see during installation of a particular bundle. This icon applies only to the icon displayed by ZENworks Adaptive Agent on the managed device. ZCC uses default icons to represent the different bundles (Directive, File, Imaging, and Windows).
To select an icon, click , then browse to and select the icon you want to display on managed devices.
If the desired icon is embedded in a .exe, .dll, or .ico file that has multiple icons from which to choose, you must install additional items before you can browse to and select the desired icon.
For Mozilla Firefox, if you have not already installed the Novell File Upload extension on this device, you must do so before you can download and install the download plugin or browse to and upload the icon. For more information, see Novell File Upload Extension. After you install the Novell File Upload extension, you must also install the download plugin. To do so, click the message box that displays in the Select Icon dialog box (if you have already installed the plugin on this device, the plugin box does not display), click , then click .
For Microsoft Internet Explorer, you must install the Novell File Upload ActiveX control only; there is no download plugin for Internet Explorer. For more information, see Novell File Upload Extension.
After you have downloaded and installed the necessary extensions and plugin, click
 to browse to and select the icon you want ZENworks Adaptive Agent to display to represent the bundle. If the icon in embedded in a .exe, .dll, or .ico file that contains multiple icons, an additional dialog box displays to let you select the desired icon.
If you do not specify an icon, a default icon is used.
Description: Provide a short description of the bundle's contents. This description displays in ZENworks Control Center and in the ZENworks Adaptive Agent.
-
Click , then skip to the appropriate step, depending on which bundle category you chose in Step 4:
-
(Conditional) If you are creating a Copy Directory bundle, follow the wizard prompts until you reach the Summary page, then skip to Step 12.
Click for information about each page or refer to the following table:
Wizard Page and Field
Details
Select Directory page > field
Specify the source directory. The path must be resolvable by the device on which the bundle is run.
Select Directory page > link
If you have not installed the Novell File Upload extension on this device, you must do so before you can browse to and upload files. For more information, see Section C.0, Novell File Upload Extension.
Select Directory page > field
Specify the destination directory on the device in which you want to copy the directory. The path must be resolvable by the device on which the bundle is run.
Select Directory page > check box
Select the check box to specify that the directory is hidden after installation.
Select Files page > check box
Select the check box to specify that the directory is read-only after installation.
Select Files page > list
Select a copy option from the list:
Copy Always: Copies the contents of the directory regardless of whether the files currently exists on the workstation.
Copy If Exists: Copies the contents of the directory only if the files currently exists on the workstation.
Copy If Does Not Exist: Copies the contents of the directory only if the files does not currently exist on the workstation
Copy If Newer: Copies the contents of the directory only if the modified date and time of the file is newer than the existing file’s date and time, or if the files does not currently exist on the workstation.
Copy If Newer and Exists: Copies the contents of the directory only if it already exists on the workstation and the date and time of the file is newer than the existing file’s date and time.
Copy if Newer Version: Copies the contents of the directory only if the internal version of the file is newer than the existing file’s version (if version information is present).
Request Confirmation: Prompts the user to verify that the contents of the directory should be copied.
Copy If Different: Copies the contents of the directory if the creation date, creation time, or size of the file is different than the existing file’s date, time, or size.
-
(Conditional) If you are creating a Copy Files bundle, follow the wizard prompts until you reach the Summary page, then skip to Step 12.
Click for information about each page or refer to the following table:
Wizard Page and Field
Details
Select Files page > field
Click to display the Select File dialog box. Click to browse and select the file you want to copy to the device, then click . Repeat these steps as many times as necessary to copy the desired files. The path must be resolvable by the device on which the bundle is run.
Select Files page > link
If you have not installed the Novell File Upload extension on this device, you must do so before you can browse to and upload files. For more information, see Section C.0, Novell File Upload Extension.
Select Files page > field
Specify the destination directory on the device in which you want to copy the file. The path must be resolvable by the device on which the bundle is run.
Select Files page > check box
Select the option to create shortcut icons for the source file on the destination directory. The source files are not copied to the destination directory.
Select Files page > check box
Select the check box to specify that the file is hidden after installation.
Select Files page > check box
Select the check box to specify that the file is read-only after installation.
Select Files page > list
Select a copy option from the list:
Copy Always: Copies the file regardless of whether the file currently exists on the workstation.
Copy If Exists: Copies the file only if the file currently exists on the workstation.
Copy If Does Not Exist: Copies the file only if the file does not currently exist on the workstation.
Copy If Newer: Copies the file only if its date and time are newer than the existing file’s date and time, or if the file does not currently exist on the workstation.
Copy If Newer and Exists: Copies the file only if it already exists on the workstation and the date and time of the file is newer than the existing file’s date and time.
Copy if Newer Version: Copies the file only if its internal version is newer than the existing file’s version (if version information is present).
Request Confirmation: Prompts the user to verify that the file should be copied.
Copy If Different: Copies the file if its date, time, or size is different than the existing file’s date, time, or size.
-
(Conditional) If you are creating a Create/Delete Directory bundle, follow the wizard prompts until you reach the Summary page, then skip to Step 12.
Click for information about each page or refer to the following table:
Wizard Page and Field
Details
Select Directory page > field
Select option to create a directory on the managed device.
Select Files page > link
If you have not installed the Novell File Upload extension on this device, you must do so before you can browse to and upload files. For more information, see Section C.0, Novell File Upload Extension.
Select Directory page > field
Select option to delete a directory on the managed device.
Select Directory page >
Click to browse and select the directory you want to create or delete on the managed device. You can also specify the directory name. The path must be resolved by the device on which the bundle is run.
-
(Conditional) If you are creating an Install Directory Files bundle, follow the wizard prompts until you reach the Summary page, then skip to Step 12.
Click for information about each page or refer to the following table:
Wizard Page and Field
Details
Select Directory page > field
Click
to display the Select Directory dialog box. Browse to and select the file to upload. The field displays each file’s upload status.
Select Files page > link
If you have not installed the Novell File Upload extension on this device, you must do so before you can browse to and upload files. For more information, see Section C.0, Novell File Upload Extension.
Select Directory page > field
Specify the destination directory in which you want to install the directory. The path must be resolvable by the device on which the bundle is run.
Select Directory page > check box
Select the check box to specify that the directory is hidden after installation.
Select Directory page > check box
Select the check box to specify that the directory is read-only after installation.
Select Directory page > list
Select a copy option from the list:
Copy Always: Installs the directory regardless of whether the directory currently exists on the workstation.
Copy If Exists: Installs the directory only if the directory currently exists on the workstation.
Copy If Does Not Exist: Installs the directory only if the directory does not currently exist on the workstation.
Copy If Newer: Installs the directory only if its date and time are newer than the existing directory’s date and time, or if the file does not currently exist on the workstation.
Copy If Newer and Exists: Installs the directory only if it already exists on the workstation and the time of the directory is newer than the existing file’s date and time.
Copy if Newer Version: Installs the directory only if its internal version is newer than the existing directory’s version (if version information is present).
Request Confirmation: Prompts the user to verify that the directory should be installed.
Copy If Different: Installs the directory if its date, time, or size is different than the existing directory’s date, time, or size.
-
(Conditional) If you are creating a Install Files bundle, follow the wizard prompts until you reach the Summary page, then skip to Step 12.
Click for information about each page or refer to the following table:
Wizard Page and Field
Details
Select Files page > field
Click to display the Select File dialog box. Click to browse and select the file you want to install on the device, then click . Repeat these steps as many times as necessary to copy the desired files.
You can click to remove all the files from the list.
Select Files page > link
If you have not installed the Novell File Upload extension on this device, you must do so before you can browse to and upload files. For more information, see Section C.0, Novell File Upload Extension.
Select Directory page > field
Specify the destination directory in which you want to install the file. The path must be resolvable by the device on which the bundle is run.
Select Files page > check box
Select the check box to specify that the file is hidden after installation.
Select Files page > check box
Select the check box to specify that the file is read-only after installation.
Select Files page > list
Select a copy option from the list:
Copy Always: Copies the file regardless of whether the file currently exists on the workstation.
Copy If Exists: Copies the file only if the file currently exists on the workstation.
Copy If Does Not Exist: Copies the file only if the file does not currently exist on the workstation.
Copy If Newer: Copies the file only if its date and time are newer than the existing file’s date and time, or if the file does not currently exist on the workstation.
Copy If Newer and Exists: Copies the file only if it already exists on the workstation and the time of the file is newer than the existing file’s date and time.
Copy if Newer Version: Copies the file only if its internal version is newer than the existing file’s version (if version information is present).
Request Confirmation: Prompts the user to verify that the file should be copied.
Copy If Different: Copies the file if its date, time, or size is different than the existing file’s date, time, or size.
-
Review the information on the Summary page, making any changes to the bundle settings by using the button as necessary.
-
(Conditional) Select the check box to display the bundle’s Summary page after the wizard completes. You can use the various tabs to edit the bundle’s assignments, system requirements, actions, settings, and content replication settings.
-
Click to create the bundle as configured per settings on the Summary page.
When you click , the bundle is created but it does not have users or devices assigned, schedules, and group membership. At some point in the future, you need to configure additional options for the bundle by continuing with Section 3.2, Assigning Existing Bundles to Devices or Section 3.3, Assigning Existing Bundles to Users.