9.3 Creating Closest Server Rules
-
Launch ZENworks Control Center.
-
Do one of the following:
-
To create a Closest Server rule for your Management Zone, click the tab, then click (in the Management Zone Settings panel) > .
-
To create a Closest Server rule for a device folder, open the folder’s details page, then click > (in the Settings panel) > .
-
To create a Closest Server rule for a device, open the device’s details page, then click > (in the Settings panel) > .
-
-
Conditional: If you are creating Closest Server rules on a device or device folder, click to activate the Closest Server Rules panel.
The option (not depicted) displays only at the device and device folder levels.
-
Click to display the Rule Construction dialog box:
-
In the field, specify a name for the rule.
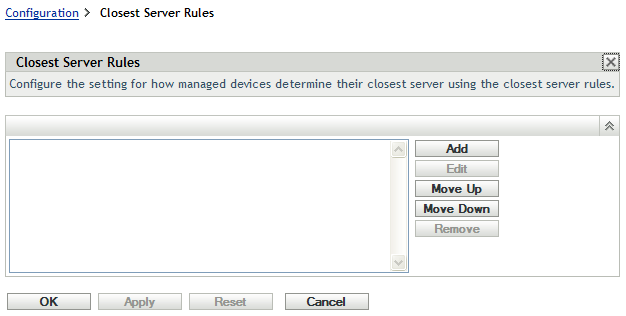
The name displays in the Closest Server Rules listing in ZENworks Control Center. To access this listing, click in the left pane, click the tab, click the panel to open it, click the section to open it, then click . All defined rules for the current level are displayed there.
-
If you do not want to append the Closest Server Default rule to the servers you are listing in this Closest Server rule, select the check box.
The Closest Server rules feature first uses the servers specified in the rule, then proceeds to any other servers listed in the Closest Server Default rule if the specified servers are not available to the managed device. Therefore, to obtain content only from the servers specified in the rule, select this check box to exclude all other servers.
-
Use the fields to create the rule expression.
An expression consists of a criteria option, operator, and value. For example:
DNS Name Filter equal to *.novell.com
DNS Name Filter is the criteria option, equal to is the operator, and *.novell.com is the value. In the above example, the Closest Server rule is applied only to devices whose DNS name ends with .novell.com.
If necessary, you can use NOT to perform a logical negation of the expression. For example:
NOT DNS Name Filter equal to *.novell.com
In the above example, the Closest Server rule is applied only to devices whose DNS name does not end with .novell.com.
You can use more than one expression for the rule. For example:
DNS Name Filter equal to provo.novell.com or IP Address equal to 192.168.67.12/24
You can use the following criteria:
Option
Explanation
DNS Name Filter
Matches DNS names that meet the filter criteria. You can specify an exact filter or use a question mark (?) or an asterisk (*) as a wildcard to match one or more characters in the DNS name. A ? matches one character and an * matches one or more characters. Examples:
- provo.novell.com: Matches all devices in the provo subdomain of the novell.com top-level domain.
- *.novell.com: Matches all devices in the novell.com top-level domain, including any devices in subdomains.
- provo?.novell.com: Matches all devices in the provo1 and provo 2 subdomains of the novell.com top-level domain; does not match devices in the provo12 subdomain.
IP Address /n
Matches IP addresses that fall within the specified CIDR (Classless Inter-Domain Routing) block. With CIDR, the dotted decimal portion of the IP address is interpreted as a 32-bit binary number that has been broken into four 8-bit bytes. The number following the slash (/n) is the prefix length, which is the number of shared initial bits, counting from the left side of the address. The /n number can range from 0 to 32, with 8, 16, 24, and 32 being commonly used numbers. Examples:
- 192.168.67.12/16: Matches all IP addresses that start with 192.168.
- 192.168.67.12/24: Matches all IP addresses that start with 192.168.67.
-
To configure the servers listed in any section, do any of the following:
-
(Conditional) You can perform the following tasks to manage individual servers in any of the server lists (Collection, Content, Configuration, and Authentication):
Task
Steps
Additional Details
Add a server to a list
-
In the desired server list (Collection, Content, Configuration, or Authentication), click .
-
Browse for and select one or more ZENworks Servers or Satellites.
-
Click to add the selected servers to the list.
By default, ZENworks Servers support all functions (Collection, Content, Configuration, and Authentication). Therefore, all ZENworks Servers are available for selection in any of the server lists.
Satellites, however, can be configured for specific roles (Collection, Content, Imaging, and Authentication). This has the following implications:
-
When selecting Satellites for the Collection Server list, only those Satellites that are assigned the Collection role are available for selection.
-
When selecting Satellites for the Authentication Server list, only those Satellites that are assigned the Authentication role are available for selection.
-
When selecting Satellites for the Content Server list, only those Satellites that are assigned the Content role or Imaging role are available for selection.
-
Satellites do not fulfill the Configuration role. Therefore, they cannot be added to the Configuration Server list.
Satellite roles are configured in the Server Hierarchy panel on the Configuration tab.
Reorder the list
-
In the desired server list, select the check box for the server, group, or L4 switch you want to move.
-
Click or as necessary to change its order in the list.
-
Repeat as necessary to order the list.
Placement in the list determines the order in which servers are contacted. The first list item (server, group, or L4 switch) is contacted first, then the second, and so forth.
You can order the items in the lists differently. This allows you to spread the workload initiated by devices by placing different servers higher in one list than in the other lists. For example:
-
Collection Servers: Server1, Group1, Server3, L4Switch5
-
Content Servers: L4Switch5
-
Configuration Servers: Server3, Server2, Group1
-
Authentication Servers: Server1, Server2
Remove a server from a list
-
In the server list, select the check box for the server you want to remove.
-
Click .
-
-
(Conditional) You can use a group to randomize connections to servers. Each time the server list is sent to a device, it is randomized so that not all devices receive the same ordered list.
For example, assume the server list contains the following:
-
Server 1
-
Group 1 (Server 2, Server 3, Server 4)
-
Server 5
One device might receive the following list: Server 1, Server 3, Server 2, Server 4, Server 5.
Another device might receive a different list: Server 1, Server 4, Server 3, Server 2, Server 5.
In all cases, Server 1 is listed first and Server 5 is listed last, but the order of the servers in Group 1 is randomized.
You can perform the following tasks to manage server groups in any of the server lists (Collection, Content, Configuration, and Authentication):
Task
Steps
Additional Details
Create a server group
-
In the desired server list, select the check boxes for the servers you want to include in the group, then click > .
or
If you want to create an empty group, click > .
You can add servers to the empty group later using the > option.
-
Specify a name for the group, then click to add the group to the list.
-
Click to make the change effective.
Add servers to a group
-
In the desired server list, select the check boxes for the servers you want to add to the group.
-
Click > .
-
Do one of the following:
-
To add the selected servers to a new group, select , specify a group name, then click .
-
To add the selected servers to an existing group, select a group from the list in the field, then click .
-
-
Click to make the change effective.
Reorder the list
-
In the server list, select the check box for the server, group, or L4 switch you want to move.
-
Click or as necessary to change its order in the list.
-
Repeat as necessary to order the list.
Placement in the list determines the order in which servers are contacted. The first list item (server, group, or L4 switch) is contacted first, then the second, and so forth.
You can order the items in the lists differently. This allows you to spread the workload initiated by devices by placing different servers higher in one list than in the other lists. For example:
-
Collection Servers: Server1, Group1, Server3, L4Switch5
-
Content Servers: L4Switch5, Server2, Server3, Server1
-
Configuration Servers: Server3, Server2, Group1
-
Authentication Servers: Group1, L4Switch5, Server1, Server2
Copy a group from one list to another list
-
In the server list to which you want to copy a group, click > .
For example, to copy a group from the Collection Servers list to the Content Servers list, click > in the Content Servers list.
-
Select the desired group from the list, then click to copy the group.
-
Click to make the change effective.
If you copy a group to a list that does not already contain the group’s servers, the unlisted servers are removed from the group. For example, if Group1 includes Server1 and Server2 and you copy Group1 to a list that does not include Server1, Server1 is removed from the group.
Remove servers from a group
-
In the server list, expand the group to display its servers.
-
Select the check boxes for the servers that you want to remove from the group.
-
Click > , then click .
-
Click to make the change effective.
The servers are not removed from the server list, only from the group.
Remove a group
-
In the server list, select the check box for the group you want to remove.
-
Click > , then click .
-
Click to make the change effective.
The group’s servers are not removed, only the group.
-
-
(Conditional) If you have ZENworks Servers or Satellites that are clustered behind an L4 switch, you can define the L4 switch and add the servers to the definition. This enables the L4 switch to continue to balance the traffic among those servers.
Task
Steps
Additional Details
Create an L4 switch definition
-
In the server list, select the check boxes for the servers to include in the L4 switch definition, then click > .
or
If you want to create an empty L4 switch definition, click > .
You can add servers to the empty definition later using the > option.
-
Specify the DNS name or the IP address of the L4 switch, then click to add the L4 switch to the list.
-
Click to make the change effective.
Add servers to an L4 switch definition
-
In the server list, select the check boxes for the servers you want to add to the L4 switch definition.
-
Click > .
-
Do one of the following:
-
To add the selected servers to a new L4 switch definition, select and specify the DNS name or IP address of the L4 switch, then click .
-
To add the selected servers to an existing L4 switch definition, select an L4 switch definition from the list in the field, then click .
-
-
Click to make the change effective.
Reorder the list
-
In the desired server list, select the check box for the server, group, or L4 switch you want to move.
-
Click or as necessary to change its order in the list.
-
Repeat as necessary to order the list.
Placement in the list determines the order in which servers are contacted. The first list item (server, group, or L4 switch) is contacted first, then the second, and so forth.
You can order the items in the lists differently. This allows you to spread the workload initiated by devices by placing different servers higher in one list than in the other lists. For example:
-
Collection Servers: Server1, Group1, Server3, L4Switch5
-
Content Servers: L4Switch5, Server2, Server3, Server1
-
Configuration Servers: Server3, Server2, Group1
-
Authentication Servers: Group1, L4Switch5, Server1, Server2
Remove servers from an L4 switch definition
-
In the server list, expand the L4 switch definition to display its servers.
-
Select the check boxes for the servers that you want to remove from the L4 switch definition.
-
Click > , then click .
-
Click to make the change effective.
The servers are not removed from the server list, only from the L4 switch definition.
Remove an L4 switch definition
-
In the server list, click > , then click .
-
Click to make the change effective.
The L4 switch definition's servers are not removed, only the definition.
-
-
-
Specify the number of ZENworks servers whose data must be sent to the managed devices at a time. The available options are:
-
Unlimited: By default, the contact information about all servers listed in the effective rule’s lists are sent to the managed devices. In addition, unless excluded in the effective rule, the servers listed in the default rule are appended to the servers listed in the effective rule.
-
Limit to <number> Servers per list: If you want to converse bandwidth between the server and the managed devices, specify the number of servers whose data must be sent to the managed devices at a time.
NOTE:You can also configure the setting in the Closest Server Default rule. The limit that you set in the Closest Server rule overrides the limit that you set in the Closest Server Default rule.
-
-
When you are finished, click to add the rule to the list.
-
If necessary, when you are finished creating rules, do the following:
-
Use the and buttons to reorder the rules in the list.
The rules are evaluated in the order they are listed. You should place the rules in the order you want them evaluated.
-
To modify the settings of a rule, select the desired rule, then click .
-