

Log in to your Windows 2000 server as Administrator.
If the Windows 2000 Configure Your Server window displays after login, uncheck the Show This Screen at Startup check box.
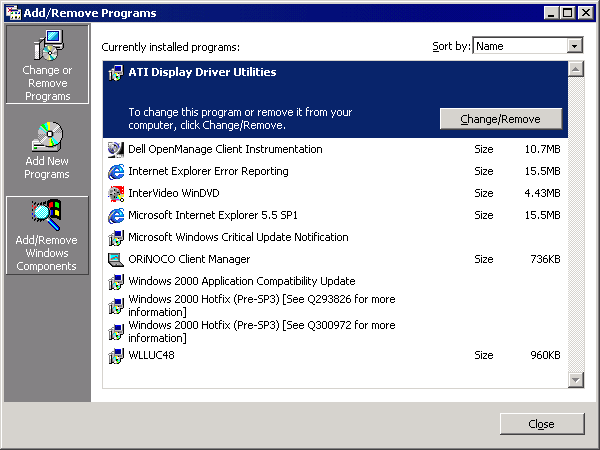
From the Windows desktop, click Start > Settings > Control Panel > Add/Remove Programs.
In the Add/Remove Programs window, click Add/Remove Windows Components.
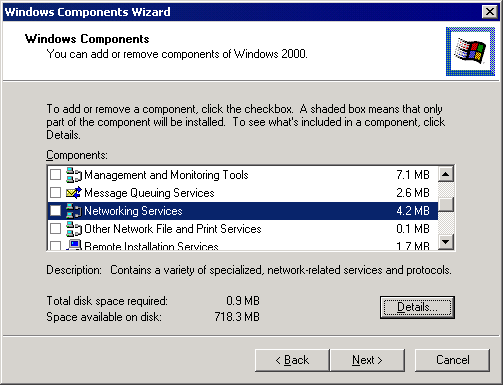
On the Windows Components page of the Windows Components Wizard, select Networking Services without changing the check box status > click Details.
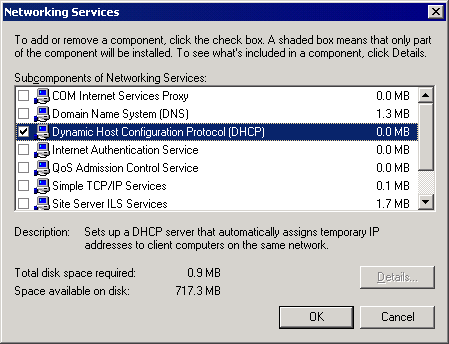
In the Networking Services dialog box, check Dynamic Host Configuration Protocol (DHCP) > click OK.
When the Windows Component Wizard displays again, click Next.
In the Windows Component Wizard, click Finish.
In the Add/Remove Programs window, click Close.
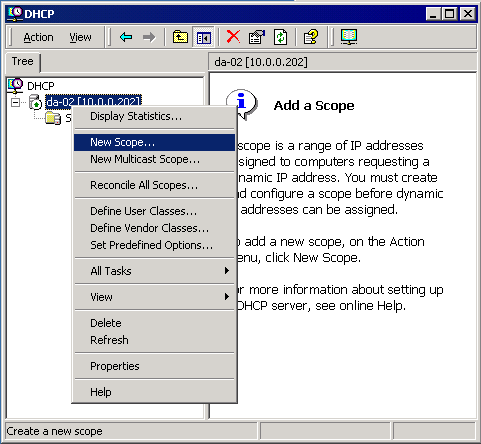
From the Windows desktop, click Start > Settings > Control Panel > Administrative Tools > DHCP.
In the DHCP window, right-click da-02 [10.0.0.202] > select New Scope.
On the Welcome page of the New Scope Wizard, click Next.
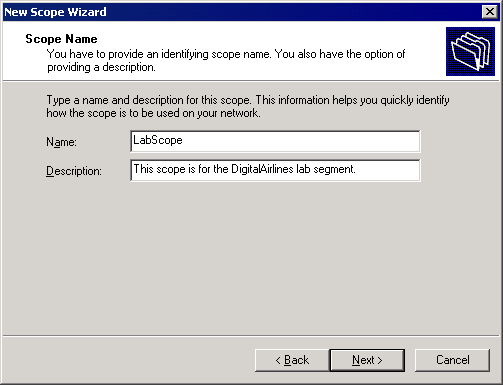
On the Scope Name page, type LabScope in the Name field > click Next.
On the IP Address Range page, fill in the fields:
Start IP Address: 10.0.0.50.
End IP Address: 255.255.255.0
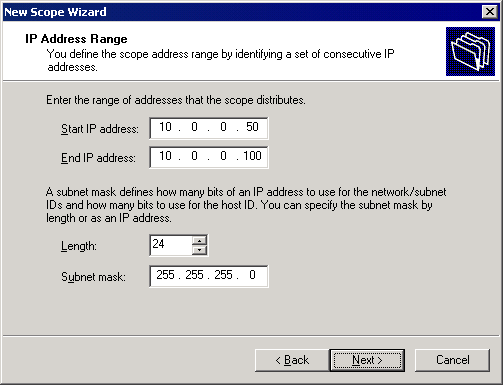
Click Next.
On the Add Exclusions page, click Next.
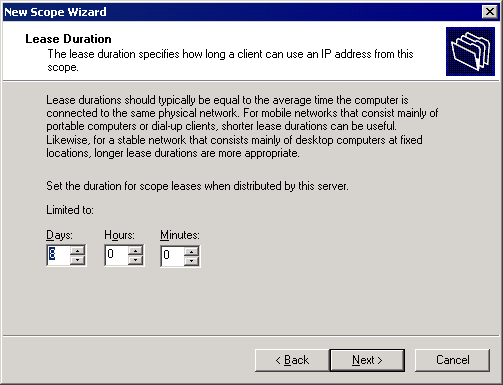
On the Lease Duration page, click Next.
On the Configure DHCP Options page, select Yes, I Want to Configure These Options Now > click Next.
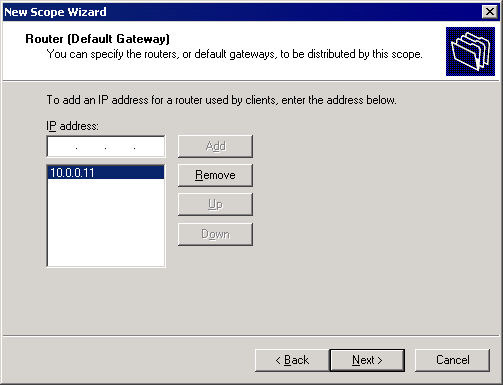
On the Router (Default Gateway) page, type your router address (if you have one) in the IP Address field > click Add > click Next.
In the Domain Name and DNS Servers window, fill in the fields:
Parent Domain: digitalairlines.com.
IP Address: 10.0.0.202
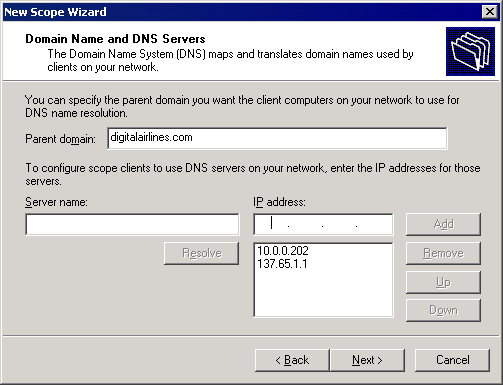
Click Add > if you have an external DNS server, enter its IP address > click Next.
On the WINS Servers page, click Next.
On the Activate Scope page, select Yes, I Want to Activate This Scope Now > click Next.

In the Completing the New Scope Wizard window, click Finish.
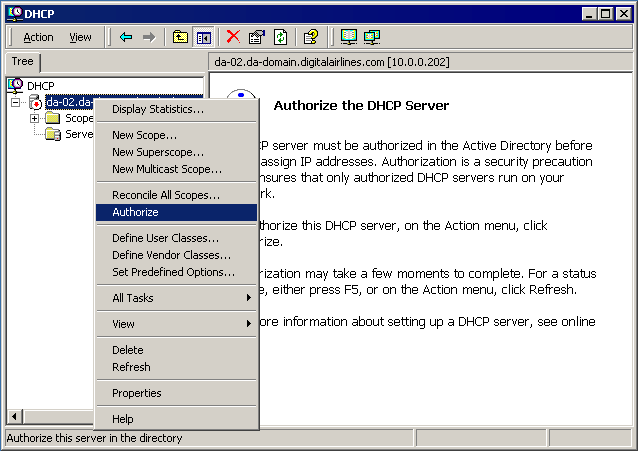
In the left pane of the DHCP window, right-click the DHCP server name > click Authorize.
Close the DHCP configuration utility.