Installing Novell NDS eDirectory on the ZENworks Windows 2000 server for this Lab Guide requires the following parts:
Although Microsoft* Active Directory is not required for ZENworks services, many Windows server environments use Active Directory, or its close predecessor Windows NT Domain Services, to better manage Windows server security.
For more seamless integration between ZENworks services and Windows Networking, it helps to synchronize accounts between Microsoft Active Directory and Novell eDirectory by using Novell Account Management. Novell Account Management can be set up quickly, and it provides bi-directional account synchronization---including password synchronization--- between the two directory services.
Use the following steps to install Novell eDirectory on the Windows 2000 server.
-
Insert the Novell eDirectory 8.61 CD. Autorun will start the Novell eDirectory setup.
-
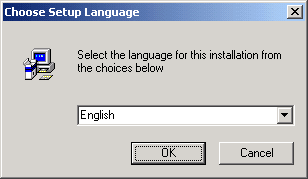
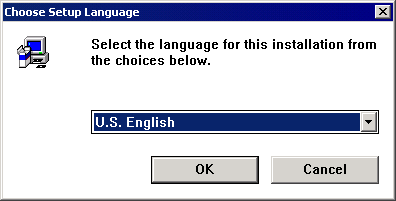
In the Choose Setup Language dialog box, click English > OK.

-
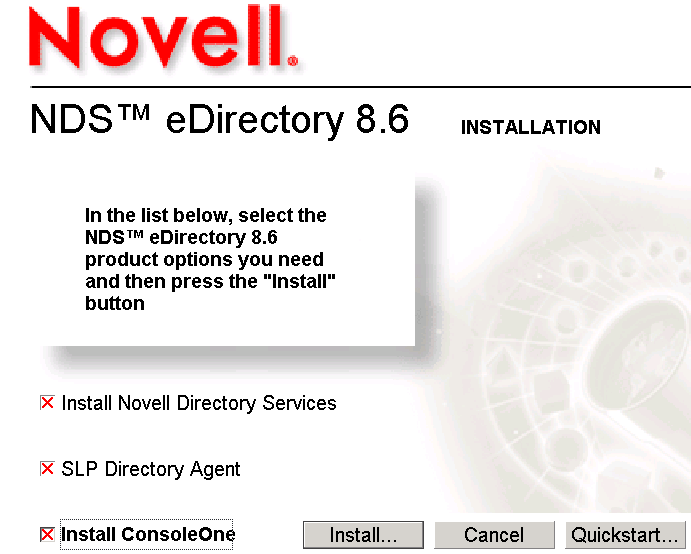
On the Novell eDirectory 8.6 Installation page, select all three options: Install Novell Directory Services, SLP Directory Agent, Install ConsoleOne options > click Install.
-
In the Novell NICI Server for Windows Installation window, click Next.
-
In the License Agreement window, click Accept.
-
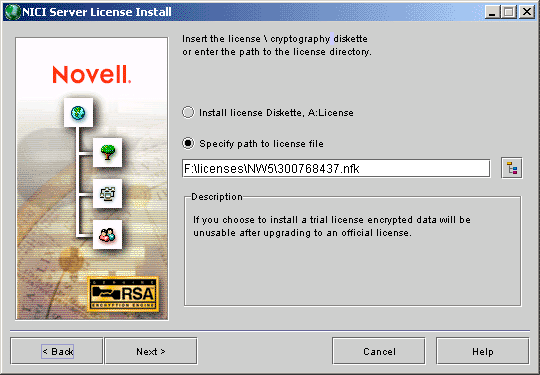
In the NICI Server License Install window, enter the path to your NICI license (.nfk) file > click Next.
-
In the Installation Complete window, click Close.
-
In the NDS® eDirectory Product Installation window, click Next.
-
In the License Agreement window, click Accept.
-
In the Languages window, click Next.
-
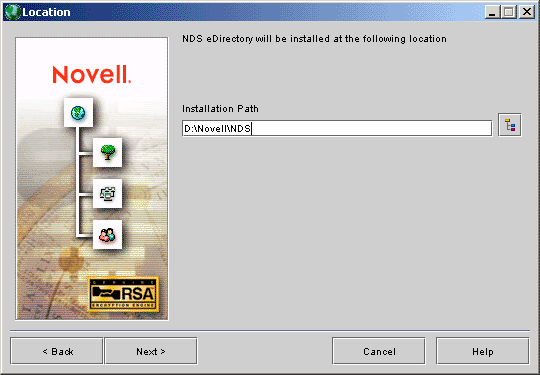
In the Location window, change the Installation Path field to D:\Novell\NDS > click Next.
-
In the Create Destination Location window, click Yes.
-
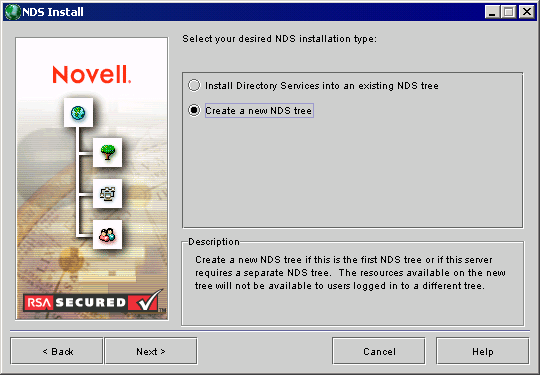
In the NDS Install window, select Create a New NDS Tree > click Next.
-
In the second NDS Install window, fill in the fields:
Tree Name:
DA_Tree
New Server Object Context:
DA-02-NDS.Servers.IST.Corp.DA
Admin Name:
Admin
Admin Context:
DA
Password:
novell
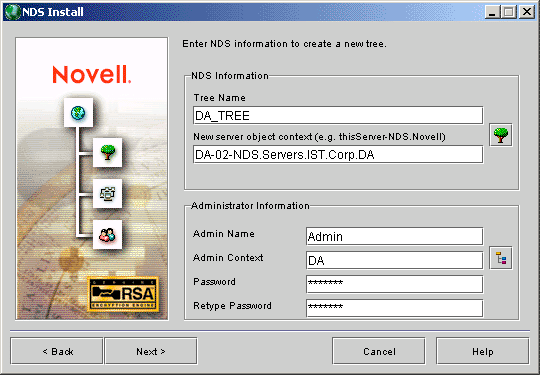
When you have finished filling out the fields, click Next.
-
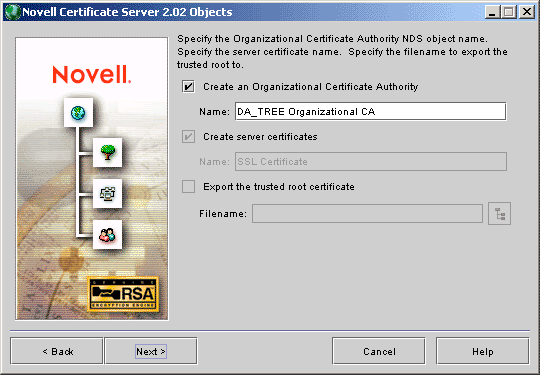
In the Novell Certificate Server window, accept the default options > click Next.
-
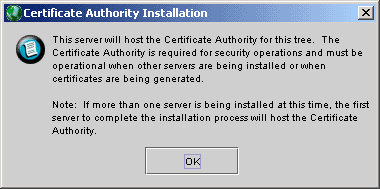
In the Certificate Authority Installation informational dialog box, click OK.
-
In the LDAP Configuration window, change the Clear Text Port to 388 > change the SSL Port to 635 > click Next.
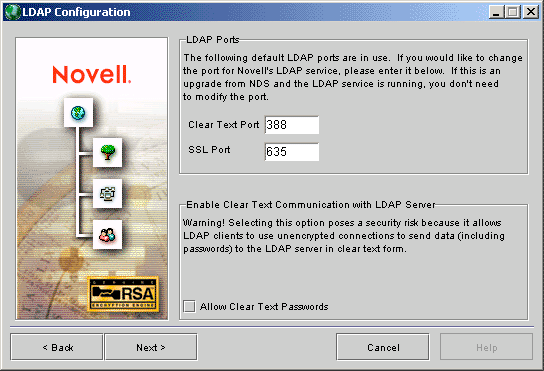
The default TCP/IP ports will cause the Novell LDAP server to conflict with Active Directory.
-
In the ConsoleOne® 1.3.3 Install window, click Next.
-
In the ConsoleOne 1.3.3 License Agreement window, click Accept.
-
In the Next window, leave all language options unchecked > click Next.
-
In the Location window, change the default installation path to D:\NOVELL\CONSOLEONE\1.2 > click Next.
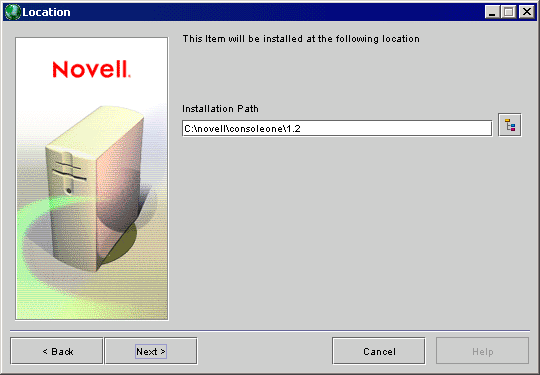
This step conserves space on the C: drive and ensures a smooth ZfD installation.
-
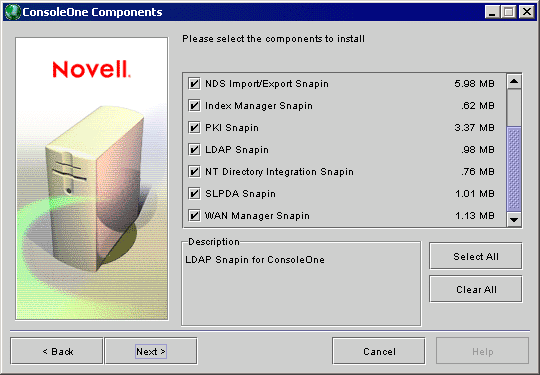
In the ConsoleOne Components window, leave all the default components selected > click Next.
-
In the Jinfonet - License Agreement window, select I Do Accept the Terms of this License Agreement > click Next.
-
In the Summary window, click Finish to initiate the ConsoleOne install Progress window.

-
In the Installation Complete window, click Close.
-
In the Choose Setup Language dialog box, click OK.
-
In the Welcome page, click Next.
-
In the Software License Agreement page, click Yes.
-
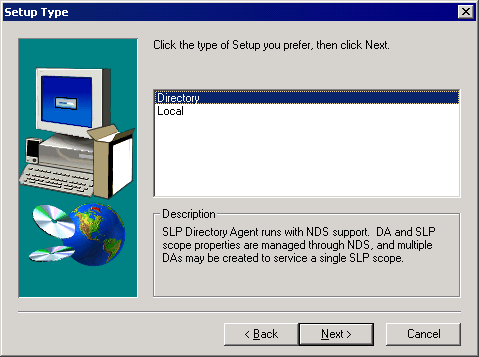
On the Setup Type page, select Directory from the list of options > click Next.
-
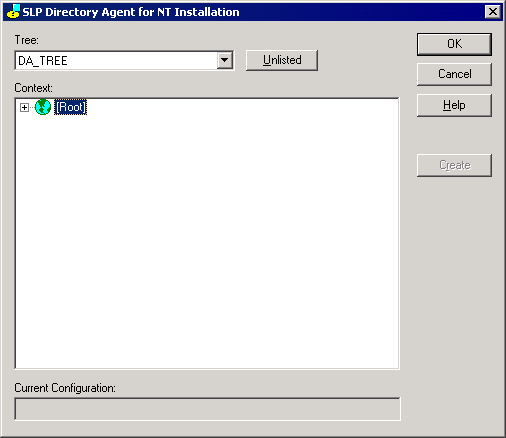
In the SLP Directory Agent for NT Installation dialog box, make sure that the Tree drop-down box shows DA_TREE. Click the expand tree button (+ symbol) next to [Root] and wait for the Novell Login dialog box to be displayed.
-
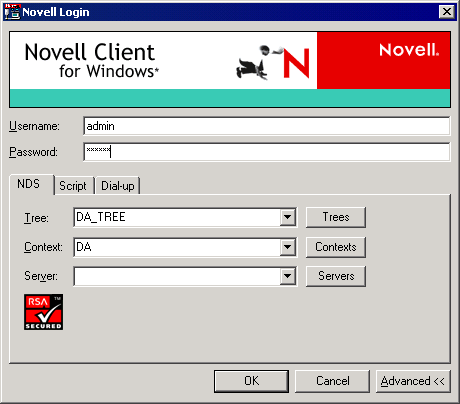
In the Novell Login dialog box, click the Advanced button > enter the following values > click OK:
Username:
Admin
Password:
novell
Tree:
DA_Tree
Context:
DA
-
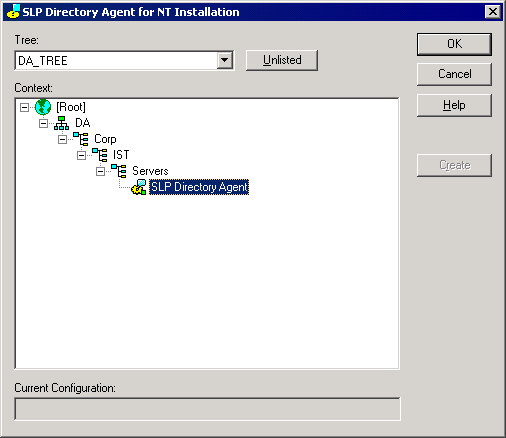
When login completes, select the Servers.IST.Corp.DA container.
NOTE: Notation for directory services typically specifies the lowest-level container first.
-
Click Create > rename the new agent SLP Directory Agent > click OK.
-
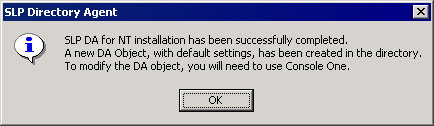
In the SLP Directory Agent confimation dialog box, click OK.
-
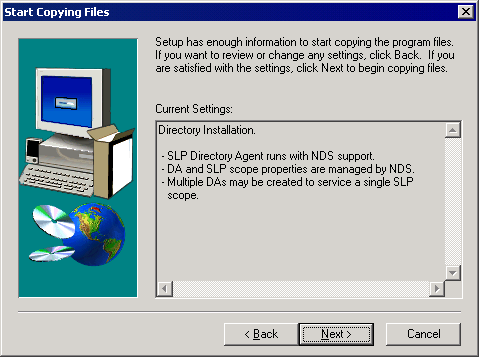
On the Start Copying Files page, click Next.
-
On the Setup Complete page, click Finish.
-
Most eDirectory installations do not require a reboot. However, if you are prompted to reboot, click OK > proceed to reboot.
If you are prompted only to Close, then you do not need to reboot. After clicking Close, click the Windows Start menu > Shut Down > Log off Administrator.
-
In the Novell Login dialog box, click Advanced.
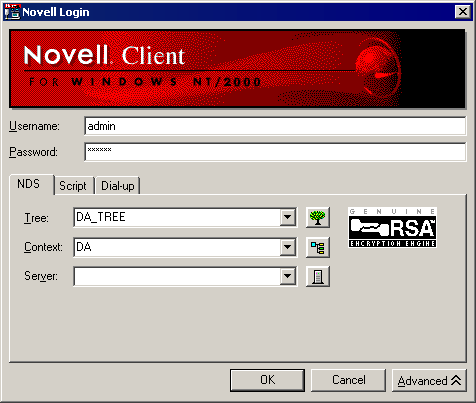
-
In the NDS tab's Tree field, type DA_TREE.
-
In the Context field, type DA.
-
In the Username field, type Admin.
-
In the Password field, type novell > click OK.
-
Locate the D:\NOVELL\NDS\NDSIMON.INI file and change its properties to disable the Read Only setting.
-
Use Notepad to open D:\NOVELL\NDS\NDSIMON.INI.
-
Find the line that starts with #httpport and remove the leading # symbol > change the port from 80 to 90 > save the file.
This step changes the NDS iMonitor Facility Web server to use port 90 so that the Microsoft IIS Web server can continue using port 80.