ZfD 3.2 ships with a set of pre-made reports for both Workstation Inventory and information on the ZENworks Application Launcher. Because there are many pre-made reports, this section will explore the interface, but it will not cover these reports extensively. After exploring the pre-made reports, this section explores how ZENworks inventory data can be exported to comma-separated value (CSV) format for use with any generic reporting tool, such as Crystal Reports.
-
In ConsoleOne, click Tools > ZENworks Reporting.
-
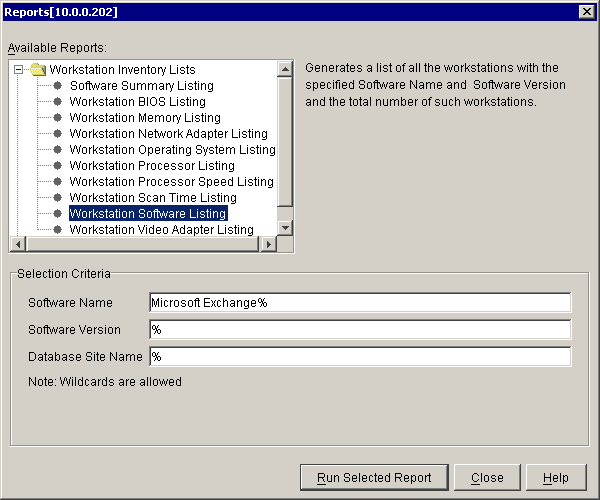
From the Reports window, select Workstation Inventory Lists > Workstation Software Listing. In the Software Name field, enter Microsoft Exchange%. Leave the Software Version and Database Site Name fields at the default of %, which is a wildcard character to ensure we do not further narrow the scope of the report.

-
To finish, click Run Selected Report.

-
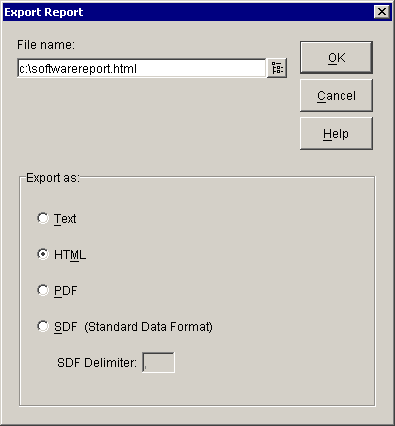
After viewing the report, click File > Export Report.
-
In the Export Report window's File Name field, type c:\softwarereport > enable the HTML option > click OK.
-
Close the View Report:ListSoftware window.
-
Use a Web browser to open the C:\SOFTWAREREPORT.HTML file that you exported.
HTML is one of four formats to which you can export the pre-made Zenworks Inventory reports.
- Text
- HTML
- PDF, which uses the Adobe* Portable Document Format
- SDF (Standard Data Format) uses delimited text file format, which is importable to various applications. (For example, by exporting to SDF, and then changing the file extension to CSV, you can open the report with Microsoft* Excel)
For many, the pre-made ZENworks Inventory reports may not cover exactly the data outputs needed. Custom reports can be made with various utilities, such as Crystal Decisions' Crystal Reports. To ease the pain of creating ODBC and SQL database queries, Novell® provides an export tool for use with ZfD inventory.
-
In ConsoleOne, click Tools > Data Export.
-
In the Inventory Database Export window, select Create a New Database Query > click Next.
-
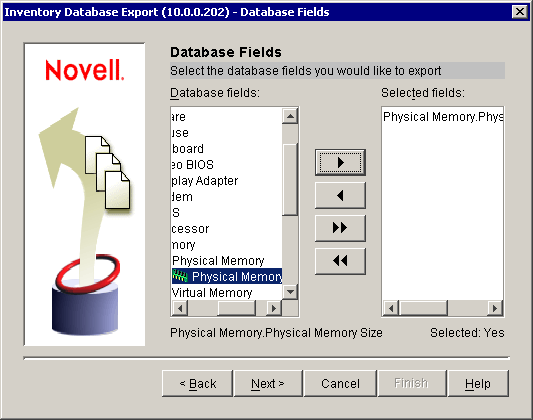
In the Database Fields screen, browse to select Workstation > Hardware > Memory > Physical Memory > Physical Memory Size > click the single right-arrow button to move this item to the Selected Fields list > click Next.
-
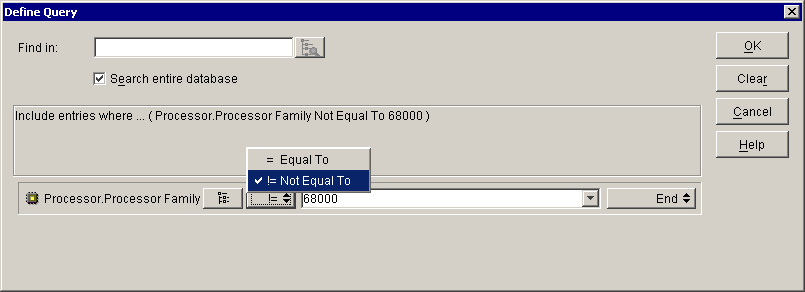
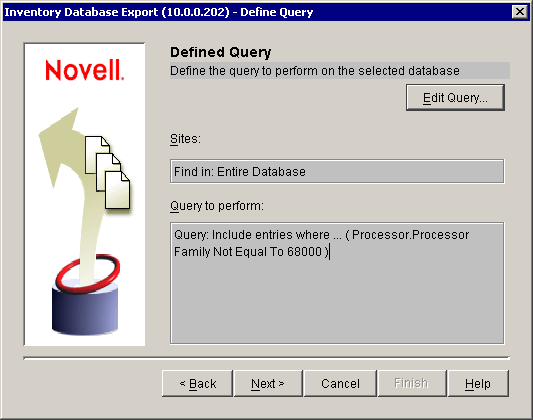
Click Edit Query > change the equal button ( ) to not equal (
 ) > OK.
This query ensures that all workstations will be exported, because ZENworks does not currently support the 68000 processor.
To run the export, the Export Wizard requires a query filter of some sort. We will set up a query to include all workstations.
-
At the Defined Query window, review your query > click Next > click Next > click Finish.
-
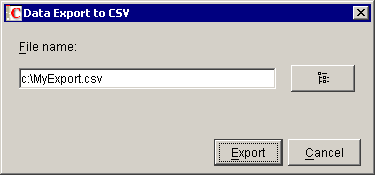
In the Data Export to CSV window, type c:\MyExport.csv in the File Name field > click Export.
Make sure you remember to type C:\ in front of the default CSV name.
-
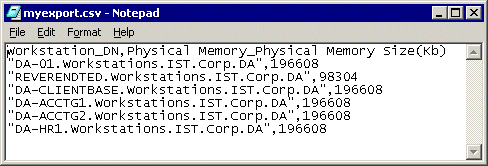
Start Notepad > open C:\MYEXPORT.CSV to see the results of the export.
In its raw form, this export example could be used to determine which workstations have sufficient memory to run specific applications, or a new operating system. By slightly restructuring the query portion of this procedure, you could use this tool to show only workstations that need a memory upgrade, and so forth.
The following graphics are examples of the inventory information you can view.


