1.2 Getting Started
This section includes the following:
1.2.2 The ZENworks Reporting Home Page
From the home page, you can quickly access the most frequently used features of the server. The menus are displayed based on user permissions.
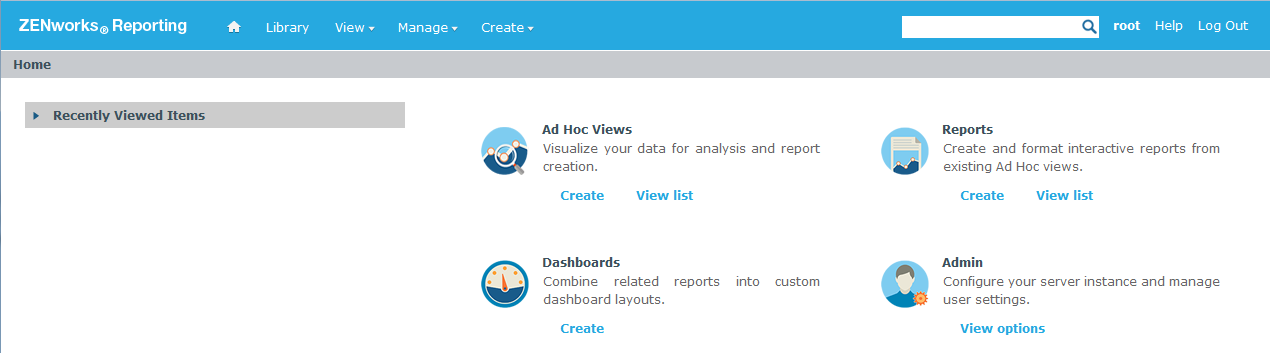
The home page contains the following icons:
-
: Displays a list of reports that you can view and run.
-
Launches the Data Chooser wizard, followed by the Ad Hoc Editor for designing Ad Hoc views that are the basis for creating reports on the server interactively.
-
: Launches the Dashboard Designer to integrate reports, input controls, graphics, labels, and web content in a single, integrated view.
-
Launches the Users and Roles page. Only administrators can view and access this menu. For information, see Section 5.0, ZENworks Reporting Management.
The following table provides a description of the menus on the home page:
Menu
Description

Enables you to return to the Home page.
Library
Displays the repository page that contains only the Ad Hoc views, reports, and Dashboards for which the current logged-in user has rights to view and perform actions.
The Library displays the following information:
-
: When the resource was created
-
: When the resource was last modified
Generally, the created date is earlier than the modified date. However, in scenarios such as the following, the created date might be after the modified date:
-
When an existing report (Report A) is modified, and then is subsequently copied into a new report (Report B). In the Library list, Report B’s creation date is the day it was created, but its modified date reflects the last time Report A was changed.
-
An existing report is exported from one system and imported into another. In the Library list, the is the date on which it was imported into the new system, and the is the date on which it was last modified in the original system.
View
-
Displays the repository of resources filtered by the search criteria in the panel. You can also access this by clicking on the Home page.
For more information about the search feature, see section Filtering Search Results.
-
Displays the repository of files and folders containing resources, such as reports, report output, data sources, and images.
-
Lists system messages, such as an error in a scheduled report.
Manage
-
Displays the Manage Users page.
-
Displays the Manage Roles page.
-
Displays the Server Settings page.
Only administrators can view and access these pages. For more information, see Section 5.0, ZENworks Reporting Management.
Create
-
: Launches the Ad Hoc Editor for designing views interactively. You can also access it by clicking on the Getting Started page.
For creating an Ad Hoc View, see Section 2.2, Creating an Ad Hoc View.
-
: Launches the Create Report page for creating a report by selecting the required Ad Hoc view. You can also launch by clicking on the home page.
For creating a report, see Section 2.3, Generating an Ad Hoc Report.
-
: Launches the Dashboard Designer to integrate reports, input controls, graphics, labels, and web content in a single, integrated view.
For more information, see Section 3.0, Working with ZENworks Reporting Dashboards.
If you log in as an administrator, the home page is displayed with additional options and menu items for managing users, roles, and settings.
-
1.2.3 Browsing the Repository
The Repository is the internal storage for reports, analysis views, and related files of the server. The Repository is organized into folders that contain resources such as file systems. However, unlike a file system, the repository is stored as a private database that only ZENworks Reporting can access directly.
You can access the Repository page from the Home page by using any of the following methods:
-
Click
-
Click
-
Click
-
Click
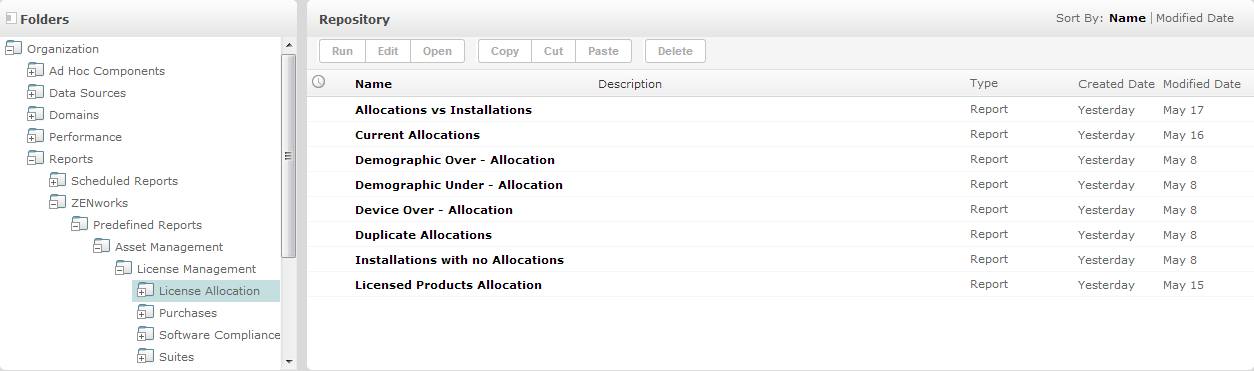 The Repository page provides a different view of the same set of underlying objects. From the Repository page, you access the reports and other files stored on the server. If you have appropriate rights to these , you can browse the repository content.
1.2.4 Searching the Repository
Based on access rights, you can search the entire repository or narrow the search by using filters. You can use filters based on the resource name, who changed the resource, the type of resource, the date of resource creation and schedule.
Searching All Resources
To search all resources in the repository:
-
Click or use the field in the top right corner of the Home page.
-
In the Filters panel, choose one of these filters: , , or
-
Select .
-
Click
 .
.The search results display files that you have permission to view. Click a resource in the list to view.
Filtering Search Results
If you enter a search criteria and click ![]() at the top of any server page, the server will not use filters. The search feature uses the following default settings:
at the top of any server page, the server will not use filters. The search feature uses the following default settings:
-
Includes sub folders
-
Starts at the top-most folder visible to the user
-
Searches for reports, report outputs, or other resources
-
Sorts alphabetically by name
If you click and click ![]() on the search results page, the server uses the filters set in the panel.
on the search results page, the server uses the filters set in the panel.
NOTE:The search criteria that you enter in the search field is not cleared automatically. To clear the search criteria, click ![]() .
.
You can refine a search by using filters. For example, using filters you can find the most recently viewed reports. You can set the following types of filters:
-
User
-
Resource
-
Access time
-
Scheduled report
You can set each filter independently.
The User filter includes the following settings:
|
Filter Setting |
Description |
|---|---|
|
All available (default) |
All resources are displayed. |
|
Modified by me |
Selects resources that were last modified by the logged-in user. |
|
Viewed by me |
Selects resources that were run and viewed by the logged-in user. This filter applies to visualization types and also to resources such as images that are included in the reports. |
The Resource type filter has the following settings:
|
Filter Setting |
Description |
|---|---|
|
All types (default) |
Displays all resources. |
|
Reports |
Displays only reports. |
|
Report outputs |
Displays the output from reports that were scheduled or run in the background. Report outputs can be any of the supported export types, such as HTML and PDF. |
|
Ad Hoc views |
Displays only views. |
|
Dashboards |
Displays only dashboards. |
|
Domains |
Displays only domains. |
|
Data sources |
Displays only data sources. |
|
Deprecated Reports |
Displays only deprecated reports. |
The access time filter has the following settings. All time settings are relative to the effective time zone of the user:
|
Filter Setting |
Description |
|---|---|
|
Any time (default) |
Displays all resources. |
|
Today |
Displays resources viewed or modified during the current day. |
|
Yesterday |
Displays resources viewed or modified yesterday. |
|
Past week |
Displays resources viewed or modified during the past 7 days, including today. |
|
Past month |
Displays resources viewed or modified during the past 30 days, including today. |
The scheduled report filter has the following settings:
|
Filter Setting |
Description |
|---|---|
|
Any schedule (default) |
Displays all resources. |
|
Scheduled |
Displays reports that have scheduled jobs. |
|
Scheduled by me |
Displays reports that have jobs scheduled by the current logged in user. |
|
Not scheduled |
Displays reports that do not have scheduled jobs and all other resource types. |
Tips to search for resources:
-
Use word fragments.
-
Search for the display name or part of the display name of a resource.
-
Search for words or fragments in the description of a resource.
-
Use multiple words.
-
Use case-insensitive words.
-
Do not search for folder names.
-
Do not enter quotes or symbols between terms.
1.2.5 Using Repository Resources
After finding a resource in the Repository panel, you can perform the following tasks:
-
To run and view the report, click the report name.
-
To perform other options in the context menu, right-click the name of a resource. For example, or . Options are displayed in the context menu based on the rights assigned to the user.
-
To select one or more resources, click anywhere in the row, except the resource name. Use the context menu or buttons above the results list (, , , , (move), or ). If the resource does not support the operation or if you do not have permission, these buttons might not be available. For example, when you select a dashboard or an Ad Hoc report, the button is not available if you do not have the write permission.
You might also need permission to access the folder or the dependent file; such as an image of a resource. For example, to schedule a report, you need to have read, write, or delete permissions on the folder in which the server saves the report output.
The following icons might appear in the panel:
-
The
 icon indicates that the report is scheduled to run or is running in the background. To viewthe list of jobs scheduled for the report, click this icon.
 -
The
 icon indicates that the report has save options for its input controls. To list the save options, click the icon.