14.2 Enrolling devices using the Apple Device Enrollment Program
The Device Enrollment Program (DEP) is part of the Apple Deployment Programs and provides administrators with a streamlined way to deploy multiple corporate owned iOS devices. Upon device activation, over-the-air configuration of the device is immediate and enrollment with the MDM server is automatic. There is no need for IT administrators to physically access each device to complete the setup. The benefits of this program are:
-
Zero-touch enrollment of devices to the MDM Server
-
Wireless supervision of devices
-
Enforce MDM Enrollment of devices
-
Lock MDM Profiles on the devices
-
Streamlined setup process
The procedure to enroll devices to the Apple Device Enrollment Program (DEP) using ZENworks is summarized in the following workflow. However, as a prerequisite, you need to first set up a DEP account and associate your sales information with it. For more information on setting up a DEP account, see the Apple Support Documentation.
NOTE:With the iOS 11.x release, you can associate any iOS 11.x device to an existing DEP account (even if these devices are not purchased directly from Apple or an Apple reseller) using the Apple Configurator tool. For more information on associating these devices using the Apple Configurator tool, see Enrolling existing devices to the Apple Device Enrollment Program for simplified provisioning with ZENworks.
NOTE:Enrollment of Apple TV devices using the Apple Device Enrollment Program is currently supported on an experimental basis. The enrollment of these devices are the same as enrolling an DEP enabled iOS device.
To know more about the Apple Deployment Program, you can also watch the following videos to know more about the Apple Deployment Program:
IMPORTANT:If you are enrolling devices using Apple School Manager, ensure that the Device Manager role is assigned to your Apple School Manager account. For more information, see the Apple School Manager Help.
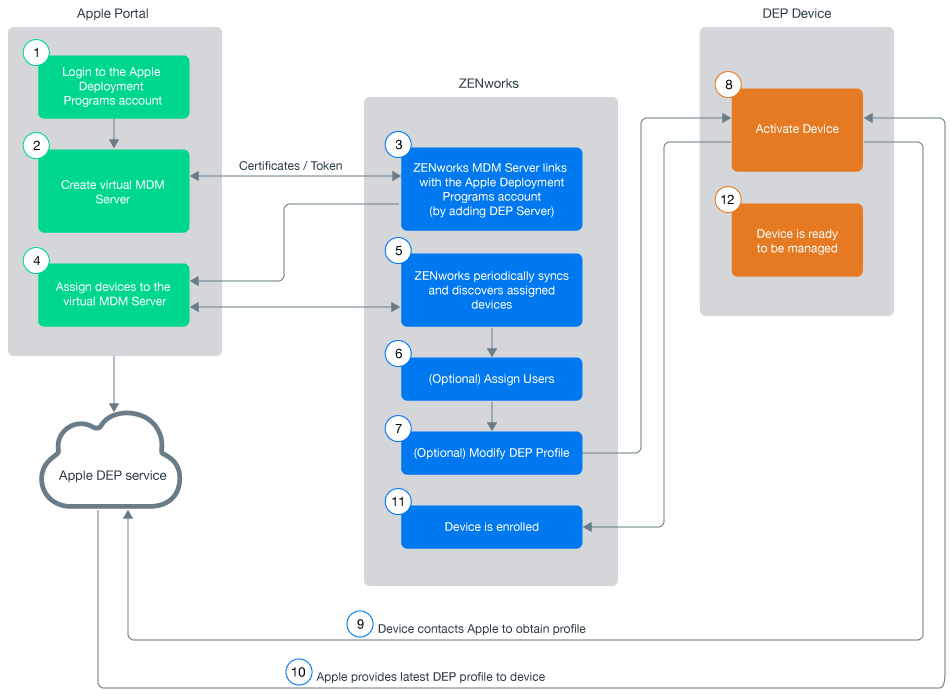
The workflow associated with enrolling DEP devices are as follows:
14.2.1 Linking ZENworks to the Apple Deployment Programs Account
A DEP Server links the ZENworks MDM Server to the virtual MDM Server that you need to create in the DEP portal.
A ZENworks MDM Server can be linked to multiple virtual MDM Servers. However, a virtual MDM Server that is already linked with a ZENworks MDM Server, cannot be linked to another ZENworks MDM Server. The devices assigned to these virtual MDM Servers will enroll to the associated ZENworks MDM Server.
To add a DEP Server:
-
On the Getting Started with Mobile Management page, click . Alternatively, navigate to > > > .
-
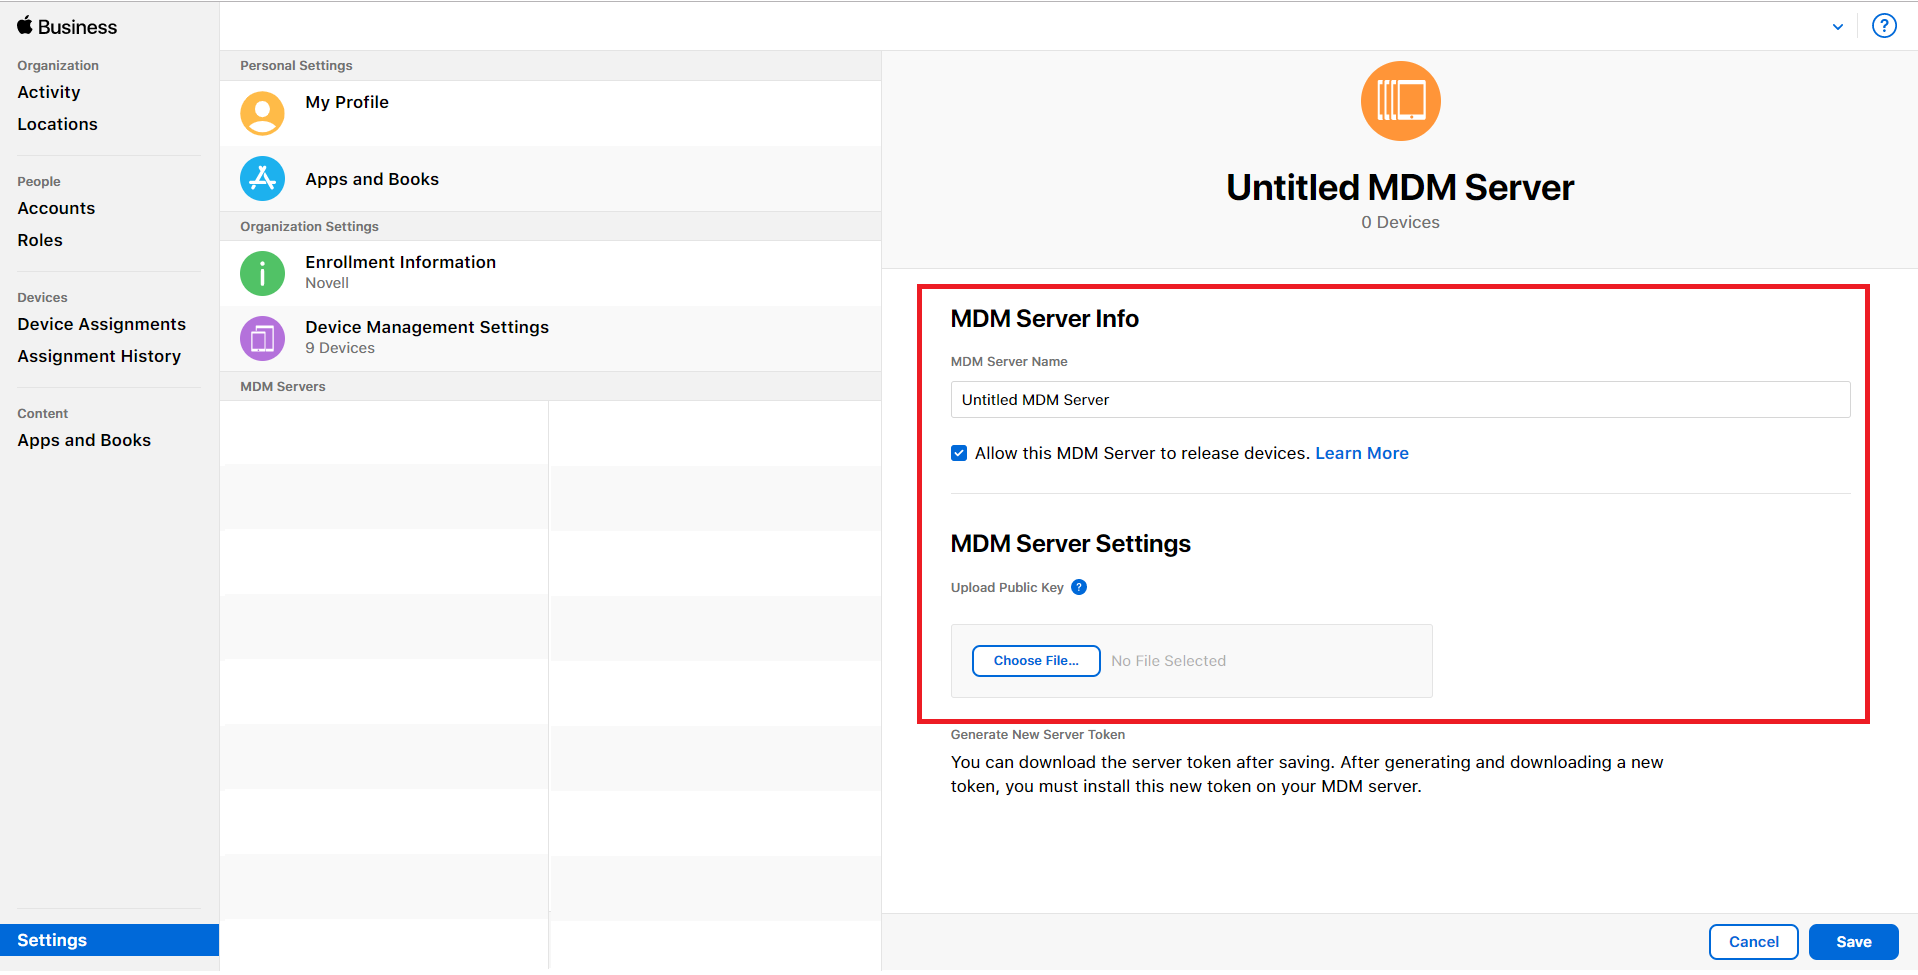
Click to link a ZENworks MDM Server to your deployment program account.
-
Click the Browse icon, select an MDM Server and click to download and save the Public Key certificate of the selected MDM Server.
-
Click the Apple Business Manager or the Apple School Manager portal and sign in using your DEP account credentials. On this portal:
-
Navigate to on the left pane of the page.
-
Click in . Click on the right pane.

-
Specify a name for the DEP Server.
-
Upload the Public Key of the ZENworks MDM Server that you had saved earlier in the section. Click .
-
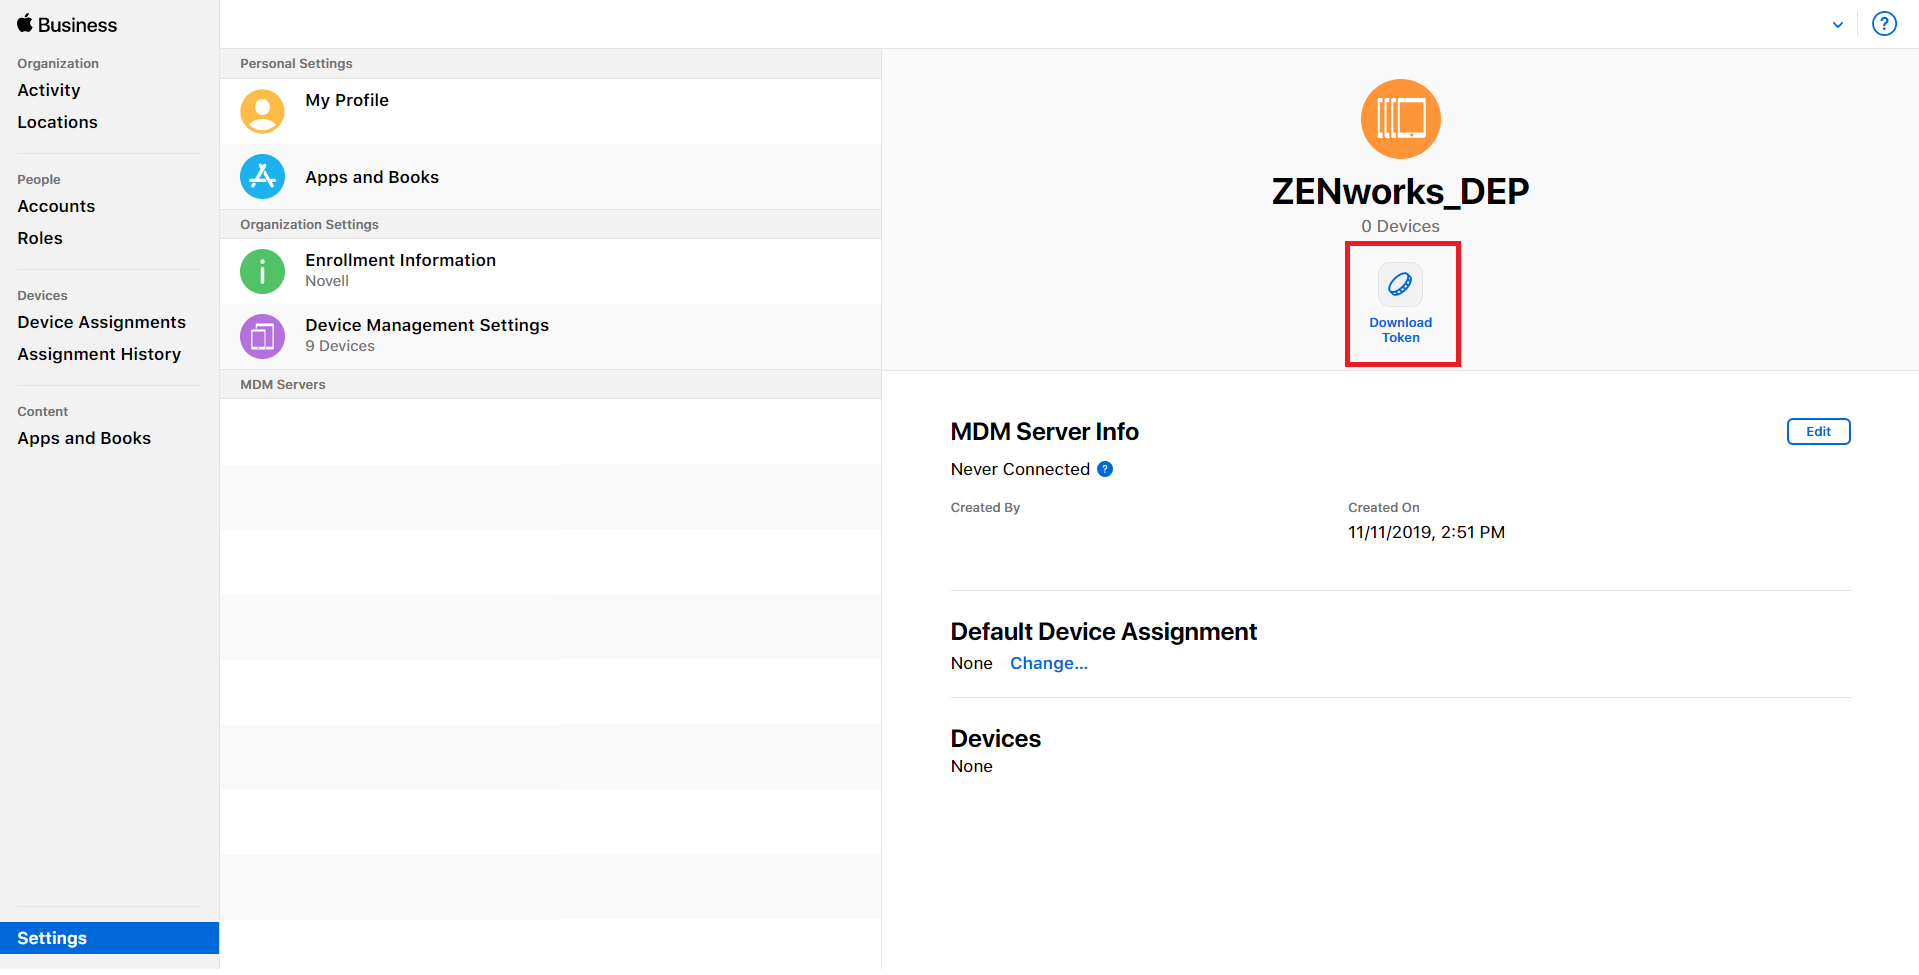
Click and download the token issued by Apple and click .
-
-
In ZCC, click to upload the DEP token issued by Apple to the selected ZENworks MDM Server. This token enables the ZENworks MDM Server to securely connect with the Apple DEP web service.
-
Click . You have now created a DEP Server in ZCC.
14.2.2 Assigning Devices
You need to create at least one virtual MDM Server in the Apple portal before you begin assigning devices.
-
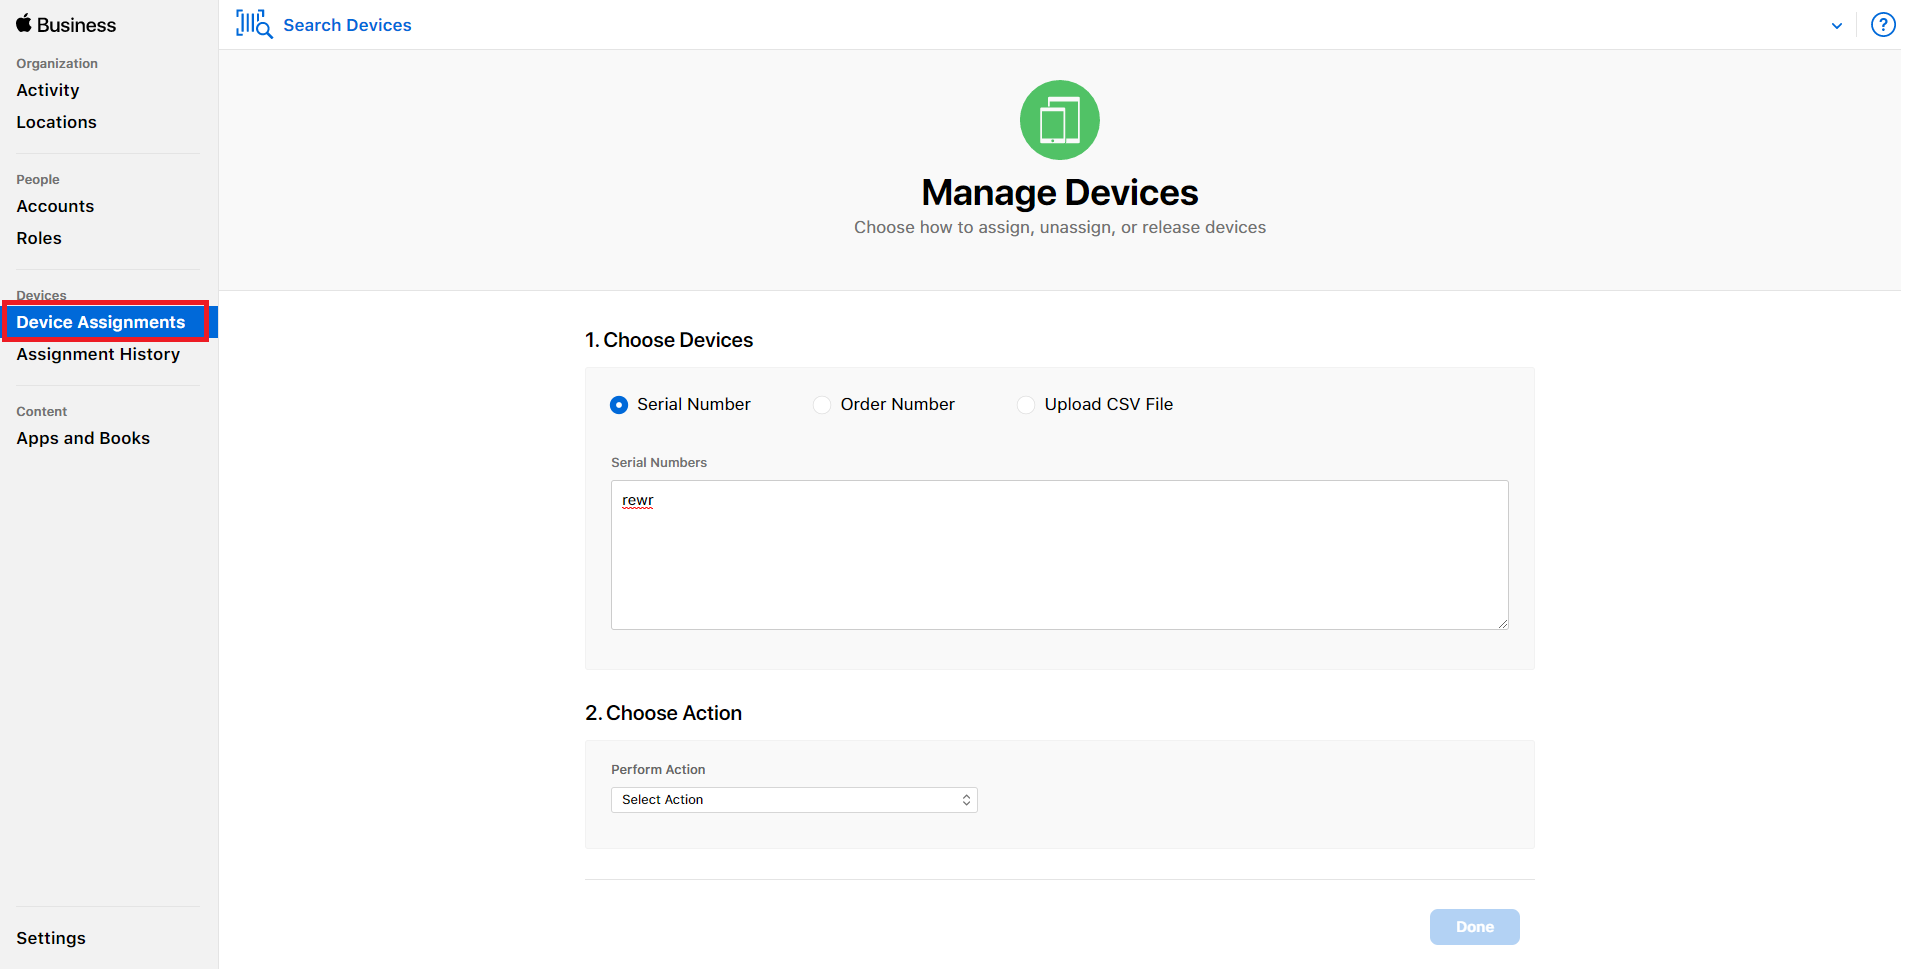
Click the Apple Business Manager or the Apple School Manager portal and click on the left pane of the page.
-
You can assign devices based on:
-
Serial Number: Specify each serial number separated by a comma.
-
Order Number: The quantity and type of devices are displayed.
-
Upload CSV File: Upload a comma-separated value (CSV) file that contains a list of device serial numbers.
NOTE:Apple TV devices can be assigned using a serial number.
-
-
Select the virtual MDM Server to which you want to assign the devices, in the drop down menu.
-
Click .
NOTE:Only those devices that are assigned to the virtual MDM Server in the Apple portal are identified as DEP devices in ZCC. If a DEP enabled device is enrolled to ZENworks (using ZENworks User Portal) but is not assigned to the virtual MDM Server in the Apple portal, this device will not be identified as a DEP device.