5.4 Using the Patches Page
The following sections provide more information on the Patches page:
5.4.1 Patches
This section of the Patches page provides the following information about patches:
-
Name of the patch
-
Total number of patches available
-
Impact of the patch
-
Statistics of the patch
-
Date when the patch was released
This section features the menu, which enables you to perform any of the five actions related to patches: , , , , and . For more information on these actions, see Action Menu Items.
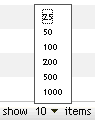
The section also features the drop-down list that enables you to select the number of items to be displayed in this section, as shown in the following image:
Figure 5-4 Show Items Drop-Down List
The following sections explain the information on the Patches page:
Patch Name
This is the name that identifies a patch. This name typically includes the vendor or manufacturer of the patch, the specific application, and version information.
An example of a patch name is shown as follows. It indicates that Adobe is the vendor, Acrobat Reader is the application, and 6.0.6 is the version information:
Figure 5-5 Example of a Patch Name

-
All Microsoft security patches are titled with their Microsoft Security Bulletin number in the format MS0x-yyy, where 0x indicates the year the patch was released and yyy indicates the sequential number of the released patch. These patches are critical and must be installed as soon as possible.
-
Names of all Microsoft non-security patches include the Knowledge Base (KB) article number. These patches can be installed at your discretion.
-
The names of Microsoft service packs and third-party patches do not usually contain a KB number, and never a Microsoft Security Bulletin number. Test these service packs thoroughly to ensure that they have the expected results.
For more information on the naming conventions for patches, refer to Comprehensive Patches and Exposures (CVE), which is a list of standardized names for patches and other information exposures. Another useful resource is the National Patch Database, which is the U.S. government repository of standards-based patch management data.
Total Patches Available
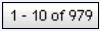
The total number of patches that are available for deployment is displayed in the bottom left corner of the table. In the following figure, the total number of available patches is 979:
Figure 5-6 Show Items Drop-down List
Patch Impacts
The type of patch defined on the basis of the severity of the patch; the type can be Critical, Recommended, Informational, or Software Installers. Each impact is described as follows:
-
Critical: Novell has determined that this type of patch is critical, and should be installed as soon as possible. Most of the recent security updates fall in this category. ZENworks Server automatically downloads and saves the patches that have critical impact.
-
Recommended: Novell has determined that this patch, although not critical or security related, is useful and should be applied to maintain the health of your computers. You should install patches that fall into this category.
-
Software Installers: These types of patches are software applications. Typically, this includes software installers. The patches show if the application has not been installed on a machine.
-
Informational: This type of patch detects a condition that Novell has determined is informational. Informational patches are used for information only. There is no actual patch to be installed.
Patch Management impact terminology for its patch subscription service closely follows the vendor impact terminology for patch criticality. Each operating system has a vendor-specific impact rating and that impact is mapped to a Novell rating as described in this section. Patch Management, following the recommendations of Lumension Security, increases or steps up the severity of the impact rating. For example, Microsoft classifications for Critical, Important, and Moderate patches are all classified as Critical by Novell.
The following table lists the mapping between Novell and Microsoft patch classification terminology:
Table 5-3 Novell and Microsoft Patch Impact Mapping
|
Novell Patch Impacts |
Windows |
Other |
|---|---|---|
|
Critical |
Critical Security Important Moderate |
NA |
|
Recommended |
Recommended Low Example: Microsoft Outlook 2003 Junk E-mail Filter Update |
NA |
|
Software Installers |
Software Distribution Example: Microsoft Windows Malicious Software Removal Tool (Virus Removal) |
Adobe 8.1 software installer |
|
Informational |
NA |
NA |
Source: Lumension Security
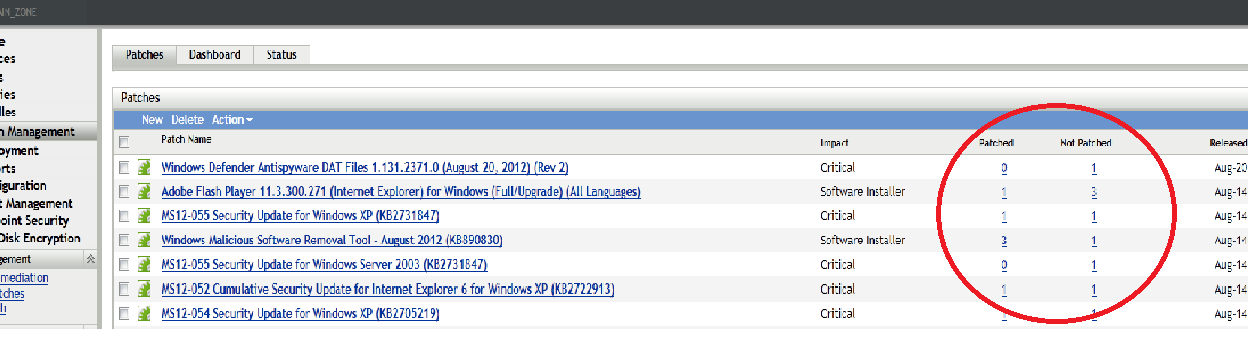
Patch Statistics
Patch statistics show the relationship between a specific patch and the total number of devices (or groups) within ZENworks Server that meet a specific status. The patch statistics appear in two columns on the far right side of the Patches page. Each column status is described as follows:
-
Patched: Displays a link indicating the total number of devices to which the corresponding patch has been applied.
Clicking this link displays a page that lists the patched devices, in alphabetical order.
If a patch does not support uninstallation, the option in the menu is disabled.

The Patched page provides the following information about the devices to which a patch has been applied.
Item
Definition
The name of the device registered with Novell ZENworks 11 SP2 Patch Management to which the patch is to be deployed.
The last time the device contacted the Patch Management Server.
The operating system of the device.
The name of the DNS server.
The IP address of the device.
You can uninstall the patch by using the option in the menu.
-
Not Patched: Displays a link indicating the total number of devices to which the corresponding patch has not been applied.
Clicking this link displays a page that lists these devices, in alphabetical order.

The Not Patched page provides the following information about the devices to which a patch has been applied.
Item
Definition
The name of the device registered with Novell ZENworks 11 SP2 Patch Management to which the patch is to be deployed.
The last time the device contacted the Patch Management Server.
The operating system of the device.
The name of the DNS server.
The IP address of the device.
You can deploy the patch to these devices by using the option in the menu.
-
Information: The Information page displays detailed information for a selected patch.

You can view the following information for a patch:
Property Name
Definition
Name
The name of the patch.
Impact
The impact of the patch as determined by Novell. See Patch Impacts.
Status
Status of the patch; can be , or .
Vendor
The name of the vendor.
Released on
The date the patch was released by the vendor.
Vendor Product ID
The ID number given to the product by the vendor.
Description
The description of the patch; includes detailed information concerning the defect or issue resolved by this patch, deployment notes, and the prerequisites for deployment.
Number of Devices Patched
The number of devices to which the patch has been applied.
Number of Devices Not Patched
The number of devices to which the patch has not been applied.
Number of Devices Not Applicable
The number of devices to which the patch does not apply.
The patches shown in the Patches page have different icons indicating their current status. The following table describes the icons for each patch:
Table 5-4 Patch Icons
|
Patch Icon |
Significance |
|---|---|
|
|
Indicates the patches that are disabled. Disabled patches are hidden by default. Use the filter in the panel to show these items. |
|
|
Indicates that only the fingerprint information for the patch has been brought down from the ZENworks Patch Subscription Network. This icon represents the patches that are not cached. |

|
Indicates that a download process for the bundles associated with the selected patch is pending. |

|
Indicates that a download process for the bundles associated with the selected patch has started. This process caches those bundles on your ZENworks Server. |
|
|
Indicates that the fingerprints and remediation patch bundles that are necessary to address the patch have been cached in the system. This icon represents the patches that are cached and ready for deployment. |

|
Indicates that an error has occurred while trying to download the bundle associated with the selected patch. |
Patch Release Date
The date the patch was released by the vendor is displayed in columnar form. The latest released patches are displayed in bold font and the released date is displayed under the Released On column.
Sorting of patches by released date
Clicking the Released On column lets you sort patches by their release date.
Patches released within the last 30 days are displayed in bold font
All the patches released in last 30 days are displayed in bold font.
Patch Creation
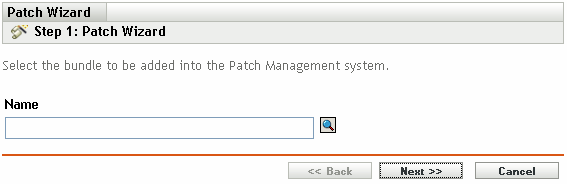
The Patches section features a Patch Wizard, which enables you to create custom patches for your devices. The wizard assists in selecting patch bundles and modifying patch details.
When you select the menu item on the Patches page, the Patch Wizard appears as shown in the following figure:
Figure 5-7 Patch Wizard
The following sections provide more information on each step of the wizard:
Add Patch Bundle
Adding a bundle to the existing Patch Management System is the first step in creating a patch using the Patch Wizard.
To add one or more bundles to a patch:
-
Click the menu item on the Patches page to open the Patch Wizard.
-
Click the
 icon. The following window appears:

-
Click the arrow next to the option to display the available bundles in the folder.
-
Click the arrow next to a vendor to display the available bundles of that vendor.
-
Click the desired bundle.
-
Click to confirm bundle selection.
-
The window closes and the Select Bundles page displays the selection.
NOTE:You can associate only one bundle with a patch.
After selecting the bundle to add to the patch, click the button to modify the patch details. Click to exit the wizard.
Modify Patch Details
The Modify Details page allows you to add information relevant to the created patch. Modifying patch details is the second step in creating a patch using the Patch Wizard.
Figure 5-8 Modify Patch Details
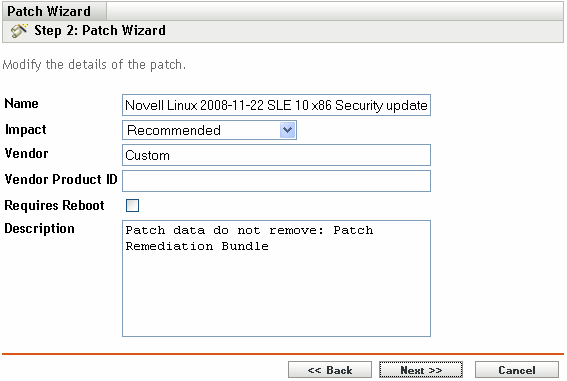
You can modify the following information for a patch:
|
Property Name |
Definition |
|---|---|
|
|
The name of the patch. |
|
|
The impact of the patch as determined by Novell. See Patch Impacts. |
|
|
The name of the vendor. |
|
|
The ID number given to the product by the vendor. |
|
|
Whether a reboot is required after patch deployment |
|
|
The description of the patch; includes detailed information concerning the defect or issue resolved by this patch, deployment notes, and the prerequisites for deployment. |
Click the button to open the Export Patches Summary page. Click the button to return to the previous page. Click to exit the wizard.
Export Patches Summary
The Export Patches Summary page of the Patch Wizard displays the summary of the patch creation you have scheduled in the previous steps. Summarizing the important points of the creation is the last and third step in creating a patch.
Figure 5-9 Export Patches Summary
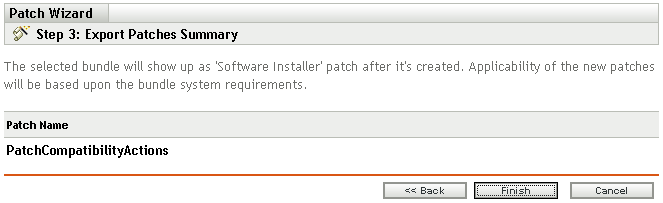
The Export Patches Summary page displays the name of the patch.
Click the button to complete the process of creating a patch. Click the button to return to the previous page. Click to exit the wizard.
NOTE:After creating a new patch, you cannot immediately deploy it to any devices. This is because the Patch Management Server does not recognize the patch yet. To enable deployment, perform a subscription update after the new patch is created.
Patch Deletion
The Patches section enables you to remove patches from the Patch Management System.
To delete a patch:
-
Select the check boxes for the patches you want to delete and click the menu item.
A message appears, asking you to confirm patch deletion.

-
Click Yes to confirm the deletion. Click No to return to the Patches page.
Choosing to delete patches also removes all the bundles associated with the selected patches from the Patch Management System. Performing a subscription update adds the deleted bundles to the Patch Management System.
Action Menu Items
The section also features an menu, which enables you to perform one of five actions on the patches listed on the page. The following figure shows the five options in the menu:

The menu consists of the following five options:
-
Deploy Remediation: Enables you to deploy a patch. To use this option, select the check boxes for the patches you want to deploy and select from the menu options to open the Deploy Remediation Wizard. For more information, see Section 6.0, Using the Deploy Remediation Wizard.
-
Enable: Allows you to enable a disabled patch.
-
Disable: Allows you to disable a patch. To use this option, select the check box for the desired patch and select . The selected patch is removed from the list.
Disabling a patch also disables all the bundles associated with it.
-
Update Cache: Initiates the download process for the bundles associated with the selected patch and caches those bundles on your ZENworks Server.
The remediation patch bundles must be cached before they are installed on the target device.
To use this option:
-
Select one or more patches in the patches list.
-
In the menu, click .
The patch icon changes to
 . While the download is in progress, the icon changes to . When caching is complete, the color of the patch icon changes to green. This indicates that the patch remediation is ready to be deployed.
You can sort the patches in ascending and descending alphabetical order. To sort, click the arrow in the column heading as shown below.
Figure 5-10 Patch Name Column

-
-
Update Dashboard Report: Enables you to update the dashboard report with the latest statistics.
NOTE:To know when a patch was downloaded, view the panel for that patch in the section.
5.4.2 Patch Information
You can view detailed information for a selected patch in the section. Clicking the name of a patch displays the details of that patch.
For example, if you select the patch called from the list of patches, the section displays the result of a patch analysis for the selected patch, as shown in the following figure:
Figure 5-11 Patch Information for a Selected Patch

The following table defines each property name in the section:
Table 5-5 Property Names in the Patch Information Section
|
Property Name |
Definition |
|---|---|
|
Name |
The name of the patch. |
|
Impact |
The impact of the patch as determined by Novell. See Patch Impacts. |
|
Status |
Status of the patch; can be , or . |
|
Vendor |
The name of the vendor or manufacturer. |
|
Released on |
The date the patch was released by the vendor. |
|
Vendor Product ID |
The ID number given to the product by the vendor. |
|
Description |
The description of the patch; it includes the advantages of deploying the patch and the prerequisites for deployment. |
|
Requires Reboot |
Whether a reboot is required after patch deployment |
|
Supports Uninstall |
Whether the patch supports an uninstall after installation |
5.4.3 Searching for a Patch
The section on the Patches page offers extensive search and data filtering options that allow you to search for specific patches and filter result sets based on the status and impact of the patches. Searching and filtering can be performed independently of each other or can be combined to provide extensive drill-down capabilities. The following figure shows the section:
Figure 5-12 Search Section on the Patches page
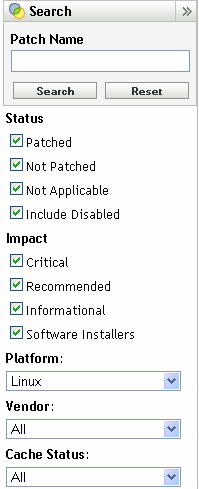
To search for a patch:
-
Type all or part of the patch name in the text box.
-
Select the desired check box under and .
-
Select the platform in the drop-down list.
-
Select the vendor in the drop-down list.
-
Select the cache status in the drop-down list.
-
Click .
NOTE:Click to return to the default settings.
The following table describes the result of selecting each filter option under :
Table 5-6 Status Filters in Search
|
Status Filter |
Result |
|---|---|
|
|
Search results include all the patches in the patch list that have been applied to one or more devices. |
|
|
Search results include all the patches in the patch list that have not been applied to any device. |
|
|
Search results include all the patches in the patch list that do not apply to the device. |
|
|
Search results include all the patches in the patch list that have been disabled by the administrator. |
The following table describes the result of selecting each filter option under :
Table 5-7 Impact Filters in Search
|
Impact Filter |
Result |
|---|---|
|
|
Search results include all the patches in the patch list that are classified as Critical by Novell. |
|
|
Search results include all the patches in the patch list that are classified as Recommended by Novell. |
|
|
Search results include all the patches in the patch list that are classified as Informational by Novell. |
|
|
Search results include all the patches in the patch list that are classified as Software Installers by Novell. |
Table 5-8 Vendor Filters and Cache Status Filter in Search
|
Filter |
Result |
|---|---|
|
|
Search results include all the patches relevant to the vendor in the patch list. |
|
|
Search results include all the patches relevant to their cache status on the local server. |
|
|
Search results include all the patches relevant to the operating system in the patch list. |
5.4.4 Patch Management
The following sections provide more information on the different options in the Patch Management pane:
Deploy Remediation
This option enables you to deploy a patch. To use this option, select the check boxes for the patches you want to deploy and click the link to open the Deploy Remediation Wizard. For more information, see Section 6.0, Using the Deploy Remediation Wizard.
Export Patches
Details such as the status and impact of all patches can be exported into a comma-separated value (CSV) file. You can choose to save the file in a different file format after opening it from the download option.
-
Click the link in the left pane.
This exports all data results, not just selected results. However, some data might not export or translate into.csv format in a readable format.
-
In the dialog box, click .

-
In the dialog box, select from the available options:
-
Open: Creates the file and opens it in your Web browser. From the browser, you can save to a variety of file formats, including CSV, XML, text, and numerous spreadsheet applications.
-
Save: Creates the file and saves it to a local folder. The file is saved in Microsoft Office Excel CSV format. The file is named ZPMPatchesList.csv by default.
-
Cancel: The report is not created or saved.

-
View Patch
Select a patch and click the link to display a page that provides details for that patch. The page provides three tabs as follows:
-
Patched: Displays the patched devices for that patch.
-
Not Patched: Displays all the devices that are not patched for that patch.
-
Information: Displays detailed information for that patch.