2.2 Scheduling an Inventory Scan
This section shows you how to schedule an inventory scan. By default, the inventory schedule is already configured.
You can define the scan schedule settings at three levels:
-
Management Zone: The settings are inherited by all device folders and devices. To schedule a scan for the Management Zone, see Section 2.2.1, Configuring an Inventory Scan Schedule for the Management Zone.
-
Device Folder: The settings are inherited by all devices contained within the folder or its subfolders. Overrides the Management Zone settings. To schedule a scan for devices in a folder, see Section 2.2.2, Configuring an Inventory Scan Schedule for Devices in a Folder.
-
Device: The settings apply only to the device for which they are configured. Overrides the settings at the Management Zone level and device folder level. To schedule a scan for a device, see Section 2.2.3, Configuring an Inventory Scan Schedule for a Device.
2.2.1 Configuring an Inventory Scan Schedule for the Management Zone
-
In ZENworks Control Center, click , then in the Management Zone Settings panel, click .
-
Click in the category list.
-
In the field, select the type of schedule you want to use.
No Schedule: No scan is scheduled. See No Schedule.
Date Specific: Scans run on specified dates. See Date Specific.
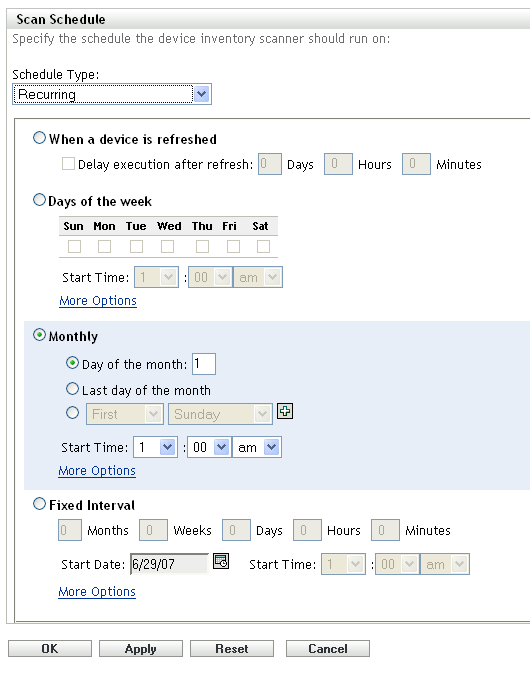
Recurring: Scans run on a recurring schedule. See Recurring.
No Schedule
-
Select in the field.
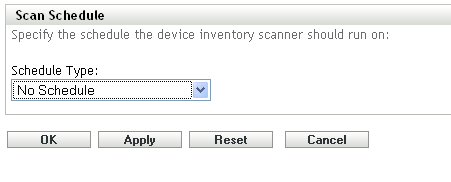
-
Click or .
No automatic scans are configured.
Date Specific
-
Select in the field.
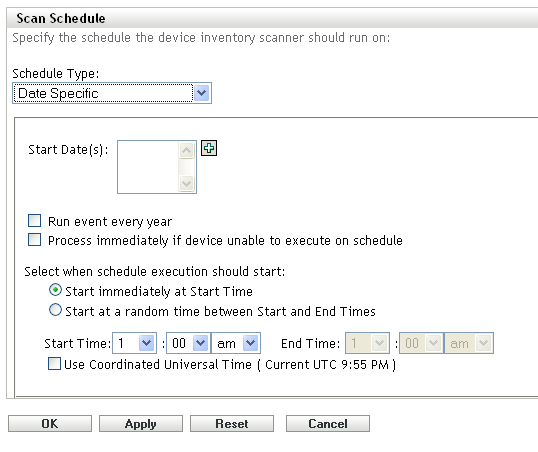
-
Click the + icon to the right of the field to open a calendar, then select a date. To select more than one date, click the + icon again. Click the - icon to delete a selected date.
-
(Optional) Select to run a scan annually on the dates you selected.
-
(Optional) For some reason, if the event does not run on the schedule you configured, to trigger the event immediately, select .
-
Select whether you want the scan to start at a specified time or at a random time between a specified start and end time.
-
Specify a start time, and if you selected , specify an end time.
-
(Optional) Select . Recommended, if the management zone is across geographical locations.
-
Click or .
Recurring
Select whether you want the scan to run when a device is refreshed, on certain days of the week, monthly, or at a fixed interval.
To run a scan when a device is refreshed:
-
Select in the field.
-
Select .
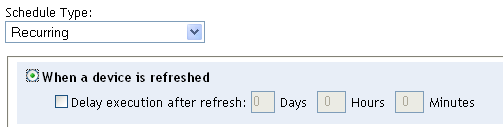
-
(Optional) If you want the scan to be delayed for a set time after a refresh, select and specify the time in days, hours, and minutes.
-
Click or .
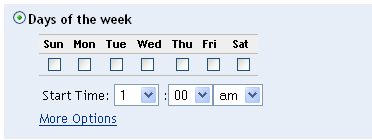
To run a scan on certain days of the week:
-
Select in the field.
-
Select .
-
Select the days on which you want the scan to run.
-
In the field, specify the time you want the scan to start.
-
Click .
-
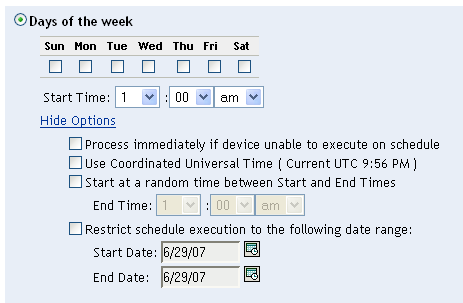
(Optional) For some reason, if the event does not run on the schedule you configured, to trigger the event immediately, select
-
(Optional) Select . Recommended, if the management zone is across geographical locations.
-
(Optional) If you want the scan to start randomly between a specified start and end time, select then specify an end time.
-
(Optional) If you want to restrict the scan to a certain date range, select , then specify the start and end dates.
-
Click or .
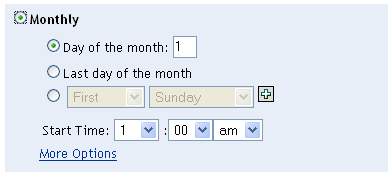
To run a scan monthly:
-
Select in the field.
-
Select .
-
Select either and specify a number between 1 and 31, , or select the configurable field where you can choose a combination of days of the month for a recurring scan.
-
In the field, specify the time you want the scan to start.
-
Click .
-
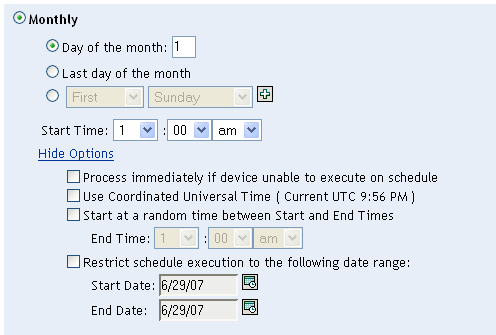
(Optional) For some reason, if the event does not run on the schedule you configured, to trigger the event immediately, select
-
(Optional) Select . Recommended, if the management zone is across geographical locations.
-
(Optional) If you want the scan to start randomly between a specified start and end time, select then specify an end time.
-
(Optional) If you want to restrict the scan to a certain date range, select then specify the start and end dates.
-
Click or .
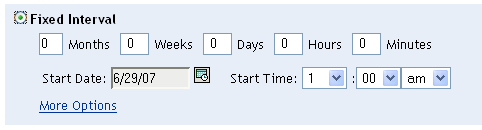
To run a scan at a fixed interval:
-
Select in the field.
-
Select .
-
Specify the number of months, weeks, days, hours, and minutes in their respective fields.
NOTE:
-
If a Satellite with Collection role is configured in the Management Zone, ensure that the scan interval is set such that the scan schedule is less frequent than the .
-
Currently Schedule Type is not effective for Inventory Scans.
-
-
Specify a start date by clicking the calendar icon and selecting a date.
-
In the field, specify the time you want the scan to start.
-
Click .
-
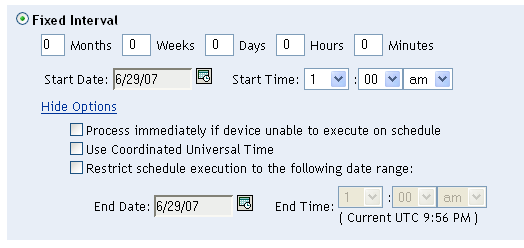
(Optional) For some reason, if the event does not run on the schedule you configured, to trigger the event immediately, select
-
(Optional) Select . Recommended, if the management zone is across geographical locations.
-
(Optional) If you want to restrict the scan to a certain date range, select then specify an end date and end time.
-
Click or .
2.2.2 Configuring an Inventory Scan Schedule for Devices in a Folder
-
In ZENworks Control Center, click , then click the tab.
-
Click next to the folder containing the devices you want to configure an inventory scan schedule for.
-
Click the tab.
-
In the Settings panel, click .
-
In the list, click .
-
In the Inventory Schedule panel, click .
This overrides the Management Zone settings for these devices.
-
In the field, configure the schedule you want to use.
For configuring the schedule type, perform steps from Step 3 through Step 3 listed in Section 2.2.1, Configuring an Inventory Scan Schedule for the Management Zone.
2.2.3 Configuring an Inventory Scan Schedule for a Device
-
In ZENworks Control Center, click , then click the tab.
-
Click the folder containing the device you want to configure an inventory scan schedule for.
-
Click the device.
-
Click the tab.
-
In the Settings panel, click .
-
In the list, click .
-
In the Inventory Schedule panel, click .
This overrides the Management Zone and folder settings for this device.
-
In the field, configure the schedule you want to use.
For configuring the schedule type, perform steps from Step 3 through Step 3 listed in Section 2.2.1, Configuring an Inventory Scan Schedule for the Management Zone.