Using the Desktop Management Preboot Services Menu Editor Utility
This section contains information that will help you understand and use the ZENworks Desktop Management Preboot Services Menu Editor utility.
- What Is the Preboot Services (PXE) Menu?
- What Is the Preboot Services Menu Editor?
- Using the Preboot Services Menu Editor
NOTE: If you upgraded to ZENworks Desktop Management from a previous version of ZENworks for Desktops, you can access the ZENworks Preboot Services Menu Editor Manual from the Start menu. However, in order to access the latest information about this utility, you should use the information in this ZENworks Desktop Management Administration Guide.
What Is the Preboot Services (PXE) Menu?
When a PXE-enabled workstation is booted, it broadcasts for DHCP information and receives a response from both the DHCP and Proxy DHCP servers. The workstation then downloads the Preboot Services client and check for imaging work with the Transaction server. If there is imaging work to do, the workstation displays a default Desktop Management Preboot Services (PXE) Menu displaying the following options:
- Start ZENworks Imaging in Automatic Mode
- Start ZENworks Imaging in Maintenance Mode
- Disable the ZEN Partition
- Enable the ZEN Partition
- Exit
What Is the Preboot Services Menu Editor?
If you want to create a custom Preboot Services (PXE) menu, you can use the Desktop Management Preboot Services Menu Editor to set and run your own actions and DOS utilities on the client workstation. Novell provides this utility as a service; no custom DOS or Linux utilities have been developed by Novell.
The Menu Editor is a Windows-based, option-driven utility that lets you do the following on the Preboot Services (PXE) menu:
- Add menu items or submenus to the Preboot Services (PXE) menu
- Add executable commands to be performed on the client workstation
- Delete a submenu or an action from an existing menu
The Menu Editor generates menu files and stores them on the Desktop Management Preboot Services server. These files can be selected from the Menu Editor interface and downloaded to a Preboot Services client workstation.
The following sections contain additional information:
- Installing the Preboot Services Menu Editor
- Accessing the Preboot Services Menu Editor
- Understanding the Preboot Services Menu Editor Interface
Installing the Preboot Services Menu Editor
If you chose the Preboot Services component during the Desktop Management Preboot Services installation program, the Menu Editor is automatically installed on Windows servers you designate as Preboot Services servers. For more information, see "Desktop Management Server Installation Procedure" in the Novell ZENworks 6.5 Desktop Management Installation Guide. The Menu Editor is not installed to a NetWare server during the Preboot Services installation; the files must be accessed from a Windows workstation.
Accessing the Preboot Services Menu Editor
If you installed to a Windows server, you can access the Menu Editor from the Windows desktop (after the PXE-enabled Windows workstation is imaged) by clicking Start > Programs > ZEN Preboot Services > ZEN Preboot Services Menu Editor.
If you need to access the Menu Editor from a NetWare server, locate the files on the ZENworks Desktop Management Program CD in the \menu editor folder, then copy them to your NetWare server. Then, from a Windows machine, you can map a drive to the location on the server and run the Menu Editor.
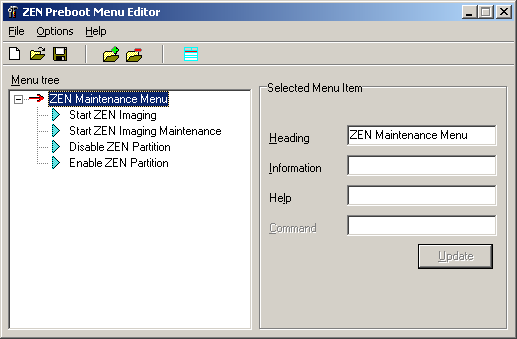
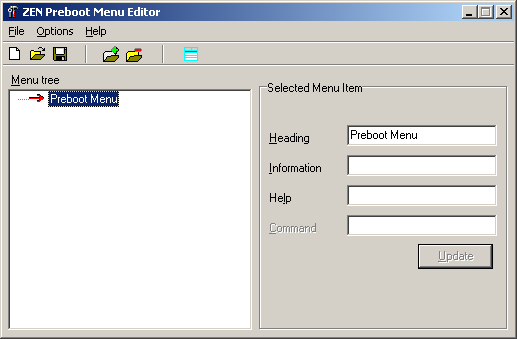
Understanding the Preboot Services Menu Editor Interface
The Menu Editor interface is not available unless you are creating or editing an existing menu. Add and delete functions are available from the Options menu or from icons on the toolbar. Menu Editor functions can also be initiated with keyboard commands from a Windows workstation. For example, pressing the Insert key while in the Menu Editor adds a menu item, and pressing the Delete key deletes a menu item.
You can enter descriptive text about the menu in the Information field. You can also add help by entering appropriate text in the Help field.
Using the Preboot Services Menu Editor
Although you will probably use the default Preboot Services (PXE) Menu for Desktop Management Preboot Services, you might want to take advantage of the flexibility of the Preboot Services Menu Editor to create a new menu or to modify the default menu.
This section contains the following information:
- Modifying the Default Menu
- Creating a New Preboot Services (PXE) Menu
- Creating a Submenu
- Creating Functions Within the Menu
- Saving the Menu as a .Dat File
Modifying the Default Menu
There may be circumstances that require you to limit the options on the Desktop Management Preboot Services (PXE) menu. For example, you may want to restrict the user from using the Linux bash command line options. In such a case, you must create a new default menu and copy it to proper location on the Preboot Services server.
The following steps assume that you want to overwrite the existing default menu. If you want to save the options of this menu, we recommend that you rename defmenu.mnu (for example, defmenu_old.mnu), edit it with the Menu Editor to meet your needs, then save it again as defmenu.mnu.
To modify the default menu:
-
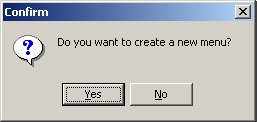
In the Windows desktop, click Start > Programs > ZEN Preboot Services > ZEN Preboot Services Menu Editor to display the following dialog box:
-
Click No to display the menu files that reside in the directory from which meditor.exe is running.

-
Select (or browse to) the defmenu.mnu you want to change, then click Open.
-
Select the menu item that you want to delete, click Options, then click Delete to display a message similar to the following:
Do you want to delete Start ZEN Imaging Maintenance and its subitems?
-
Click Yes to return to the Menu Editor.
-
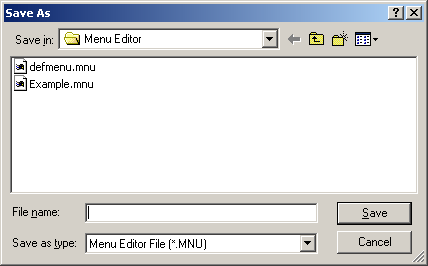
Click File > Save to open the Save As dialog box.
-
Select defmenu.mnu to enter this filename in the File Name field, then click Save. The following prompt is displayed:
Do you want to overwrite the old file?
-
Click Yes to overwrite the file and to return to the Menu Editor window.
You have now modified the defmenu.mnu menu template.
-
In the Menu Editor window, click File > Save to reopen the Save As dialog box.
-
In the Save As Type drop-down list, select ZEN Preboot Menu file (*.DAT).
-
Select defmenu.dat to enter this filename in the File Name field, then click Save. The following prompt is displayed:
Do you want to overwrite the old file?
-
Click Yes to overwrite the file and to return to the Menu Editor window.
You have now modified the data file that will be displayed as the menu on a PXE workstation.
-
Copy the new defmenu.dat file to the /tftp folder on the Preboot Services server.
Creating a New Preboot Services (PXE) Menu
Use the following steps to create a new Preboot Services (PXE) menu using the Desktop Management Preboot Services Menu Editor:
Creating a Submenu
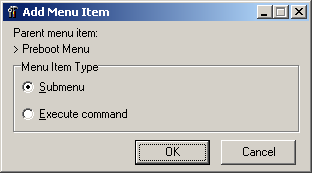
If you want to create your own functions for the Preboot Services (PXE) menu, you need to create a submenu of these functions. Use the following steps to create a submenu.
-
Select Add from the Options menu to display the Add Menu Item window.
-
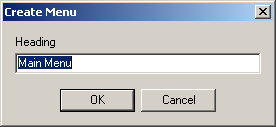
Select Submenu, then click OK to display the Add Menu dialog box.
-
In the Heading field of the dialog box, specify the text you want to use as the option in the submenu, then click OK.
The Menu Editor displays the submenu option as a subordinate item to the main menu you have already created.
-
Enter descriptive and help text in the Information and Help fields.
-
Click Update to save the text of the submenu option and any accompanying text you have created.
Although the submenu item is now created and will appear on the Preboot Services (PXE) menu, it does not launch any utility; it is merely a text heading that serves as a navigation tool to options that actually perform functions.
Creating Functions Within the Menu
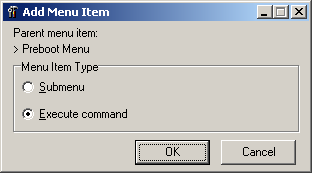
As stated earlier in this document, Desktop Management Preboot Services ships with a Preboot Services (PXE) menu that allows only limited, predesigned actions from the client workstation. Novell does not ship other DOS or Linux utilities. However, if you want to add functionality of your own, you can do so with the Preboot Services Menu Editor.
To add executable commands to the Menu Editor:
-
In the Preboot Services Menu Editor window, select a menu item, click Options, then click Add to display the Add Menu Item window.
-
Select Execute Command, then click OK.
-
In the Execute Command dialog box, specify menu text that describes the functionality of your program, then click OK.
-
Specify the command parameters of the utility you want to run, then click OK.
-
Specify descriptive text about the item you have created, then click OK.
-
Specify any help text that you want to be accessible by an F1 command for this menu item, then click OK.
-
When you have finished creating the menu, click File > Save to save the structure.
By default, the file is saved in .mnu format, which is used as a template by the Preboot Services Menu Editor interface. To be used by the Preboot Services (PXE) menu, this file must be exported to a binary (.dat) format. For more information, see Saving the Menu as a .Dat File.
Saving the Menu as a .Dat File
To create a .dat file for the Preboot Services (PXE) menu using a .mnu file:
-
Open the Preboot Services Menu Editor, then click No to display the existing .mnu files saved to your default folder (the same folder where the menu editor, meditor.exe, resides).
-
Select the .mnu file of the menu you want to export for later use by the Preboot Services (PXE) menu, click File, then click Export.
-
In the Save As Type drop-down list, select ZEN Preboot Menu file (*.dat).
-
In the file Name field, type DEFMENU, then click Save to return to the Menu Editor window. You have now created a data file that can be displayed as the default menu on a PXE workstation.
-
Copy the defmenu.dat file to the /tftp folder on the Preboot Services Server.
The .dat file is saved in the local folder from which you are running the Preboot Services Menu Editor. You must copy the file to the \tftp folder at the Preboot Services server.