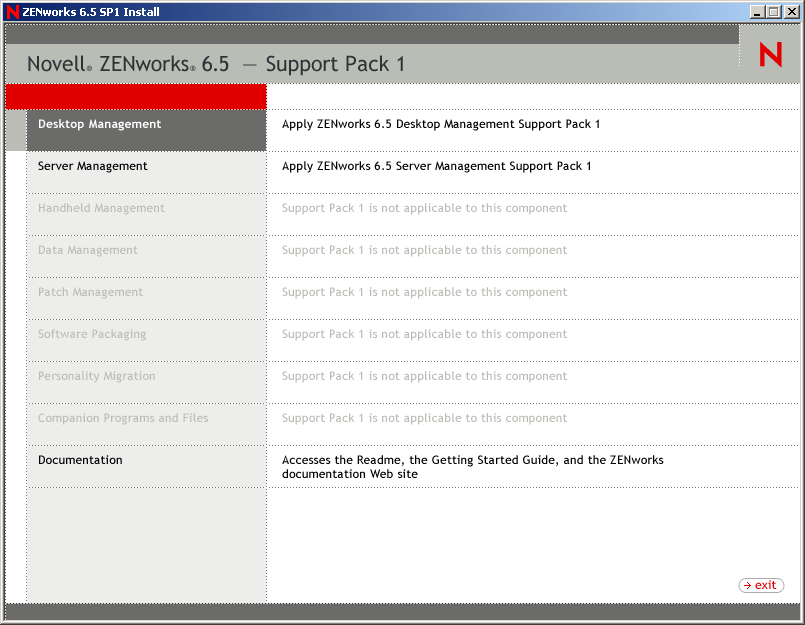
Installing the SP1 Upgrade for the Desktop Management Server
Use the following steps to install the ZENworks 6.5 Desktop Management Server Support Pack 1 (SP1) on a NetWare® or Windows server.
-
Select a Windows 2000/XP workstation (or a Windows 2000/2003 server) to run the SP1 installation program.
The workstation or server must meet the requirements for an installing workstation. For details, see Preparing the Workstation or Server Where You Will Install or Administer ZENworks.
-
Browse to the SP1 installation program that you previously downloaded from Novell Support and run the winsetup.exe program.
-
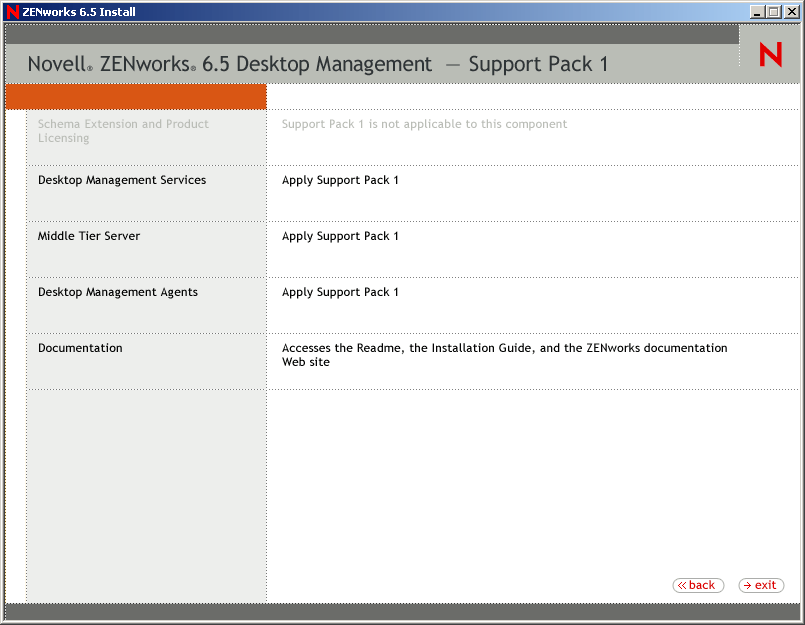
Click Desktop Management to display a page with options to install in various languages.
-
Click English to display a page with Desktop Management installation options.
-
Click Desktop Management Services to launch the Desktop Management Server installation wizard.
-
On the first Installation page, read the details about running the installation program, then click Next.
-
Read the License agreement, then click Accept if you agree with the terms of the License Agreement.
If you do not agree with the terms of the license agreement, do not install the software.
-
On the Installation Requirements page, read the requirements for installing the Desktop Management Server Support Pack 1, make sure that the server where you plan to install meets the listed requirements, then click Next.
-
On the Tree Selection page, type or browse to the name of the Novell eDirectoryTM tree where you want to update the Desktop Management Server to SP1, then click Next.
Because you are installing ZENworks 6.5 Support Pack 1 (SP1), the eDirectory tree is already extended, so the Extend Schema check box from the 6.5 installation is not included on this page of the SP1 installation.

If you want to install only the ZENworks Desktop management snap-ins to your local administrative workstation, you do not need to select a tree.
You can authenticate to a tree by clicking the Login button and entering a user ID and password with the appropriate rights.
-
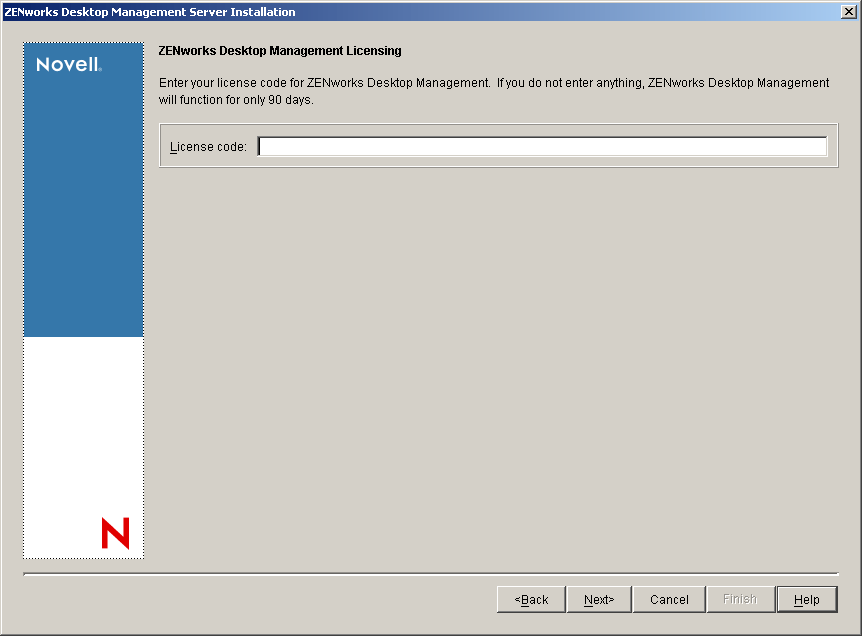
On the ZENworks Desktop Management Licensing page, click Next to retain the license code you installed with the original version of ZENworks 6.5 Desktop Management.
-
On the Server Selection page, click Add Servers to browse to the names of the servers where you want to install Support Pack 1.
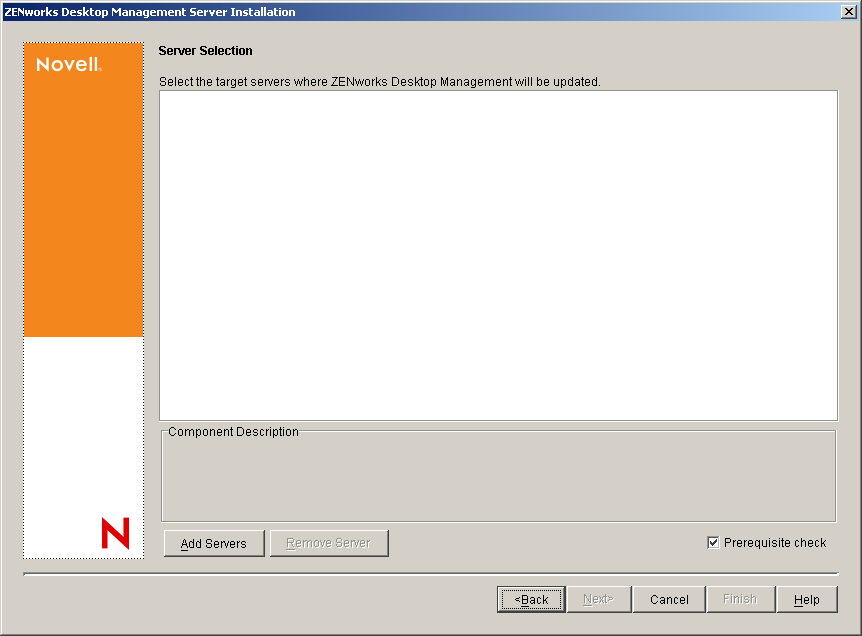
You can select servers only from the tree you selected in Step 9.
The Desktop Management Server is not supported on some network operating systems, even though those servers might be included on the available servers list. Check the list of supported servers displayed at the beginning of this installation program (following the license agreement) or refer to the ZENworks Desktop Management Online Documentation for more information.
In ZENworks 6.5 Desktop Management SP1 it is possible add to servers that have no previous installation of the ZENworks Desktop Management Server, but if they are selected for addition, the installation rejects them as candidates for the SP1 update.
IMPORTANT: If you previously installed Desktop Management Services on a NetWare cluster, you should select the cluster volume (that is, the virtual cluster server) as the target for those components. If you are installing the ConsoleOne snap-ins on the cluster, choosing the cluster volume installs the snap-ins on each cluster node.
-
(Optional) In the Add Servers dialog box, you can list servers by their eDirectory tree names. To install to a server, select eDirectory Trees, then browse to and click the name of the server you want to install to or click Add All Servers to select all of the servers in a container, click the right-arrow button to move your selected servers to the Selected Servers pane, then click OK.
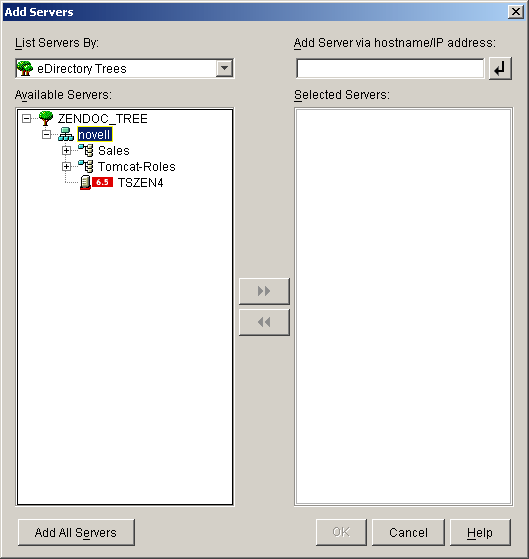
Windows servers are not available for selection when you browse the directory unless you have installed eDirectory on those servers.
If you want to add a Windows server that you might not be authenticated to, you can double-click the server icon to display a dialog box where you can enter credentials to allow for Windows authentication.
-
(Optional) In the Add Servers dialog box, you can specify the hostname or IP address of a server in the Add Server Via Hostname/IP Address field. The value that you provide must be resolvable to the name of a server.
Click
 to begin the name resolution process and add the server to the Selected Servers list.
-
-
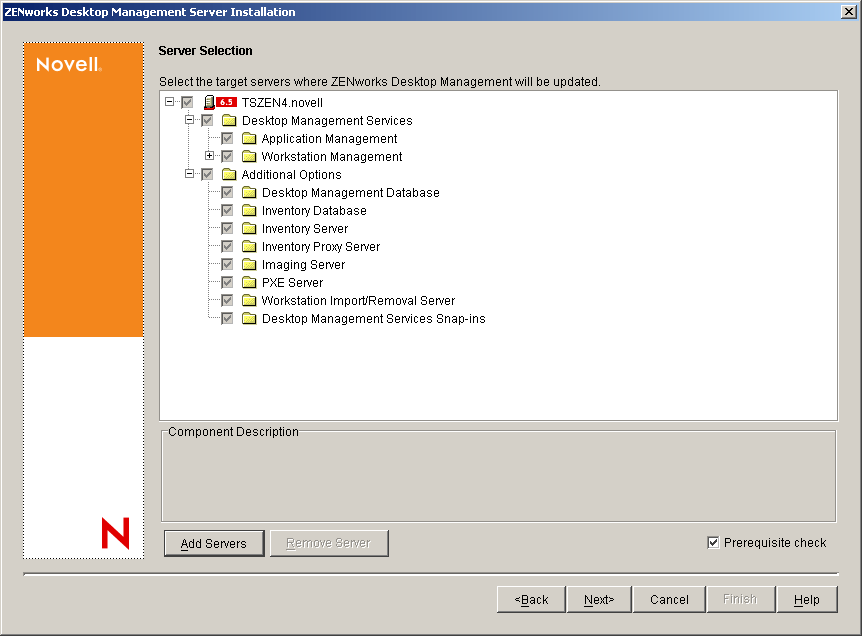
On the now-populated Server Selection page, only those services previously installed by ZENworks 6.5 on that server are available for the SP1 update. With the exception of the Local Workstation setting, you cannot change the selections.
NOTE: For a description of these services, see Performing the Full Installation (Including Schema Extension).
Local Workstation: In the ZENworks 6.5 installation, you had the option of installing Desktop Management Services snap-ins to your local workstation by selecting the Desktop Management Service Snap-ins check box under the Local Workstation option.
In the SP1 installation, the check box is displayed if the snap-ins were previously installed locally. You can deselect the check box if you want to.
-
(Optional) Prerequisite Check is selected by default. Retain the selection if you want the installation program to verify that the server or servers meet the installation requirements for ZENworks Desktop Management Services.
The installation program checks the version of the server's network operating system (including any required service or support packs), the presence and version of the Novell ClientTM (4.9 SP1a) on Windows servers and on the installing workstation, and the presence and version of ConsoleOne (1.3.6).
If the server operating system and support/service packs are not the correct version, the installation displays an error or a warning message and does not continue until the required software is installed and detected or until you deselect the check box.
-
On the Summary page, review the list of components and their parts that are to be installed. If the summary is correct, click Finish to launch the installation program.
You can click Back as many times as necessary to make changes.
If you click Cancel, no installation information is saved.
You can review the installation log file after the installation has completed. The log file name is datestamp_timestamp_zdmserver_install.log (for example: 20040304_024034_zdmserver_install.log). It is located in the \novell\zfdtemp directory on the machine you are installing from. This log file indicates whether any component failed to install.
You can also review the installation summary to review the selections you made. The summary is saved in a log file named datestamp_timestamp_zdmserver_installsummary.log (for example: 20040304_024034_zdmserver_installsummary.log). It is also located in c:\novell\zfdtemp.
-
(Conditional) If you have upgraded Inventory server, you must manually start the Inventory service.
On NetWare Servers: Enter startinv at the server's main console prompt.
On Windows Servers: Continue with Step 15.a, below.
Post-Upgrade Task
If a ZENworks 6.5 Inventory server receives ZENworks software dictionary updates from a ZENworks 6.5 SP1 Inventory server, you must perform the following tasks on the ZENworks 6.5 Inventory server:
-
Stop the Inventory service.
-
Make a reliable backup of desktopcommonutility.jar located in the Inventory_server_installation_path\zenworks\inv\server\wminv\lib directory
-
Copy desktopcommonutility.jar from ZENworks 6.5 SP1 Companion CD\companion2\zen65patch\inv\server\wminv\lib to the Inventory_server_installation_path\zenworks\inv\server\wminv\lib directory.
-
Start the Inventory service.