17.1 Viewing the Inventory Information Using ConsoleOne
The following sections explain the various types of information you can view using ConsoleOne:
-
You can list hardware and software components found on the inventoried server and any custom information you have specified for the inventoried server.
The Inventory Summary window displays the inventory items for an inventoried server. This window displays the information from the last inventory scan for the inventoried server. For more information, see Section 17.1.2, Viewing the Inventory Summary of an Inventoried Server.
-
You can list inventoried servers with the inventory information from the Inventory database satisfying the criteria you specify in the Inventory Query window. You form a query by specifying the component and its attribute for servers within the selected database sites.
For more information about querying the Inventory database, see Section 17.1.3, Viewing Inventory Information of Inventoried Servers by Querying the Database.
-
You can use a list of reports that generate the inventory information from the Inventory database specific to your needs.
For more information, see Section 17.1.4, Running Inventory Reports.
-
You can now quickly and easily view the inventory information
For more information, see Section 17.1.5, Quickly and Easily Viewing the Inventory Data Using Quick Reports.
17.1.1 Configuring the Inventory Database
If you want to view the inventory information stored in the database from ConsoleOne, you must configure the database. The inventory information from the Inventory database that you configure is used for generating inventory reports, viewing inventory information, and for querying the inventory information from the database.
To configure the Inventory database:
-
In ConsoleOne, select a container.
-
Invoke Configure DB.
-
To invoke Configure DB from a database object, right-click the database object, click , then click . This configures the database object.
-
To invoke the Configure DB dialog box from the ConsoleOne Tools menu, click , click , then click .
-
-
Click to browse for and select the object.
You can also select an existing ZENworks Database object from the list of Database objects.
This Database object contains the database settings such as the protocol, port in use by the database, and others.
-
To apply this database configuration to all the sessions, select the check box.
-
Click .
The database you configured is used for data retrieval unless you change it again using this same procedure.
17.1.2 Viewing the Inventory Summary of an Inventoried Server
The Inventory Summary window displays the information from the last inventory scan for the inventoried server.
To view the inventory information of an inventoried server, do the following in ConsoleOne
-
Configure the Inventory database.
For more information, see Configuring the Inventory Database.
-
Right-click any of the following objects: Subscriber, Distributor, or External Subscriber, click , then click .
or
In the Query Results window, double-click an inventoried server.
ZENworks 7 Server Management provides the following inventory information collected from the inventoried servers:
Table 17-1 Inventory information as displayed in Inventory Summary
 Inventory Information
 General >
  System Information
 System Identification
 Login Details >
  Windows Domain
 Software >
  Application Vendors >

 Patches
 Representative File Information
 Disk Usage
 Device Drivers >
  Pointing Device Drivers >
  Display Drivers
 Network Drivers
 Operating System
 Hardware >
  Monitor
 Chassis
 Keyboard
 Display Adapter >
  BIOS
BIOS
 Processor
 Modem
Modem
 Battery
 Power Supply
 Memory
 Disk Drives >
  Floppy
 Removable Disk
 Logical Disk >
  CDROM
CDROM
 Ports >
  Serial Port
 Parallel Port
 Bus
Bus
 Network Adapter
 Sound Adapter
 System >
  System IRQ
 System Cache
 System DMA
 System Slot
 Motherboard
NOTE:For an enumerated attribute, the value is displayed in the format enumerated_value [enumerated_ID]. For example, Processor.Processor Family = Pentium (R) III [17].
The Status bar displays the following information:
-
Tree Name: Displays the eDirectory tree name where the inventoried server or inventoried server resides.
-
Recent Information: Set to if the Inventory database has been updated with the latest inventory information of the selected inventoried server.
17.1.3 Viewing Inventory Information of Inventoried Servers by Querying the Database
Using ConsoleOne, you can query the Inventory database to display the hardware and software components of inventoried servers that you want to view. The Inventory Query window displays the information satisfying the criteria you specify.
The Inventory database stores inventory information (general, hardware, software, network, and system information) for each inventoried server. Querying the Inventory database helps to create groups of similar devices and to focus your reports on specific types of machines. For example, you can query the database to find machines that have an i486D processor and a VGA card.
To query the Inventory database for inventory information:
-
In ConsoleOne, click a container.
-
Invoke Query:
-
To invoke the Inventory query from a database object, right-click the database object, click , then click .
-
To invoke the Inventory query from the ConsoleOne Tools menu, you must first configure the database and then click , click , then click. For more information on how to configure the Inventory database, see Configuring the Inventory Database.
-
-
Specify the criteria for query:
Query the Inventory database for: By default, the option is enabled. The query locates all inventoried servers satisfying the query expression. If ZENworks 7 Server Management and Desktop Management are installed in the same environment; the , the and the options are available. When you select , the query locates all inventoried servers satisfying the query expression. Choose to include all workstations and inventoried servers satisfying the query expression.
Find Type: Select or . Click to specify a simple query. When you choose a query, you specify one attribute, relational operators, and the value of the attribute. Choose query to specify many attributes. You can combine multiple query groups so each group defines a set of query criteria. For example, use the Advanced query to run a query to discover all devices in the database with 486 processors and use query connectors, and add another query to discover which of these inventoried servers have a VGA color video adapter.
Display Machine(s) Not Satisfying the Query: Select the check box to retrieve machines that do not satisfy the query.
Select Attribute: Select the component or component attributes. Attributes that you can specify to query on the inventoried servers are grouped into the following categories: General, Software, Hardware, Network, and System.
The custom attribute is prefixed by an asterisk (*).
For example, to find the machines that do not have a pointing device installed, select Pointing Device as the component. To specify the version of BIOS as a component in the query, select BIOS as the component and VERSION as the component attribute.
Operator or Relational Operator: Select to determine the relationship between the components and the value. The relational operators are grouped on the basis on the data type of the attribute selected in the Select Attribute window as shown in the following table:
NOTE:If the query does not display the result when the data type of the attribute is Custom and the relational operator is Numeric or Date, use the Equal To operator to find the values for the custom attributes that are stored in the Inventory database.
If you select only the component in the Select Attribute window, the Relational Operator is set to NULL by default and other relational operators are not available.
Value: Description values are the possible values of an inventory component. For example, 6.0 is a possible value for the DOS-Version attribute. Description values are not case sensitive.
NOTE:For an enumerated attribute, the value is displayed in the format, enumerated_value [enumerated_ID]. For example, Processor.Processor Family = Pentium (R) III [17].
If you choose Matches ([ ]) or Does Not Match (![ ]) as the relational operator, you can use wildcards to substitute characters in the Value field. The following table lists the wildcards that can be used according to the SQL documentation:
NOTE:To define a query using special characters such as ? or [, specify the query in the following formats: [?] or [ [ ].
The list of description values displayed for an Inventory component is taken from the Inventory database corresponding to the component.
Logical Operator: This option is available only for the Advanced query. Logical Operator forms query groups that is combined with the previous query group by using the relational operator specified between the query groups.
Save: This option is available only for the Advanced query. It saves the query expression as a file in the location that you specify. The query file does not have a default extension; however, we recommend the .qry extension for easy reference.
Load: This option is available only for the Advanced query. It loads the query file that you specify. You must provide the full filename with its extension.
-
Click .
This will query based on the query criteria you specify and display the inventoried servers that match the query in the Query Results window.
In the Query Results window, double-click the inventoried server or click , then click to view the inventory information of the inventoried server.
Usage of Relational Operators
-
Match: Use the Match operator to find the inventoried servers that satisfy the query condition.
For example, use the Match operator to find all the inventoried servers with IP address 164.99.151.%.
-
NULL: Use the NULL operator to query for those inventoried servers whose particular attribute is not scanned but the component has been scanned and some attributes are populated.
For example, to find a list of inventoried servers for which BIOS.Manufacturer is not scanned, form a BIOS.Manufacturer is NULL query. This query displays the inventoried servers for which the BIOS has been scanned.
-
NOT SATISFYING: Use the NOT SATISFYING query (or the NOT SATISFYING filter condition) to find filter conditions for the inventoried servers that negate the given query.
For example, two servers S1 and S2 contain serial ports COM1 and COM2. The query (SerialPort='COM1') returns S1 and the query (SerialPort!='COM1') also returns the S1 because S1 contains the serial port COM2. To query the inventoried servers that do not contain the serial port COM1 you must use <NOT SATISFYING>(SerialPort='COM1'). To use the NOT SATISFYING option, click the check box in the query window.
17.1.4 Running Inventory Reports
You can run reports to gather inventory information from the Inventory database. The Inventory reports are designed using Crystal Reports*.
You can select from a predefined set of report forms to generate a report. The inventory report is displayed in the Crystal Viewer window.
You can print or export the report as desired. Remember that any reports you generate would be empty if you have not configured ZENworks 7 Server Management to start populating the Inventory database with the information you want.
This section covers information on the following sections:
Prerequisites for Generating Inventory Reports
Before running the inventory reports, ensure that you have installed the appropriate ODBC client. For more information, see Installing the ODBC Drivers
in the Novell ZENworks 7 Server Management Installation Guide.
Types of Inventory Reports
You can generate the types of reports described below, assuming you have already configured ZENworks 7 Server Management to start populating the inventory database with the information you want.
Table 17-2 gives the Simple Inventory lists that provide information on individual aspects of Server Inventory, such as the operating system and the selection criteria. The table also lists the Comprehensive Inventory Reports that combine several aspects of Server Inventory into each report, such as memory, hard disk, and processor.
Table 17-2 List of Inventory reports and information displayed by each report
|
Inventory Report Group |
Report Name |
Selection Criteria |
Information Displayed in the Inventory Report |
|---|---|---|---|
|
Hardware Inventory |
Asset Management Report |
Scope, Machine Name, IP Address, and DNS Name You can also select to display the following options in the report: Memory, Processor, Display Adapter, Keyboard, Pointing Device, Fixed and Removable Disk, Floppy, CDROM, Network Adapter, and Monitor |
Memory, processor, display details, keyboard, pointing device, fixed and removable disk, floppy, CD drive, network adapter, and monitor details for inventoried servers. |
|
BIOS Listing |
Scope, Machine Name, IP Address, DNS Name, BIOS Install Date, and Manufacturer |
List of all the inventoried servers with BIOS manufacturer, BIOS release date, and the total number of such machines. |
|
Battery Listing |
Scope, Machine Name, IP Address, DNS Name, and Name |
List of all inventoried servers that match the specified battery name. |
|
Bus Listing |
Scope, Machine Name, IP Address, DNS Name, and Bus Type |
List of all inventoried servers with the selected bus type. |
|
CDROM Listing |
Scope, Machine Name, IP Address, DNS Name, Caption, Description, and Manufacturer |
List of all inventoried servers that match the specified CD caption, description, and manufacturer's name. |
|
Display Adapter Listing |
Scope, Machine Name, IP Address, DNS Name, Video Architecture, and Description |
List of all inventoried servers that match the specified display adapter's video architecture and description. |
|
Floppy Listing |
Scope, Machine Name, IP Address, DNS Name, Manufacturer, and Description |
List of all inventoried servers that match the specified floppy description and manufacturer's name. |
|
Hardware Summary Report |
Scope, Machine Name, IP Address, DNS Name, Operating System Type, Operating System Version, Processor Family, Curr. Clock Speed (Lower Bound in MHz), Curr. Clock Speed (Upper Bound in MHz), Total Memory (Lower Bound in MB), Total Memory (Upper Bound in MB), Hard Disk Size (Lower Bound in GB), and Hard Disk Size (Upper Bound in GB) |
Operating system name, operating system version, processor family, processor current clock speed, memory, and hard disk size for each inventoried server. |
|
Keyboard Listing |
Scope, Machine Name, IP Address, DNS Name, Description, and Layout |
List of all inventoried servers that match the specified keyboard description and layout. |
|
Modem Listing |
Scope, Machine Name, IP Address, DNS Name, and Name |
List of all inventoried servers that match the specified modem name. |
|
Monitor Listing |
Scope, Machine Name, IP Address, DNS Name, Manufacturer, Manufacture Date, Nominal Size (Lower Bound in inches), and Nominal Size (Upper Bound in inches) |
List of all inventoried servers that match the specified monitor manufacturer's name, manufacture date, and the specified range of monitor's nominal size. |
|
Network Adapter Listing |
Scope, Machine Name, IP Address, DNS Name, and Name |
List of all inventoried servers that match the specified network adapter's name. |
|
Physical Disk Listing |
Show Chart, Scope, Machine Name, IP Address, DNS Name, Removable, Manufacturer, Description, Total Size (Lower Bound in GB), and Total Size (Upper Bound in GB) |
List of all inventoried servers that match the specified physical disk manufacturer's name, description, the specified range of total size and disks that are fixed, removable, or both. You can also select the Show Chart box to display the Physical Disk Listing report in a pie chart. |
|
Pointing Device Listing |
Scope, Machine Name, IP Address, DNS Name, Pointing Device Type, and Pointing Device Name |
List of all inventoried servers that match the specified pointing device type and name. |
|
Power Supply Listing |
Scope, Machine Name, IP Address, DNS Name, and Description |
List of all inventoried servers that match the specified power supply description. |
|
Processor Listing |
Show Chart, Scope, Machine Name, IP Address, DNS Name, Processor Family, Maximum Speed (Lower Bound in MHz), Maximum Speed (Upper Bound in MHz), Current Speed (Lower Bound in MHz), and Current Speed (Upper Bound in MHz) |
List of all the inventoried servers with a processor family (such as Pentium Pro), processor maximum clock speed, and the processor current clock speed of the machines. You can also select the Show Chart box to display the Processor Listing report in a pie chart. |
|
Sound Adapter Listing |
Scope, Machine Name, IP Address, DNS Name, and Name |
List of all inventoried servers that match the specified sound adapter name. |
|
Storage Devices Inventory Report |
Scope, Machine Name, IP Address, and DNS Name You can also select to display the following options in the report: Fixed and Removable Disk, Logical Disk, Floppy, and CDROM. |
Fixed disk, removable disk, logical disk, floppy, and CD drive details for each inventoried server. |
|
|
System Chassis Listing |
Scope, Machine Name, IP Address, DNS Name, Chassis Type, and Manufacturer |
List of all inventoried servers that match the specified system chassis type and manufacturer's name. |
|
|
System Configuration Inventory |
Inventory Scan Listing |
Show Chart, Scope, Machine Name, IP Address, DNS Name, Last Scan Date (On or Before), Inventory Server Name, and Recent Information |
Date and time of the last inventory scan, Inventory server name, and recent information on each inventoried server. You can also select the Show Chart box to display the System Configuration Inventory report in a pie chart. |
|
Memory Listing |
Show Chart, Scope, Machine Name, IP Address, DNS Name, Total Memory (Lower Bound in MB), and Total Memory (Upper Bound in MB) |
List of all the inventoried servers within a range of memory size (such as 200-400 MB) and the total number of such machines. You can also select the Show Chart box to display the Memory Listing report in a pie chart. |
|
Operating System Listing |
Show Chart, Scope, Machine Name, IP Address, DNS Name, Operating System Type, and Operating System Version |
List of all inventoried servers that match the specified operating system type and version. You can also select the Show Chart box to display the Operating System Listing in a pie chart. |
|
Networking Information Report |
Scope, Machine Name, IP Address, and DNS Name |
Network adapter type, DNS, IP address, MAC address, IPX address, and Windows Domain name for each inventoried server. |
|
System Information Listing |
Scope, Machine Name, IP Address, DNS Name, and Computer Manufacturer |
List of all inventories servers that match the specified computer manufacturer's name. |
|
|
System Internal Hardware Inventory Report |
Scope, Machine Name, IP Address, and DNS Name You can also select to display the following options in the report: System IRQ, System Cache, System DMA, System Slot, and Motherboard. |
IRQ, cache, DMA, slot, and motherboard for each inventoried server. |
|
Software Inventory |
Add-Remove Programs by Application |
Scope, Machine Name, IP Address, DNS Name, Min Last Scan Time, Max Last Scan Time, and Software Name |
List of all software that are listed in the Add/Remove Programs list for each inventoried server. |
|
Add-Remove Programs by Machine |
Scope, Machine Name, IP Address, DNS Name, Min Last Scan Time, Max Last Scan Time, and Software Name |
List of all software that are listed in the “Add-Remove Programs” list for each inventoried server. |
|
|
Anti-Virus Signature Files by Machine |
Scope, Machine Name, IP Address, DNS Name, Min Last Scan Time, Max Last Scan Time, Software Name, Min Virus Definition Date and Max Virus Definition Date |
List of all antivirus signature files grouped by antivirus product installed on each inventoried server. |
|
Anti-Virus Signature Machine Count |
Scope, Machine Name, IP Address, DNS Name, Min Last Scan Time, Max Last Scan Time, Software Name, Min Virus Definition Date and Max Virus Definition Date |
List showing the count of inventoried servers that have any antivirus product installed. |
|
Disk Usage by Machine |
Scope, Machine Name, IP Address, DNS Name, Min Last Scan Time, Max Last Scan Time, and File Extension |
List of all inventoried servers and the disk usage that match the specified file extension. |
|
Exception List by Machine |
Scope, Machine Name, IP Address, DNS Name, Min Last Scan Time, Max Last Scan Time, File Name, Vendor Name, and Product Name |
List of all inventoried servers and the file information that match the specified filename, vendor name, and product name. |
|
Installed NetWare Software by Machine |
Scope, Machine Name, IP Address, DNS Name, Min Last Scan Time, Max Last Scan Time, and Software Name |
List of all inventoried NetWare machines and the products.dat details that match the given software name. |
|
Internet Explorer Installation Count |
Scope, Machine Name, IP Address, DNS Name, Min Last Scan Time, Max Last Scan Time, Internet Explorer Version, and Service Pack |
List showing the count of inventoried servers with Internet Explorer installed. |
|
Internet Explorer Patches by Machine |
Scope, Machine Name, IP Address, DNS Name, Internet Explorer Version, and Service Pack |
List of all installed patches for the Internet Explorer version that matches the specified value and patch name. |
|
Internet Explorer by Machine |
Scope, Machine Name, IP Address, DNS Name, Min Last Scan Time, Max Last Scan Time, Internet Explorer Version, and Service Pack |
List of all Internet Explorer installations that match the specified version. |
|
MSI Products by Application |
Scope, Machine Name, IP Address, DNS Name, Min Last Scan Time, Max Last Scan Time, Software Name, and Vendor Name |
List of all products installed on each inventoried server and that are listed in the MSI (Microsoft Installer) database. |
|
|
MSI Products by Machine |
Scope, Machine Name, IP Address, DNS Name, Min Last Scan Time, Max Last Scan Time, Software Name, and Vendor Name |
List of all products installed on each inventoried server and that are listed in the MSI (Microsoft Installer) database. |
|
Microsoft Office Components by Machine |
Scope, Machine Name, IP Address, DNS Name, Min Last Scan Time, Max Last Scan Time, Microsoft Office Version, and Service Pack |
List of all products that match the specified product name and vendor name, and have been installed from the specified source. |
|
Microsoft Office Installation Count |
Scope, Machine Name, IP Address, DNS Name, Min Last Scan Time, Max Last Scan Time, Microsoft Office Version, and Service Pack |
List showing the count of inventoried servers with Microsoft Office installed. |
|
Microsoft Office by Machine |
Scope, Machine Name, IP Address, DNS Name, Min Last Scan Time, Max Last Scan Time, Microsoft Office Version, and Service Pack |
List of all Microsoft Office installations that match the specified version. |
|
Novell Client Components by Machine |
Scope, Machine Name, IP Address, DNS Name, Min Last Scan Time, Max Last Scan Time, Novell Client Version, and Service Pack |
List of all Novell Client components that match the specified version. |
|
Novell Client Installation Count |
Scope, Machine Name, IP Address, DNS Name, Min Last Scan Time, Max Last Scan Time, Novell Client Version, and Service Pack |
List showing the count of inventoried servers with Novell Client installed. |
|
Novell Client by Machine |
Scope, Machine Name, IP Address, DNS Name, Min Last Scan Time, Max Last Scan Time, Novell Client Version, and Service Pack |
List of all Novell Client installations that match the specified version. |
|
Outlook Express Installation Count |
Scope, Machine Name, IP Address, DNS Name, Min Last Scan Time, Max Last Scan Time, and Outlook Express Version |
List showing the count of inventoried servers with Outlook Express installed. |
|
Outlook Express by Machine |
Scope, Machine Name, IP Address, DNS Name, Min Last Scan Time, Max Last Scan Time, and Patch Name |
List of all Outlook Express installations that match the specified version. |
|
Software Dictionary Application Files by Machine |
Scope, Machine Name, IP Address, DNS Name, Min Last Scan Time, Max Last Scan Time, Vendor Name, Software Name, and Software Version |
List of all inventoried servers and their software dictionary application files that match the specified vendor, software, and software version. |
|
Software Dictionary Applications by Machine |
Scope, Machine Name, IP Address, DNS Name, Min Last Scan Time, Max Last Scan Time, Vendor Name, Software Name, and Software Category |
List of all inventoried servers and their software dictionary applications that match the specified vendor, software, and software version. |
|
Software Dictionary Versions Machine Count |
Scope, Machine Name, IP Address, DNS Name, Min Last Scan Time, Max Last Scan Time, General Dictionary Version, and Private Dictionary Version |
List showing the count of all inventoried servers with specified General Dictionary and Private Dictionary versions. |
|
Software Dictionary Versions by Machine |
Scope, Machine Name, IP Address, DNS Name, Min Last Scan Time, Max Last Scan Time, General Dictionary Version, and Private Dictionary Version |
List of all inventoried servers with specified General Dictionary and Private Dictionary versions. |
|
Software Installation Count |
Scope, Machine Name, IP Address, DNS Name, Min Last Scan Time, Max Last Scan Time, Vendor Name, Software Name, and Software Version |
List showing the count of inventoried servers with specified vendor name, software, and version. |
|
Software Installations |
Scope, Machine Name, IP Address, DNS Name, Min Last Scan Time, Max Last Scan Time, Vendor Name, Software Name, and Software Version |
List of all inventoried servers with specified vendor name, software, and version. |
|
Software by Machine |
Scope, Machine Name, IP Address, DNS Name, Min Last Scan Time, Max Last Scan Time, Vendor Name, Software Name, and Software Version |
List of all inventoried servers and software information that match the specified vendor name, software, and version. |
|
System Software Inventory Report |
Scope, Machine Name, IP Address, and DNS Name. You can also select to display the following options in the report: Display Driver, Pointing Device Driver, Network Adapter Driver, and NetWare Client. |
Drivers (such as pointing device drivers, network adapter drivers, and display drivers) and Novell NetWare® Client for each inventoried server. |
|
Windows Components by Machine |
Scope, Machine Name, IP Address, DNS Name, Windows Version, and Service Pack |
List of all Windows components that match the specified version. |
|
Windows Installation Count |
Scope, Machine Name, IP Address, DNS Name, Min Last Scan Time, Max Last Scan Time, Windows Version, and Service Pack |
List showing the count of inventoried servers that have Windows operating system installed. |
|
Windows Media Player Count |
Scope, Machine Name, IP Address, DNS Name, Min Last Scan Time, Max Last Scan Time, and Windows Media Player Version |
List showing the count of inventoried servers with Windows Media Player installed. |
|
Windows Media Player Patches by Machine |
Scope, Machine Name, IP Address, DNS Name, Min Last Scan Time, Max Last Scan Time, and Windows Media Player Version |
List of all patches for Windows Media Player installations that match the specified version and patch name. |
|
Windows Security Patches by Patch |
Scope, Machine Name, IP Address, DNS Name, Min Last Scan Time, Max Last Scan Time, Windows Version, and Service Pack |
List of all patches for Windows operating systems that match the specified version and patch name. |
|
|
Windows Media Player by Machine |
Scope, Machine Name, IP Address, DNS Name, Min Last Scan Time, Max Last Scan Time, and Windows Media Player Version |
List of all Windows Media Player installations that match the specified version. |
|
Windows Operating System by Machine |
Scope, Machine Name, IP Address, DNS Name, Min Last Scan Time, Max Last Scan Time, Windows Version, and Service Pack |
List of all Windows operating systems that match the specified version and serial number. |
|
Windows Security Patches by Machine |
Scope, Machine Name, IP Address, DNS Name, Min Last Scan Time, Max Last Scan Time, Windows Version, and Service Pack |
List of all patches for Windows operating systems that match the specified version and patch name. |
|
Novell ZENworks Desktop Management Installed Agent Components by Machine |
Scope, Machine Name, IP Address, DNS Name, Min Last Scan Time, and Max Last Scan Time |
List of all machines that were successfully last scanned within the specified time range and the agent components of ZENworks 7 Desktop Management installed on these machines. |
|
Novell ZENworks Desktop Management Installed Server Components by Machine |
Scope, Machine Name, IP Address, DNS Name, Min Last Scan Time, and Max Last Scan Time |
List of all machines that were successfully last scanned within the specified time range and the server components of ZENworks 7 Desktop Management installed on these machines. |
|
Novell ZENworks Handheld Management Installed Components by Machine |
Scope, Machine Name, IP Address, DNS Name, Min Last Scan Time, and Max Last Scan Time |
List of all machines that were successfully last scanned within the specified time range and the ZENworks 7 Handheld Management components installed on these machines. |
|
Novell ZENworks Installed Components by Machine |
Scope, Machine Name, IP Address, DNS Name, Min Last Scan Time, and Max Last Scan Time |
List of all machines that were successfully last scanned within the specified time range and the ZENworks 7 components installed on these machines. |
|
Novell ZENworks Installed Suites by Machine |
Scope, Machine Name, IP Address, DNS Name, Min Last Scan Time, and Max Last Scan Time |
List of all machines that were successfully last scanned within the specified time range and the ZENworks 7 suites installed on these machines. |
|
Novell ZENworks Server Management Installed Agent Components by Machine |
Scope, Machine Name, IP Address, DNS Name, Min Last Scan Time, and Max Last Scan Time |
List of all machines that were successfully last scanned within the specified time range and the agent components of ZENworks 7 Server Management installed on these machines. |
|
Novell ZENworks Server Management Installed Server Components by Machine |
Scope, Machine Name, IP Address, DNS Name, Min Last Scan Time, and Max Last Scan Time |
List of all machines that were successfully last scanned within the specified time range and the server components of ZENworks 7 Server Management installed on these machines. |
|
Others |
User Defined Reports For more information on how to create user-defined reports, see the Understanding User-Defined Reports. |
Based on the options specified by the user in the consoleone\consoleone_version\bin\userreports.ini file |
Displays the user-defined report. |
NOTE:The Show Chart selection criteria display a graphical representation of the Inventory report.
Generating Inventory Reports
To generate the inventory report:
-
Invoke the Inventory report by using any of the following methods:
-
To invoke the Inventory report from a database object, right-click the database object, then click .
-
To invoke the Inventory report from the ConsoleOne Tools menu, you must first configure the database, click , then click . For more information on how to configure the database, see Configuring the Inventory Database.
-
-
Click the report you want to generate.
The description for the report is displayed on the right side of the screen.
See the table with listing of simple Inventory lists and listing of the comprehensive inventory reports.
-
Specify the selection criteria.
The Scope selection criteria is enabled only if both ZENworks 7 Desktop Management and ZENworks 7 Server Management are installed on the same machine.
For example, to view all inventoried servers that have the Windows 2000 operating system, you would select Operating System Listing, specify the selection criteria scope as , and the operating system type as Windows 2000. The report displays the inventory information of all servers within the configured Inventory database.
Depending on the type of report you want, you can filter the information. For example, to view all inventoried servers with the Windows operating system, you select the Operating System Listing, and specify the selection criteria Scope as Both, the Operating System Type as Windows, and the Operating System Version as 2000.
Follow these guidelines as you work with the Reporting dialog box:
-
The selection criteria in the Inventory report are case sensitive
For example, if you want to know the list of machines whose Distinguished Name is CN=MACHINE1.OU=ENG.O=NOVELL, specify OU=ENG.O=NOVELL as the selection criterion. All the machines whose DN contains OU=ENG.O=NOVELL are displayed in the Inventory report, but the machines whose DN contains ou=eng.o=novell are not displayed in the Inventory report.
-
If the Reporting dialog box allows wildcards, you can use an asterisk (*) or question mark (?) with all selection criteria. The wildcard characters can be used for text fields only.
You can use * to retrieve the remaining entire text of a string where as ? can be used to retrieve only one character of a string.
Example 1: Lets assume that a machine name is "server1". If you query using ser*, then server1 is found. If you query using ser?, then the machine is not found. To find server1 using the ?, you must query using ser????, where each ? represents a character.
Example 2: Lets assume that the machine name is "CN=MACHINE1.OU=ENG.O=NOVELL.T=TREE". To find the machine, you can query by using "CN=MA*.OU=ENG.O=NOVELL.T=TREE" or CN=MA*. The machine name can be queried partly also. If you want to query by "O=novell.T=TREE", use * as "*O=novell.T=TREE".
The following table lists examples of wildcards usage:
-
-
Click .
A status box appears displaying the progress of the report generation. When the report is generated, it appears in the viewer. Use the buttons on the toolbar to page through, print, or export the report.
NOTE:ZENworks Inventory report supports only the following double-byte character languages: German, English, Spanish, French, Portuguese, and Japanese. Other double-byte characters might not be displayed properly in the Inventory reports.
Printing an Inventory Report
To print a report:
-
To change the default settings of the Printer, click the icon
 and modify the settings.
-
Click the icon
 .
.
Exporting an Inventory Report to a File
To export an inventory report to a file:
-
On the toolbar, click the icon
 .
.
-
In the Export dialog box, specify the location and file format.
If you choose to export the Inventory report to a text file, in the Export to Text dialog box, select the option and set the value to 16 because the data exported will be truncated if the value is less than 16.
If you want to export the Inventory report to an HTML file, you can select HTML 3.2 or HTML 4.0 (DHTML) file format. We recommend that you export to HTML 4.0 (DHTML) because the data exported to HTML 3.2 is not formatted properly.
If you want to export the Inventory report to a comma-separated value (.csv) file, do the following:
-
Export the report to Microsoft* Excel.
NOTE:If you choose to export to .csv at this point, the report is not properly exported.
-
Open the .xls file.
-
Click , then click .
-
In the field, choose.
-
Click .
-
-
Click .
-
Browse for and select the directory where you want to save the exported file.
-
Click .
Understanding User-Defined Reports
Using the Crystal Report Designer you can generate reports displaying information in the Inventory database.
Before generating the reports, you must ensure that the report file (.rpt) is created using Crystal Report Designer 8.0/8.5. For more information on how to create a .rpt file, see the Crystal Report documentation.
IMPORTANT:Except for the Software Inventory reports, you can use any Inventory report as a template to create a report.
To generate the User-defined Inventory report:
-
On the machine where you are designing the report, set the ODBC DSN name to ZenInventory.
To set the ODBC name:
-
Click , click, then click .
-
Double-click , then click .
-
Select the ODBC driver for the database you want to connect to.
-
Click .
-
Specify the Data Source name as ZenInventory and specify the details.
NOTE:If you want to specify a data source name other than ZenInventory, you must configure the ODBC name on the each of the machines where you invoke user-defined reports through ConsoleOne.
-
-
After you have designed the report, place the report in the \consoleone\version\reporting\canned\novellreporting\ zeninventory\locale directory.
Where locale can be EN for English language reports, FR for French language reports, PT_BR for Portuguese-Brazilian language reports, DE for German language reports, and ES for Spanish language reports. The non-English reports are displayed based on the respective locale of the machine.
-
Set the values in the userreports.ini file in the \consoleone\version\bin directory. The userreports.ini file must contain the following values:
#[ReportName] <actual name of the report file without the .rpt extension>
#DisplayName=User Defined Report’s display name
#Param1=Constant,Display name,<if combo then {val-1|val-2|val-3}>#<where Param1 is the internal name of the parameter as stored in the .rpt file>
#<Constants are 1, 2 and 3 for Combo selection, text field and numeric field respectively>
For example, you can set the value as given below:
[ListSystemInformation]DisplayName=System Information
Role=1,Role,{2|3|5}IPAddress=2,IP Address
DNName=2,Distinguished Name
DNTree=2,Distinguished Tree
DNSName=2,DNS Name
[ListMemory]
DisplayName=Memory
Role=1,Role,{2|3|5}IPAddress=2,IP Address
DNName=2,Distinguished Name
DNTree=2,Distinguished Tree
DNSName=2,DNS Name
MemoryLowerLimit=3,Memory Lower Bound
-
After you set the values in the userreports.ini file, the User Defined Report is displayed in the Inventory Reports tree. You can specify multiple reports in the userreports.ini files.
NOTE:If the userreports.ini file is empty, the user cannot view the User Defined Reports in the Inventory Reports tree.
-
Click .
17.1.5 Quickly and Easily Viewing the Inventory Data Using Quick Reports
In ZENworks 7 Workstation Inventory, provides a new tool called Quick Reports to easily retrieve and view the data from the ZENworks Inventory database. Each Quick Report contains a list of inventory attributes and a query that you define using the Quick Report wizard.
The following sections provide more information about working with Quick Report:
Invoking the Quick Report Wizard
Invoke the Quick Report Wizard using any of the following methods:
-
To invoke the Quick Report from a database object, right-click the database object, click , then click .
-
To invoke the Quick Report from the ConsoleOne Tools menu, click , then click .
If you have already configured the Inventory database, the Quick Report wizard uses that database.
If you have not yet configured the Inventory database, the Quick Report wizard is displayed, and you can configure the database using the wizard. For more information, see Configuring the Inventory Database.
Creating a Quick Report
-
Invoke the Quick Report wizard.
The Create and Manage Quick Reports page is displayed.
-
Click .

-
In the Define Query page, define the query criteria and specify the scope for viewing the data from the Inventory database.

You can use either the default query or define a new query.
To use the default query, click. The Quick Report is created with the default query: System Identification.Name Matches %.
To define a new query:
-
Select one of the following options.
-
Workstations: Select this option to view the data satisfying the specified filter conditions for inventoried workstations. If you have only Desktop Management installed, this option is enabled by default and the other two options are unavailable.
-
Servers: Select this option to view the data satisfying the specified filter conditions for inventoried servers. If you have only Server Management installed, this option is enabled by default and the other two options are unavailable.
-
Both: Select this option to view the data satisfying the specified filter conditions for both inventoried servers and inventoried workstations. If you want to view data for inventoried workstations only, or for inventoried servers only, use one of the other query options. This option is available only if you have both ZENworks 7 Desktop Management and ZENworks 7 Server Management installed.
-
-
(Optional) If you want to apply the filter condition defined in the Define Query window, select the option.
This option is available only if you define the query using the following software classes and its attributes in the Define Query window: Software Group, Software Group File Information, Software Group Patch Information, Software, File Information, Patch Information, Exclude File Information, and Disk Usage.
-
Click to change the query.

For detailed information on how to change the query, see Viewing Inventory Information of Inventoried Servers by Querying the Database.
-
Review the query and make changes as necessary. The Query to Perform pane displays the query you define.
-
Click .
-
-
In the Database Fields page, do the following:

-
From the list, select the inventory attribute that you want to report.
By default, System Identification.Name is selected. You cannot deselect or change the order of this attribute.
-
Click
 to add the selected inventory attribute to the list.
If you select a group attribute, all attributes of the group are added. For example, if you select the Software attribute, the Software attributes such as vendor name, product name, and version are included in the list.
-
To add an additional inventory attribute, repeat Step 4.a and Step 4.b.
NOTE:You can change the order of the attributes using
 and
and  .
.
-
To view the report, click .
The data is displayed in the Query Results window. For more information about the Query Results window, see Working with the Query Results Window.
-
To save the report, click Save.
IMPORTANT:Only the saved Quick Reports are listed on the Create and Manage Quick Reports page.
-
Click .
-
Modifying an Existing Quick Report
-
In the Create and Manage Quick Reports page, select the Quick Report that you want to modify from the list of Quick Reports.
You can modify only one Quick Report at a time.
By default, the list displays all the Quick Reports saved in the ConsoleOne_installation_directory\consoleone\1.2\reporting\export directory. To modify a Quick Report residing in another directory, click the icon to browse and select the directory.
IMPORTANT:Only the saved Quick Reports are listed on the Create and Manage Quick Reports page.
-
Click .

-
(Optional) In the Define Query page, change the existing query criteria and specify the scope for viewing the data from the Inventory database.
-
Select one of the following options.
-
Workstations: Select this option to view the data satisfying the specified filter conditions for inventoried workstations.
-
Servers: Select this option to view the data satisfying the specified filter conditions for inventoried servers.
-
Both: Select this option to view the data satisfying the specified filter conditions for both inventoried servers and inventoried workstations.
-
-
(Optional) If you want to apply the filter condition defined in the Define Query window, select the option.
This option is available only if you define the query using the following software classes and its attributes in the Define Query window: Software Group, Software Group File Information, Software Group Patch Information, Software, File Information, Patch Information, Exclude File Information, and Disk Usage.
-
Click to change the query.
For detailed information on how to change the criteria, see Viewing Inventory Information of Inventoried Servers by Querying the Database.
-
Review the query and make changes as necessary. The Query to Perform pane displays the query you define.
-
Click .
-
-
(Optional) In the Database Fields page, do the following:
-
From the list, select the inventory attribute that you want to report.
By default, System Identification.Name is selected. You cannot deselect or change the order of this attribute.
-
Click
to add the selected inventory attribute to the list.
If you select a group attribute, all attributes of the group are added. For example, if you select the Software attribute, the Software attributes such as vendor name, product name, and version are included in the Selected Fields list.
-
To add an additional inventory attribute, repeat Step 4.a and Step 4.b.
NOTE:You can change the order of the attributes using
and .
-
To view the report, click .
The report is displayed in the Query Results window. For more information about the Query Results window, see Working with the Query Results Window.
-
To save the report, click Save.
IMPORTANT:Only the saved Quick Reports are listed on the Create and Manage Quick Reports page.
-
Click .
-
Viewing the Data Retrieved by the Quick Report
You can view the data retrieved by the Quick Report using any of the following methods:
Viewing the Data While Creating or Modifying a Quick Report
-
In the Database Fields page, click .

Viewing the Data of a Saved Quick Report
-
In the Create and Manage Quick Reports page, select the Quick Report that you want to view from the list of Quick Reports.
You can view only one Quick Report at a time.
By default, the list displays all the Quick Reports saved in the ConsoleOne_installation_directory\consoleone\1.2\reporting\ export directory. To view a Quick Report residing in another directory, click the icon to browse and select the directory.
IMPORTANT:Only the saved Quick Reports are listed on the Create and Manage Quick Reports page.
-
Click .

The data is displayed in the Query Results window. For more information about the Query Results window, see Working with the Query Results Window.
Deleting a Quick Report
-
In the Create and Manage Quick Reports page, select the Quick Report that you want to delete from the list of Quick Reports.
By default, the list displays all the Quick Reports saved in the ConsoleOne_installation_directory\consoleone\1.2\reporting\ export directory. To delete a Quick Report residing in another directory, click the icon to browse and select the directory.
IMPORTANT:Only the saved Quick Reports are listed on the Create and Manage Quick Reports page.
-
Click .

Configuring the Inventory Database
-
In Create and Manage Quick Reports page, click .

The Configure ZENworks Database window is displayed.
-
Click to select an existing ZENworks database object from the list.
This database object contains the database settings such as the protocol, port in use by the database, and so forth.
-
Click .
Working with the Query Results Window
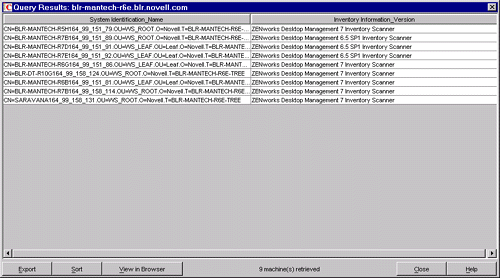
The Query Results window displays the data stored in the ZENworks Inventory database on querying the selected quick report. The Query Results window displays data for a maximum of 500 inventoried machines.
Figure 17-1 Query Results Window
You can perform the following operations in this window:
-
View the data in a browser.
IMPORTANT:When you click , the inventory data is exported in the XML format for rendering in the browser. Ensure that the browser, such as Microsoft Internet Explorer or Mozilla* Firefox, is the default application associated with the XML format.
If Internet Explorer is the default application associated with the XML format and it is already opened, and when you click View in Browser, you want the data to displayed in a new Internet Explorer window, do the following:
- 1. Invoke Windows Explorer on the machine running Quick Report.
- 2. Click the menu, then click .
- 3. In the Folder Options window, click the tab.
- 4. From the list of registered file types, select .
- 5. In the pane, click .
- 6. In the Edit File Type window, click .
- 7. Specify an action name, and in the field, type Internet_Explorer_installation_directory\iexplore.exe -new %1.
- 8. Click .
- 9. In Edit File Type window, select the newly created action from the pane, and click .
- 10. Click OK, then click Close.
-
Stop the data retrieval process.
The Quick Report retrieves the data from the ZENworks Inventory database. You can stop the retrieval process by clicking in the status bar of the Query Results dialog box.
The status bar displays the count of machines whose data has been retrieved. If you stop the process while the data for a single machine has not yet been completely retrieved, the Query Results dialog box displays the data retrieved until that time, but the status bar does not contain any message. And, if you stop the process while the data is being retrieved for multiple machines, the status bar displays the count of machines for which the data has been completely retrieved.
-
Re-order the columns by dragging and dropping them.
-
Re-size the columns.
-
Select the entries by using the mouse or pressing Ctrl+A.
-
Copy and paste the entries to the Clipboard by pressing Ctrl+C and Ctrl+V.
Exporting the Entries to an XML or a CSV File
-
Click .
-
In the Export Results dialog box, specify the XML or the CSV filename, and select the corresponding file type.
By default, the file is saved as quick_report_name.xml in the ConsoleOne_installation_directory\consoleone\1.2\reporting\ export directory.
NOTE:If you specify a filename within double quotes, and without an extension or with an extension other than .xml or .csv, the file is stored in the comma-separated value (CSV) format irrespective of the file type you select.
Sorting the Display Ascending or Descending Order
-
Click .
-
In the list, select the column by which you want to sort the entries.
-
Select either or .
-
Configure the drop-down lists.
-
Click .
For example, the Query Results window has the following entries:
If you want to sort the entries first by the vendor name in the ascending order and then sort all the Novell products in the ascending order, do the following:
-
Click the button.
-
In the drop-down list, select .
-
Select the option.
-
In the drop-down list, select .
-
Select the option.
-
Click .
The entries are displayed as shown below: