27.2 Working with the Probe Manageability Tool
Review the following sections to understand how to work with the Probe Manageability tool:
27.2.1 Adding a Node to the List
-
In the Probe Manageability window, click
 located in the List of Nodes pane.
-
In the Add a Node window, type the eDirectory name, the DNS name or the IP address of the node. You can also click to browse to and select a node.
-
Click Add.
The node is added to the list of nodes.
27.2.2 Adding Multiple Nodes at a Time to the List
-
In the Probe Manageability window, click
 located in the List of Nodes pane
-
In the Select Objects window, select multiple nodes that you want to add to the list.
-
Click OK.
The selected nodes are added to the list of nodes.
27.2.3 Deleting a Node from the List
-
In the Probe Manageability window, select the node you want delete from the list of nodes
-
Click
 .
.
The selected node is deleted from from the list of nodes.
27.2.4 Starting the Probe Manageability Operation
-
In the Probe Manageability window, click Start.
27.2.5 Stopping the Probe Manageability Operation
-
In the Probe Manageability window, click Stop.
27.2.6 Viewing the Probe Manageability Log for a Node
-
Click View Log.
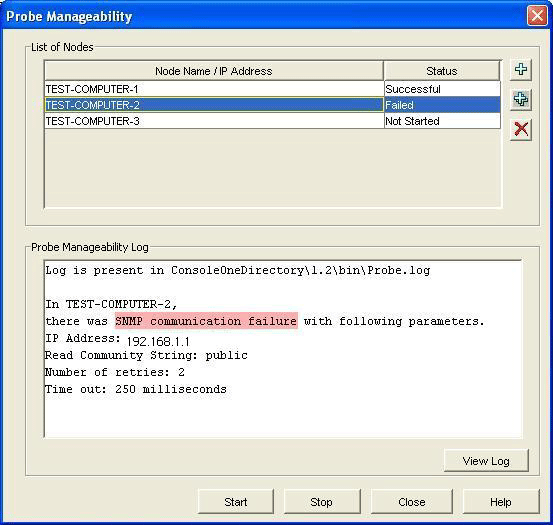
The log for nodes for which Probe Manageability is completed till that instance is shown in the Log pane. However, to view the information of a specific node, select the node in the List of Nodes pane. At the end of current Probe Manageability session, log for all the nodes is displayed in the Log pane.
The location of log file is Novell_ConsoleOne_Directory\1.2\reporting\Probe_ Manageability\Probe.log:
Figure 27-2 Probe Manageability Log
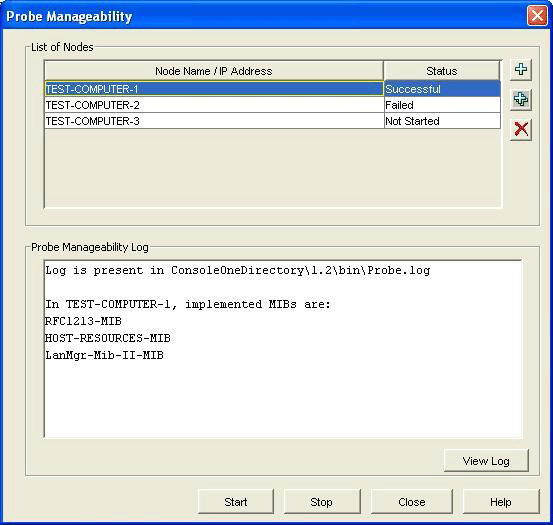
Figure 27-3 Probe Manageability Log with details of SNMP failure.