12.1 Upgrade Using the Program CD
Using this method, there are two platform-based options for upgrading:
-
NetWare and Windows servers: For these platforms, the GUI installation program is started on the Windows workstation where the Novell ZENworks 7 Server Management with Support Pack 1 Program CD is inserted. Upgrade options are available in the program’s menus.
This method must be used first to upgrade eDirectory objects and NetWare or Windows Distributor servers.
-
Linux and Solaris servers: For these platforms, a script file is used. It is provided on the Novell ZENworks 7 Server Management with Support Pack 1 Program CD, and is run locally on each Linux or Solaris server to be upgraded.
This method must be used first to upgrade eDirectory objects and Linux or Solaris Distributor servers.
To automate installation to multiple Subscriber servers, we recommend upgrading these servers using the Server Software Package method (see Section 12.2, Upgrade Using a Server Software Package).
To upgrade ZENworks for Servers 3.0.2 Policy and Distribution Services to ZENworks 7 with SP1:
12.1.1 Upgrade Concepts and Issues
Using the GUI upgrade program, you can upgrade ZENworks for Servers 3.0.2 Tiered Electronic Distribution objects and servers to ZENworks 7 Server Management with SP1.
Review the following to understand what the GUI upgrade program does, and to understand the issues involved:
After reviewing this section, continue with Section 12.1.2, Upgrade Preparation.
What the Upgrade Program Does
-
Upgrades the ZENworks for Servers 3.0.2 Novell eDirectory™ objects to version 7 in the tree that you have selected. The upgrade is done only for the Distributor and Subscriber objects.
-
Maintains the existing attributes for each updated eDirectory object, so that you do not need to reconfigure the objects.
-
Maintains all working directories, so that Distributions created in ZENworks for Servers 3.0.2 can be upgraded and used in version 7.
-
Upgrades to the ZENworks 7 Server Management with SP1 software using the installation paths where ZENworks for Servers 3.0.2 was installed.
Files are always copied in the ZENworks directories, replacing both older and newer files with the upgrade files. Files copied to other locations outside of the ZENworks directories are replaced only if they are older.
The reason for replacing both older and newer files in the ZENworks directories is that version 3.0.2 files from a support pack that is more recent than the release of version 7 needs to be replaced with the older-dated version 7 files in order to have the correct files for version 7.
-
When you select to upgrade a Subscriber, the ZENworks for Servers 3.0.2 Policy Package Agent is automatically upgraded to the ZENworks 7 Server Management with SP1 Policy/Package Agent.
In summary, the upgrade program upgrades the objects and installs the software on the Distributor and Subscriber servers.
What the Upgrade Program Does Not Do
-
The upgrade program does not install ZENworks 7 Server Management with SP1 to servers where ZENworks for Servers 3.0.2 was not installed. It only upgrades existing ZENworks for Servers 3.0.2 objects and software.
-
The schema is not automatically extended. You must do this before upgrading. This task is covered in the upgrade steps.
-
The ZENworks 7 Server Management with SP1 snap-ins for ConsoleOne® are not installed to the local machine during upgrading. You must do this with the installation program after you have exited the upgrade program. This task is covered in the upgrade steps.
-
The ZENworks 7 Server Management with SP1 plug-ins for iManager are not installed by the upgrade program. You must do this with an installation program menu option after you have exited the upgrade program. This task is covered in the upgrade steps.
-
Does not upgrade the ConsoleOne snap-ins on servers where ConsoleOne is installed. This must be done using the installation program.
-
File Distributions are not re-baselined, which must be done manually. File Distributions that are not re-baselined causes a “Local class compatibility” error at the time of building or extracting, and the Distribution is not processed. This task is covered in the upgrade steps.
In summary, the upgrade program does not install ZENworks 7 Server Management with SP1 where ZENworks for Servers 3.0.2 was not installed. The ZENworks for Servers objects are necessary for identifying the servers to upgrade.
Upgrading Servers on Multiple Trees
The upgrade program discovers your target servers by their corresponding Distributor or Subscriber objects contained in the tree. You can only select one tree when running the upgrade program. Therefore, if you have multiple trees with ZENworks for Servers 3.0.2 objects, you need to run the upgrade program twice per tree: once for the Distributors, then again for the Subscribers.
However, if you use the software package method to upgrade your Subscribers (see Section 12.2, Upgrade Using a Server Software Package), you can upgrade Subscribers across multiple trees.
Upgrading Distributors First
Whether upgrading incrementally or all at once, for the following reasons we recommend that you upgrade all of your Distributors first, then upgrade your Subscribers:
-
Version 7 Distributors can send their version 7 Distributions to version 7 Subscribers.
-
Version 7 Distributors can send their version 7 Distributions to version 3.0.2 Subscribers.
It is the Interim Release 1 requirement for ZENworks for Servers 3.0.2 that makes this possible. For more information, see Section 17.1.2, Interoperability with ZENworks for Servers 3.x.
-
Version 3.0.2 Distributors can send their version 3.0.2 Distributions to version 3.0.2 Subscribers.
-
However, version 3.0.2 Distributors cannot send their version 3.0.2 Distributions to version 7 Subscribers.
This is the main reason for upgrading the Distributors first. If you upgraded some Subscribers before upgrading the Distributor that sends them its Distributions, the Distributions fail because of the Distribution version and Subscriber version conflict.
After a ZENworks for Servers 3.0.2 Distributor is converted to ZENworks 7 Server Management with SP1, before it sends any of its Distributions, it converts them to ZENworks 7 Server Management with SP1 Distributions when it builds them.
Incremental Upgrading and Interoperability
For a variety of reasons, you might need to upgrade your ZENworks for Servers 3.0.2 Subscriber objects incrementally. For example, you may have too many servers to upgrade all of them in one session. Interoperability issues can exist when upgrading incrementally.
For interoperability between ZENworks 7 with SP1 Subscribers and ZENworks for Servers 3.0.2 Subscribers when upgrading incrementally, you must have Interim Release 1 installed on all version 3.0.2 Subscriber servers. For more information, see Section 17.1, Version Interoperability.
Determining Whether to Upgrade Incrementally
Consider the following in determining whether to upgrade your Subscribers incrementally:
-
Number of Subscribers: If you have many Subscribers, consider the time it might take to upgrade them in one session. If that time frame is too long, select your target Subscribers in groups so that you can upgrade one group at a time.
-
Desktop Application Distributions: If you have ZENworks for Servers 3.0.2 Desktop Application Distributions, you should maintain one ZENworks for Servers 3.0.2 Distributor for sending Desktop Application Distributions to the ZENworks for Servers 3.0.2 Subscribers requiring them.
The upgrade process is then:
-
Upgrade the ZENworks for Servers 3.0.2 Distributor to version 7 that was sending Desktop Application Distributions.
-
Rebuild the Desktop Application Distributions as version 7 Distributions, but do not allow them to be sent yet.
-
Upgrade the version 3.0.2 Subscribers that need the upgraded Desktop Application Distributions.
-
Send the upgraded Desktop Application Distributions.
-
Cluster Issues with Upgrading
The upgrade program automatically upgrades clusters.
12.1.2 Upgrade Preparation
The servers you want to upgrade must meet all of the same server requirements for installation of ZENworks 7 Server Management with SP1 that are provided in Section 5.0, Server Requirements.
WARNING:If you intend to upgrade incrementally, be aware that some system requirements for ZENworks 7 Server Management with SP1 should not be applied to servers where you will continue to use ZENworks for Servers 3.0.2 Interim Release 1. Meet the server requirements only for the servers you are upgrading to ZENworks 7 Server Management with SP1.
You need to know the following information to upgrade ZENworks for Servers 3.0.2 objects and servers to ZENworks 7 Server Management with SP1:
Trees to Upgrade
Determine the trees where ZENworks for Servers 3.0.2 objects have been installed. You need to extend the schema on these trees before upgrading. Extending the ZENworks 7 Server Management with SP1 schema does not remove the ZENworks for Servers 3.0.2 schema extensions. ZENworks schema extensions are additive.
If you have ZENworks for Servers 3.0.2 installed across multiple trees, you should first upgrade the Distributors per tree, then upgrade the Subscribers in those trees using either the upgrade program or .cpk file method (which allows upgrading multiple trees at a time using a Distribution).
Distributor Servers to Upgrade
The upgrade program displays all ZENworks for Servers 3.0.2 Distributor objects in the tree. Plan to upgrade all of the Distributors in a given tree at the same time.
For ZENworks for Servers 3.0.2 servers that are both a Distributor and Subscriber, the Subscriber software is also upgraded when you upgrade the Distributor software.
Subscriber Servers to Upgrade
The upgrade program displays all ZENworks for Servers 3.0.2 Subscriber objects in the tree.
If you plan to upgrade incrementally within a tree, determine the groups of servers that you want to upgrade. For more information, see Incremental Upgrading and Interoperability.
Continue with Section 12.1.3, Upgrading NetWare and Windows Servers.
12.1.3 Upgrading NetWare and Windows Servers
If you have ZENworks for Servers 3.0.2 objects installed to multiple trees, repeat the following upgrade instructions for each tree. Also, if you are upgrading Subscribers incrementally, repeat the following upgrade instructions for each increment.
To upgrade ZENworks for Servers 3.0.2 to ZENworks 7 Server Management with SP1, perform the following tasks in order:
Pre-Upgrade Checklist
-
Review the Novell ZENworks 7 Server Management with Support Pack 1 Readme for any last-minute information concerning upgrading.
Readme_servers.html is located in the \readmes\en directory on the Novell ZENworks 7 Server Management with Support Pack 1 Program CD, and is also accessible from an installation menu option.
-
Make sure your upgrade workstation has met the requirements listed in Section 4.0, Installation Machine and Management Workstation Requirements.
IMPORTANT:Make sure you have updated each of your ConsoleOne installations, because you will be updating to the ZENworks 7 Server Management with SP1 snap-ins when completing the upgrade process (see Upgrade the ConsoleOne Snap-Ins).
-
Make sure you have met all of the server requirements listed in Section 5.0, Server Requirements.
-
If you have not already done so, log in to the eDirectory tree where you are updating the ZENworks for Servers 3.0.2 objects to version 7.
If you are not logged in to this tree, you cannot select it during the upgrade process.
You can upgrade Distributors and Subscribers one tree at a time. You can run the upgrade program as many times as necessary.
You must extend the schema for ZENworks 7 Server Management with SP1 on this tree.
-
If you upgrade the software on any Windows servers, make sure you have closed the Services window on each Windows server to be upgraded.
The upgrade program automatically stops all ZENworks Server Management services. However, the Server Management services cannot be registered if the Services window is left open while upgrading the server.
Continue with Upgrade Steps.
Upgrade Steps
To upgrade ZENworks for Servers 3.0.2 to ZENworks 7 Server Management with SP1, do the following tasks in order:
Disable the Distribution Channels
If you re-baselined your version 3.0.2 File Distributions when updating to Interim Release 2, you should disable the Channels if you do not want Distributions being sent and extracted while you are upgrading. However, this is not required, because a Distribution being extracted on a Subscriber can be interrupted by an upgrade process, then pick up where it left off after the upgrade has finished.
If you did not update ZENworks for Servers 3.0.2 to Interim Release 2, you must disable all Channels where File Distributions are listed. File Distributions must be re-baselined after upgrading to prevent a “Local class compatibility” error at the time of building or extracting, which causes the Distribution to not be processed. In order to prevent distribution errors in this situation, Distributions should not be sent between Distributors and Subscribers until they have been upgraded. Steps to re-baseline File Distributions are provided in Re-Baseline File Distributions.
To disable the applicable Channels:
-
In ConsoleOne, multiple-select the Channel objects for the Channels you need to disable.
These should be all Channels where a File Distribution is listed.
-
Right-click the selected objects, then click .
-
Select each of the Channels listed on the tab, then click the tab.
-
Click the box to deselect it, then click to exit the properties.
-
Exit ConsoleOne.
-
Continue with Extend the Schema.
Extend the Schema
-
On the upgrade workstation, insert the Novell ZENworks 7 Server Management with Support Pack 1 Program CD.
The startup screen is displayed. If the startup screen is not automatically displayed after inserting the CD, run winsetup.exe at the root of the CD.
We recommend that you upgrade Policy and Distribution Services from the Program CD. However, if you need to copy the CD structure to a hard drive, the path between the root of the hard drive and the first CD directory can contain only directory names that conform to the 8.3-character DOS file naming convention. If any long directory names exist in the path, the upgrade program does not work.

-
Select .

-
If you have not yet extended the schema for version 7, select ; otherwise, skip the following steps and continue with Start the Upgrade Program.
To upgrade ZENworks for Servers 3.0.2 to ZENworks 7 Server Management with SP1, you must extend the schema on the trees where you are updating the ZENworks objects.

-
If you agree with the Software License Agreement, click , then click to display the eDirectory Tree for Creating Objects page; otherwise, click and to exit.

-
Select the tree where you want the ZENworks objects created, then click to display the ZENworks Server Management Licensing page.
IMPORTANT:Select the check box only if you are extending the schema for the first time. If you are running the menu option only to enter a product license code, deselect this box.
The button allows you to log into the tree if you are not already authenticated.
ZENworks Server Management schema extensions need to be done only once for a tree. If you have multiple trees, you need to extend the schema only on the trees where you are installing ZENworks objects.
Schema extensions for Policy and Distribution Services are installed at the same time when extending the schema.

-
Enter a license code, or leave the field blank and click to display the Summary page.
You should have received the license code when you purchased the product.
If you leave the field blank, the 90-day Evaluation License is in effect. You can return to this page at a later date to enter a license code.

-
To extend the schema, click .
After the schema extension process has completed, the main installation menu is displayed.
-
Continue with Start the Upgrade Program.
Start the Upgrade Program
Figure 12-1 Upgrade from ZfS 3 Menu Option
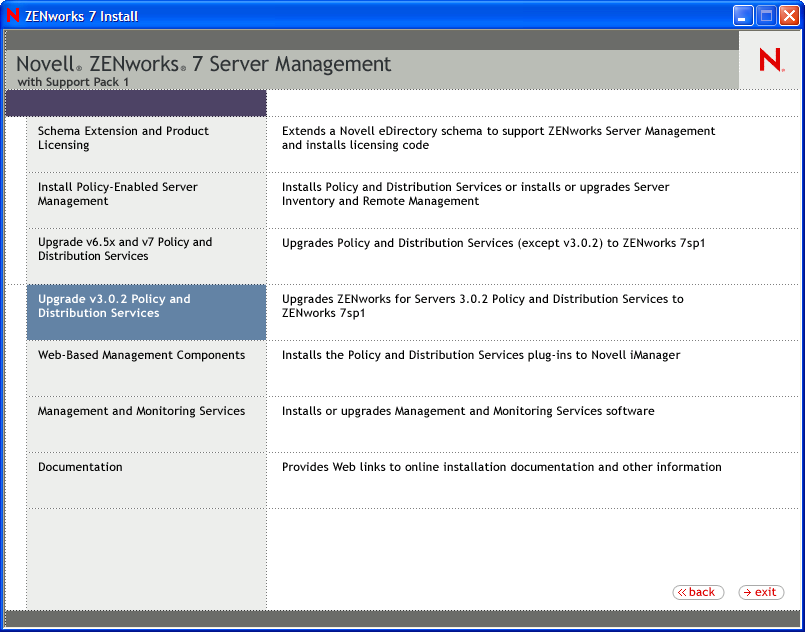
-
Select .

-
If you agree with the Software License Agreement, click , then click ; otherwise, click to exit.

-
Select the tree where you have Distributor and Subscriber objects to be upgraded.
If necessary, you can click the button to authenticate to the tree.
-
There are two configuration options:
-
Container: To avoid searches across WAN links, specify a container.
The tree walking process the installation program must use to search for Distributor and Subscriber objects could take hours, even causing the workstation to seem to hang. By specifying a container, these objects are only searched within that container and its subcontainers.
-
Update the Subscriber files: By default, this check box is selected.
To upgrade both the Subscriber files and objects, select this box. However, if you plan to upgrade your Subscriber servers using the .cpk file in a Distribution, deselect this box so that only the Subscriber objects are upgraded.
IMPORTANT:The Subscriber objects must be upgraded using the GUI upgrade program. They are not upgraded by the .cpk file.
-
-
Click and continue with Select the Objects for Upgrading.
Select the Objects for Upgrading
Figure 12-2 Select the Objects for Upgrading Page
The objects listed are all of the ZENworks for Servers 3.0.2 (or unknown version) objects in the selected tree for all supported platforms. All of the check box options are dependent on each other. Any combination can cause a different set of servers to be displayed.
-
Configure the selection as necessary:
-
Check one or both of the following boxes, as applicable:
-
Distributors: You must upgrade Distributors first, because ZENworks 7 Server Management with SP1 Subscribers cannot receive Distributions from ZENworks for Servers 3.0.2 Distributors; however, ZENworks for Servers 3 Subscribers can receive Distributions from ZENworks 7 Server Management with SP1 Distributors, except as explained concerning Desktop Application Distributions.
To upgrade only Distributors, click the check box to deselect all Subscribers. If you have already upgraded the Distributors, click the check box to deselect all Distributors.
-
Subscribers: You can upgrade all of the listed Subscribers, or upgrade groups of Subscribers at different times. To upgrade only groups of Subscribers, select the check boxes for the Subscribers that you do not want to upgrade at this time.
For all supported platforms, Subscriber objects must be upgraded using this GUI upgrade program.
By default, both boxes are selected. For more information, see Determining Whether to Upgrade Incrementally.
-
-
Software versions to upgrade:
-
Version 3.0.2: This causes all ZENworks for Servers 3.0.2 servers to be displayed.
-
Version 3/Unknown: This causes servers with ZENworks for Servers 3, 3 Support Pack 1, or any unknown version to be displayed.
-
-
Server platforms to upgrade:
-
NetWare: Displays only NetWare servers that match the other criteria (Distributor, Subscriber, versions).
-
Windows: Displays only Windows servers that match the other criteria (Distributor, Subscriber, versions).
-
Linux/Solaris/Unknown: Displays only Linux, Solaris, or platform unknown servers that match the other criteria (Distributor, Subscriber, versions).
By default, all platform boxes are selected. Servers are sorted by platform in the listing.
-
-
-
Click and continue with Configure the Upgrade Locations and Options.
Configure the Upgrade Locations and Options
Figure 12-3 File Upgrade Locations and Options Page
-
On the File Upgrade Paths and Options page, select one or more objects in the list.
Select objects individually or in groups, depending on whether their servers share the same installation paths and Server Management software starting methods.
The field is for display only. The previous installation path is detected and used.
-
To have servers for the selected objects automatically start ZENworks 7 Server Management with SP1 on server startup, select the check box (which is selected by default).
-
To have the upgrade program automatically start Policy and Distribution Services after upgrading, select the check box (which is selected by default).
-
Repeat Step 1 through Step 3 for each group of selected objects.
-
Click and continue with Upgrade Summary.
Upgrade Summary
Figure 12-4 Upgrade Summary Page

-
On the Upgrade Summary page, click to begin the upgrade process.
-
If you upgraded Distributors and now want to upgrade Subscribers, repeat the steps in Upgrade Steps.
-
If you upgraded one tree and want to upgrade another at this time, repeat the steps in Upgrade Steps.
-
Continue with Complete the Upgrade.
Complete the Upgrade
To complete the upgrade process, do the following tasks in order:
Upgrade the ConsoleOne Snap-Ins
When upgrading, you should have updated the instance of ConsoleOne to the ZENworks 7 Server Management with SP1 snap-ins on the workstation that you used for upgrading. However, if you need to upgrade that or other instances of ConsoleOne with the snap-ins, continue in this section; otherwise, skip to Upgrade the Novell iManager Plug-Ins.
Make sure you have already upgraded to the newest version of ConsoleOne from the Novell ZENworks 7 with Support Pack 1 Companion 1 CD (see Section 4.4, Installing ConsoleOne 1.3.6e). This is required before installing the ZENworks 7 Server Management with SP1 snap-ins to any instance of ConsoleOne on a workstation or server.
To install the ZENworks 7 Server Management with SP1 snap-ins for ConsoleOne:
-
On a workstation or server where the ConsoleOne snap-in need to be upgraded to version 7, insert the Novell ZENworks 7 Server Management with Support Pack 1 Program CD.
The main menu is displayed. If it is not automatically displayed after inserting the CD, run winsetup.exe at the root of the CD.
-
Select the option.

-
Select to start the installation program.
The License Agreement page is the first installation page displayed when the program has loaded.

-
If you agree with the Software License Agreement, click , then click to display the Installation Type page; otherwise, click and click to exit.

-
On the Installation Type page, click to perform a new installation and display the Installation Options page.

-
On the Installation Options page, click the option to deselect the box, then click to display the Server Selection page.
You do not need tree access to update the ConsoleOne snap-ins.
The option must be selected to install the ConsoleOne snap-ins.
The option is optional.

On the Server Selection page, the option is selected for the check box.
-
Click to display the Installation Summary page.
is the workstation or server where you are running this program.

-
Click to install the ConsoleOne snap-ins to the local machine.
-
Repeat Step 1 through Step 8 for each machine where you need to upgrade the ConsoleOne snap-ins.
-
If you installed the ConsoleOne snap-ins as part of upgrading with the GUI installation program, continue with Upgrade the Novell iManager Plug-Ins.
Or, if you installed the ConsoleOne snap-ins as part of upgrading with the software package, continue with Step 13 under Upgrading with the Server Software Package.
Upgrade the Novell iManager Plug-Ins
If you have Novell iManager 2.0.2 installed in your network, and you need to upgrade the iManager plug-ins to ZENworks 7 with SP1, follow the instructions under Section 6.1.2, Web-Based Management for Policy and Distribution Services, then return to this section.
Continue with Start Policy and Distribution Services.
Start Policy and Distribution Services
If you chose not to auto-start Policy and Distribution Services after the upgrade completes, you must start Policy and Distribution Services on servers where you have upgraded from ZENworks for Servers 3.0.2.
-
On a server where you upgraded from ZENworks for Servers 3.0.2 to ZENworks 7 Server Management with SP1, do the appropriate procedure for your platform:
-
Repeat Step 1 for each server that you upgraded.
-
If you upgraded NetWare servers, continue with Verify That the Policy and Distribution Services Agents Are Loaded on NetWare Servers.
Or, if you upgraded only Windows servers, continue with Verify That the Policy and Distribution Services Agents Are Loaded on Windows Servers.
Verify That the Policy and Distribution Services Agents Are Loaded on NetWare Servers
-
On the target server’s console, press Ctrl+Esc to view the loaded software programs.
-
If the service is not displayed, review the \zenworks\zfs-startup.log file, which contains information about why the agent did not start.
Zfs-startup.log is used to log startup problems only.
-
If the service is not displayed, review the \zenworks\zfs-startup.log file, which contains information about why the Sybase engine database did not start.
-
Rerun the upgrade program as necessary (see Upgrade Steps).
-
If you upgraded Windows servers, continue with Verify That the Policy and Distribution Services Agents Are Loaded on Windows Servers.
Or, if you have File Distributions, you may need to re-baseline them. If so, continue with Re-Baseline File Distributions.
Or, if you have Linux or Solaris Distributor servers to upgrade, continue with Section 12.1.4, Upgrading Linux and Solaris Servers.
Or, if you planned to upgrade Subscriber servers using the software package method, continue with Section 12.2, Upgrade Using a Server Software Package.
Otherwise, you have completed upgrading NetWare and Windows servers.
Verify That the Policy and Distribution Services Agents Are Loaded on Windows Servers
-
On the target server, open the Control Panel, double-click > , then determine if the following services are running:
- Novell Database - Sybase
- Novell ZENworks Service Manager
-
If the services are not displayed, do the following:
-
Close the Services window.
-
Click > , then enter the following command:
zenworks\pds\bin\dservices.bat
This stops the ZENworks Server Management services and unregisters them. This is done to make sure clean state exists for registering the services.
-
Click > , then enter the following command:
zenworks\pds\bin\sservices.bat
This registers the ZENworks Server Management services.
-
Open the Control Panel, double-click > , then start the services.
-
-
Rerun the upgrade program as necessary (see Upgrade Steps).
-
If you have File Distributions, you may need to re-baseline them. If so, continue with Re-Baseline File Distributions.
Or, if you have Linux or Solaris Distributor servers to upgrade, continue with Section 12.1.4, Upgrading Linux and Solaris Servers.
Or, if you planned to upgrade Subscriber servers using the software package method, continue with Section 12.2, Upgrade Using a Server Software Package.
Otherwise, you have completed upgrading NetWare and Windows servers.
Re-Baseline File Distributions
After upgrading to ZENworks 7 Server Management with SP1, all ZENworks for Servers 3.0.2 File Distributions must be re-baselined in order to incorporate new code contained only in the upgraded Distributor and Subscriber software. Otherwise, a “Local class compatibility.” error at the time of building or extracting is given, and File Distributions fails to process.
Review the following to re-baseline the Distributions:
However, if you had updated ZENworks for Servers 3.0.2 to Interim Release 2 before upgrading, you will have re-baselined those Distributions at that time. Therefore, you have completed upgrading your NetWare and Windows servers. Do one of the following:
-
If you have Linux or Solaris Distributor servers to upgrade, continue with Section 12.1.4, Upgrading Linux and Solaris Servers.
-
If you planned to upgrade Subscriber servers using the software package method, continue with Section 12.2, Upgrade Using a Server Software Package.
Understanding Baselining
The first time a File Distribution is sent, the entire content of the Distribution is sent. This is known as the “baseline” Distribution. To minimize network traffic and rebuilding time, File Distributions can have “deltas” sent, instead of the entire Distribution. A delta is a file made up of the differences between the last version of a Distribution and its newer version.
Deltas are useful for minimizing network traffic and bandwidth utilization, and are particularly useful with very large Distributions that change often, but have minimal changes.
The field on the General tab of the Distribution object’s properties allows you to determine how many deltas are built and sent before the entire Distribution built and sent again. The default for this field is 10.
Using this default value, the next 9 revisions are all deltas. Then, the 10th revision becomes a new baseline with the entire Distribution being rebuilt and sent. This causes all of the temporary files relative to that Distribution to be removed from the Distributor’s working directory and to be replaced by the new baseline files. The baseline-deltas cycle is then repeated.
Continue with Re-Baselining the Distributions.
Re-Baselining the Distributions
There are two methods to force re-baselining of File Distributions:
-
Changing the Maximum Revisions field back to 1
By changing this value back to 1, the next time the File Distribution is built, a new baseline is created.
-
Deleting the Distribution’s directory
The File Distribution is automatically be re-baselined the next time the Distribution’s Build schedule starts.
In both methods, re-baselining occurs the next time the File Distribution is built. Therefore, to speed up the re-baselining time, you may need to force rebuilding of the Distributions.
IMPORTANT:If you have more than 50 File Distributions, you should not re-baseline them all at once. This could force the Distributor to perform a lot of work all at once, and, depending on the Send schedule for these Distributions, could result in high network traffic in sending all of the new baselines at the same time.
Also, it could result in the Subscriber having a heavy workload if it is receiving and extracting several File Distributions that have been re-baselined.
We recommend you plan to re-baseline and send your File Distributions in small groups of 10 to 20 at a time.
To re-baseline File Distributions, review the following two methods and select the one that is most applicable for you:
Change the Maximum Revisions Value to 1
-
In ConsoleOne:
-
Right-click a File Distribution object and click .
-
Click the tab.
-
If you want to preserve the current value in the field, make a note of it.
Because this value can vary between the Distributions, you cannot multiple-select Distribution objects to change it.
-
Change the value to 1.
-
Click to close the Distribution’s properties.
-
Repeat steps Step 1.a through Step 1.e for each File Distribution.
-
Multiple-select the Distributor objects owning the File Distributions.
-
Right-click the selected Distributor objects, then click .
-
-
In iManager, for each Build schedule that is not already set to , if you do not want to wait for its schedule to start, do the following; otherwise, skip to Step 3:
-
Under the role, click .
-
Browse for and select a Distributor that owns one of the File Distributions that you modified in Step 1.d, then click .
-
On the tab, click .
-
Select the File Distributions to be rebuilt, then click .
-
Click to start building the selected Distributions.
Each File Distribution whose maximum revisions value was set to 1 is rebuilt as a new baseline.
-
Repeat steps Step 2.a through Step 2.e for each Distributor that owns one of the File Distributions that you previously modified to have a value of 1.
-
-
After the File Distributions have been rebuilt, in ConsoleOne:
-
Right-click a File Distribution object and click .
-
Click the tab.
-
If you want to preserve the current value in the field, make a note of it.
-
Change the value from 1 back to its original value (that you noted in Step 1.c).
-
Click to close the Distribution’s properties.
-
Repeat steps Step 3.a through Step 3.e for each File Distribution.
-
Multiple-select the Distributor objects owning the File Distributions.
-
Right-click the selected Distributor objects and click .
-
You have completed re-baselining the File Distributions. They are sent and extracted according to the Channel and Send schedules involved.
Do one of the following:
-
If you have Linux or Solaris Distributor servers to upgrade, continue with Section 12.1.4, Upgrading Linux and Solaris Servers.
-
If you planned to upgrade Subscriber servers using the software package method, continue with Section 12.2, Upgrade Using a Server Software Package.
Delete the Distribution’s Directory
After you have completed upgrading Policy and Distribution Services:
-
In ConsoleOne, right-click a Distributor object for a Distributor that owns one of the File Distributions that you need to re-baseline, then select .
-
On the > tab, note the Distributor’s working directory.
-
On the Distributions tab, note the distinguished name for each File Distribution, then exit the Distributor’s properties.
-
Repeat Step 1 through Step 3 for each Distributor that owns one of the File Distributions that you need to re-baseline.
-
Using a file management application, under the Distributor’s working directory that you noted in Step 2, delete all of the directories that match the distinguished names of the File Distributions that you noted in Step 3.
-
Repeat Step 5 for each Distributor server where you noted File Distributions to be deleted.
-
In ConsoleOne, multiple-select these Distributors, right-click them, then click .
-
For each Build schedule that is not already set to , if you do not want to wait for its schedule to start, do the following in iManager:
-
Under the role, click .
-
Browse for and select a Distributor that owns one of the File Distributions that you are re-baselining, then click .
-
On the tab, click .
-
Select the File Distributions to be rebuilt, then click .
-
Click to start building the selected Distributions.
-
Repeat steps Step 8.a through Step 8.e for each Distributor that owns one of the File Distributions that you are re-baselining.
-
You have completed setting up re-baselining of the File Distributions. The next time the Build schedules start for these Distributions, a new baseline version is built. Then they are sent and extracted according to the Channel and Send schedules involved.
Do one of the following:
-
If you have Linux or Solaris Distributor servers to upgrade, continue with Section 12.1.4, Upgrading Linux and Solaris Servers.
-
If you planned to upgrade Subscriber servers using the software package method, continue with Section 12.2, Upgrade Using a Server Software Package.
12.1.4 Upgrading Linux and Solaris Servers
It is assumed that you have already extended the schema in the tree where the Linux and Solaris Distributor and Subscriber objects reside. If not, follow the instructions in Extend the Schema before continuing in this section.
Perform the following tasks to upgrade your Linux and Solaris servers from ZENworks for Servers 3.0.2 to ZENworks 7 Server Management with SP1:
Upgrade the Linux or Solaris Operating System
In most cases, you need to upgrade your Linux or Solaris operating systems before you upgrade ZENworks for Servers 3.0.2 to ZENworks 7 Server Management with SP1.
The following table lists the corresponding versions of the Linux and Solaris operating systems that are supported at minimum:
Table 12-1 Minimum Supported Linux and Solaris Operating Systems for Upgrading
The Red Hat Linux Advanced Server 2.1 and the Red Hat Linux Enterprise Server 2.1 operating systems are supported in both versions of ZENworks. Therefore, if you have ZENworks for Servers 3.0.2 installed on either the Red Hat Linux Advanced Server 2.1 or the Red Hat Linux Enterprise Server 2.1 operating system, skip to Upgrade the Distributor and Subscriber Objects.
SUSE® Linux was not supported in ZENworks for Servers 3.0.2. However, the following Linux operating systems are supported in ZENworks 7 Server Management with SP1:
- SUSE Linux Enterprise Server (SLES) 8, 9, and 9 SP1
- SUSE Linux Standard Server (SLSS) 8, 9, and 9 SP1
You can use any SUSE Linux version as replacement for a non-supported Linux operating system. However, the file system is different between SUSE Linux and the Red Hat Linux, requiring you to install ZENworks 7 Server Management with SP1 fresh.
In order to upgrade ZENworks for Servers 3.0.2 on machines running Red Hat Linux 7.1, 7.2, 7.3, 8 or 9, you must upgrade to a supported Red Hat operating system.
To prepare Linux and Solaris servers for upgrading to ZENworks 7 Server Management with SP1:
-
For a Linux or Solaris operating system that is no longer supported, upgrade it to a version supported by ZENworks 7 Server Management with SP1.
WARNING:When upgrading the Linux or Solaris operating system, it is very important to preserve the file system so that the ZENworks software and files are preserved for upgrading; especially the Distribution files. If you do not preserve the file system, you need to install ZENworks 7 Server Management with SP1 fresh and you will lose all Distributions owned by the version 3.0.2 Linux or Solaris Distributors.
-
Continue with Upgrade the Distributor and Subscriber Objects.
Upgrade the Distributor and Subscriber Objects
You must first upgrade the Distributor and Subscriber objects using the GUI upgrade program. If you already did this when upgrading the NetWare or Windows platforms to ZENworks 7 Server Management with SP1, skip to Upgrade the Linux and Solaris Servers; otherwise:
-
Follow the steps in Section 12.1.3, Upgrading NetWare and Windows Servers, with the following adjustments to the steps:
-
eDirectory Tree for Upgrading Objects page: By default, the check box is selected. Because you only need to upgrade objects, deselect this check box.
-
Select the Objects to Upgrade page: The upgrade program displays a list of upgrade candidates based on the check boxes that are selected at the bottom of the page. Make sure that the necessary check boxes are selected, For example, deselect the and check boxes, and make sure the check box is selected.
All of the Linux and Solaris Distributor and Subscriber servers in your tree are listed on this page. Click the check boxes in the column for each Linux or Solaris server to be upgraded.
-
Incremental Upgrade Issue: If you are upgrading Linux and Solaris servers incrementally, only select the check boxes in the column for those servers to be upgraded at this time.
-
-
Continue with Upgrade the Linux and Solaris Servers.
Upgrade the Linux and Solaris Servers
The script for Linux and Solaris servers detects the existence of ZENworks for Servers 3.0.2 software and asks whether you want to upgrade or install. We recommend using the upgrade option, which is documented in the following steps.
IMPORTANT:We strongly recommend that you upgrade your Distributor servers first, then upgrade your Subscriber servers. Otherwise, you can have version 3.0.2 Distributions being sent to version 7 Subscribers, which will fail.
To upgrade a Linux or Solaris server:
-
Log in as root.
-
If you are running X Windows on the Linux or Solaris server, open an XTerm window.
-
Place the Novell ZENworks 7 Server Management with Support Pack 1 Program CD in the server’s CD-ROM drive.
-
Review the Novell ZENworks 7 Server Management with Support Pack 1 Readme for any last-minute information concerning installation.
Readme_servers.html is located in the \readmes\en directory on the Program CD.
-
To run the Policy and Distribution Services script, enter one of the following commands in an XTerm window:
Red Hat Linux: /mnt/cdrom/ZfS/TedPol/platform/zfs-pds-install
SUSE Linux: /media/cdrom/ZfS/TedPol/platform/zfs-pds-install
where platform is either Linux or Solaris.
-
Press Enter to display the license agreement, press the Spacebar to scroll through the license agreement, type y, then press Enter to accept the license agreement.
The script installs software from the j2re .rpm or .pkg file.
The script detects that an earlier version of Policy and Distribution Services is installed on the server and asks:
Would you like to upgrade or reinstall? (u/r)
-
To upgrade, type u and press Enter.
We recommend that you upgrade in order to retain the server’s current Policy and Distribution Services settings. The remaining information in these steps assumes that you select the upgrade option.
The following is displayed (including errors, if any) for a Linux installation while the server is upgraded:
Installing the novell-zen-zfs RPM...
Preparing...         ######################################## [100%]
   1:novell-zen-zfs    ########################################### [100%]
Error messages are displayed at this point. After any error messages, the upgrade concludes by displaying the following:
ZENworks Server Management Policy and Distribution Services has been restarted.
You may check its status by running:
  /etc/init.d/novell-zfs status
You can reconfigure this service by running:
  /opt/novell/bin/zfs-pds-configure
-
To verify that Policy and Distribution Services is running, enter:
/etc/init.d/novell-zfs status
Policy and Distribution Services is now ready to use on your Linux or Solaris server.
-
Repeat Step 1 through Step 8 on each Distributor or Subscriber server.
-
To upgrade Remote Management, see Section 14.0, Remote Management.
To upgrade Management and Monitoring Services, see Section 15.0, Management and Monitoring Services.
Otherwise, you have completed upgrading Policy and Distribution Services.