7.2 Starting the Console
To launch the Management Console login window, click > > > > .
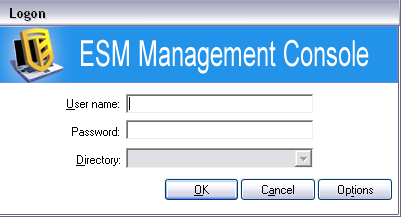
Log in to the Management Console by entering the administrator name and password. Before you can enter the username and password, you must be connected to the directory service's domain (see Section 7.2.1, Adding eDirectory Services). The username must be a user on the Management Service domain.
Figure 7-5 Login to ZENworks Endpoint Security Management Management Console
7.2.1 Adding eDirectory Services
The following steps provide information for using Novell eDirectory as the directory service. For information about using Microsoft Active Directory, see Configuring the Directory Service
in the ZENworks Endpoint Security Management Administration Guide.
-
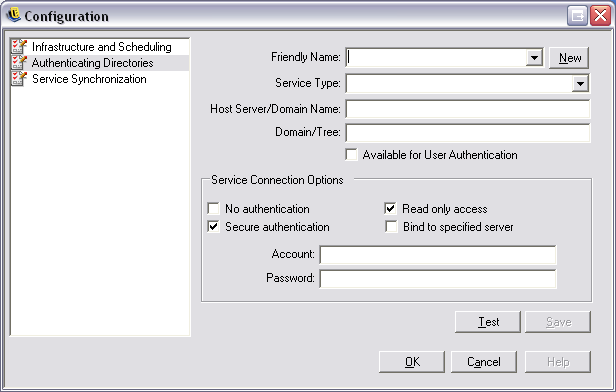
Click the button on the login screen to display the Configuration window.
Figure 7-6 Authenticating Directories
-
Enter a friendly name for the Directory Service and select eDirectory from the drop-down list.
-
In the field, specify the IP address of the eDirectory server and specify the tree name under the tree.
-
Check to display the domain in the login drop-down menu.
-
Uncheck in the options.
-
Specify the Account name using LDAP format. For example, in "cn=admin,o=acmeserver" cn is the user and o is the object where the user account is stored.
-
Specify the password for the account.
NOTE:The password should be set to not expire and this account should never be disabled.
-
Click to verify communication to the directory service. If communication cannot be established, the user is notified of the error. Any inaccurate information is corrected, where possible. by the interface during the test.
Figure 7-7 Completed Directory Screen

-
Click to add this directory service to the database, then click to add another directory service to the database.
-
Click or to exit the Configuration window and return to the login screen.
7.2.2 Configuring the Management Console’s Permissions Settings
is found on the menu of the Management Console and is accessible only by the primary administrator for the Management Service and any other users who have been granted permissions access by that administrator. This control is not available when running the Stand-Alone Management Console. See Section 10.0, ZENworks Endpoint Security Management Unmanaged Installation for more details.
The permissions settings define which user or group of users are permitted access to the Management Console, Publish Policies, and Change Permission Settings.
During the Management Server installation, an administrator or Resource Account name is entered into the configuration form. After a successful test has been performed and the user information is saved, the permissions are automatically granted to this user.
After the Management Console is installed, all user groups within the domain are granted full permissions. The resource user should remove permissions from all but the groups and users who should have access. The resource user can set additional permissions for the designated users. The permissions granted have the following results:
-
Management Console Access: The user can view policies and components, and edit existing policies. Users granted only this privilege are not permitted to add or delete polices and the publish and permissions options are unavailable.
-
Publish Policy: The user can publish policies only to assigned users and groups.
-
Change Permission: The user can access and change permissions settings for other users that have already been defined, or grant permissions to new users.
-
Create Policies: The user can create new policies in the Management Console.
-
Delete Policies: The user can delete any policy in the Management Console.
NOTE:For security purposes, only the resource user or very few administrators should be granted the Change Permission and Delete Policies permissions.
The following sections contain more information:
Configuring Administrative Permissions
-
Click > .
The groups associated with this domain are displayed.
Figure 7-8 Management Console Permissions Settings Window
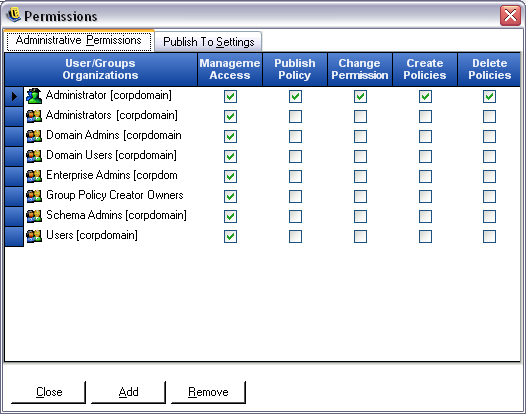
NOTE:All groups are granted full permissions in the Management Console by default. Administrators should immediately uncheck any and all policy tasks from unauthorized groups. Access to the console can be removed by unchecking that permission.
-
(Optional) To load users and new groups to this list:
-
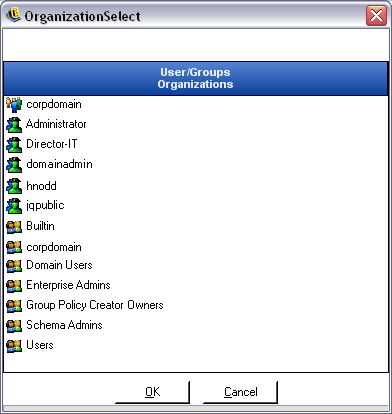
Click the button on the bottom of the screen to display the Organization table.
Figure 7-9 Permission Settings Organization Table
-
Select the appropriate users and groups from the list. Use the Ctrl or Shift keys to select multiple users.
-
When all users and groups have been selected, click button to add the users and groups to the grid on the Permissions form.
-
-
Assign permissions to the available users and groups.
To remove a selected user or group, select the name, then click .
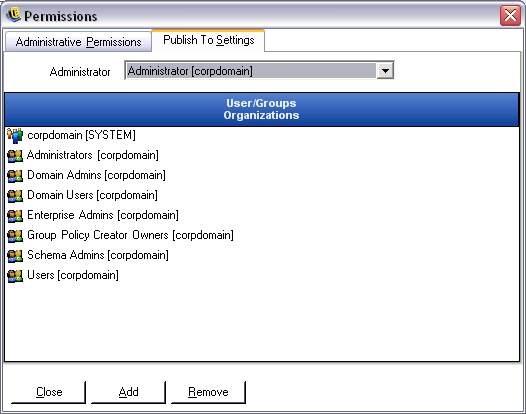
Configuring Publish To Settings
Users and groups who have checked must be assigned users or groups to publish to. To set the Publish To Settings:
-
Click the tab.
-
From the drop-down list, select the users and groups granted the Publish permission.
Figure 7-10 Publish To Settings

-
To assign users and groups to this user or group:
-
Click the button on the bottom of the screen to display the Organization table.
-
Select the appropriate users and groups from the list. Use the Ctrl and Shift keys to select multiple users.
-
When all users/groups have been selected, click the button.
Figure 7-11 Publish To List
-
To remove a selected user or group, select the name in the list, then click .
The permission sets are immediately implemented, so the administrator only needs to click and accept the changes to return to the editor.
When a new directory service is added, the Resource Account is granted full permissions settings, as described above.
7.2.3 Publishing a Policy
To Publish a security policy with the default settings:
-
Click .
-
Specify a name for the policy, then click .
-
Save the policy, then click the tab.
-
Because Endpoint Security Client users must check in to display in the tree, select the top of the tree on the left, then double-click to populate the publishing field with all current groups and users.
-
Click to send the policy to the Policy Distribution Service.
The policy generated in this manner has the following characteristics:
-
A single location (Unknown) is created.
-
CD/DVD ROM drives are allowed.
-
Removable storage devices are allowed.
-
All communications ports (including Wi-Fi) are permitted.
-
The Firewall Setting, All Adaptive (all outbound traffic over networking ports is allowed; unsolicited inbound traffic over networking ports is disallowed) is included.
For information on creating a more robust security policy, please see the ZENworks Endpoint Security Management Administration Guide.