16.4 Generic GNOME Policy
The Generic GNOME policy is used to configure GConf- based applications on a device.
To configure the GNOME policy:
-
In the ZENworks Control Center, click the tab.
-
In the list, click , then click to display the Create New Policy page.
-
In the list, click , then click to display the Policy Name page.

-
Fill in the fields:
-
Policy name: (Required) Provide a unique name for the policy. The name you provide displays in the ZENworks Control Center interface, which is the administrative tool for ZENworks Linux Management.
For more information, see Section C.0, Naming Conventions in the ZENworks Control Center.
-
Folder: (Required) Type the name or browse to the folder that this policy will be created in. Folders display in the ZENworks Control Center.
-
Description: Provide a short description of the policy. This description displays on the policy's Summary page in the ZENworks Control Center interface.
-
-
Click to display the Source page.

-
Select the desired option, then click .
Import the settings from a device: Use this option to import the existing GConf settings from any device that is registered with the ZENworks Linux Management Server. The system obtains all settings, including default settings, from that device. You can enforce these settings on a desired managed device or group of devices at a later time.
Before you import settings to your device, make sure the GConf settings are correct on the device you are importing from.
If you choose this option, continue with Step 7.
Define a setting on your own: Create a directory and corresponding key settings such as key names, types, and values. At a later time, you can enforce these settings on a managed device or on a group of devices.
Make sure that you specify the correct key names and types.
If you choose this option, continue with Step 8.
-
(Conditional) If you chose the option in Step 6, choose the device from which you want to import the GConf settings.

-
Select one of the following options:
Selected machine: Browse to and select a device from which you want to import GConf settings, then click .
Only managed devices that are registered with the ZENworks Linux Management Server are displayed.
DNS name / IP address: Specify the DNS name or IP address of a managed device from which you are importing GConf settings. Ensure that the device is registered with the ZENworks Linux Management Server.
-
Specify the username of the managed device from which you are importing the GConf settings.
Only those GConf settings are imported that are related to the specified user. Ensure that the specified user has a valid account on the managed device from which you are importing the settings.
-
Click to import the top-level directories. The four top-level directories that are imported are Apps, Desktop, System, and GNOME.
-
Select one or more directory whose settings you want to import, then click .
-
(Optional) Add or delete the keys and their respective values from the imported GConf settings, then click and skip to Step 9.
For detailed information about defining your own GConf settings, click the
 button on the Built Gconf Tree page.
-
-
(Conditional) If you chose the in Step 6, define your own Gconf settings by adding and deleting keys on the Gconf Tree, then click .
For detailed information about defining your own Gconf settings, click the
button on the Built Gconf Tree page.

-
Click to display the default system requirements for Generic GNOME Policy page.

-
Specify the minimum system requirements for Generic GNOME policy settings to be effective.
The value you specify in the field indicates the distribution and minimum version that is required for the policy settings to be effective. The policy is applied if the device has the same version or a later version of the distribution.
If you chose the option in Step 6, the default value is the operating system of a device from which you have imported GConf settings. If you have not included this setting in the policy, and if the operating system of a managed device (where the policy is to be applied) is different than the operating system of the device from which the settings have been imported, a warning message is generated. However, the policy settings are enforced.
If you chose the option in Step 6, and you want to include the default system requirement in the policy, you must specify the distribution and version of the operating system. If you do not include this setting in the policy, the system does not check for minimum operating system requirements and immediately enforces the policy.
Refer to the contents of the /etc/SuSE-release or /etc/redhat-release file to obtain the correct string for your platform.
-
Click to display the Summary page.
-
Click to create the policy as configured according to the settings on the Summary page. If you click , the Generic GNOME policy is created but it does not have devices assigned or a schedule. At some point in the future, you need to configure additional options for the policy by continuing with Section 17.4, Assigning Policies.
or
Click to display the Policy Assignment page to perform the following tasks:
-
Specify assignments for this policy
-
Specify the schedule for this policy
-
Specify groups for this policy

-
-
Assign the policy to the devices.
-
Click to browse for and select the appropriate Server or Workstation objects.
You can also select Folder or Group objects.
-
Click the down-arrow next to or to expand the list, then click the underlined link in the column to select the desired objects and display their names in the list box.
Assigning a policy to a Group object is the preferred method of assigning the policy. Assigning the policy to a large number of objects (for example, more than 250) might cause increased server utilization.
-
Click .
-
-
Click to display the Policy Schedule page.
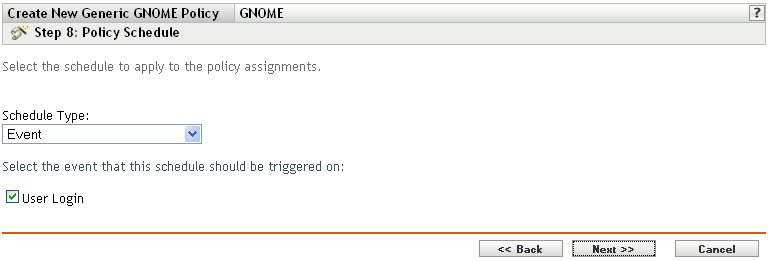
-
Select the schedule to apply to the assignments from the drop-down list, then select the desired options, which vary, depending on the schedule type you select.
The settings you configure on this page determine when the policy is applied to devices.
See Section 15.3, Schedules for information about the available schedules and their options.
-
Click to display the Policy Groups page.

-
(Optional) Click to open the Select Groups dialog box, then click the underlined links in the Name column to select the desired policy groups and display their names in the Selected list box.
Using policy groups eases administration efforts by letting you group several policies so you can use common assignments, schedules, and so forth, rather than configuring these settings for each policy you create. For more information, see Section 17.3, Creating Policy Groups.
-
Click to display the Finish page.
-
Review the information on the page, making any changes to the policy settings by using the button as necessary. Click to create the policy as configured according to the settings on the Finish page.