Maintaining E-Mail and Instant Messaging
The GroupWise/Messenger Setup Wizard in YaST helps you create your initial GroupWise and Messenger systems. iManager helps you automatically add GroupWise accounts for new eDirectory users. But long-term management and growth of your GroupWise and Messenger systems require that you use ConsoleOne for maintenance tasks.
Using ConsoleOne
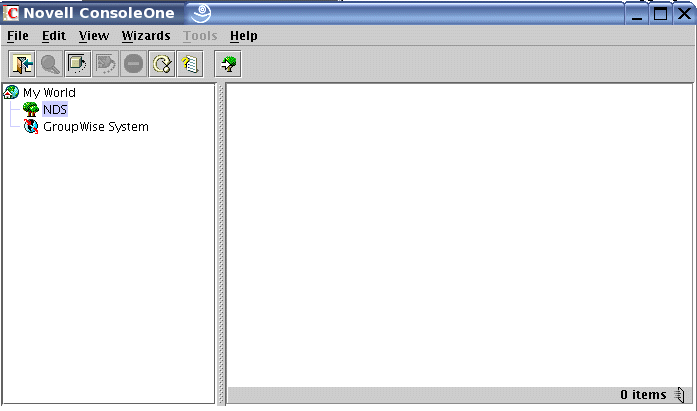
The eDirectory Setup Wizard in YaST installed ConsoleOne, along with the GroupWise snap-ins, under the /usr/ConsoleOne directory. You start ConsoleOne in a terminal window.
-
On your Linux desktop, open a terminal window, and then become root by entering su and the root password.
-
Enter the following command to start ConsoleOne:
/usr/ConsoleOne/bin/ConsoleOne
HINT: For ease of use, you can create a desktop icon for starting ConsoleOne. For example, if you use the KDE desktop, right-click the desktop, and then click Create New > File > Link to Application. On the Application tabbed page, specify the above command in the Command field. Click Advanced Options, and then in the User box, select to run ConsoleOne as root. Set up other icon properties as desired. Other desktops offer similar functionality.
The first time you start ConsoleOne on Linux, you are prompted for the directory where you typically mount external file systems.
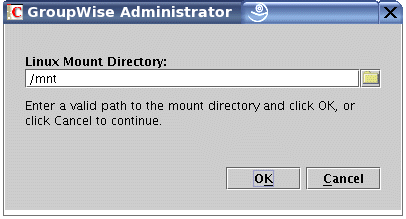
HINT: If the Linux Mount Directory dialog box does not appear, click the ConsoleOne window to clear the splash screen.
The default of /mnt is typically correct. You can change the directory as needed. ConsoleOne requires direct access to any server where a domain or post office is located. This dialog box does not appear again when you start ConsoleOne in the future.
For more information about what the Linux mount directory is used for, see "Selecting a Linux Mount Directory" in "Installing a Basic GroupWise System" in the GroupWise 6.5 Installation Guide.
-
If necessary, specify or browse to and select the Linux mount directory, and then click OK.
The first time you start ConsoleOne on Linux, ConsoleOne does not automatically authenticate to any eDirectory trees, so the NDS® object is not immediately expandable.
-
In ConsoleOne, select the NDS object, and then click File > Authenticate.
-
Fill in the following fields:
Login Name: The Small Business server admin username.
Password: The password for the username.
Tree: The eDirectory tree for your Small Business server.
HINT: Under some circumstances, you need to provide the IP address of your Small Business server, rather than the tree name.
Context: The full context of the User object associated with the username you provided.
By default, the Admin object is created in the Organization object you specified when you ran the eDirectory Setup Wizard.
-
Click Login.
The next time you start ConsoleOne, all information except the password is automatically provided for you.
After you are logged in to eDirectory, you must connect to the GroupWise domain in order to access GroupWise system information.
-
Select the GroupWise System object, and then click Tools > GroupWise System Operations > Select Domain.
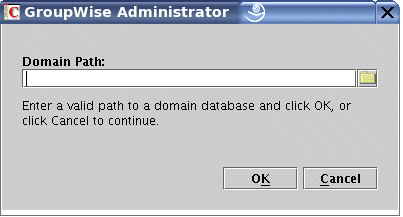
By default, the domain directory structure is created in /opt/novell/groupwise/db/gwdom and the post office directory structure is created in /opt/novell/groupwise/db/gwpo on your Small Business server.
-
Browse to and select the gwdom directory, and then click OK.
-
Expand the GroupWise System object, and then expand the Domain object to view the structure of your basic GroupWise system in the GroupWise View.

-
Expand the NDS object, expand your tree, and then expand the Organization object to see where the GroupWise and Messenger objects are located in the eDirectory View.
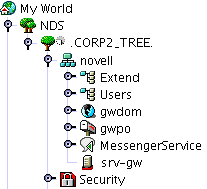
By default, the Domain and Post Office objects are located in the same container where the Admin User object is located.
The sections that follow cover basic GroupWise administration tasks that you might need to perform in maintaining your GroupWise system on your Small Business server. For more detailed instructions for using ConsoleOne to manage GroupWise, see the GroupWise 6.5 Administration Guide.
Managing Users
As time passes, you might need to perform some of the following tasks for users:
- Creating GroupWise Accounts Manually
- Deleting GroupWise Accounts
- Disabling LDAP Password Changing
- Assigning a Postmaster
Creating GroupWise Accounts Manually
You can create eDirectory users and GroupWise accounts in ConsoleOne as well as in iManager. In ConsoleOne, you can create GroupWise accounts individually or for multiple users in the same post office.
- Adding GroupWise Accounts When Adding eDirectory Users
- Adding Multiple eDirectory Users to a Post Office
Adding GroupWise Accounts When Adding eDirectory Users
-
In ConsoleOne, browse to and right-click the container object where you want to create a new User object, and then click New > User.
-
Fill in the fields as needed for the eDirectory user.
-
Select Add User to GroupWise Post Office, and then browse to and select the post office that you want the new user to belong to.
-
Click OK in the New User dialog box to create the new eDirectory user and assign the new user to the selected post office.
This creates a GroupWise tab on the property page of the User object.

Adding Multiple eDirectory Users to a Post Office
-
In ConsoleOne, browse to and right-click the post office where you want to add users (by default, the gwpo object), and then click Properties.
-
Click GroupWise > Membership.
-
Click Add, select one or more User objects, and then click OK.
-
Click OK on the Membership page to add the listed users to the post office.
Deleting GroupWise Accounts
You cannot delete GroupWise accounts in iManager. You must use ConsoleOne.
-
In ConsoleOne, browse to and select the context where the User object is located.
-
Right-click the User object, and then click Delete.
or
Select multiple User objects, right-click the selected objects, and then click Delete.
-
Click Yes to display the Delete Options dialog box.

In ConsoleOne, you can delete the user's eDirectory object and GroupWise account together, or you can delete the GroupWise account while retaining the eDirectory object.
-
Click OK to delete both the eDirectory object and the GroupWise account.
or
Deselect Delete in the eDirectory Account box if you want to retain the eDirectory object, while deleting the GroupWise account.
-
Click OK.
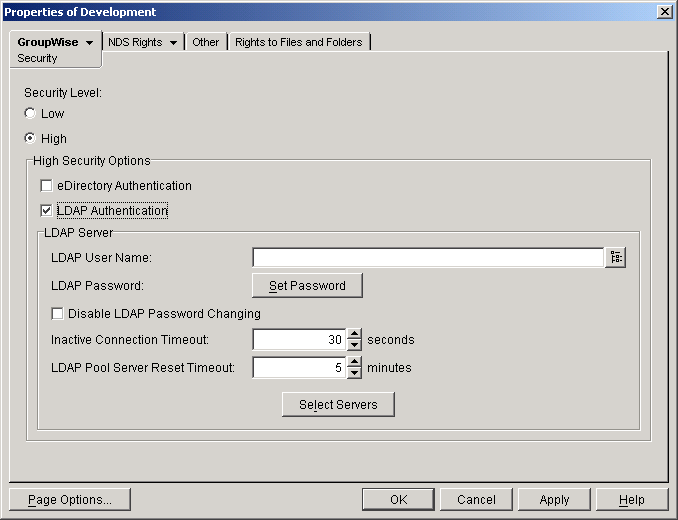
Disabling LDAP Password Changing
To facilitate easy access to GroupWise mailboxes, the GroupWise/Messenger Setup Wizard in YaST automatically enables LDAP authentication for the post office it creates. It also configures the LDAP server for use by GroupWise users. This default configuration accommodates SSL if it is in use on the LDAP server.
LDAP authentication allows the same password to be used for network login and mailbox access. When LDAP authentication is enabled, users are, by default, allowed to change their LDAP passwords in any of the GroupWise clients (WebAccess, Linux, Macintosh, or Windows). It is possible that users could change their GroupWise passwords without realizing that they are also changing their network login passwords. To prevent this, you can use ConsoleOne to disable the ability to change LDAP passwords in the GroupWise client.
-
In ConsoleOne, browse to and right-click the post office (by default, the gwpo object), and then click Properties.
-
Click GroupWise > Security.
-
Select Disable LDAP Password Changing, and then click OK.
ConsoleOne notifies the POA to restart so the new LDAP setting can be put into effect.
Assigning a Postmaster
On the Internet, each site must assign at least one user to be a Postmaster. The Postmaster is the recipient of messages addressed to postmaster@mydomain.
-
In ConsoleOne, browse to and select the domain (by default, the gwdom object) to display its contents.
-
Right-click the Internet Agent (GWIA) object for the domain, and then click Properties.
-
Click GroupWise > Gateway Administrators.
-
Click Add, select a GroupWise user to be the Postmaster, and then click OK.
-
Select the user from the list, and then click Postmaster.
-
Click OK to save the information.
ConsoleOne notifies the Internet Agent to restart so that applicable messages are sent to the Postmaster as needed.
Managing GroupWise and Messenger Systems
As time passes and your small business grows, your e-mail and instant messaging systems might need to change and grow as well. The following tasks can help you handle system maintenance and growth.
- Managing the GroupWise and Messenger Agents
- Maintaining Your GroupWise System
- Maintaining Your Messenger System
Managing the GroupWise and Messenger Agents
When you set up your GroupWise system, the GroupWise and Messenger agents are configured to start automatically whenever you reboot your server. When started automatically, the agents run as daemons, without a user interface. Status information is written to log files.
In a smoothly running system, you should not need to deal with the agents individually. However, the following sections provide useful commands and procedures for managing the GroupWise and Messenger agents, should you need to do so.
- Viewing Agent Log Files
- Starting and Stopping the Agent Daemons
- Starting the Agents with a User Interface
- Monitoring the Agents from Your Web Browser
Viewing Agent Log Files
The log files for the GroupWise and Messenger agents are located in agent-specific subdirectories:
/var/log/novell/groupwise
/var/opt/novell/log/messenger
Starting and Stopping the Agent Daemons
The following table lists commands that help you manage the agent daemons in a terminal window. You must be logged in as root to start and stop the agents.
In addition, the agents respond properly to a standard Linux kill command.
Starting the Agents with a User Interface
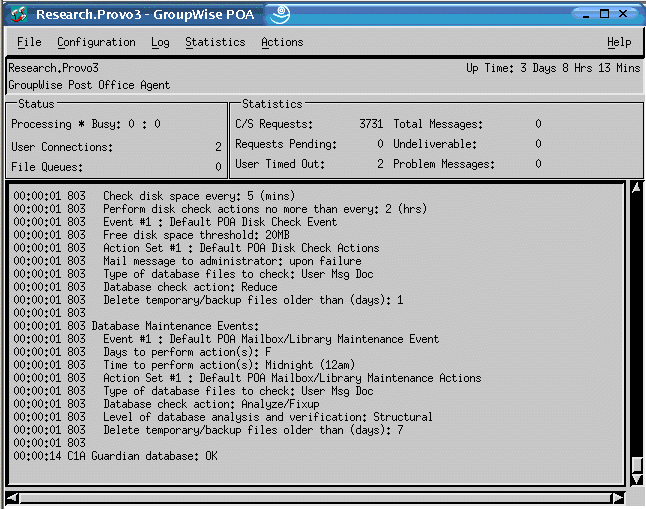
The Post Office Agent, the Message Transfer Agent, and the Internet Agent can run with a user interface that provides information, status, and message statistics, as well as the ability to temporarily change some agent configuration settings. The WebAccess Agent can run so that it displays configuration and status messages in the terminal window. The Monitor Agent and the Messenger agents cannot run with any type of user interface. Running the agents with a user interface can be useful for troubleshooting.
IMPORTANT: The X Windows System and OpenMotif* are required by the user interfaces for the GroupWise agents.
-
In a terminal window, become root by entering su and the root password.
-
Stop the agents if they are currently running as daemons.
-
Change to the /opt/novell/groupwise/agents/bin directory.
-
Use the following commands to start the agents with a user interface:
./gwpoa --show @../share/gwpo.poa &
./gwmta --show @../share/gwdom.mta &
./gwia --show @../share/gwia.cfg &
./gwinter --show @../share/webac65a.waa &The interfaces for the Post Office Agent, the Message Transfer Agent, and the Internet Agent are very similar.
-
To stop an agent from its user interface, click File > Exit.
or
To stop the WebAccess Agent from its configuration and status window, close the window.
For information about using the agent console interfaces, see the following sections of the GroupWise 6.5 Administration Guide
Monitoring the Agents from Your Web Browser
If you installed Monitor (see Setting Up GroupWise E-Mail and Messenger), you can monitor the GroupWise and Messenger agents from your Web browser by viewing the following URL:
http://server_address/gwmon/gwmonitor
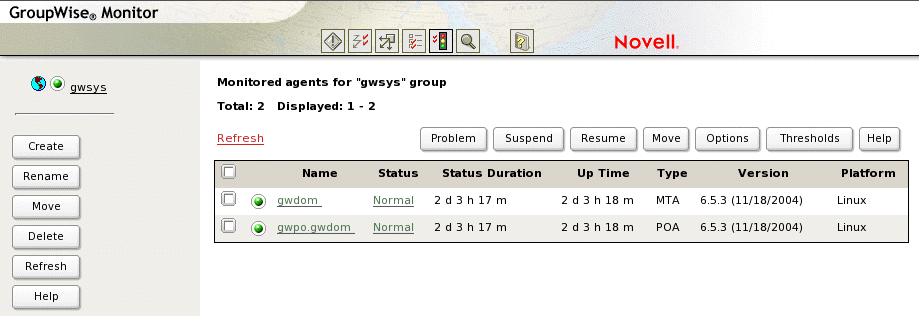
By default, the Post Office Agent and the Message Transfer Agent are monitored. For information about configuring the Internet Agent and the WebAccess Agent to be monitored, see the following sections of the GroupWise 6.5 Administration Guide:
- "Monitoring the Internet Agent through the Web Console"
- "Monitoring the WebAccess Agent through the Web Console"
For information about configuring the Messenger agents to be monitored, see the following sections of the Messenger 1.0 Administration Guide:
Maintaining Your GroupWise System
Depending on the importance and volume of e-mail generated by your users, a number of maintenance tasks might need to be performed to keep your GroupWise system running smoothly. The GroupWise 6.5 Administration Guide can help you learn to perform the tasks your system needs.
The following table summarizes the most common tasks and where they are described:
Maintaining Your Messenger System
Depending on the importance and volume of instant messages generated by your users, a number of maintenance tasks might need to be performed to keep your Messenger system running smoothly. The Messenger 1.0 Administration Guide can help you learn to perform the tasks your system needs.
The following table summarizes the most common tasks and where they are described: