ZfD 4.0.1 DeFrame no longer includes DeFrame Dynamic User (DDU) functionality for creating and managing local user accounts and roaming profiles. If you have been using DDU, you will need to use ZfD Workstation Manager and Dynamic Local User (DLU) policies. For instructions, see Migrating From DDU to ZfD DLU Policies .
If you have been using DLU to manage terminal server user accounts and profiles, changes made to the DLU policies require you to reconfigure the policies you've been using to manage terminal server accounts. For instructions, see Migrating ZfD 3.2 DLU Policies to ZfD 4.0.1 DLU Policies
Migrating From DDU to ZfD DLU Policies
Complete the tasks in the following sections to use ZfD Workstation Manager and Dynamic Local User (DLU) policies to manage user accounts or profiles on your DeFrame terminal servers.
IMPORTANT: After completing these tasks to configure DLU, DDU will continue to be used until you upgrade the DeFrame software and ZfD Management Agent on the terminal server (see Upgrading Terminal Server Software ). At that point, Workstation Manager and the DLU policies will be used.
Creating a User Policy Package
You use the Windows 2000 Terminal Server policies, available in a User Policy package, to manage dynamic local user accounts and roaming user profiles. You can use an existing User Policy package, or you can create a new User Policy packages specifically for Windows 2000 Terminal Server policies. If you already have a User Policy package that you want to use, skip to Configuring Dynamic Local User Accounts . Otherwise, complete the following steps to create a User Policy package:
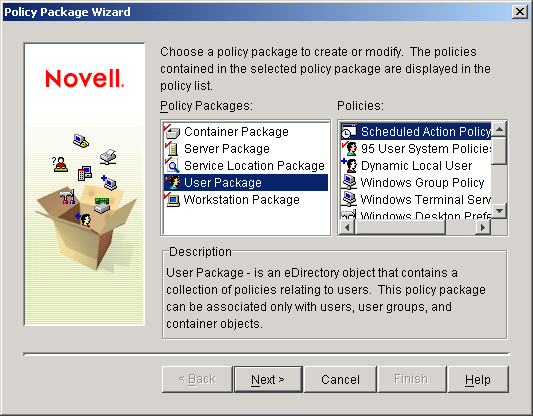
In ConsoleOne, right-click the container where you want to create the User Policy Package object > click New > click Policy Package to display the Policy Package Wizard.
In the Policy Packages list, select User Package > click Next.
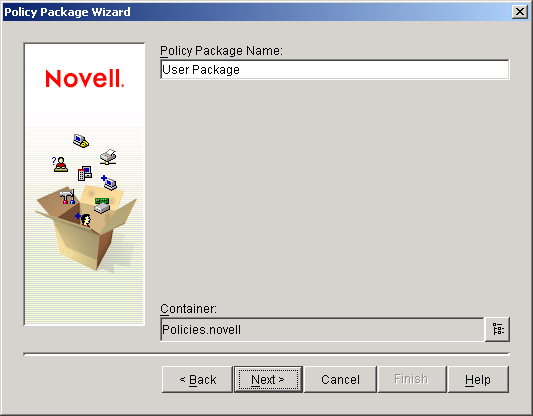
The package object's name must be unique within the container where it will be created. If you plan to create multiple User Policy packages, you might want to use a more descriptive name, such as Win2000 TS User Package. Or, you might want to create the policy in the same container where the policy's users reside.
If necessary, change the package's object name and the container where it will be created > click Next.
In the Summary page, select Define Additional Properties > click Finish to create the User Package object and display the object's property pages.
Click the Policies tab > Win2000 Terminal Server to display the Win2000 Terminal Server policies page.
You use the Dynamic Local User (DLU) policy to configure how Workstation Manager creates user accounts on the terminal server.
In the Windows 2000 Terminal Server Policies page, click the check box to the left of the Dynamic Local User Policy to enable the policy > click Properties to display the Dynamic Local Users property page.
Configure the following fields:
Enable Dynamic Local User: Select this option to enable Workstation Manager to dynamically create user accounts.
Manage Existing User Account (if any): If you want Workstation Manager to apply the DLU policy to existing user accounts, select this option. Otherwise, the DLU policy will apply only to new user accounts.
Use eDirectory Credentials: Select this option to use eDirectory usernames and passwords when creating user accounts. With the user's eDirectory and Windows credentials synchronized and contextless login configured (see Upgrading Terminal Server Software ), the user will not be prompted for any credentials when launching a DeFrame thin-client application from a terminal server.
Volatile User (Remove User after Logout): Select this option if you want a user's account removed after the user exits the thin-client application and the session is closed. All user account information is removed. If you want to retain user profiles, you can configure roaming profiles. Instructions are provided in the next section, Configuring Roaming User Profiles .
Member Of/Not Member Of: In the Not Member Of list, select the group (or groups) that you want users made members of > click Add. Group membership determines a user's access rights on the terminal server. If none of the groups listed provides the exact file system rights you want assigned to user accounts, you can use the File Rights page (Dynamic Local User tab > File Rights page).
Click OK to save your changes and close the Dynamic Local Users property page.
There are two policies you can use to configure roaming user profiles:
Windows Terminal Server Policy: The Windows Terminal Server policy enables you to specify a network storage location for roaming user profiles. There are several advantages to using this policy: 1) It is applied only when a user logs into a terminal server, either through a remote or local session 2) It contains other configuration settings you can use to control client sessions.
Using this policy for user profiles is the same as configuring the Terminal Services Profile properties page for a user account on a Windows terminal server.
Windows Desktop Preferences Policy: The Windows Desktop Preferences policy also enables you to specify a network storage location for roaming user profiles. However, it will be applied whenever a user logs into a workstation or terminal server, so you should only use it if you want the same user profile used in both situations.
In general, we recommend that you use the Windows Terminal Server policy to configure the roaming profile settings. If you configure roaming profile settings on both policies, the settings on the Windows Terminal Server policy are used unless you select the Override Terminal Server Profile setting on the Windows Desktop Preferences policy.
On the Windows 2000 Terminal Server Policies page, click the check box to the left of the Windows Terminal Server Policy to enable the policy > click Properties to display the policy's property pages.
Click the Terminal Configuration tab > click Login to display the Login page.
Enable the Inherit Client Configuration option.
IMPORTANT: If you don't enable this option, when a user launches a DeFrame thin-client application, the policy will cause the session to open to the terminal server's desktop rather than the launched application.
In the Terminal Server Profile Path field, enter the path to the network location where you want profiles specified. Keep in mind the following:
Make sure you use the %username% variable to ensure that each user's profile is saved to a separate directory. For example:
\\server\vol1\profiles\%username%
Using the above path, the profile for user jsmith would be saved to the following location:
\\server\vol1\profiles\jsmith
Make sure the user's profile directory already exists. In the above example, \\server\vol1\profiles\jsmith must already exist for jsmith's profile to be saved there.
Make sure the user has rights to his or her profile directory. If the profile directory is on a NetWare server, you can assign rights through eDirectory. If the profile directory is on a Windows server, you must assign share rights through the user's Windows account.
Click OK to save your changes and close the Windows Terminal Server property pages.
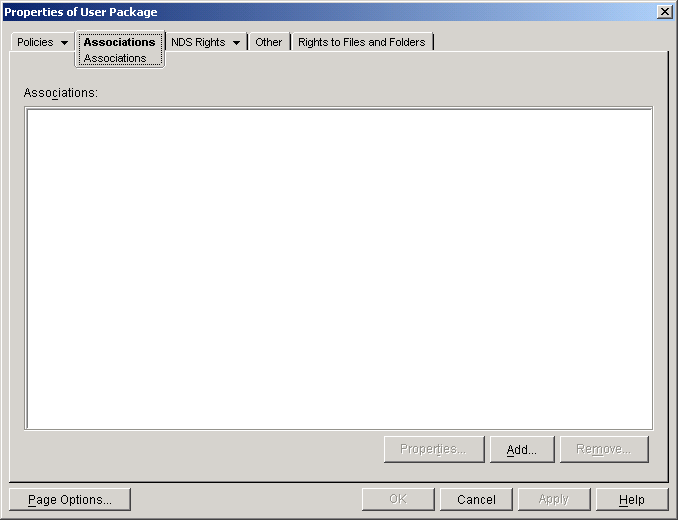
You must associate the User Policy package with users before it will take effect.
If the User Package object's property page is not open, right-click the User Package > click Properties.
Click the Associations tab to display the Associations page.
Click Add > browse to and select the users you want the policy package applied to. You can add users, user groups, or containers.
When you've finished adding users, click OK to save your information.
Migrating ZfD 3.2 DLU Policies to ZfD 4.0.1 DLU Policies
In ZfD 3.2, there were two policies you could use to configure dynamic local user accounts and user profiles:
WinNT-2000-XP DLU Policy
WinNT-2000-XP Windows Terminal Server Policy
The WinNT-2000-XP policies applied to users not only when they logged in to a Windows 2000 terminal server but also when they logged in to a Windows NT/2000/XP workstation.
In ZfD 4.0.1, because of the need to provide different configurations for users on workstations versus users on terminal servers, Win2000 Terminal Server policies have been added, including a DLU policy and a Windows Terminal Server policy.
When users log in to a terminal server, the ZfD 4.0.1 Workstation Manager reads the Win2000 Terminal Server policies and ignores the WinNT-2000-XP policies. Therefore, you need to migrate your WinNT-2000-XP DLU and Windows Terminal Server policy settings to the Win2000 Terminal Server policies. The best way to do this is to complete the steps in Configuring Dynamic Local User Accounts and Configuring Roaming User Profiles , referring to your current WinNT-2000-XP DLU and Windows Terminal Server policies as necessary as you configure the new Win2000 DLU and Windows Terminal Server polices.
Upgrading the DeFrame eDirectory Schema and Objects
During installation of the ZfD Server software to a network server, the installation program installed the ZfD DeFrame snap-in for ConsoleOne. Before installing the DeFrame software on terminal servers, you need to run the DeFrame activation wizard in ConsoleOne. The activation wizard does the following:
Lets you specify the containers to use for DeFrame servers and DeFrame applications.
Updates the existing DEFAULT_REG and PASS_ADMIN objects to ensure that the DEFAULT_REG object points to the specific DeFrame server and DeFrame applications containers.
Cleans up attributes used when configuring an Application object for a DeFrame thin-client application. Because of these attribute changes, if you are using the OnDemand Services 2 gadgets, users will not be able to launch DeFrame thin-client applications until you upgrade OnDemand Services 2 to ZENworks 6 Web Self-Service.
To update the DeFrame eDirectory schema and objects:
At a Windows workstation, launch ConsoleOne from a ZfD 4.0.1 server.
If you've copied the ZfD server's ConsoleOne directory to the local workstation, you can launch ConsoleOne from the local directory.
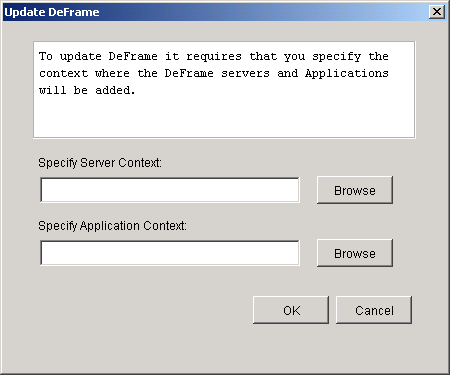
In ConsoleOne, click the Tools menu > DeFrame Tools > Activate DeFrame to display the Update DeFrame dialog box.
Fill in the following fields:
Server Context: This field populates the DeFrame Server Container field in the DEFAULT_REG object. Whenever you install and start the DeFrame software on a new DeFrame terminal server, a DeFrame Server object is created in this container to represent the terminal server. You should specify the container in which existing DeFrame Server objects reside. This ensures that any new DeFrame Server objects will be created in the container where your current DeFrame Server objects reside and that the PASS_ADMIN object has sufficient rights to the container.
Application Context: This field populates the DeFrame Application Container field in the DEFAULT_REG object. Application objects created by the DeFrame Published Application Synchronization utility are created in this container. You should specify the container in which your existing DeFrame Application objects reside. The DeFrame Published Application Synchronization utility imports applications from Citrix Published Application Manager utility into eDirectory. For more information about this utility, see the ZENworks for Desktops ZENworks for Desktops 4.0.1 DeFrame Installation and Administration Guide guide.
Click OK to update the DeFrame schema and objects.
Upgrading Terminal Server Software
After using the DeFrame activation wizard to upgrade the DeFrame eDirectory schema and objects, your DeFrame terminal servers will not work until you upgrade their DeFrame software.
The ZfD Management Agent installation program installs the DeFrame software to a terminal server. You need to run the ZfD Management Agent installation program on each existing DeFrame terminal server to upgrade the DeFrame software.
Make sure the Novell Client, version 4.83 or newer, is installed on the terminal server.
Make sure you are logged in to the eDirectory tree where you activated DeFrame and that your primary connection is to that tree.
To ensure that your primary tree connection is correct, right-click the N icon in the status area of the taskbar > click NetWare Connections > select the correct tree > click Set Primary.
At the terminal server, insert the ZENworks for Desktops Program CD or the ZENworks 6 Desktop Management Program CD. The winsetup.exe program will automatically run. If it does not automatically run, run winsetup.exe from the root of the CD.
NOTE: The ZfD Management Agent installation program is a Microsoft Windows Installer package (zfdagent.msi). Rather than launching the installation program through the ZfD winsetup.exe program, you can launch it directly from the agentinstall\english directory on the ZENworks for Desktops Program CD, the agentinstall\english directory on the ZENworks 6 Desktop Management Program CD, or the public\zenworks\zfdagent\english directory on the ZfD server. If you do so, skip to Step 7 below.
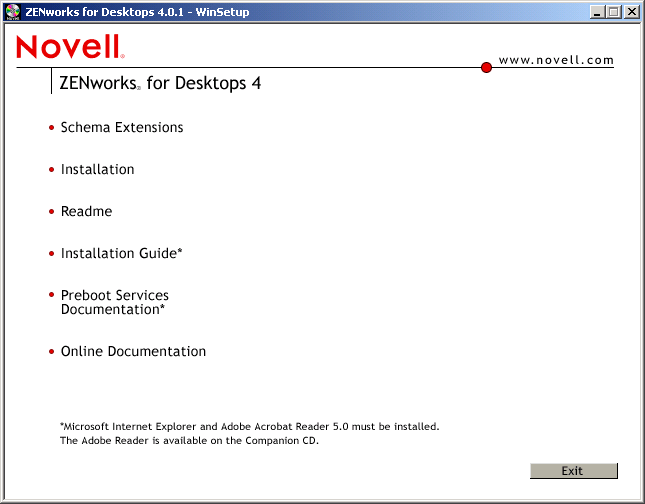
Click English to display the ZfD main installation page.
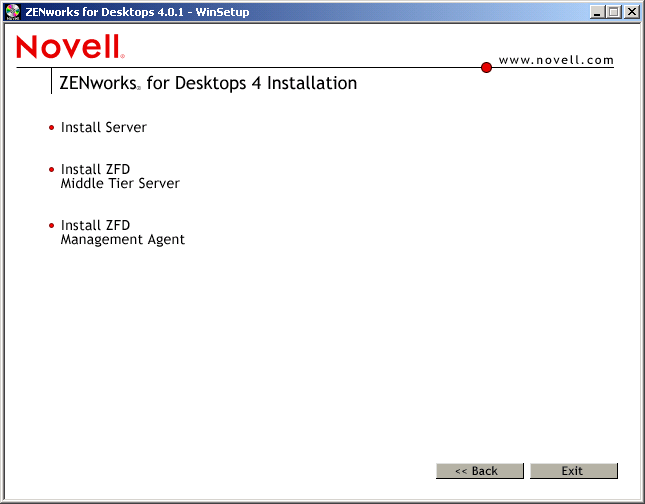
Click Installation to display the ZfD installation options page.
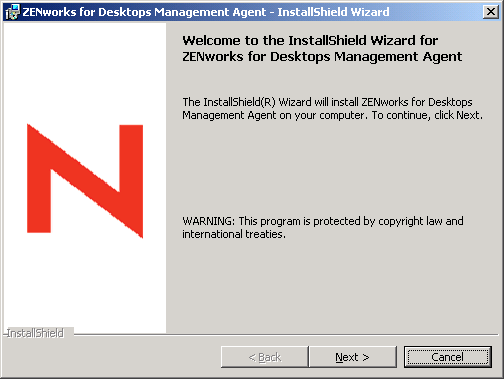
Click Install ZfD Management Agent to launch the installation program.
Read the introductory text > click Next.
Read the License Agreement. If you agree to the terms of the license, click I Accept the Terms in the License Agreement.
or
Click I Do Not Accept the Terms in the License Agreement. This closes the installation program.
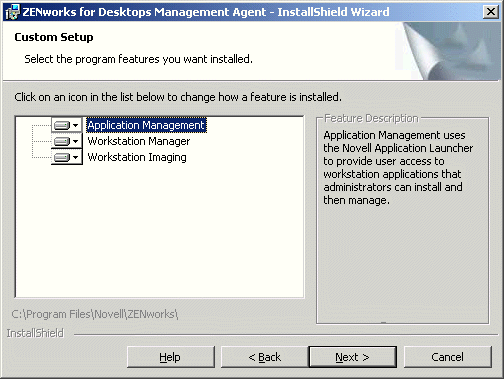
By default, all features are selected and will be installed. You must install the Application Management and Workstation Manager features. The Workstation Imaging feature is optional.
If you don't want to install Workstation Imaging on the terminal server, click the feature's icon > select This Feature Will Not Be Available.
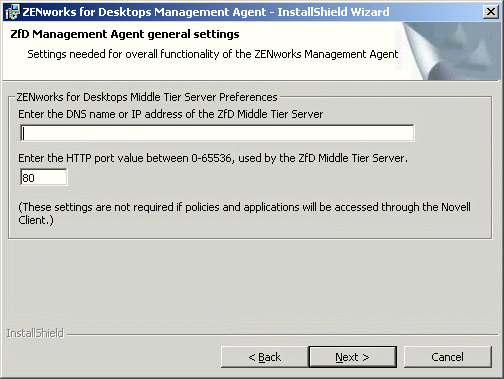
Click Next to display the General Settings page.
This page lets you define a ZfD Middle Tier Server that the Management Agent can connect to in the absence of the Novell Client.
For users to run DeFrame thin-client applications from this server, you do not need to specify a Middle Tier Server; all eDirectory authentication occurs through the Novell Client.
If you specify a Middle Tier Server, anyone who does a Windows logon at the terminal server will be able to access Novell Application Launcher applications and Workstation Manager policies without authenticating to eDirectory through the Novell Client.
If desired, on the General Settings page, enter the DNS name or IP address of the ZfD Middle Tier Server that the agent can connect to > enter the HTTP or HTTPS port number that the Apache Web Server (NetWare) or the IIS Web Server (Windows) will use to listen for the Agent login, > click Next.
If you want Novell Application Launcher to start when a user logs in to Windows at the terminal server, select the view (Application Explorer, Application Window, or both) that you want started > click Next
This will not affect users who launch DeFrame thin-client applications from the terminal server. It only affects users who log in to Windows at the terminal server.
In the Ready to Install Program page, click Install to begin the installation.
When installation is complete, select the option to restart the terminal server > click Finish.
The DeFrame 2.01 services (DeFrame Access Control Service, DeFrame Watchdog Service, and DeFrame Disconnected Session Tracking Service) have been combined into one service called the Novell ZENworks Thin-Client Application Service (zentcas.exe). By default, the ZENworks Thin-Client Application Service is configured to start automatically on server startup.
If you need to manually start the service
Click the Start menu > Settings > Control Panel > Administrative Tools > Services.
Double-click the Novell ZENworks Thin-Client Application Service.
Click Start.
Click OK.
Verify that Workstation Manager is installed and running on the terminal server by checking for the Workstation Manager service in the Services window:
At the terminal server, click the Start menu > Settings > Control Panel > Network Identity.
In the Novell Network Identity dialog box, click Settings.
Verify that the Enable Workstation Manager box is checked and that the tree is set correctly.
If you have multiple eDirectory trees, make sure Workstation Manager is configured to read the eDirectory tree where your User objects reside.
(Optional) Check the Tree value in the Windows registry, underneath the HKEY_LOCAL_MACHINE/SOFTWARE/NOVELL/Workstation Manager/Identification key.
Configuring Contextless Login
To simplify the process of launching thin-client applications, DeFrame provides contextless login. With contextless login, a user is not prompted for a username and password when he or she launches a thin-client application, if the user's eDirectory account and Windows user account have the same username and password.
If you've been using contextless login, contextless login will continue to work. If you have not been using it, or if it no longer works after upgrading the DeFrame software or ZfD Management Agent software on the terminal server, complete the following steps:
Turn on the terminal server's Use Client Provided Logon Information setting and turn off the Always Prompt for Password setting:
At the terminal server, click Start > Programs > Administrative Tools > Terminal Services Configuration.
Highlight a connection type (the default is RDP-Tcp) and double-click to enter the properties.
In the Logon Settings tab, check the Use Client Provided Logon Information setting and uncheck the Always Prompt for Password setting.
Repeat for each connection type.
Configure the default profile for the terminal server's Novell Client:
At the terminal server, right-click the Novell icon (N icon) in the status area of the taskbar > click Novell Client Properties.
Click the Location Profiles tab.
In the Location Profiles list, select Default > click Properties to display the Location Profiles Properties dialog box.
Select Login Service in the Service list, select Default in the Service Instance List > click Properties to display the Novell Login dialog box.
Deselect (turn off) the Save Profile After Successful Login option.
Click the NDS tab.
In the Tree field, select the eDirectory tree where the thin-client applications are configured as Application objects.
Delete any information from the Context and Server fields.
To save the configuration settings, click OK until you've closed all dialog boxes.
If the terminal server is an Active Directory Domain Controller (rather than a member server or a workgroup server), modify the terminal server's DeFrame Server object to include the domain name rather than the server name.
During contextless login, the username and password are used to log into eDirectory and then into the Windows terminal server. In addition to the username and password, the Windows terminal server login requires the domain name or server name (in the From field of the Windows Workstation login dialog box). During creation of the DeFrame Server object, the object is populated with the server name. If the terminal server is a Domain Controller, the domain name is required. To change to the domain name:
In ConsoleOne, right-click the DeFrame Server object > click Properties to display the DeFrame Server object's property pages.
Click the DeFrame Server Environment tab to display the Environment page.
In the Domain field, enter the terminal server's domain.