4.6 Setting Up the Filr Appliances
Figure 4-7 illustrates that the Filr appliances are deployed after all other components are in place.
Figure 4-7 Filr-Clustering Task 4: Set up the Filr Appliances

4.6.1 Downloading, Starting, and Configuring the Filr Appliances
You can use the steps that follow to gain hands-on experience with setting up a Filr-clustered deployment in your own lab or production network.
Complete the instructions in this section for each Filr appliance in a Filr cluster. Continuing with the example from the previous sections requires starting and configuring two Filr appliances.
-
Download and configure the virtual environment for the Filr appliances as documented in
Downloading the Filr Appliance and Configuring the Virtual Environment
in the Novell Filr 1.1 Installation and Configuration Guide.For example, for a VMware Workstation deployment this involves the following basic steps:
-
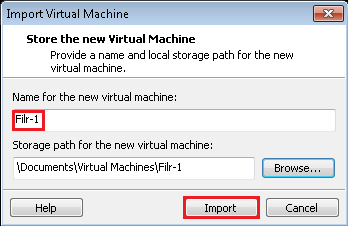
Download, unzip, and open the .ovf file.

-
Name the appliance, then click .
-
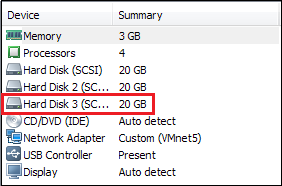
Add a second hard disk to the appliance for the /vastorage mount point.
-
Add a third hard disk to the appliance for the log files (/var) mount point.
-
Adjust the appliance resources (RAM and so forth) as needed.
-
Power on the appliance.
-
-
To speed up the Filr deployment process, you can temporarily stop the Filr Search appliances’ Ganglia processes from collecting monitoring information and writing to the VMware server’s disk. This provides much better disk access for the Filr appliances while they are being initialized and configured.
Log in as root at the command line for both Filr Search appliances, then enter the following commands:
rcnovell-gmond stop
rcnovell-gmetad stop
-
Install the Filr appliance that you downloaded and configured in Step 1 as documented in
Installing the Filr Appliance
in the Novell Filr 1.1 Installation and Configuration Guide.-
Accept the license agreement.

-
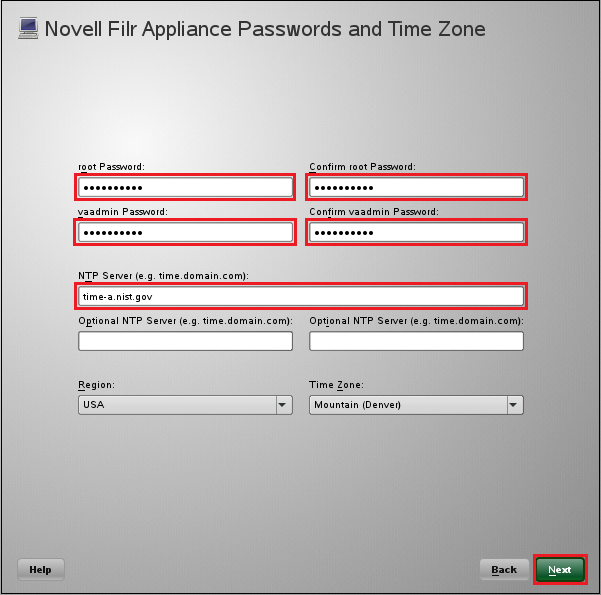
Specify the passwords and time settings.
-
Specify the network settings.

-
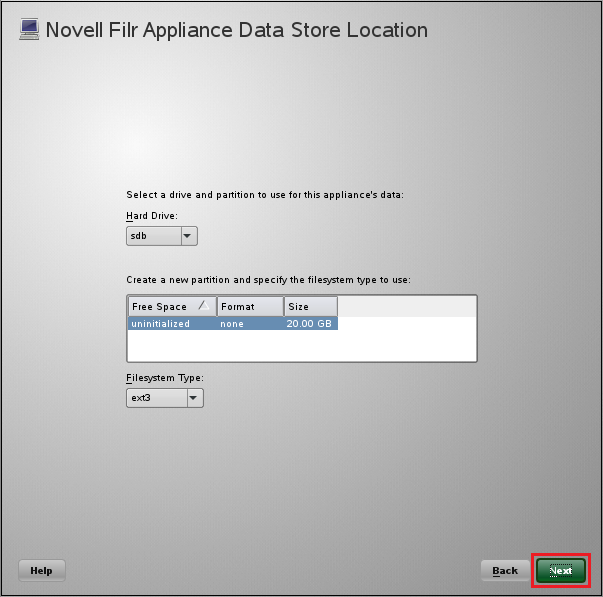
Specify the second hard disk you added in Step 1.c as the data storage location for /vastorage by clicking .
-
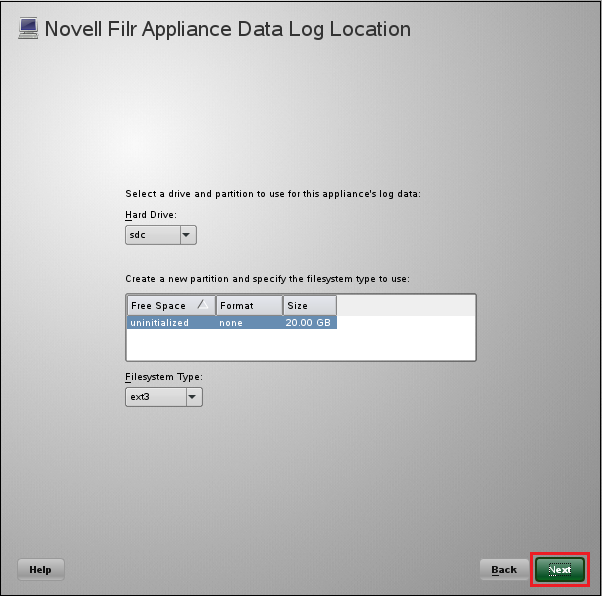
Specify the third hard disk you added in Step 1.d as the data log file location for /var by clicking .
-
-
Configure the appliance for shared storage, an important component of Filr-clustering.
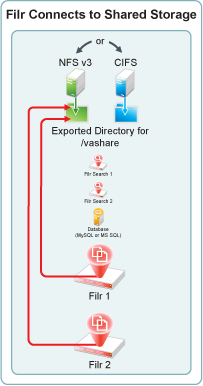
Figure 4-8 illustrates that each Filr appliance is configured to access the shared NFS disk or Windows share. The example that follows uses NFS.
Figure 4-8 Configuring the /vashare mount point
-
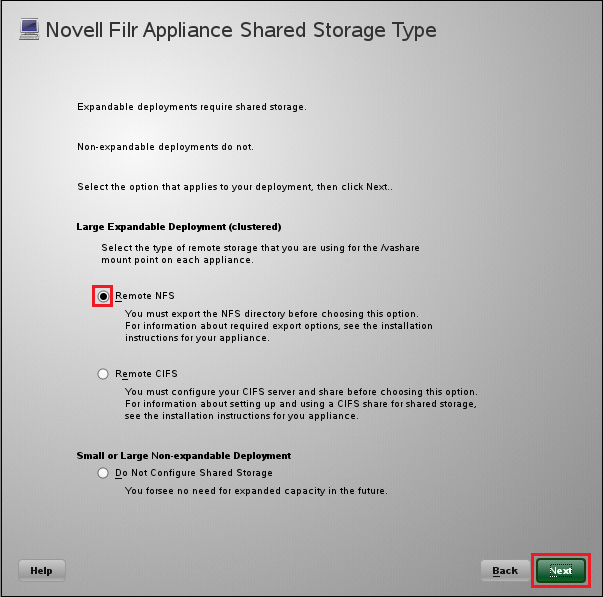
In the Novell Filr Appliance Shared Storage Configuration dialog, select , then click .
-
In the field, type the IP address or hostname of the Linux server where you created the NFS shared storage in Section 4.3, Setting Up Shared Storage.
Click the button next to the field.

-
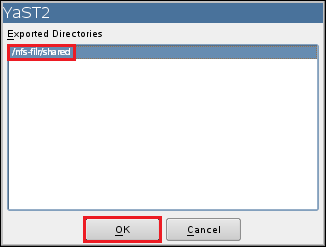
Select the directory you exported in Step 8, then click .
-
Click .
-
When the terminal prompt screen appears, log in as root and enter the following commands to temporarily halt the Ganglia monitoring process:
rcnovell-gmond stop
rcnovell-gmetad stop
-
-
Return to Step 1 to start and configure the next Filr appliance.
When all of the Filr appliances are started and configured, continue with Section 4.6.2, Deploying the Filr Appliances.
4.6.2 Deploying the Filr Appliances
-
Using a browser, access the Appliance Administration Utility on the Filr appliance by entering the following URL:
https://IP_Address:9443
Where IP_Address is the IP address of the first Filr appliance.

-
Log in as the vaadmin user using the password that you set in Step 3.b.
-
Click the button to launch the .
-
Select , then click .

-
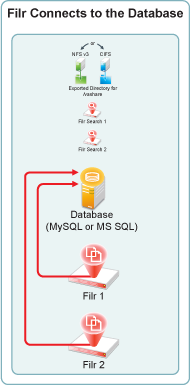
Specify the information for the connection between the Filr appliance and the SQL database.
Figure 4-9 illustrates that each Filr appliance is configured to access the database server or appliance.
Figure 4-9 Configuring Filr with the Database Information
-
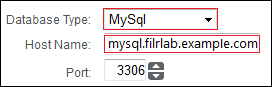
Select your , then in the field, type the address of the SQL database server or MySQL appliance.
-
In the field, type a name for the Filr database.
Novell recommends naming the database filr, unless you have an organization policy that doesn’t allow that name.
If you are using an existing SQL server, Filr creates the database on the server with the proper configuration.
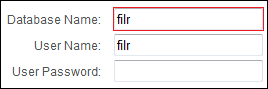
If you are using the MySQL appliance, the default name is filr (see Step 2.d).
-
In the fields, type the name and password of a database user with sufficient rights to create and administer the Filr database. The user must already exist on the database server.

If you are using the MySQL appliance, this is the filr user that you created in Step 2.c
-
Click .

-
-
Specify the first Filr Search appliance’s DNS name and Lucene password, then click .
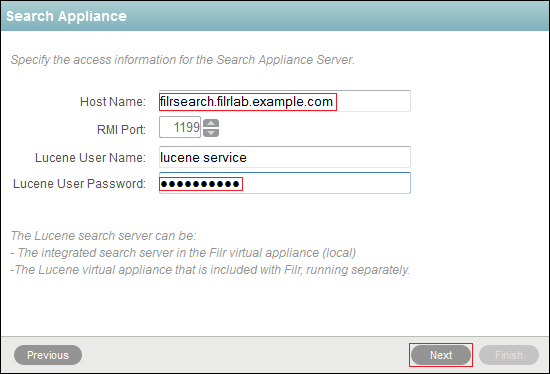
IMPORTANT:If you specify the IP address, it must be resolvable to the DNS hostname of the search appliance.
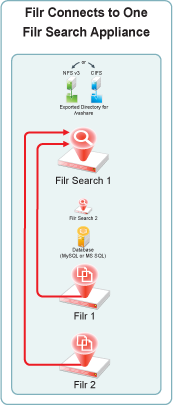
Figure 4-10 illustrates that each Filr appliance is configured at this point to access one of the Filr Search appliances. In Section 4.7, Creating the Filr Cluster you connect it to both appliances.
Figure 4-10 Initially, Each Filr Appliance Connects to Only One Filr Search Appliance
-
Select a locale, then click and wait for the server to start.

-
When the “Congratulations!” message displays, return to Step 1 and deploy the next Filr appliance.

-
After all of the Filr appliances are deployed, continue with
Creating the Filr Cluster.