3.6 Handling Unwanted Email (Spam)
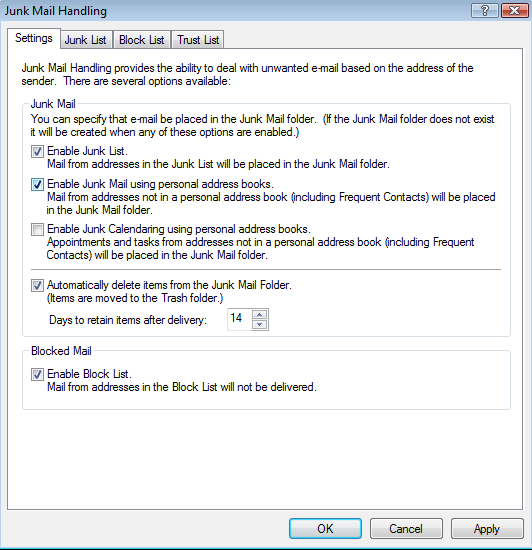
Use Junk Mail Handling to decide what to do with unwanted Internet email and calendar appointments, also known as spam, that is sent to your GroupWise email address.
-
Section 3.6.2, Blocking or Junking All Email from a Particular User
-
Section 3.6.3, Blocking or Junking Email from a Particular Internet Domain
-
Section 3.6.4, Junking Email from Users Not In a Personal Address Book
-
Section 3.6.5, Preventing Email from a User or Internet Domain from Being Junked or Blocked
-
Section 3.6.6, Modifying Junk Mail Handling Lists and Settings
-
Section 3.6.7, Automatically Deleting Items from the Junk Mail Folder
-
Section 3.6.8, Manually Deleting Items from the Junk Mail Folder
3.6.1 Understanding Junk Mail Handling
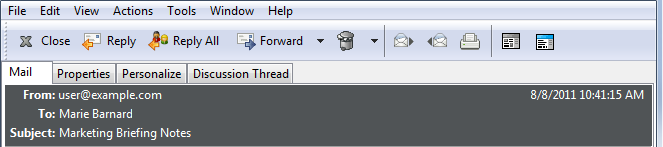
Internet email includes all email where the sender’s address is in the form of name@example.com, name@example.org, and so forth.
The following figure is an example of an email message from the Internet:
Figure 3-2 Email from the Internet
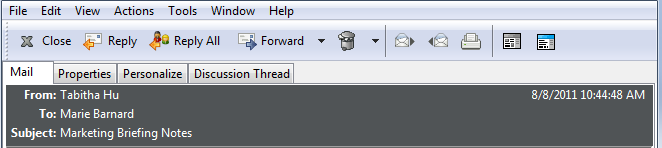
Junk Mail Handling does not apply to internal email or appointments. Internal email is email where the sender is part of your GroupWise system and the field shows only the name of the sender, not an Internet address as explained above. If you want to block or junk internal email or appointments, you can use rules. (For more information, see Section 9.4, Creating a Rule.)
The following figure is an example of an internal email message:
Figure 3-3 Email from a GroupWise User
You have three options for blocking or junking Internet email:
-
You can add individual email addresses or entire Internet domains to a Block List. Items from these addresses or Internet domains are blocked and never arrive in your Mailbox.
An Internet domain is the part of the email address that comes after the @. For example, in the address Henry@example.com, the Internet domain is example.com.
However, email from contacts in your Frequent Contact address book and your corporate address book is not blocked.
-
You can add individual email addresses or entire Internet domains to a Junk List. Items from these addresses or Internet domains are delivered to the Junk Mail folder in your Mailbox. You can specify that the items in this folder be automatically deleted after a certain number days.
Figure 3-4 Full Folder List Showing the Junk Mail Folder

-
You can specify that any email items from users whose addresses are not in your personal address books (including your Frequent Contacts address book and any personal address books you have created) are sent to the Junk Mail folder. This is sometimes called “white listing.”
For information about the Junk Mail folder, see Junk Mail Folder.
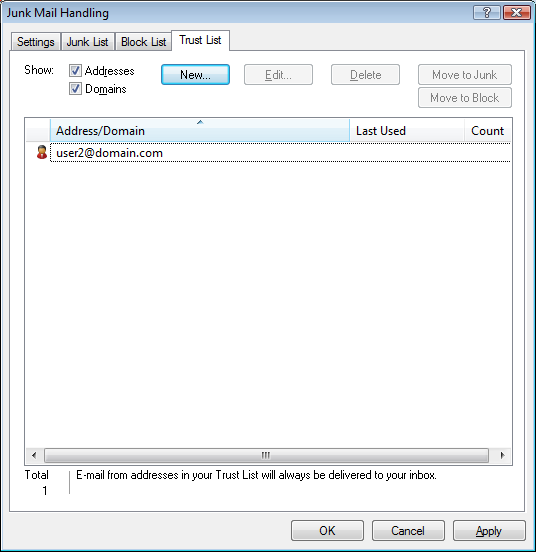
In addition to the Block List and Junk List, there is a Trust List. Use this list to add email addresses or Internet domains that you do not want blocked or junked, no matter what is specified in the other two lists. For example, you have example.com in your Block List, but you have one friend whose address is myfriend@example.com. Add this friend’s email address to the Trust List.
If you specify Junk Mail Handling options in Caching or Remote mode, make sure to synchronize with your Online Mailbox in order to see the same options when you log in to GroupWise on another computer.
Your GroupWise administrator can turn off Junk Mail Handling so that it is not available.
3.6.2 Blocking or Junking All Email from a Particular User
When you block all emails from specific users as described in this section, blocked users who send you messages do not receive notifications from GroupWise that their emails were blocked.
-
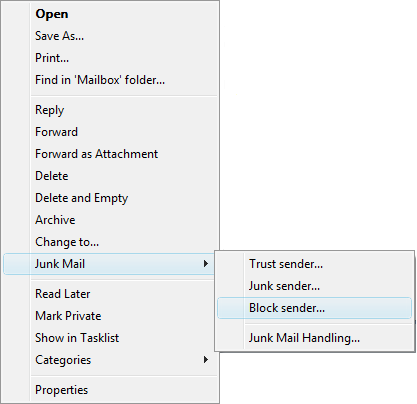
Right-click an item with an Internet address, then click .
-
Click .
or
Click .
-
Select or .
If you select , the address is added to the Junk List. All future email items from this email address are delivered to the Junk Mail folder
 .
.
You can specify that the items in this folder are automatically deleted after a certain number of days. This folder is not created in the folder list unless a Junk Mail option is enabled or an address or Internet domain is added to the Junk List (which enables the Junk List option).
If you select , the address is added to the Block List. All future email items from this email address are not delivered to your Mailbox.
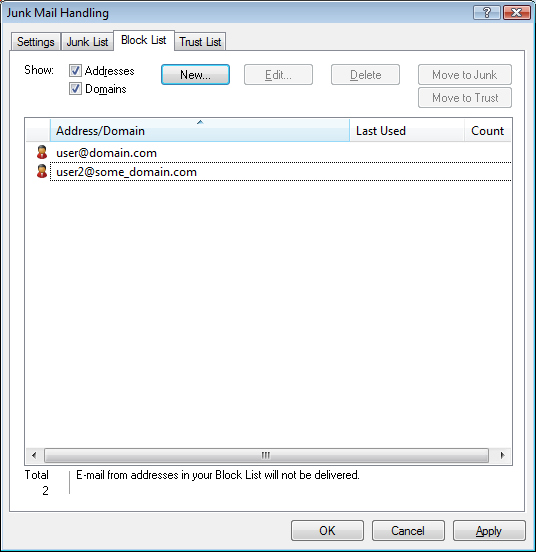
Your Junk List and Block List can each include up to 1000 entries. If more than 1000 entries are added, the least-used entries are discarded.
-
If the Junk List or Block List is not enabled, select or .
At any time, you can click > , click or , then click to add an email address to the Junk List or Block List.
Figure 3-5 Junk Mail Handling Dialog Box Showing the Junk List Tab
3.6.3 Blocking or Junking Email from a Particular Internet Domain
An Internet domain is the part of the email address that comes after the @. For example, in the address Henry@example.com, the Internet domain is example.com.
When you block all emails from a specific Internet domain as described in this section, blocked users who send you messages do not receive notifications from GroupWise that their emails were blocked.
-
Right-click an item, then click .
-
Click .
or
Click .
-
Select or .
If you select , the Internet domain is added to the Junk List. All future email items from this Internet domain are delivered to the Junk Mail folder
.
You can specify that the items in this folder be automatically deleted after a certain number of days. This folder is not created in the folder list unless a Junk Mail option is enabled or an address or Internet domain is added to the Junk List (which enables the Junk List option).
If you select , the Internet domain is added to the Block List. All future email items from this Internet domain are not delivered to your Mailbox.
Your Junk List and Block List can each include up to 1000 entries. If more than 1000 entries are added, the least-used entries are discarded.
-
If the Junk List or Block List is not enabled, select or .
At any time, you can click > , click or , then click to add an Internet domain to the Junk List or Block List.
3.6.4 Junking Email from Users Not In a Personal Address Book
-
Click > .
-
Select .
-
Click .
All future email from addresses not in your Frequent Contacts address book and other personal address books is delivered to the Junk Mail folder. You can specify that the items in this folder are deleted after a specified number of days.
3.6.5 Preventing Email from a User or Internet Domain from Being Junked or Blocked
-
Click > .
-
Click the tab.
-
Click , type an email address or Internet domain, then click .
An address or Internet domain can be in uppercase, lowercase, or mixed case. For example, amy@example.com and AMY@EXAMPLE.COM are both the same.
You cannot use wildcard characters such as * or ? in an Internet domain name. However, an Internet domain such as example.com affects all email from example.com and any subdomains that prefix this Internet domain, such as offers.example.com or members.example.com. A domain of abcexample.com is not affected.
-
Click .
All future items from this email address or Internet domain are not blocked or delivered to the Junk Mail folder, no matter what is specified in the Block List and Junk List.
3.6.6 Modifying Junk Mail Handling Lists and Settings
-
Click > .
-
On the tab, modify any settings.
-
Click the tab of the list you want to modify.
-
To add an email address or Internet domain to a list, click , type the email address or Internet domain, then click .
An address or Internet domain can be in uppercase, lowercase, or mixed case. For example, amy@example.com and AMY@EXAMPLE.COM are both the same.
You cannot use wildcard characters such as * or ? in an Internet domain name. However, an Internet domain such as idomain.com affects all email from idomain.com and any subdomains that prefix this Internet domain, such as offers.idomain.com or members.idomain.com. A domain of abcidomain.com is not affected.
-
To change an email address or Internet domain, click the address or Internet domain, click , make changes, then click .
-
To remove an email address or Internet domain from a list, click the address or Internet domain, then click .
-
Click .
3.6.7 Automatically Deleting Items from the Junk Mail Folder
-
Click > .
-
Click
-
Specify how long you want items retained in the Junk Mail folder.
-
Click .
3.6.8 Manually Deleting Items from the Junk Mail Folder
To manually delete items from the Junk Mail folder, right-click the folder, click , then click .