6.9 Setting Up Migration Networking
For each workload portability job, you must properly configure workload networking so that source workloads and targets can communicate with each other and the PlateSpin Server during the migration process, and that the network configuration of a target workload is in line with its end state.
Temporary Networking: Also called Take Control Network Settings; they apply to source and target workloads booted into a temporary pre-execution environment. See Offline Transfer with Temporary Boot Environment.
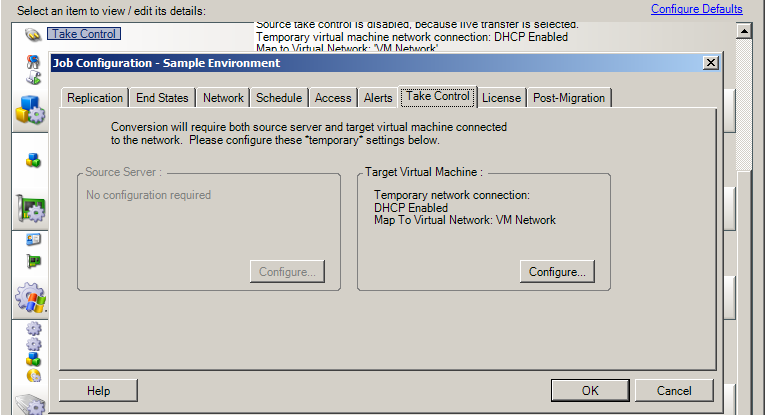
6.9.1 Temporary (Take Control) Network Settings
Temporary (Take Control) Network Settings control how source workloads, targets, and the PlateSpin Server communicate among each other during the migration. If required, you can manually specify a temporary network address to your source and target, or configure them to use a DHCP-assigned IP address during the migration.
During Windows and Linux workload migrations, the Temporary Network Settings control the PlateSpin Server’s communication with the source and target workloads that are booted into a temporary pre-execution environment. See Offline Transfer with Temporary Boot Environment.
To configure Temporary (Take Control) network settings:
-
In Advanced mode: In the Migration Job window, under the Job Configuration section, click . To access network interface mapping and TCP/IP settings, click in the source and target areas as applicable.
-
In Wizard mode (Windows only): In the wizard’s navigation pane, click In the or row, in either or drop-down menu, select . To quickly select DHCP without opening configuration options, select .

Configuration options for the Temporary networking vary and depend on whether the network interface is virtual or physical, and whether it is connecting a Windows or a Linux workload.
Target Take Control network settings are only used during an Offline migration process. On completion, target network settings are read from settings you specify for Target Post-Migration Networking. See Target Post-migration Networking.
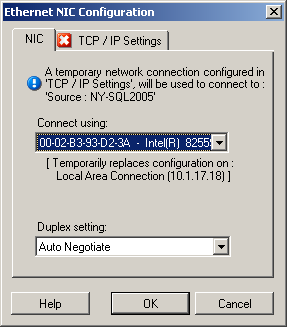
Temporary (Take Control) Network Settings: Physical Network Interfaces
These settings apply only to source physical machines. For target physical machines, Temporary (Take Control) network settings are configured during the boot process that uses the boot ISO image. See Discovering Target Physical Machines.
|
|
If multiple network adapters are present, select the adapter that can communicate with both the PlateSpin Server and the target. Use the drop-down list to select network card duplexing. It must match the duplex setting for the switch to which the network interface is connected. When the source is connected to switch ports that are set to 100 Mbit full duplex and cannot be changed to auto negotiation, select . tab: Click the tab to access TCP/IP and advanced network settings. See TCP/IP and Advanced Network Settings. |
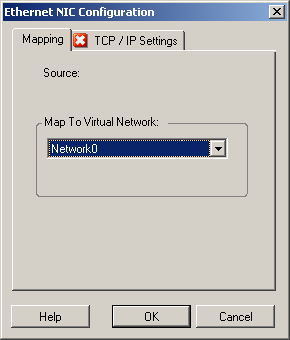
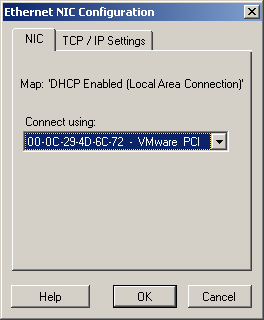
Temporary (Take Control) Network Settings: Virtual Network Interfaces
These settings apply to both source and target Take Control network settings.
|
|
From the drop-down list, select the virtual switch or network to use for communication during an Offline migration. If multiple virtual network adapters are present, select the adapter that can communicate with both the PlateSpin Server and the source machine. This network can differ from the network on which the target virtual machine will run after the migration. tab: Click the tab to access TCP/IP and advanced network settings. See TCP/IP and Advanced Network Settings. |
6.9.2 Target Post-migration Networking
Target post-migration network settings defined in a migration job control the network configuration of a target after the migration is complete. This applies to both physical and virtual network interfaces.
During workload migration, the target workload’s post-migration network settings are configured while the workload is booted into a pre-execution environment.
To configure target post-migration network settings:
-
In Advanced mode: In the Migration Job window, under the Network Configuration section, click (for target virtual machines) or (for target physical machines).
-
In Wizard mode (Windows only): In the wizard’s navigation pane, click In the Configure Target Network Adapters section, in either or drop-down menu, select . To quickly select DHCP without opening configuration options, select .
Configuration options for the target post-migration network settings vary and depend on whether the network interface is virtual or physical, and whether it is connecting a Windows or a Linux workload.
Post-Migration Networking for Physical Network Interfaces (Windows and Linux)
Use these settings to configure the post-migration network settings of a workload being migrated to physical hardware.
|
|
If multiple network adapters are present, select the adapter that can communicate with the PlateSpin Server. tab: Click the tab to access TCP/IP and advanced network settings. See TCP/IP and Advanced Network Settings. |
Post-Migration Networking for Virtual Network Interfaces (Windows and Linux)
By default, PlateSpin Migrate configures a migration job to create a virtual NIC for each NIC found on the source. For post-migration connectivity, ensure that the target virtual NIC is mapped to the appropriate virtual network on the target virtualization platform.

|
|
When this options is selected, PlateSpin Migrate creates a virtual NIC for a source NIC. Select the virtual network that will be used on the target VM. Choose a virtual network that allows the target VM to communicate with the server. Enable this option to connect the virtual network interface when starting the target machine. tab: Click the tab to access TCP/IP and advanced network settings. See TCP/IP and Advanced Network Settings. |
6.9.3 TCP/IP and Advanced Network Settings
PlateSpin Migrate provides a standard network configuration interface to both source and target network settings, and for both Temporary and target post-migration networking. Configuration settings vary slightly, depending on the operating system.
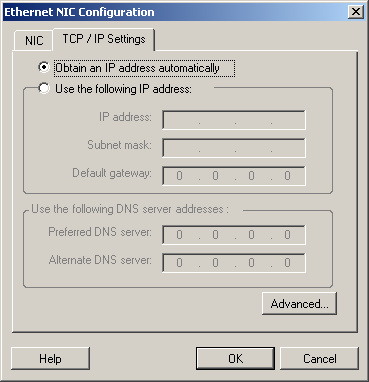
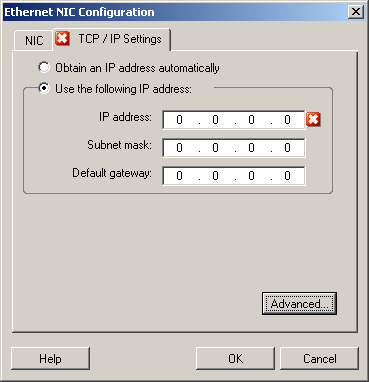
TCP/IP and Advanced Network Settings (Windows)
The following are standard TCP/IP and advanced network settings for Windows workloads:
|
|
When this option is selected, the workload uses an IP address automatically assigned by a DHCP server during the migration process. Select this option to specify a static IP address. If required, specify preferred and alternative DNS server addresses. Click this button to access advanced TCP/IP configuration settings, then specify or edit default gateway, DNS server, and WINS server information as required. |
TCP/IP and Advanced Network Settings (Linux)
The following are standard TCP/IP and advanced network settings for Linux workloads:
|
|
When this option is selected, the workload uses an IP address automatically assigned by a DHCP server during the migration process. Select this option to specify a static IP address. Click this button to access DNS configuration settings, then specify preferred and alternate DNS server addresses as required. You can also indicate whether you want DNS addresses copied to the resolv.conf file located in your target’s /etc directory. |