3.1 Sending Email
When you send an email message from GroupWise WebAccess, you can send the message either as text or HTML. Additionally, you can choose to attach a file, add a signature to the message, and spell check the message before it is sent.
The address book and name completion help you to quickly and easily find the contacts you need when sending an email message.
3.1.1 Composing Email
-
Click on the toolbar.
-
In the box, type a user name, then press Enter. As you begin to type, the system automatically tries to match the name and complete it for you. Repeat for additional users. If necessary, type user names in the and boxes.
or
To select user names from a list, click on the toolbar, search for and select each user, click , , or for each user, then click .
-
Type a subject.
-
Type a message.
You can specify many options, such as making this message a high priority, requesting a reply from the recipients, and more, by clicking the tab.
-
Include any attachments by clicking the .
-
Click on the toolbar.
3.1.2 Formatting Messages
When you send a message, you can select from several format options. You can select to send the message as a text or HTML message, and you can change the fonts, colors, and layout of the message.
Changing the Font in the HTML View
The recipient of an item sees the changes you make in Plain Text view if he or she views the item in Plain Text view. The recipient of an item sees the changes you make in HTML view if he or she views the item in HTML view. You might want to let the recipient know which view you composed the item in.
-
In an open item you are composing, make sure the HTML toolbar is displayed.

-
Use the HTML toolbar to change the font, add background colors, add images, and more.
You might need to resize the item view horizontally to see all the buttons on the HTML toolbar.
Formatting Bulleted and Numbered Lists
You can easily include bulleted and numbered lists in messages.
-
In an open item you are composing in the HTML view, use the HTML toolbar to insert a bulleted or numbered list
-
Type the list item, then press Enter to create the next item in the list.
-
Press Enter twice after the last item to turn off the list formatting.
Undoing the Last Text Action
You can undo the last text action in the or field of a message you are composing.
-
Press Ctrl+Z.
For information about other shortcut keys, see Section C.0, Using Shortcut Keys.
3.1.3 Spell-Checking Messages
Spell Checker lets you check for misspelled words in the messages you create. It checks for misspelled words, duplicate words, and irregular capitalization in items you are creating.
When Spell Checker finds a misspelled word, you can replace it with a word Spell Checker suggests, edit the word manually, or skip the word.
You use the compose options to set up Spell Checker to automatically spell check your messages before you send them.
Spell-Checking an Item with Spell Checker
-
Click the or field.
-
Click .
WebAccess highlights any misspelled words.
-
Click any highlighted word.
-
Select one of the words Spell Checker suggests to replace the misspelled word.
or
Click to make your own corrections.
-
Click when spell-checking is complete.
Spell-Checking Items Automatically with Spell Checker
You can automatically spell-check items every time you click .
-
On the main WebAccess page, click the icon
 , then click .
-
Click the tab.
-
Select .
-
Click , then click .
Selecting the Spell Checker Language
-
In an open item you are composing, click the field or the field.
-
Click the drop-down menu next to .
-
Select the language to use.
3.1.4 Attaching Files
You can send files to other users. You can attach files that exist on your hard disk, diskette, or network drive to an item you are sending. The recipients can open an attached file, save it, view it, or print it. If you change an attached file after you have sent it, the recipients do not see the changes.
If you attach a file that is password-protected, the recipient cannot open or view the attachment without entering the password.
-
Open a new item.
-
Fill in the , , and fields.
-
Click , then browse to and select the file or files you want to send.
To remove an attached file, click the Remove icon
 .
.
-
Click on the toolbar.
Moving or deleting a file on a disk or network drive does not affect a file you attached to an item and sent.
If you delete an attached file, it is not erased from disk or network drive; it is simply removed from the attachment list.
3.1.5 Adding a Signature
Use Signatures to insert a signature or tag line at the end of items you send. For example, you can have GroupWise automatically list your name, phone number, and email address at the bottom of every item you send.
In addition to personal signatures, your GroupWise administrator can create a global signature for everyone to use. If the GroupWise administrator requires the global signature, it is automatically appended to all items that are sent. When you resend an item, the global signature is not automatically added to the message.
Signatures that you create or modify in the GroupWise Windows client are automatically displayed in GroupWise WebAccess. Likewise, signatures that you create or modify in GroupWise WebAccess are automatically displayed in the GroupWise Windows client.
-
On the main page, click the icon
, then click .
-
Click .
-
Select
-
Click , specify a name for the new signature, then click .
-
(Optional) Create additional signatures. In the drop-down list, select the signature that you want to make your default signature, then select .
-
Type your signature text in the box.

-
Clickto automatically add your signature when you send the item.
or
Click to have WebAccess prompt you to add the signature when you send the item.
-
Click , then click .
3.1.6 Saving Unfinished Email
Understanding Auto-Save
When you compose a new message in GroupWise WebAccess, items are automatically saved for you. This prevents the loss of any messages you are authoring if WebAccess unexpectedly shuts down. When you restart WebAccess, you have the option to recover these messages to finish composing them.
If you stop using GroupWise WebAccess for 10 seconds (the default non-use value) and have unsent messages, or if you have been actively composing messages for 60 seconds (the default continuous use value), WebAccess automatically saves your messages to your folder. WebAccess adds two characters to the title of all auto-saved messages to distinguish them from other items you might have manually saved to your Work In Progress folder.
Your administrator can disable the auto-save feature and change the non-use and continuous values.
If there are auto-saved messages when you start WebAccess a message is displayed. The type of message that is displayed differs depending on the number of messages that were auto-saved.
When One Auto-Saved Message is Recovered
When you start WebAccess and only one auto-saved message is recovered, you see the following message:
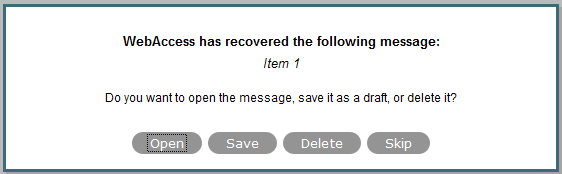
You have the following options to deal with the auto-saved messages:
Open: Opens the auto-saved messages so that you can finish composing them.
Save: Saves the messages as regular Work In Progress items so that you can finish composing the messages later.
Delete: Deletes the auto-saved messages. The information in them is permanently lost.
Skip: Retains the saved messages on disk but does not recover them in WebAccess. The next time you start WebAccess, the Auto-Save window reappears.
When Two to Five Auto-Saved Messages Are Recovered
When you start WebAccess and two to five auto-saved message are recovered, you see the following message:
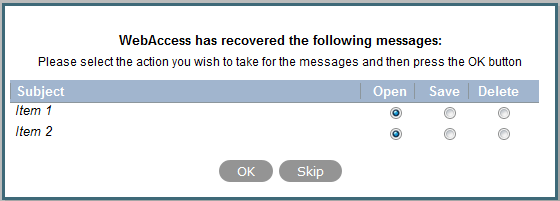
You have the following options to deal with the auto-saved messages. Select one of these options for each auto-saved message, then click .
Open: Opens the auto-saved messages so that you can finish composing them.
Save: Saves the messages as regular Work In Progress items so that you can finish composing the messages later.
Delete: Deletes the auto-saved messages. The information in them is permanently lost.
Click to retain the saved messages on disk but to not recover them in WebAccess. The next time you start WebAccess, the Auto-Save window reappears.
When 6 or More Auto-Saved Messages Are Recovered
When you start WebAccess and six or more auto-saved message are recovered, you see the following message:

Click to save the messages as regular Work In Progress items so that you can finish composing the messages later.
Enabling or Disabling Auto-Save
By default, Auto-Save is enabled if you use a high-speed connection to access your GroupWise system. It is disabled by default if you use a low connection speed. For more information on your login options for connecting, see Section 1.2, Starting GroupWise WebAccess.
-
On the main WebAccess page, click the icon
, then click .
-
Click the tab.
-
Select to enable Auto-Save.
or
Deselect to disable Auto-Save.
-
Click then click .
Saving an Unfinished Email
-
In an open item, click the icon.
-
Click the folder you want to save the item to, then click .
The draft message is placed in the folder you chose in Step 2. The default folder for unfinished messages is the Work In Progress folder  .
.
3.1.7 Selecting the Default Compose View
When you are composing a message in GroupWise WebAccess, you can select to have the default compose format in either plain text or HTML.
-
On the main WebAccess page, click the icon
, then click .
-
Click the tab.
-
In the box, select or .
-
Click , then click .
To change the view in one item:
-
Open an item.
-
Click the > icon.
3.1.8 Addressing Mail Messages
A mail message has a primary recipient, a subject line, and can be carbon copied and blind copied to other users. You can also attach files, document references, sounds, movies, and OLE objects to your mail messages.
Using the Address Book
For information on using the Address Book, see Section 6.0, Contacts and Address Books.
CC (Carbon Copy)
Carbon copy recipients (CC) receive a copy of an item. CC recipients are users who would benefit from the information in an item, but are not affected by or directly responsible for it. All recipients can see that a carbon copy was sent. They can also see the names of the CC recipients.
BC (Blind Copy)
Blind copy recipients (BC) receive a copy of an item. Other recipients receive no information about blind copies. Only the sender and the blind copy recipient know that a blind copy was sent. If a recipient replies and chooses , the blind copy recipient does not receive the reply.
Adding Addresses to Mail Messages
-
Click on the toolbar.
-
In the field, type a user name, then press Enter. Repeat for additional users. If necessary, type user names in the and fields.
or
To select user names from a list, click on the toolbar. For more information on how to use the Address Selector, see Section 6.2, Using the Address Selector.
-
Type a subject.
-
Type a message.
You can specify many options, such as making this message a high priority, requesting a reply from recipients, and more, by clicking the tab.

If you want, you can change the font of the message text. For information, see Changing the Font in the HTML View.
-
Include any attachments by clicking .
-
Click on the toolbar.
3.1.9 Selecting Send Options
Changing the Priority of Mail You Send
Changing the Priority for All Items You Send
-
To change the priority of all items you send, click the icon
, then click .
-
Click the tab.
-
Select , , or .
The small icon next to an item in the Mailbox is red when the priority is high, white when the priority is standard, and gray when the priority is low.
-
Click , then click .
Changing the Priority for One Item
-
To change the priority of one item, open an item, then click the tab.
-
Select , , or .
The small icon next to an item in the Mailbox is red when the priority is high, white when the priority is standard, and gray when the priority is low.
-
Click .
Changing the Security Setting (Classification) of All Items You Send
A classification is a security setting that lets the recipient know if the item is confidential, top secret, and so forth. This information appears at the top of the item. A classification does not provide any encryption or additional security. It is meant to alert the recipient to the relative sensitivity of the item.
-
On the main WebAccess page, click the icon
, then click .
-
Click the tab.

-
Select a security setting from the drop-down list.
-
Click , then click .
Changing the MIME Encoding of a Message
Many languages require different character encodings to display certain characters properly. In GroupWise WebAccess, you can change the encoding for items that you send and receive.
Changing the Encoding for All Items You Send
-
On the main WebAccess page, click the icon
, then click .
-
Click the tab.
-
Select your MIME encoding from the g drop-down list.
-
Click , then click .
Changing the Encoding for One Item
-
In the Mail Message window, click the tab.
-
Select your MIME encoding from the g drop-down list.
-
Click on the toolbar to send the message.
3.1.10 Posting a Note
A note is a message that is posted to your mailbox only. Notes are a way of creating personal notes for yourself.
-
In your Mailbox or Calendar, click the drop-down arrow next to , then click .
-
Type a subject.
-
Type a message.
-
Include any attachments by clicking .
-
Click on the toolbar.
3.1.11 Sending a Phone Message
A phone message is a note you can send to notify other GroupWise users of calls they received while they were out of the office or unavailable. Phone messages are stored in the recipient’s Mailbox. You cannot answer your phone from a phone message.
-
In your Mailbox or Calendar, click the drop-down arrow next to , then click .

-
In the field, type a user name, then press Enter. Repeat for additional users.
or
To select user names from a list, click on the toolbar. For more information on how to use the Address Selector, see Section 6.2, Using the Address Selector.
-
Type the name, company, and phone number of the caller.
-
Type the message in the message body.
If you want, you can change the font of the message text. For information, see Changing the Font in the HTML View.
-
Click on the toolbar.