4.2 Installing and Configuring ZENworks Orchestrator Components
The ZENworks Orchestrator Server (Orchestrator Server) is supported on SUSE® Linux Enterprise Server 10 Service Pack 1 (SLES 10 SP1) only. You should install the ZENworks Orchestrator Server on a dedicated server for optimal performance.
After you install and configure the components you want from ZENworks Orchestrator, there are other basic tasks you need to perform to make the Orchestrator system perform at a basic level. Those tasks are documented in Section 5.0, First Use of Basic ZENworks Orchestrator Components.
For this guide, the installation of the Orchestrator Server, the Virtual Machine (VM) Warehouse and Builder, and the ZENworks Monitoring Server are all shown. The virtual machine components are purchased under a separate license, but for the purpose of this guide, the same installation is used for all.
These VM components (if licensed and selected during the installation) can be installed on the same machine where the Orchestrator Server is installed. However, for better scale and performance we recommend that you install the VM Warehouse and VM Builder together on a separate machine from the Orchestrator Server. VM Warehouse and VM Builder must be installed on Dom0 of the Xen box. The Monitoring Server can be installed on any server as it runs independently of the other components. For more information, see Section 3.1, Orchestrator Server Requirements.
This section includes the following information:
4.2.1 Installation and Configuration Steps
To install and configure a typical ZENworks Orchestrator system:
-
Review Section 3.0, Planning the Installation to verify that the device where you want to install the Orchestrator Server software fulfills the necessary requirements.
-
Download the appropriate ZENworks Orchestrator Server ISO (32-bit or 64-bit) to an accessible network location.
-
(Optional) Create a DVD ISO (32-bit or 64-bit) that you can take with you to the machine where you want to install it.
-
Install ZENworks Orchestrator software:
-
Log in to the target SLES 10 SP1 server as root, then open YaST2.
-
In the YaST Control Center, click > , then click to display the Add-on Product Media dialog box.
-
In the Add-on Product Media dialog box, select the ISO media ( or ) to install.
-
(Conditional) Select , click , insert the DVD, then click .
-
(Conditional) Select , click, select the check box, browse to ISO on the file system, then click .
-
-
Read and accept the license agreement, then click to display YaST2.
-
In YaST2, click the drop-down menu, then select to display the install patterns available on the ZENworks Orchestrator ISO.

-
Select the ZENworks Orchestrator installation patterns that you want to install:
-
ZENworks Orchestrator Server: This pattern is the gateway between enterprise applications and resource servers. The Orchestrator Server manages computing nodes (resources) and the jobs that are submitted from applications to run on these resources.
-
ZENworks Virtual Machine Warehouse: Stores VM images and image data, versions the images, designates the gold master VM image, and checks out and in the VM images.
For better scale and performance, we recommend that you install this pattern to a different server than where the Orchestrator Server is installed. Also, it must be installed on the same server where the VM Builder pattern is installed.
-
ZENworks Monitoring Server: Uses open source Ganglia monitoring of the performance of certain data on network resources in a user-defined time period.
This pattern can be installed on a server where any other ZENworks Orchestrator pattern is installed, or on a server by itself.
-
ZENworks Orchestrator Agent: This pattern is installed on all computing resources that are to be managed. It runs applications under the management of the Orchestrator Server and reports its status to the Orchestrator Server.
-
ZENworks Orchestrator Clients: Installing this pattern installs the ZENworks Orchestator Console that lets the computing resource administrator troubleshoot, initiate, change, or shut down server functions for ZENworks Orchestrator and its computing resources. For information about the tools included in this pattern, see ZENworks Orchestrator Clients:.
-
ZENworks Virtual Machine Builder: This pattern is an agent that builds the VM images as the jobs are sent to it by the Orchestrator Server. The Xen hypervisor must exist on the server where this pattern is installed.
We recommend for better scale and performance that this pattern be installed to a different server than where the Orchestrator Server is installed. Also, it must be installed on the same server where the VM Warehouse pattern is installed.
-
ZENworks Monitoring Agent: This pattern is installed with any installation of the Orchestrator Server, and it installs the Ganglia Agent on each monitored node, which collects performance metrics and sends the data to the ZENworks Monitoring Server.
Refer to the information in Section A.0, ZENworks Orchestrator Components: Install Patterns for more detail about these patterns.
If you choose not to install the ZENworks Orchestrator Agent or the ZENworks Orchestrator Clients on some machines using this method now, you can install them later by using installers that are accessible from a hosted Web page from the ZENworks Orchestrator Server or you can repeat this process by downloading the ISO to the machine where you want to install the agent or clients. For more information, see Section 4.3, Independent Installation of the Agent and Clients.
-
-
Click to install the packages.
-
-
Configure the ZENworks Orchestrator components that you have installed. You can use one of two information gathering methods to perform the configuration:
HINT:Although the text-based configuration process detects which RPM patterns are installed, the GUI Configuration Wizard requires that you specify which components are to be configured.
-
(Optional) Run the Orchestrator product configuration script.
-
Make sure you are logged in as root to run the configuration script.
-
Run the script, as follows:
/opt/novell/zenworks/orch/bin/config
When the script runs, the following information is initially displayed:
Welcome to Novell ZENworks Orchestrator. This program will configure Novell ZENworks Orchestrator 1.2 Select products to configure # selected Item 1) yes ZENworks Monitoring Service 2) yes ZENworks Orchestrator Server 3) yes ZENworks Orchestrator Agent 4) yes ZENworks Orchestrator VM Builder 5) yes ZENworks Orchestrator VM Warehouse Select from the following: 1 - 5) toggle selection status a) all n) none f) finished making selections q) quit -- exit the program Selection [finish]: -
Determine which installed products you want to configure. The options are listed with option numbers.
-
Select or deselect an option by typing its number to toggle its selection status, or type a and press to select all of them.
-
When you have selected the products you want to configure, type f and press to finish the selection and begin the configuration, then continue with Step 6.
-
-
-
(Optional) Run the GUI Configuration Wizard.
-
Run the script for the ZENworks Orchestrator Configuration Wizard as follows:
/opt/novell/zenworks/orch/bin/guiconfig
The GUI Configuration Wizard launches.

IMPORTANT:If you only have a keyboard to navigate through the pages of the GUI Configuration Wizard, use the Tab key to shift the focus to a control you want to use (for example, a button), then press the space bar to activate that control.
-
Click to display the license agreement.
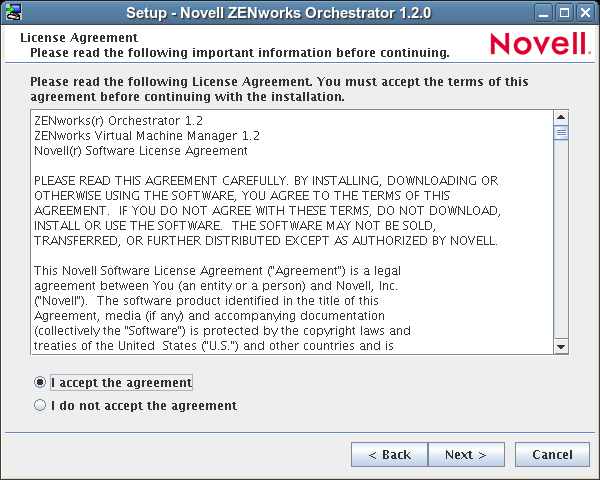
-
Accept the agreement, then click to display the ZENworks Orchestrator components page.

NOTE:Although the option is available on this wizard page, upgrading to a newer version of ZENworks Orchestrator is not supported from versions newer than 1.2.0.
-
Select , then click to display the ZENworks Orchestrator components page.

The components page lists the ZENworks Orchestrator components that are available for configuration (already installed). By default, all installed components are selected for configuration.
-
(Optional) Deselect any ZENworks Orchestrator components that you do not want to configure.
-
Click on the succeeding pages and provide information for the wizard to be used the configuration process. As the configuration interview in the wizard proceeds, refer to the information in Table 4-1, Orchestrator Configuration Information for details about the configuration data that you need to provide. The GUI Configuration Wizard uses this information to build a response file that is consumed by the setup program inside the GUI Configuration Wizard.
When you have finished answering the configuration questions in the wizard, the ZENworks Orchestrator Configuration Summary page is displayed.
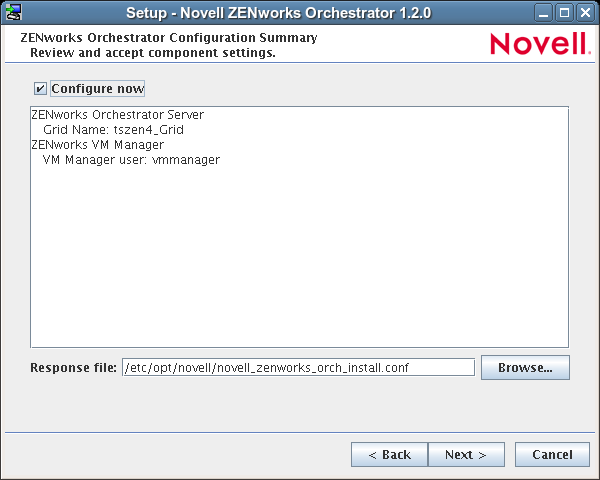
IMPORTANT:Although this page of the wizard lets you navigate using the Tab key and spacebar, you need to use the Shift+Tab combination to navigate past the summary list. Click if you accidentally enter the summary list and re-enter the page to navigate to the control buttons.
By default, the check box on this page is selected. If you accept the default of having it selected, the wizard starts ZENworks Orchestrator and applies the configuration settings. If you deselect the check box, the wizard writes out the configuration file to /etc/opt/novell/novell_zenworks_orch_install.conf without starting Orchestrator or applying the configuration settings.
NOTE:You can use this .conf file to start the Orchestrator server or client and apply the settings either manually or with an installation script. Use the following command to run the configuration:
/opt/novell/zenworks/orch/bin/config -rs
-
Click to display the following wizard page.
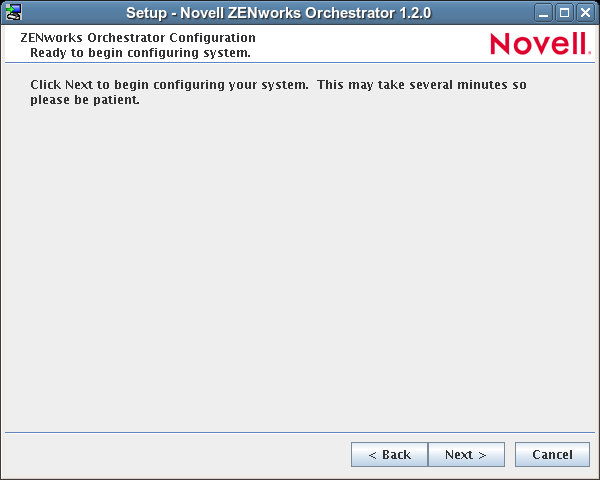
-
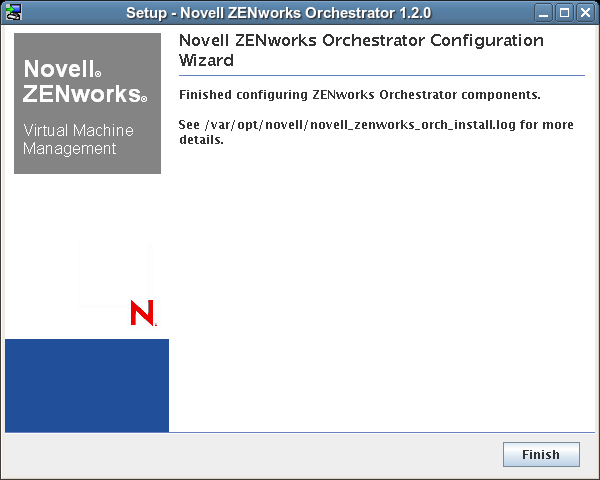
Click to launch the configuration script. When the configuration is finished, the following page is displayed:
-
Click to close the configuration wizard.
IMPORTANT:When the installation and configuration are complete, you need to register the resources to be managed by the ZENworks Orchestrator system. Please refer to Section 5.0, First Use of Basic ZENworks Orchestrator Components for detailed information about getting resources to manage in the ZENworks Orchestrator system.
-
-
-
Open the configuration log file (/var/opt/novell/novell_zenworks_orch_install.log) to make sure that the components were correctly configured.
You might want to change the configuration if you change your mind about some of the parameters you provided in the configuration process. For information about what to do in these circumstances, see Section 4.2.3, Correcting Configuration Errors and Repeating the Configuration Process.
-
Access the ZENworks Orchestrator Administrator Information Page to verify that the Orchestrator Server is installed and running. Use the following URL to open the page in a Web browser:
http://DNS_name_or_IP_address_of_Orchestrator_Server:8001
The Administrator Information page includes links to separate installation programs (installers) for the ZENworks Orchestrator Agent (Orchestrator Agent) and the ZENworks Orchestrator Clients (Orchestrator Clients). The installers are used for various operating systems. You can download the installers and install the agent or the clients on any supported machine you choose. For more information, see Section 4.3, Independent Installation of the Agent and Clients.
-
(Conditional and Optional) If you installed the ZENworks Orchestrator Clients, you can increase the heap size that the JVM handles. This enables the console to manage a larger number of objects.
-
Open the zoc bash shell script at /opt/novell/zenworks/zos/server/bin.
NOTE:On Microsoft Windows, the path to the console is files\novell\zos\clients\bin\zoc.bat. For more information, see Section 4.3, Independent Installation of the Agent and Clients.
-
Inside the script, find the following line where the JVM parameters are defined:
JVMARGS="-Xmx256m -Xms256m -Xmn64m -XX:NewSize=64m -XX:MaxNewSize=64m"
The -Xmx argument specifies the maximum heap size for the JVM. Increasing the heap size prevents a JVM out of memory condition.
-
Change the value in the -Xmx argument from 256MB to 512MB.
-
4.2.2 ZENworks Orchestrator Configuration Information
The following table includes information about the information required by the ZENworks Orchestrator configuration (config) and the configuration wizard (guiconfig). The information is organized in this way to make it readily available if you want to evaluate the entire product. The information is listed in the order that it is presented in the configuration file.
Table 4-1 Orchestrator Configuration Information
|
Configuration Information |
Explanation |
|---|---|
|
ZENworks Monitoring |
If you installed the ZENworks Monitoring Server and the ZENworks Monitoring Agent, the following questions are asked during the configuration process.
|
|
Orchestrator Server |
Because the ZENworks Orchestrator Server must always be installed for a full Orchestrator system, the following questions are always asked when you have installed server patterns prior to the configuration process:
|
|
Orchestrator Server (continued) |
|
|
Orchestrator Agent |
You can install and configure the Orchestrator Agent on any computing node. It is not necessary to install it on the same machine with the Orchestrator Server. If you installed the Orchestrator Agent, the following questions are asked in the configuration process.
|
|
VM Builder |
If you installed the ZENworks Virtual Machine Builder, the following questions are asked in the configuration process.
|
|
VM Warehouse |
If you installed the ZENworks Virtual Machine Warehouse, the following questions are asked in the configuration process.
|
|
Configuration Summary |
When you have completed the configuration process, you have the option of viewing a summary of the configuration information.
|
1 This configuration parameter is considered an advanced setting for the Orchestrator Server in the ZENworks Orchestrator Configuration Wizard. If you select the check box in the wizard, the setting is configured with normal defaults. Leaving the check box deselected lets you have the option of changing the default value.
2 This configuration parameter is considered an advanced setting for the Orchestrator Server in the ZENworks Orchestrator Configuration Wizard. If you select the check box in the wizard, this parameter is listed, but default values are provided only if the previous value is manually set to .
3 This configuration parameter is considered an advanced setting for the Orchestrator Agent in the ZENworks Orchestrator Configuration Wizard. If you select the check box in the wizard, the setting is configured with normal defaults. Leaving the check box deselected lets you have the option of changing the default value.
4 This configuration parameter is considered an advanced setting for the Orchestrator Agent in the ZENworks Orchestrator Configuration Wizard, but only if you set to .
4.2.3 Correcting Configuration Errors and Repeating the Configuration Process
If you want to reconfigure the components of the ZENworks Orchestrator system that you previously installed and configured, you can rerun the configuration script or the GUI Configuration Wizard and change your responses during the configuration process.
4.2.4 Installing and Configuring the ZENworks Orchestrator for Use with a MySQL Audit Database on a Different Host
When you install ZENworks Orchestrator, you can optionally point it to a relational database that you can use to audit the work done by the product. There is no relational database management system bundled with the product, but because ZENworks Orchestrator is supported by default on SLES 10 SP1, you can use a MySQL database and configure it for use with Orchestrator auditing. If you want to use some other database, you have to configure it separately for use with Orchestrator. This section includes the following information:
Installing the MySQL Package and Dependencies on an Independent Host
When you enable and configure ZENworks Orchestrator auditing, you create a small custom database and a simple schema that persists all of the Orchestrator jobs that have been run, along with their parameters.The database also maintains the login or logout activity of the Orchestrator users and resources.
NOTE:We recommend that you install the MySQL package on a SLES 10 SP1 server that is different from the server where you install the ZENworks Orchestrator Server. This ensures an adequate amount of space for running the server as the database is used.
If you want to run the database on the same host with ZENworks Orchestrator, see Section 4.2.5, Installing and Configuring the ZENworks Orchestrator for Use with a Local MySQL Audit Database.
If the SLES 10 SP1 machine does not have MySQL package installed and running, use YaST to search for mysql, then install the package and its dependencies.
You can also run the following command from the bash prompt:
yast2 -i mysql
When MySQL is installed, you need to start the mysql daemon. Use the following command:
rcmysql start
This command creates or updates the MySQL privilege database and installs the prepared tables.
Logging in Locally to the MySQL Database
When you have installed the database, the next step is to set a user password on the database host. The default admin username is root. Use the following command to set up a password at the database host machine:
/usr/bin/mysqladmin -u root password new_password
NOTE:Take note of the password. You will need it to log in later to log in to the database.
When the password has been set, you can log in to the MySQL server.
Creating an Orchestrator User for the MySQL Database
Because the Orchestrator Server will need to record its events to the database on another machine, you need to set up an Orchestrator user that can proxy as a MySQL user with the rights to read and write to the database.
-
On the database host machine, use the following command to log in as root at the database host machine:
mysql -u root -p
When you enter this command, you are prompted for the password. When you enter the password, you are logged in to the database.
-
At the mysql prompt on the database host, use the following command to create a user specific to the ZENworks Orchestrator Server host:
mysql>Create user root@orchestrator_server_host identified by password;
Where you supply the username and hostname.
-
At the mysql prompt on the database host, use the following commands to grant the permissions necessary for this user (see Step 2 above) to set up and use the audit database from the Orchestrator Server.
mysql>Grant All ON *.* TO root@orchestrator_server_host;
mysql>Grant Grant Option ON *.* TO root@orchestrator_server_host;
-
Enter the \q command at the mysql prompt to exit the database.
Configuring the Orchestrator Audit Database on a Separate Host
The easiest way to configure the audit database is to do so when you configure the ZENworks Orchestrator Server. Use the following procedure to configure the database.
NOTE:Although the interview questions presented in the config script are shown here, the questions presented in the graphical Configuration Wizard are similar.
-
After you have installed the ZENworks Orchestrator packages you want, run the configuration (either the config script or the graphical Configuration Wizard) until you see the following question:
Enable Auditing (y/n) [no]:
-
Enter yes to answer this question. The following question displays:
Configure MySQL DB (y/n) [no]:
-
Enter yes to answer this question. the following question displays:
Jdbc URL [jdbc:mysql://localhost/]:
-
Enter the URL of the server where MySQL is running, then press Enter.
jdbc:mysql://IP_address_of_database_server/NOTE:This is a standard JDBC URL because this server is Java and uses JDBC for the interface database. The URL must be properly formed, with a slash and without a database name at the end.
The following prompt is displayed:
DB Admin Username:
-
Specify the MySQL database administrator username, then press Enter.
This is the same name that was specified when MySQL was installed. In most instances, you install the database as root.
The following prompt is displayed:
DB Admin Password:
-
Specify the MySQL database administrator password, then press Enter.
This is the same password that was specified when MySQL was installed.
The following prompt is displayed:
Retype password:
-
Retype the database administrator password to verify it, then press Enter. The following prompt is displayed:
ZOS Audit Database Name [zos_db]:
-
Specify the name of the database you want to create for ZENworks Orchestrator auditing, then press Enter. The following prompt is displayed:
Audit DB Username:
-
Specify the name you want to use for the MySQL database user that will be used by ZENworks Orchestrator for auditing (that is, a user with Read and Write privileges, not the administrator), then press Enter. The following prompt is displayed:
Audit DB Password:
-
Specify the password you want to use for authentication by the designated MySQL database user, then press Enter. The following prompt is displayed:
Retype password:
-
Retype the password, then press Enter.
After you retype the new audit database password, the configuration interview for the Orchestrator Server continues normally.
4.2.5 Installing and Configuring the ZENworks Orchestrator for Use with a Local MySQL Audit Database
When you install ZENworks Orchestrator, you can optionally point it to a relational database that you can use to audit the work done by the product. There is no relational database management system bundled with the product, but because ZENworks Orchestrator is supported by default on SLES 10 SP1, you can use a MySQL database and configure it for use with Orchestrator auditing. If you want to use some other database, you have to configure it separately for use with Orchestrator. This section includes the following information:
Installing the MySQL Package and Dependencies
NOTE:We recommend that you install the MySQL package on a SLES 10 SP1 server that is different from the server where you install the ZENworks Orchestrator Server. This ensures an adequate amount of space for running the server as the database is used.
For more information, see Section 4.2.4, Installing and Configuring the ZENworks Orchestrator for Use with a MySQL Audit Database on a Different Host.
If your SLES 10 SP1 machine does not have MySQL package installed and running, use YaST to search for mysql, then install the package and its dependencies.
You can also run the following command from the bash prompt:
yast2 -i mysql
When MySQL is installed, you need to start the mysql daemon. Use the following command:
rcmysql start
This command creates or updates the MySQL privilege database and installs the prepared tables.
Logging in Locally to the MySQL Database
If you have installed the database on the same server where ZENworks Orchestrator is installed, the next step is to set a user password. The default admin username is root. Use the following command to set up a password:
/usr/bin/mysqladmin -u root password new_password
NOTE:Take note of the password. You will need it to log in to the database later.
When the password has been set, you can log in to the MySQL server. Use the following command to log in as root:
mysql -u root -p
When you enter this command, you are prompted for the password. When you enter the password, you are logged in to the database.
Installing and Configuring the Local Orchestrator Audit Database
When you enable and configure ZENworks Orchestrator auditing, you create a small custom database and a simple schema that persists all of the Orchestrator jobs that have been run, along with their parameters.The database also maintains the login or logout activity of the Orchestrator users and resources.
The easiest way to configure the audit database is to do so when you configure the ZENworks Orchestrator Server. Use the following procedure to configure the database.
NOTE:Although the interview questions presented in the config script are shown here, the questions presented in the graphical Configuration Wizard are similar.
-
After you have installed the ZENworks Orchestrator packages you want, run the configuration (either the config script or the graphical Configuration Wizard) until you see the following question:
Enable Auditing (y/n) [no]:
-
Enter yes to answer this question. The following question displays:
Configure MySQL DB (y/n) [no]:
-
Enter yes to answer this question. the following question displays:
Jdbc URL [jdbc:mysql://localhost/]:
-
Press Enter to accept the default (jdbc:mysql://localhost/) by pressing Enter.
NOTE:This is a standard JDBC URL because this server is Java and uses JDBC for the interface database. The URL must be properly formed, with a slash and without a database name at the end.
The following prompt is displayed:
DB Admin Username:
-
Specify the MySQL database administrator username, then press Enter.
This is the same name that was specified when MySQL was installed. In most instances, you install the database as root.
The following prompt is displayed:
DB Admin Password:
-
Specify the MySQL database administrator password, then press Enter.
This is the same password that was specified when MySQL was installed.
The following prompt is displayed:
Retype password:
-
Retype the database administrator password to verify it, then press Enter. The following prompt is displayed:
ZOS Audit Database Name [zos_db]:
-
Specify the name of the database you want to create for ZENworks Orchestrator auditing, then press Enter. The following prompt is displayed:
Audit DB Username:
-
Specify the name you want to use for the MySQL database user that will be used by ZENworks Orchestrator for auditing (that is, a user with Read and Write privileges, not the administrator), then press Enter. The following prompt is displayed:
Audit DB Password:
-
Specify the password you want to use for authentication by the designated MySQL database user, then press Enter. The following prompt is displayed:
Retype password:
-
Retype the password, then press Enter.
After you retype the new audit database password, the configuration interview for the Orchestrator Server continues normally.
4.2.6 Configuring the Audit Database after ZENworks Orchestrator is Configured
If you have already installed and configured ZENworks Orchestrator, it is still possible to configure an audit database.
-
On the ZENworks Orchestrator host machine, use your favorite editor to edit the script /opt/novell/zenworks/zos/server/conf/audit_db_def.sql.
-
Replace the ${DB_NAME} variable with zos_db.
-
Replace the ${DB_USER} variable with zos.
-
Replace the ${DB_PASSWORD} variable with zos.
-
-
Use the following command to log into MySQL as the database administrator:
mysql -u root -p
-
At the mysql prompt, use the following command to extend the MySQL database schema and to create a user for ZENworks Orchestrator:
source /opt/novell/zenworks/zos/server/conf/audit_db_def.sql;
-
In the Explorer view of the ZENworks Orchestrator console, select the grid that you created in the configuration, then scroll down the Info/Configuration view to the Audit Database Configuration section.

-
Confirm that the database username and password match the values you replaced in the variables of the .sql script. In this example, the username is zos and the password is zos.
-
Click .
The check box is selected: the Orchestrator Server is connected to the database so that any queued data and subsequent job, user, and resource events are written there.