10.4 Using a Task to Deploy the Agent
The ZENworks Server can deploy the ZENworks Adaptive Agent to devices. This requires that you create a task, called a deployment task, for the ZENworks Server. The task identifies the target devices, the credentials required to perform an installation on the devices, the registration key to use (optional), the date and time to perform the installation, and other tasks you want performed on the devices either before or after the installation.
This form of deployment is only supported on Windows and Linux devices.
The steps for creating a deployment task vary slightly depending on whether or not the target devices are already listed as discovered devices in your Management Zone (see Section I, Device Discovery):
10.4.1 Prerequisites for Deploying to Windows Devices
Before the ZENworks Server can deploy the ZENworks Adaptive Agent to a device, make sure the following prerequisites are satisfied:
In addition to these requirements, ensure that the date and time are correct on both the ZENworks Server and on managed devices.
Enabling File and Printer Sharing for Microsoft Networks
You need to enable the option to allow other computers on a network to access resources on your computer by using a Microsoft network.
Windows 2003, and Windows XP
-
Right-click > .
The Networks Connections window is displayed.
-
Right-click > .
The Local Area Connection Properties dialog box is displayed.
-
In the tab, ensure that the option is selected.
-
Click .
For more information, see File and Printer Sharing for Microsoft Networks.
Windows Vista and Windows Server 2008
-
Right-click > .
The Network and Sharing Center window is displayed.
-
In the left pane, click .
-
Right-click > .
The Local Area Connection Properties dialog box is displayed.
-
In the tab, ensure that the option is selected.
-
Click .
Windows 7 and Windows Server 2008 R2
-
Right-click > .
The Network and Sharing Center window is displayed.
-
Right-click > .
The Local Area Connection Properties dialog box is displayed.
-
In the tab, ensure that the option is selected.
-
Click .
Enabling File and Printer Sharing through Windows Firewall
Any target device that is using Windows Firewall needs to be configured to allow file and printer sharing through the firewall. This is done by enabling the exception in the Windows Firewall configuration settings. You can access Windows Firewall through the Control Panel or through the Windows Security Center.
By default, the scope of the exception applies only to a local subnet. If the target device is in a different subnet than the Primary Server from which the deployment is run, you must add the IP address of the Primary Server to the Windows Firewall along with the local subnet.
Windows Vista and Windows Server 2008
-
From the desktop menu, click > .
-
Double-click .
The Windows Firewall window is displayed.
-
Click the tab.
-
In the list, select , then click .
The Edit a Service window is displayed.
-
Click to include the IP address of the Primary Server and the local subnet.
-
Click .
Windows 7 and Windows Server 2008 R2
-
From the desktop menu, click > .
-
Double-click .
The Windows Firewall window is displayed.
-
In the left pane, click .
-
In the list, select .
-
Click .
Windows 2003 and Windows XP
You can allow WMI through Windows firewall.
-
At the command prompt, run the following command:
netsh firewall set service RemoteAdmin enable
For more information on WMI, see Connecting Through Windows Firewall.
Enabling Classic File Sharing
The ZENworks Server needs classic file sharing access to the administrative share (displayed as Admin$) on target devices.
Windows 2003
Windows 2003 devices use classic file sharing by default. If deployment of the Adaptive Agent to a Windows 2003 device fails with an invalid credentials error, you must enable classic file sharing.
-
On the Windows 2003 device, click the desktop menu > > .
-
Double-click > .
The Local Security Settings window is displayed.
-
In , navigate to > .
-
Change the value of to .
-
Click .
You can also use a Windows Group Policy to change the setting.
Windows XP
Windows XP uses simple file sharing by default. You need to disable simple file sharing to enable classic file sharing.
-
On the Windows XP device, right-click the icon, then click .
-
Click the menu > to display the Folder Options dialog box.
-
Click the tab.
-
In the list, deselect the option, then click to save the change.
Disabling this option changes the setting for the option in the Local Security Policy ( > ) to . You can also use a Windows Group Policy to change the setting.
Windows Vista
-
Open the Windows Registry and access the following:
HKLM/Software/Microsoft/Windows/CurrentVersion/Policies/System/LocalAccountTokenFilterPolicy
If the registry key does not exist, you need to create it.
-
Change its DWORD (32-bit) value to 1.
This allows remote users to log in and not be forced to be “guest.”
-
Close the registry to save the change.
-
Open the Services window and set the Remote Registry service to start automatically, then start it.
-
Click > .
-
Double-click .
-
Select , then click .
Windows Server 2008
-
Open the Windows Registry and access the following:
HKLM/Software/Microsoft/Windows/CurrentVersion/Policies/System/LocalAccountTokenFilterPolicy
If the registry key does not exist, you need to create it.
-
Change its DWORD (32-bit) value to 1.
This allows remote users to log in and not be forced to be “guest.”
-
Close the registry to save the change.
-
Open the Services window and set the Remote Registry service to start automatically, then start it.
-
Click the desktop menu > > .
-
Double-click .
-
Select , then click .
Windows 7 and Windows Server 2008 R2
-
Open the Windows Registry and access the following:
HKLM/Software/Microsoft/Windows/CurrentVersion/Policies/System/LocalAccountTokenFilterPolicy
If the registry key does not exist, you need to create it.
-
Change its DWORD (32-bit) value to 1.
This allows remote users to log in and not be forced to be “guest.”
-
Close the registry to save the change.
-
Open the Services window and set the Remote Registry service to start automatically, then start it.
-
Click the desktop menu > > .
-
Double-click .
-
In the left pane, click .
-
Select , then click .
Enabling the .NET Framework
The .NET 3.5 SP1 Framework is bundled with ZENworks 11 . However, on the Windows 7 and Windows Server 2008 R2 devices, the .NET Framework is available by default. Therefore, before deploying the agent on the Windows 7 and Windows Server 2008 R2 devices, it is recommended to enable the .NET Framework.
You do not need to enable the .NET Framework on devices other than Windows 7 and Windows Server 2008 R2.
Windows 7
-
Click > .
-
Click > .
The Windows Features dialog box is displayed.
-
Ensure that the option is selected, then click .
Windows Server 2008 R2
-
Click the desktop menu > > .
-
Click > > .
-
Select , then click .
10.4.2 Prerequisites for Deploying to Linux Devices
Before the ZENworks Server can deploy the ZENworks Adaptive Agent to a Linux device, make sure that SSH Port 22 is open. To open SSH port 22 use the following procedures to add SSH as an allowed service on the target device.
To add SSH as an allowed service on Red Hat Enterprise Linux (RHEL):
-
Edit vi/etc/sysconfig/iptables to append the following rule:
-A RH-Firewall-1-INPUT -m state –state NEW -m tcp -p tcp –dport 22 -j ACCEPT
-
Save the iptables file.
-
Restart the ip tables service by running either the service iptables restart command or the /etc/init.d/iptables restart command.
To add SSH as an allowed service on SUSE Linux Enterprise Server (SLES) and SUSE Linux Enterprise Desktop (SLED):
-
Edit the following file:
/etc/sysconfig/SuSEfirewall2
-
Add SSH to the list of ports under FW_SERVICES_<Firewall Zone>_TCP.
For example, for an external zone, add SSH under FW_SERVICES_EXT_TCP="ssh".
-
Run the following command:
/sbin/SuSEfirewall2.
10.4.3 Deploying to a Discovered Device
This section assumes that you’ve already performed a discovery task to add the target devices to your ZENworks database. If you have not, you can perform the discovery task before continuing (see Section I, Device Discovery) or you can perform the discovery as part of the deployment task (see Section 10.4.4, Deploying to a Non-Discovered Device).
To deploy the ZENworks Adaptive Agent to a discovered device:
-
In ZENworks Control Center, click the tab.
The Deployable Device panel lists all the devices (imported or discovered) to which you can deploy the Adaptive Agent.
-
In the Deployment Tasks panel, click to launch the Deploy Device Wizard.
-
Complete the wizard by using information from the following table to fill in the fields.
Wizard Page
Details
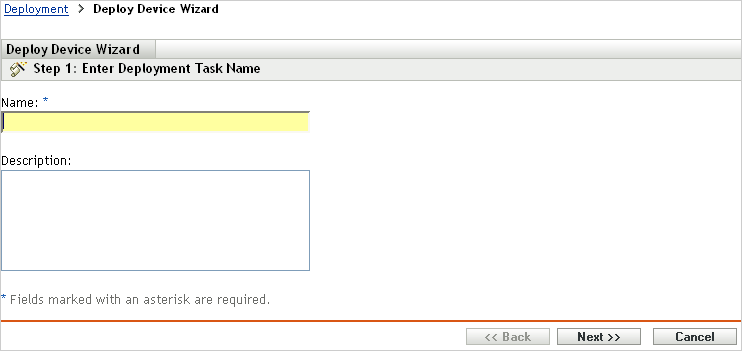
Enter Deployment Task page
Specify a name for the task. The name cannot include any of the following invalid characters: / \ * ? : " ' < > | ` % ~
Select Devices page
Allows you to identify the devices to which you want to deploy the ZENworks Adaptive Agent.
Click to display the Discovered Device Browser dialog box.
You can deploy to the target devices by using one of the following options:
-
DNS Name
-
IP Address
If you select and if the target device is not reachable by using the IP address, the deployment uses the DNS name. If you select and if the target device is not reachable by using the DNS name, the deployment uses the IP address. If the deployment uses a proxy, the target device is only connected by using the option provided.
Discovered Device Browser dialog box > >
-
In the list, select .
-
Fill in the field.
The address can use any of the following formats:
xxx.xxx.xxx.xxx: Standard dotted-decimal notation for a single address. For example, 123.45.167.100.
xxx.xxx.xxx.xxx - xxx.xxx.xxx.xxx: Standard dotted-decimal notation for a range of addresses. For example, 123.45.167.100 - 123.45.167.125.
xxx.xxx.xxx.xxx/n: Standard CIDR (Classless Inter-Domain Routing) notation. For example, 123.45.167.100/24 matches all IP addresses that start with 123.45.167.
hostname: Standard device hostname. For example, workstation1.
-
To add the device to the list, click .
-
When you are finished selecting devices, click .
Discovered Device Browser dialog box > >
-
In the list, select to display the Add New Source dialog box.
-
Fill in the following fields:
CSV File: Browse for and select the CSV file containing the devices to which you want to deploy the agent.
DNS Name Column: Select the number of the column that contains the DNS name information.
IP Address Column: Select the number of the column that contains the IP address information. If you want the IP address to be resolved from the DNS name rather than imported from the file, select the option.
OS Type Column: Select the number of the column that contains the operating system information. If you want to specify a default OS type rather than importing it from the file, select the option, then select the default operating system in the field.
-
Click OK to display the devices in the source list.
-
Click
 to move a device to the list.
-
When you are finished selecting devices, click .
Discovered Device Browser dialog box > > existing user source
-
In the list, select the existing user source.
The root of the user source is displayed in the source list.
-
Browse the directory to find the desired device.
-
Click
to move the device to the list.
-
When you are finished selecting devices, click .
Discovered Device Browser dialog box > >
-
In the list, select to display the Add New Source dialog box.
-
Fill in the following fields:
LDAP Source Name: Provide a name for the LDAP source.
LDAP Server: Specify the IP address or DNS hostname of the LDAP server.
LDAP Port/Use SSL: Defaults to the standard SSL port (636) or non-SSL port (389) depending on whether the option is enabled or disabled. If your LDAP server is listening on a different port, select that port.
LDAP Root Context: Establishes the point in the directory where you can begin to browse. If you don’t specify a base DN, the directory’s root container becomes the entry point.
Save Credentials to Data store: Unless you save the credentials (defined in the list), they are stored only in memory. Saved credentials are encrypted in the database for increased security. Credentials are cleared from memory when the ZENworks Server is restarted. If you want to permanently retain the credentials as part of the deployment task, you should save the credentials.
Credentials: Click Add to enter a username and password that provides read-only access to the directory. The user can have more than read-only access, but read-only access is all that is required and recommended.
For Novell eDirectory access, use standard LDAP notation. For example:
cn=admin_read_only,ou=users,o=mycompany
For Microsoft Active Directory, use standard domain notation. For example:
AdminReadOnly@mycompany.com
-
Click to display the LDAP directory in the source list.
-
Browse the directory to find the desired device.
-
Click
to move the device to the list.
-
When you are finished selecting devices, click .
Enter Credentials page > field
The Enter Credentials page lets you provide the usernames and passwords required to deploy the Adaptive Agent to the devices included in the task.
Unless you save the credentials, they are stored only in memory. Saved credentials are encrypted in the database for increased security.
Credentials that are not saved are cleared from memory when the ZENworks Server is restarted. If you are creating a scheduled deployment task, you should save the credentials to ensure that they are still available when the deployment is performed.
Enter Credentials page > field
To add a credential on Windows:
-
Click to display the Enter Credential Information dialog box.
-
In the list, select the type of operating system for which you want to enter the credential.
-
In the field, specify the appropriate username.
To deploy the agent, the ZENworks Server must be able to map a drive to the device’s administrative share (ADMIN$). This requires the following credentials:
-
If the device is a member of a domain: You can use a domain or local Administrator group credential. If you use the local credential, you must specify the username as workstation_name\username to distinguish it from domain credentials.
-
If the device is not a member of a domain: You must use a local Administrator group credential.
-
-
In the and fields, enter the user password.
-
Click to save the credential.
Depending on your environment, one credential might not provide access to all of the devices where you want to deploy the Adaptive Agent. In this case, you need to add as many credentials as necessary to cover the devices included in the task. The ZENworks Server uses the first credential that works.
Specify only the root credential to deploy the Adaptive Agent on Linux.
Select Schedule page
The Select Schedule page lets you choose whether you want the task to run as soon as it is created (the option) or if you want to schedule the task to run at a future date and time. If you select , choose one of the following schedules:
No Schedule: Indicates that no schedule has been set. The task does not run until a schedule is set or it is manually launched. This is useful if you want to create the task and come back to it later to establish the schedule or run it manually.
Date Specific: Specifies one or more dates on which to run the task.
Recurring: Identifies specific days each week, month, or a fixed interval on which to run the task.
See Section B.0, Schedules or click the button for more information about the schedules.
Select Primary Server page > Primary Server field
Select the ZENworks Server that you want to perform the deployment task.
Select or Edit a Proxy Device page
The Select or Edit a Proxy Device page lets you choose whether you want to use a proxy device to perform the deployment task.
Select or Edit a Proxy Device page >
If you want to use a Windows Proxy instead of the Primary Server to perform the deployment tasks on Windows devices, click the option and configure the settings in the Select Windows Proxy dialog box.
A Windows Proxy is used to perform the following actions:
-
Enable Linux Primary Servers to perform deployment tasks on Windows devices.
-
Deploy Windows devices that are in a different subnet than the Primary Server.
-
Deploy Windows devices in a network enabled for NAT.
The connection between the ZENworks Server and the Windows Proxy is secured through SSL.
For deployment, you need to add File and Printer Sharing as an exception in the Windows Firewall configuration settings. By default, the scope of the exception applies only to a local subnet. If the target device is in a different subnet than the Primary Server from which the deployment is run, you also need to add the IP address of the Primary Server as an exception. However, if you use a Windows Proxy in the same subnet as a target device, you do not need to change the scope of the Windows Firewall exception.
Override Zone Windows Proxy Settings: Select this option if you want to override the Windows Proxy settings configured at the Management Zone and configure new settings for the task.
Windows Proxy: Select a Windows managed device (server or workstation) to be used as a Windows Proxy for performing the deployment tasks instead of a ZENworks Server. The Windows Proxy must reside in the same network as the target devices.
Windows Proxy Timeout: Specify the number of seconds you want the ZENworks Server to wait for a response from the Windows Proxy.
Select or Edit a Proxy Device page >
If you want to use a Linux Proxy instead of the Primary Server to perform the deployment tasks on Linux devices, click the option and configure the settings in the Select Linux Proxy dialog box.
A Linux Proxy is used to perform the following actions:
-
Enable Primary Servers to offload a deployment task to a Linux Proxy if the task includes devices in a different subnet.
-
Deploy Linux devices in a different subnet than the Primary Server.
-
Deploy Linux devices in a network enabled for NAT.
The SSH discovery requires port 22 to be reachable in order to enable the Primary Server to connect to the target device. If the SSH port is blocked in the Network Firewall, you use a Linux managed device in the same subnet as the target device.
Override Zone Linux Proxy Settings: Select this option if you want to override the Linux Proxy settings configured at the Management Zone and configure new settings for the task.
Linux Proxy: Select a Linux managed device (server or workstation) to be used as a Linux Proxy for performing the deployment tasks instead of a ZENworks Server. The Linux Proxy must reside in the same network as the target devices.
Linux Proxy Timeout: Specify the number of seconds you want the ZENworks Server to wait for a response from the Linux Proxy.
Windows Options page > field
After installation of the ZENworks Adaptive Agent, a device must reboot to make the agent functional. Do the following:
-
Select the desired reboot option.
-
Immediate: To reboot immediately after installation of the Adaptive Agent, select to force the device
-
Manual: To allow the user to manually reboot the device at his or her convenience, select .
-
Scheduled: To reboot the device at a specified time, select . Fill in the schedule’s fields.
-
Start Date: Click
 to display a calender you can use to select a date for the event.
-
Start Time: Specify the time at which the event must start.
-
Use Coordinated Universal Time (UTC): The Start Time is converted to Universal Coordinated Time (UTC). Select this option to indicate that the Start Time you entered is already in Coordinated Universal Time and should not be converted. For example, suppose you are in the Eastern time zone. If you enter 10:00 a.m. and select this option, the Start Time is scheduled for 10:00 UTC. If you don’t select this option, the Start Time is scheduled for 14:00 UTC because Eastern time is UTC - 4 hours.
-
-
-
(Optional) Select the option if you do not want the reboot prompt message to be displayed.
NOTE:The Windows Options page is displayed only if you have provided Windows credentials on the Enter Credentials page.
Windows Options page > s fields
After deployment, you can use these options to postpone the agent installation on the target machine:
-
Show Permission Prompt: Select to display a dialog box on the agent when the installation is ready to begin. Users can cancel, postpone, or allow the installation to begin based on the Permission Prompt options configured by the Zone administrator.
NOTE:By default, this setting is set to , so users cannot cancel or postpone the installation. The installation begins immediately without any prompt. If you select On, the following options are enabled:
-
Prompt Max Postpone: Specify how many times a user can postpone or snooze the installation. Select to let the user postpone the installation an unlimited number of times, or select , then specify the number of times the user can postpone the installation.
-
Prompt Timeout: Specify how long to wait for an answer before the installation begins. To display the permission prompt until the user responds, select . Or, select and specify the number of minutes you want an unanswered prompt to remain on the user’s screen before the installation starts. By default, the user has five minutes to respond to the prompt.
-
Prompt Nag Time: Specify, in minutes, how often the prompt should appear to let a user know that an installation is waiting to start. By default, this prompt displays every 15 minutes.
-
Prompt Max Wait Time: Specify the maximum timeout for which the agent installation can be postponed. When this timeout is reached, the agent installation starts even if there are other prompt messages remaining.
-
Agent Message Overrides: Customize the text for agent installation messages that display in dialog boxes during the installation. Click to display the Edit Agent Installation Message dialog box. Select a Message Key from the drop-down list, type the desired text, then click .
Windows Options page > field
Depending upon the processor architecture of the managed device, select the deployment package to be used for installing ZENworks Adaptive Agent on the device.
If you are not sure about the device's processor architecture, choose the package with target architecture as , which applies to 32-bit and 64-bit platforms.
If the selected package has been deleted from the Primary Server, then the default deployment package is deployed.
Windows Options page > field
Specify the directory on the managed device where you want to install ZENworks Adaptive Agent. By default, the agent is installed to the directory specified in the %ZENWORKS_HOME% system environmental variable or to the %ProgramFiles%\novell\zenworks directory if the variable is not set on the managed device.
Ensure that the installation path does not contain spaces.
NOTE:If the directory you specify cannot be created, then the agent is installed in the default location.
Linux Options page
The Linux Options page lets you configure the installation options to make the ZENworks Adaptive Agent functional after the installation of the agent on the Linux devices.
Deployment Package: Depending upon the processor architecture of the managed device, select the deployment package to be used for installing ZENworks Adaptive Agent on the device. If you are not sure about the device's processor architecture, choose the package with target architecture as All, which applies to 32-bit and 64-bit platforms. If the selected package has been deleted from the Primary Server, then the default deployment package is deployed.
Installation Options: Configure the following options for deploying the ZENworks Adaptive Agent:
-
Do Not Install the GUI Packages: Select this option if you do not want to install the RPMs that provide a GUI interface for the ZENworks Adaptive Agent such as the
 icon.
icon.
-
Disable SELinux for Red Hat Devices: Select this option to disable SELinux (Security-Enhanced Linux).
SELinux provides limited access control on Linux. Select this option to disable SELinux if the agent is unable to open the ports required by ZENworks. SELinux is temporarily disabled only if the agent is unable to open the ports, and is automatically enabled again after the agent installation.
NOTE:The Linux Options page is displayed only if you have provided Linux credentials on the Enter Credentials page.
Add Registration Key page
Select a registration key to use during the registration portion of the deployment process. A registration key provides information about the folders and groups to which a device is assigned during registration. Selecting a registration key is optional; if you don’t select one, registration rules are used to determine the folder and group assignments. To deploy to servers or workstations, choose a server registration key or a workstation registration key respectively.
For more information about registration keys and rules, see Section 9.0, Registering Devices.
Pre/Post Deployment page
Specify commands that you want to run before and after the agent is installed on a device. For example, you can execute operating system commands, run scripts, and launch executables.
The commands are passed to the pre-agent as part of the deployment task package. The pre-agent executes the commands in the system space, so you must specify commands that do not require user interaction.
For more information about predeployment and post-deployment commands, click the button.
When you finish the wizard, the deployment task is added to the list in the Deployment Tasks panel. You can use the panel to manage current tasks and create new tasks for deploying the ZENworks Adaptive Agent to devices. The panel includes the following information for each task:
-
Name: Displays the name given to the task. If is displayed below the task name, the credentials required to perform the task on the targeted devices have been cleared from the ZENworks Server’s memory and must be entered again. To avoid having credentials lost when they are cleared from memory, you must store them in the ZENworks database.
-
Schedule: Displays the dates on which the task is scheduled to run.
-
Status: Displays the following status information: , , , , , , or . You can mouse over certain statuses to receive more information about the status.
If an error occurred, the error is also recorded for the target device in the Deployable Devices panel. You can click the target device in the Deployable Devices panel to receive more information about the error.
-
10.4.4 Deploying to a Non-Discovered Device
If a target device has not been added to your ZENworks database through a discovery task, you can select the device while you are creating the deployment task. The following sections explain how to create the deployment task depending on whether you want to identify the target device by its IP address/hostname, from a CSV file, or from an LDAP directory.
-
In ZENworks Control Center, click the tab.
-
In the Deployment Tasks panel, click to launch the Deploy Device Wizard.
-
Complete the wizard by using information from the following table to fill in the fields.
Wizard Page
Details
Enter Deployment Task page
Specify a name for the task. The name cannot include any of the following invalid characters: / \ * ? : " ' < > | ` % ~
Select Devices page
Allows you to identify the devices to which you want to deploy the ZENworks Adaptive Agent.
Click to display the Discovered Device Browser dialog box.
You can deploy to the target devices by using one of the following options:
-
DNS Name
-
IP Address
If you select and if the target device is not reachable by using the IP address, the deployment uses the DNS name. If you select and if the target device is not reachable by using the DNS name, the deployment uses the IP address. If the deployment uses a proxy, the target device is only connected by using the option provided.
Discovered Device Browser dialog box > >
-
In the list, select .
-
Fill in the field.
The address can use any of the following formats:
xxx.xxx.xxx.xxx: Standard dotted-decimal notation for a single address. For example, 123.45.167.100.
xxx.xxx.xxx.xxx - xxx.xxx.xxx.xxx: Standard dotted-decimal notation for a range of addresses. For example, 123.45.167.100 - 123.45.167.125.
xxx.xxx.xxx.xxx/n: Standard CIDR (Classless Inter-Domain Routing) notation. For example, 123.45.167.100/24 matches all IP addresses that start with 123.45.167.
hostname: Standard device hostname. For example, workstation1.
-
To add the device to the list, click .
-
When you are finished selecting devices, click .
Discovered Device Browser dialog box > >
-
In the list, select to display the Add New Source dialog box.
-
Fill in the following fields:
CSV File: Browse for and select the CSV file containing the devices to which you want to deploy the agent.
DNS Name Column: Select the number of the column that contains the DNS name information.
IP Address Column: Select the number of the column that contains the IP address information. If you want the IP address to be resolved from the DNS name rather than imported from the file, select the option.
OS Type Column: Select the number of the column that contains the operating system information. If you want to specify a default OS type rather than importing it from the file, select the option, then select the default operating system in the field.
-
Click OK to display the devices in the source list.
-
Click
to move a device to the list.
-
When you are finished selecting devices, click .
Discovered Device Browser dialog box > > existing user source
-
In the list, select the existing user source.
The root of the user source is displayed in the source list.
-
Browse the directory to find the desired device.
-
Click
to move the device to the list.
-
When you are finished selecting devices, click .
Discovered Device Browser dialog box > >
-
In the list, select to display the Add New Source dialog box.
-
Fill in the following fields:
LDAP Source Name: Provide a name for the LDAP source.
LDAP Server: Specify the IP address or DNS hostname of the LDAP server.
LDAP Port/Use SSL: Defaults to the standard SSL port (636) or non-SSL port (389) depending on whether the option is enabled or disabled. If your LDAP server is listening on a different port, select that port.
LDAP Root Context: Establishes the point in the directory where you can begin to browse. If you don’t specify a base DN, the directory’s root container becomes the entry point.
Save Credentials to Datastore: Unless you save the credentials (defined in the list), they are stored only in memory. Saved credentials are encrypted in the database for increased security. Credentials are cleared from memory when the ZENworks Server is restarted. If you want to permanently retain the credentials as part of the deployment task, you should save the credentials.
Credentials: Click Add to enter a username and password that provides read-only access to the directory. The user can have more than read-only access, but read-only access is all that is required and recommended.
For Novell eDirectory access, use standard LDAP notation. For example:
cn=admin_read_only,ou=users,o=mycompany
For Microsoft Active Directory, use standard domain notation. For example:
AdminReadOnly@mycompany.com
-
Click to display the LDAP directory in the source list.
-
Browse the directory to find the desired device.
-
Click
to move the device to the list.
-
When you are finished selecting devices, click .
Enter Credentials page > field
The Enter Credentials page lets you provide the usernames and passwords required to deploy the Adaptive Agent to the devices included in the task.
Unless you save the credentials, they are stored only in memory. Saved credentials are encrypted in the database for increased security.
Credentials that are not saved are cleared from memory when the ZENworks Server is restarted. If you are creating a scheduled deployment task, you should save the credentials to ensure that they are still available when the deployment is performed.
Enter Credentials page > field
To add a credential:
-
Click to display the Enter Credential Information dialog box.
-
In the list, select the type of operating system for which you want to enter the credential.
-
In the field, specify the appropriate username.
To deploy the agent, the ZENworks Server must be able to map a drive to the device’s administrative share (ADMIN$). This requires the following credentials:
-
If the device is a member of a domain: You can use a domain or local Administrator group credential. If you use the local credential, you must specify the username as workstation_name\username to distinguish it from domain credentials.
-
If the device is not a member of a domain: You must use a local Administrator group credential.
-
-
In the and fields, enter the user password.
-
Click to save the credential.
Depending on your environment, one credential might not provide access to all of the devices where you want to deploy the Adaptive Agent. In this case, you need to add as many credentials as necessary to cover the devices included in the task. The ZENworks Server uses the first credential that works.
Select Schedule page
The Select Schedule page lets you choose whether you want the task to run as soon as it is created (the option) or if you want to schedule the task to run at a future date and time. If you select , choose one of the following schedules:
No Schedule: Indicates that no schedule has been set. The task does not run until a schedule is set or it is manually launched. This is useful if you want to create the task and come back to it later to establish the schedule or run it manually.
Date Specific: Specifies one or more dates on which to run the task.
Recurring: Identifies specific days each week, month, or a fixed interval on which to run the task.
See Section B.0, Schedules or click the button for more information about the schedules.
Select Primary Server page > Primary Server field
Select the ZENworks Server that you want to perform the deployment task.
Select or Edit a Proxy Device page
The Select or Edit a Proxy Device page lets you choose whether you want to use a proxy device to perform the deployment task.
Select or Edit a Proxy Device page >
If you want to use a Windows Proxy instead of the Primary Server to perform the deployment tasks on Windows devices, click the option and configure the settings in the Select Windows Proxy dialog box.
A Windows Proxy is used to perform the following actions:
-
Enable Linux Primary Servers to perform deployment tasks on Windows devices.
-
Deploy Windows devices that are in a different subnet than the Primary Server.
-
Deploy Windows devices in a network enabled for NAT.
The connection between the ZENworks Server and Windows Proxy is secured through SSL.
For deployment, you need to add File and Printer Sharing as an exception in the Windows Firewall configuration settings. By default, the scope of the exception applies only to a local subnet. If the target device is in a different subnet than the Primary Server from which the deployment is run, you also need to add the IP address of the Primary Server as an exception. However, if you use a Windows Proxy in the same subnet as a target device, you do not need to change the scope of the Windows Firewall exception.
Override Zone Windows Proxy Settings: Select this option if you want to override the Windows Proxy settings configured at the Management Zone and configure new settings for the task.
Windows Proxy: Select a Windows managed device (server or workstation) to be used as a Windows Proxy for performing the deployment tasks instead of a ZENworks Server. The Windows Proxy must reside in the same network as the target devices.
Windows Proxy Timeout: Specify the number of seconds you want the ZENworks Server to wait for a response from the Windows Proxy.
Select or Edit a Proxy Device page >
If you want to use a Linux Proxy instead of the Primary Server to perform the deployment tasks on Linux devices, click the option and configure the settings in the Select Linux Proxy dialog box.
A Linux Proxy is primarily used for Primary Servers if you want to deploy to Linux devices in a different subnet than the Primary Server. When a Primary Server receives a deployment task that includes devices in a different subnet, it offloads the deployment tasks to the Linux Proxy. A Linux Proxy is also used for performing deployment tasks on Linux devices in a network enabled for NAT.
The SSH discovery requires port 22 to be reachable in order to enable the Primary Server to connect to the target device. If the SSH port is blocked in the Network Firewall, you use a Linux managed device in the same subnet as the target device.
Override Zone Linux Proxy Settings: Select this option if you want to override the Linux Proxy settings configured at the Management Zone and configure new settings for the task.
Linux Proxy: Select a Linux managed device (server or workstation) to be used as a Linux Proxy for performing the deployment tasks instead of a ZENworks Server. The Linux Proxy must reside in the same network as the target devices.
Linux Proxy Timeout: Specify the number of seconds you want the ZENworks Server to wait for a response from the Linux Proxy.
Windows Options page > field
After installation of the ZENworks Adaptive Agent, a device must reboot to make the agent functional. Do the following:
-
Select the desired reboot option.
-
Immediate: To reboot immediately after installation of the Adaptive Agent, select to force the device
-
Manual: To allow the user to manually reboot the device at his or her convenience, select .
-
Scheduled: To reboot the device at a specified time, select . Fill in the schedule’s fields.
-
Start Date: Click
to display a calender you can use to select a date for the event.
-
Start Time: Specify the time at which the event must start.
-
Use Coordinated Universal Time (UTC): The Start Time is converted to Universal Coordinated Time (UTC). Select this option to indicate that the Start Time you entered is already in Coordinated Universal Time and should not be converted. For example, suppose you are in the Eastern time zone. If you enter 10:00 a.m. and select this option, the Start Time is scheduled for 10:00 UTC. If you don’t select this option, the Start Time is scheduled for 14:00 UTC because Eastern time is UTC - 4 hours.
-
-
-
(Optional) Select the option if you do not want the reboot prompt message to be displayed.
NOTE:The Windows Options page is displayed only if you have provided Windows credentials on the Enter Credentials page.
Windows Options page > s fields
After deployment, you can use these options to postpone the agent installation on the target machine:
-
Show Permission Prompt: Select to display a dialog box on the agent when the installation is ready to begin. Users can cancel, postpone, or allow the installation to begin based on the Permission Prompt options configured by the Zone administrator.
NOTE:By default, this setting is set to , so users cannot cancel or postpone the installation. The installation begins immediately without any prompt. If you select On, the following options are enabled:
-
Prompt Max Postpone: Specify how many times a user can postpone or snooze the installation. Select to let the user postpone the installation an unlimited number of times, or select , then specify the number of times the user can postpone the installation.
-
Prompt Timeout: Specify how long to wait for an answer before the installation begins. To display the permission prompt until the user responds, select . Or, select and specify the number of minutes you want an unanswered prompt to remain on the user’s screen before the installation starts. By default, the user has five minutes to respond to the prompt.
-
Prompt Nag Time: Specify, in minutes, how often the prompt should appear to let a user know that an installation is waiting to start. By default, this prompt displays every 15 minutes.
-
Prompt Max Wait Time: Specify the maximum timeout for which the agent installation can be postponed. When this timeout is reached, the agent installation starts even if there are other prompt messages remaining.
-
Agent Message Overrides: Customize the text for agent installation messages that display in dialog boxes during the installation. Click to display the Edit Agent Installation Message dialog box. Select a Message Key from the drop-down list, type the desired text, then click .
Windows Options page > field
Depending upon the processor architecture of the managed device, select the deployment package to be used for installing ZENworks Adaptive Agent on the device.
If you are not sure about the device's processor architecture, choose the package with target architecture as , which applies to 32-bit and 64-bit platforms.
If the selected package has been deleted from the Primary Server, then the default deployment package is deployed.
Windows Options page > field
Specify the directory on the managed device where you want to install ZENworks Adaptive Agent. By default, the agent is installed to the directory specified in the %ZENWORKS_HOME% system environmental variable or to the %ProgramFiles%\novell\zenworks directory if the variable is not set on the managed device.
Ensure that the installation path does not contain spaces.
NOTE:If the directory you specify cannot be created, then the agent is installed in the default location.
Linux Options page
The Linux Options page lets you configure the installation options to make the ZENworks Adaptive Agent functional after the installation of the agent on the Linux devices.
Deployment Package: Depending upon the processor architecture of the managed device, select the deployment package to be used for installing ZENworks Adaptive Agent on the device. If you are not sure about the device's processor architecture, choose the package with target architecture as All, which applies to 32-bit and 64-bit platforms. If the selected package has been deleted from the Primary Server, then the default deployment package is deployed.
Installation Options: Configure the following options for deploying the ZENworks Adaptive Agent:
-
Do Not Install the GUI Packages: Select this option if you do not want to install the RPMs that provide a GUI interface for the ZENworks Adaptive Agent such as the
icon.
-
Disable SELinux for Red Hat Devices: Select this option to disable SELinux (Security-Enhanced Linux).
SELinux provides limited access control on Linux. Select this option to disable SELinux if the agent is unable to open the ports required by ZENworks. SELinux is temporarily disabled only if the agent is unable to open the ports, and is automatically enabled again after the agent installation.
NOTE:The Linux Options page is displayed only if you have provided Linux credentials on the Enter Credentials page.
Add Registration Key page
Select a registration key to use during the registration portion of the deployment process. A registration key provides information about the folders and groups to which a device is assigned during registration. Selecting a registration key is optional; if you don’t select one, registration rules are used to determine the folder and group assignments. To deploy to servers or workstations, choose a server registration key or a workstation registration key respectively.
For more information about registration keys and rules, see Section 9.0, Registering Devices.
Pre/Post Deployment page
Specify commands that you want to run before and after the agent is installed on a device. For example, you can execute operating system commands, run scripts, and launch executables.
The commands are passed to the pre-agent as part of the deployment task package. The pre-agent executes the commands in the system space, so you must specify commands that do not require user interaction.
For more information about predeployment and post-deployment commands, click the button.
When you finish the wizard, the deployment task is added to the list in the Deployment Tasks panel. You can use the panel to manage current tasks and create new tasks for deploying the ZENworks Adaptive Agent to devices. The panel includes the following information for each task:
-
Name: Displays the name given to the task. If is displayed below the task name, the credentials required to perform the task on the targeted devices have been cleared from the ZENworks Server’s memory and must be entered again. To avoid having credentials lost when they are cleared from memory, you must store them in the ZENworks database.
-
Schedule: Displays the dates on which the task is scheduled to run.
-
Status: Displays the following status information: , , , , , , or . You can mouse over certain statuses to receive more information about the status.
If an error occurred, the error is also recorded for the target device in the Deployable Devices panel. You can click the target device in the Deployable Devices panel to receive more information about the error.
-