A.5 Connecting Access Manager with the Java Data Injection Module
After you have created your Java module, you must configure a policy in Access Manager to govern how the data you extract is injected into your application. This is done by establishing policy conditions, rules, and actions as outlined below.
-
Copy your Java plug-in files to the Access Gateway. If the Access Gateway is a member of a cluster, copy them to each Access Gateway in the cluster.
-
JAR File: If you created a .jar file, copy the files to the Tomcat lib directory.
<tomcat_home>/webapps/nesp/WEB-INF/lib -
JAVA Files: If you created .java files (such as the sample code), copy the files to the Tomcat classes directory. For the sample code, this is the following directory:
<tomcat_home>/webapps/nesp/WEB-INF/classes/com/acme/policy/injection
-
-
In the Administration Console, click > > .

-
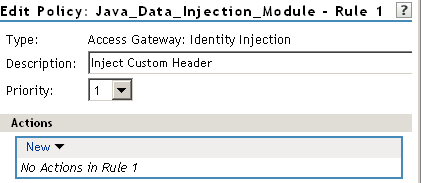
In the Policy List, click and provide the following values:
Name: Specify a name for the policy.
Type: Select from the drop-down menu.
-
Click to accept the values and open the page.
-
(Optional) In the field, type a description for the policy.
-
In the Actions pane, click and select the location for injection information. For the sample code, select .
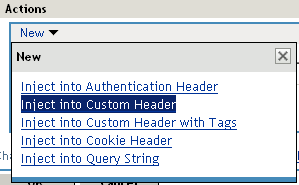
After you select the value, this window closes and you return to the Edit Policy page.
-
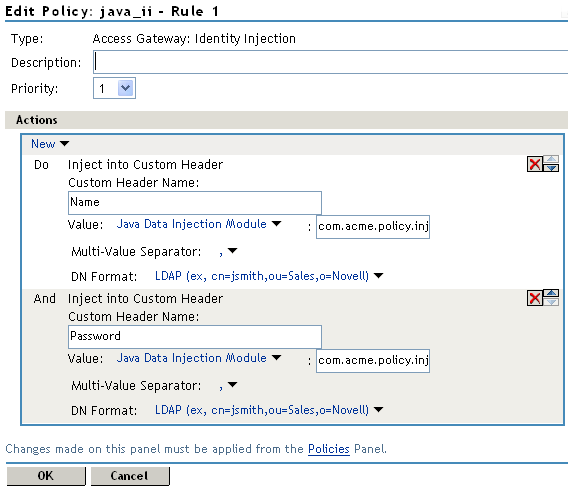
In the Actions pane of the Edit Policy screen, provide values for the policy type. For the sample code, enter the following values:
Custom Header Name: .
Value: Select from the drop-down menu.
[text box]: Specify the package name of your plug-in. For the sample code, this value is com.acme.policy.injection.AccountDataFillerFactory. In your own implementation, you would provide the full package name to the location of your Java module.
-
(Conditional) If your plug-in injects more than one value, repeat Step 7. For the sample code, you need to create a second password action, using all of the same values, except you use Password in the field.
-
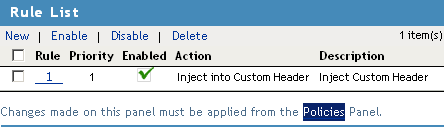
Click .
The Rule List pane in the Edit Policy window opens.
-
To enable the changes in the new policy, click the link in the Rule List.
-
Click when you are requested to save the changes and go to the Policies Panel.
-
Click , then click.
These steps create the Identity Injection policy. For the policy to be used, it must be assigned to protect a resource. For these instructions, see Assigning an Identity Injection Policy to a Protected Resource.