9.2 Creating a Policy
The policy must be associated with at least one pair before it can be run. A policy is enforced only for its associated pairs. For information on the policy parameters, see Section 9.1, Understanding Policies.
You can configure a policy by using the Policy Wizard or the Setup Wizard. The Setup Wizard allows you to create a pair, a policy, and a policy schedule at the same time that are automatically associated.
9.2.1 Creating a Policy with the Policy Wizard
-
In the Management Console, connect to the DynamicFS server that you want to manage.
-
Right-click the folder, then select .
You can also select the folder, then select > from the toolbar.
-
On the Policy Direction page, specify which direction to move files.
-
Primary to secondary
-
Secondary to primary
For information about each option, see Section 9.1.2, Policy Direction.
-
-
On the Policy Filter page, specify the search criteria to use to identify the files to be moved when the policy is enforced.
You must enable and configure at least one of the following filter options. For information about each option, see Section 9.1.3, Policy Filter Options.
Filter Option
Description
File size
Select the check box, then create a rule that moves a file only if its size is greater than or less than the specified file size.
Last accessed
Select the check box, then create a rule that moves a file only if the elapsed time since it was last accessed is greater than or less than the specified time period.
Last modified
Select the check box, then create a rule that moves a file only if the elapsed time since it was last modified is greater than or less than the specified time period.
File patterns
Select the check box, then create a rule that moves a file only if its file name uses one of the specified file patterns. Separate multiple file patterns with a comma and no spaces. If you include spaces in a pattern, the spaces are interpreted as part of the pattern you seek.
Restriction: The option cannot be used in combination with the option
File types
Select the check box to enable the option, then create a rule that moves a file based on file types.
-
Add: Click , select one or more file types from the list, then click .
-
Remove: Select a file type from the list, then click .
-
Use file content to determine type: (Optional) Select the check box to move files only if the file content matches one of the specified file types. This option increases the run time of the policy.
Restriction: The option cannot be used in combination with the option
File owners
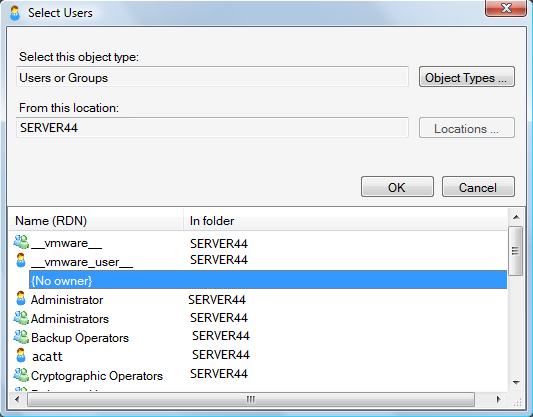
Specify one or more user names or group names. Only files owned by the specified users or groups are moved. User names or group names that are invalid at run time are ignored.
-
Add: Click , select one or more user names or group names from the list, then click .
You can move ownerless files by selecting the {No owners} entry in the > dialog box.
-
Remove: Select a user name or group name from the list, then click .
-
-
On the Policy Name and Description page, specify the following parameters, then click .
Name Option
Description
Name
Specify a unique name for the policy on the DynamicFS server.
A policy name can be up to 32 characters. For information about naming restrictions, see Section 4.12, Naming Conventions for Pairs and Policies.
If you plan to export the policy, the name must be unique on all of the servers.
Description
Optionally specify a more detailed description for the policy. This is a friendly description that provides context and meaning to the administrators.
-
On the Policy Schedule page, click , select an available schedule, click , then click .
Only one schedule can be associated to a policy at a time. To remove an associated schedule from the policy, select it, then click .
You can click to skip this step if you do not want to schedule the policy or if the schedule has not been created. You can create a schedule later and associate it with the policy.
For information about managing schedule and policy associations, see Section 10.6, Associating or Disassociating Schedules and Policies.
-
On the Pair to Policy Association page, click to view a list of the available pairs, select one or more pairs to associate with the policy, then click .
The policy must be associated with at least one pair to be able to run. The policy is enforced only for its associated pairs. To remove an associated pair from the policy, select it, then click .
You can click to skip this step if you do not want to associate the policy with pairs at this time or if the pairs have not been created. You can create pairs later and associate them with the policy.
For information about managing pair and policy associations, see Section 9.6, Associating or Disassociating Pairs and Policies.
-
Click to create the policy, or click exit without creating the policy.
If a pair and schedule are associated with the policy, the policy is enforced at its next scheduled run time, or you can run it at any time by using .
9.2.2 Creating a Policy with the Setup Wizard
-
In the Management Console, connect to the DynamicFS server that you want to manage.
-
Right-click the folder, then select .
You can also select the folder, then select > from the toolbar. If no pairs or policies exist on the server when you connect to it, the Setup Wizard opens automatically.
-
On the Pair Type page, select the pair type, then follow the steps to create a pair, then click .
-
On the Policy Direction page, specify which direction to move files.
-
Primary to secondary
-
Secondary to primary
This direction is not available (dimmed) if the specified pair type is a retention pair.
For information about each option, see Section 9.1.2, Policy Direction.
-
-
On the Policy Filter page, specify the search criteria to use to identify the files to be moved when the policy is enforced.
You must enable and configure at least one of the following filter options. For information about each option, see Section 9.1.3, Policy Filter Options.
Filter Option
Description
File size
Select the check box, then create a rule that moves a file only if its size is greater than or less than the specified file size.
Last accessed
Select the check box, then create a rule that moves a file only if the elapsed time since it was last accessed is greater than or less than the specified time period.
Last modified
Select the check box, then create a rule that moves a file only if the elapsed time since it was last modified is greater than or less than the specified time period.
File patterns
Select the check box, then create a rule that moves a file only if its file name uses one of the specified file patterns. Separate multiple file patterns with a comma and no spaces. If you include spaces in a pattern, the spaces are interpreted as part of the pattern you seek.
Restriction: The option cannot be used in combination with the option
File types
Select the check box to enable the option, then create a rule that moves a file based on file types.
-
Add: Click , select one or more file types from the list, then click .
-
Remove: Select a file type from the list, then click .
-
Use file content to determine type: (Optional) Select the check box to move files only if the file content matches one of the specified file types. This option increases the run time of the policy.
Restriction: The option cannot be used in combination with the option
File owners
Specify one or more user names or group names. Only files owned by the specified users or groups are moved. User names or group names that are invalid at run time are ignored.
-
Add: Click , select one or more user names or group names from the list, then click .
You can move ownerless files by selecting the {No owners} entry in the > dialog box.
-
Remove: Select a user name or group name from the list, then click .
-
-
On the Policy Name and Description page, specify the following parameters, then click .
Name Option
Description
Name
Specify a unique name for the policy on the DynamicFS server.
A policy name can be up to 32 characters. For information about naming restrictions, see Section 4.12, Naming Conventions for Pairs and Policies.
If you plan to export the policy, the name must be unique on all of the servers.
Description
Optionally specify a more detailed description for the policy. This is a friendly description that provides context and meaning to the administrators.
-
On the Policy Schedule page, create the schedule, then click .
The schedule is automatically associated with the policy.
-
On the Summary page, review the settings for the pair, policy, and policy schedule, the click to create them, or click exit without creating them.
If a pair and schedule are associated with the policy, the policy is enforced at its next scheduled run time, or you can run it at any time by using .