Director Tutorials
To create a database pageflow using the Database Pageflow Wizard.
The pageflow you create in this exercise accesses two tables that are related by a one-to-many (master/detail) relationship. When you build a database pageflow that combines data from tables that have a master/detail relationship, the wizard generates multiple pageflow processes, one for each level within the query.
Before creating the pageflow, you first need to create a database that has two tables that have a master/detail relationship. In addition, you need to create a connection pool and a database profile.
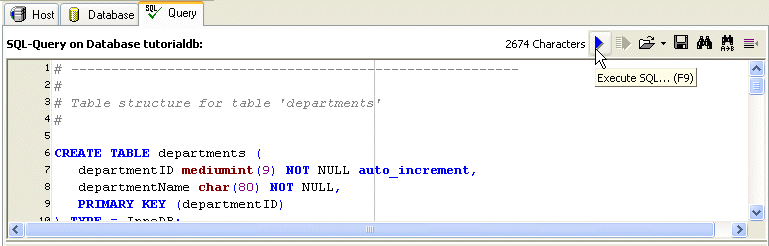
NOTE: The Director50Tutorial.zip file includes a SQL file called DBPageFlowTutorial.sql that you can use to create the database for this exercise. Details for loading and executing this file are provided below.
Before you begin See About exteNd Director Tutorials.
 To create the database required for this exercise:
TIP: Click the Start menu and navigate to Novell exteNd5.0>MySQL>MySQL- Front.
Connect to MySQL-Host by specifying a password and clicking Connect!:
TIP: Make sure the port number matches the one provided at installation time.
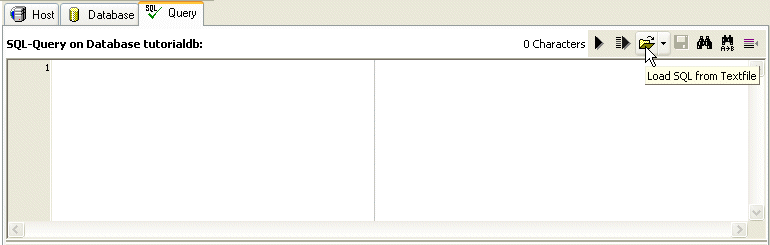
Specify DBPageFlowTutorial.sql as the file to load.
NOTE: The DBPageFlowTutorial.sql file is included in the Director50Tutorial.zip file.
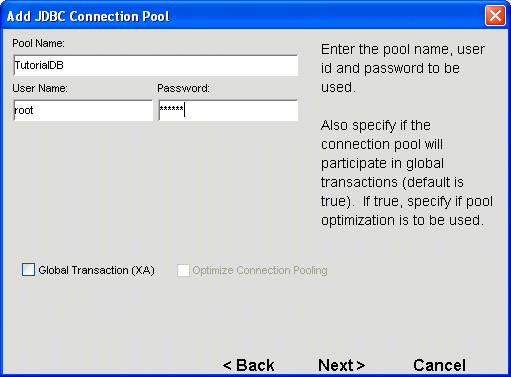
To create a connection pool for the database:
TIP: Click the Start menu and navigate to Novell exteNd5.0>AppServer>Application Server.
TIP: Click the Start menu and navigate to Novell exteNd5.0>AppServer>Server Management Console.
Select the Configuration icon from the toolbar, if it's not selected already.
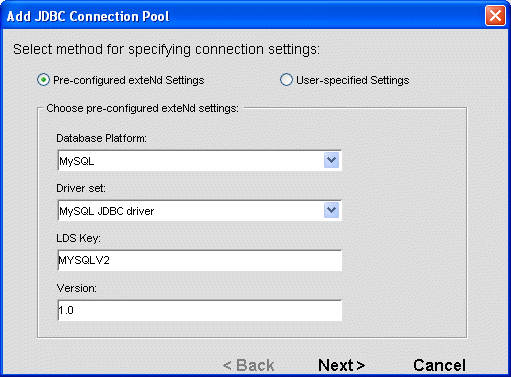
Select the Pre-configured exteNd Settings radio button, if it's not selected.
Select MySQL as the database platform and use the default settings for this platform.
Specify TutorialDB as the pool name and enter the root user ID and password for MySQL.
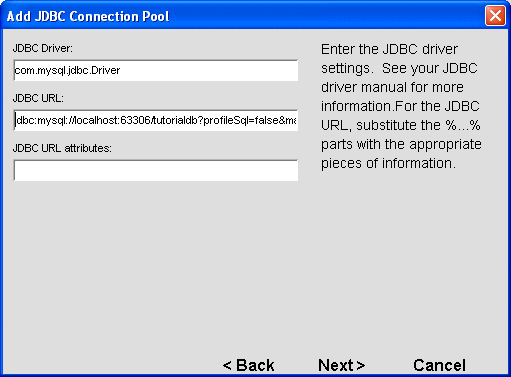
Enter this string as the JDBC URL:
jdbc:mysql://localhost:63306/tutorialdb?profileSql=false&maxRows=0
Click Next on each subsequent panel to accept the default settings.
On the final panel of the connection pool wizard, click Finish.
TIP: Click the Start menu and navigate to Novell exteNd5.0>Director>Director Designer.
Enter this string as the JDBC URL:
jdbc:mysql://localhost:63306/tutorialdb?profileSql=false&maxRows=0
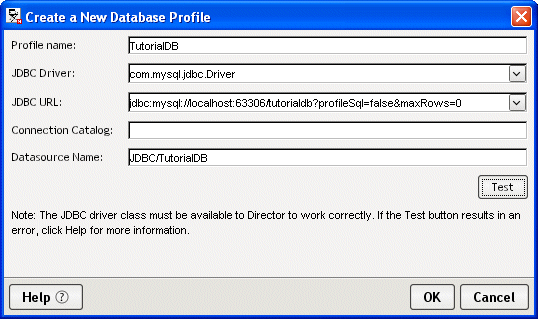
Enter this string as the datasource name:
JDBC/TutorialDB
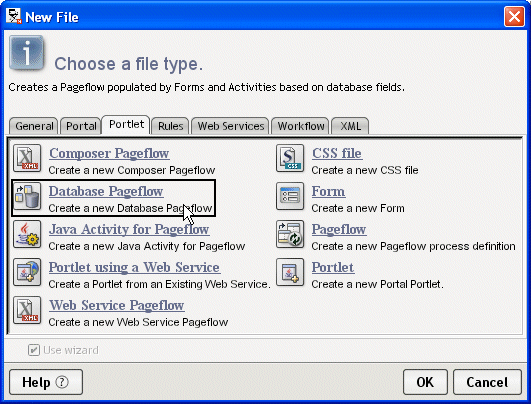
To create the database pageflow:
With the Express Portal project open in exteNd Director, select File>New.
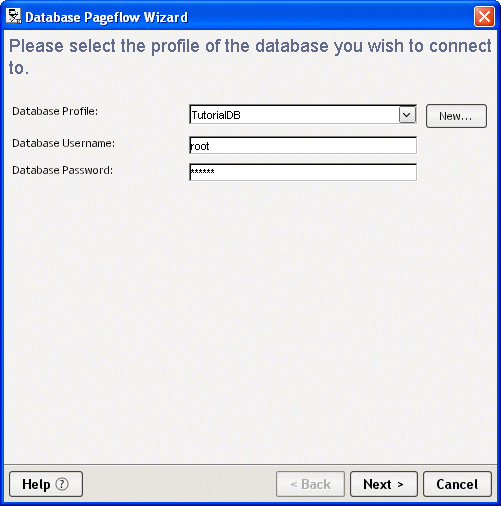
Select TutorialDB as the database profile enter the root user ID and password for MySQL.
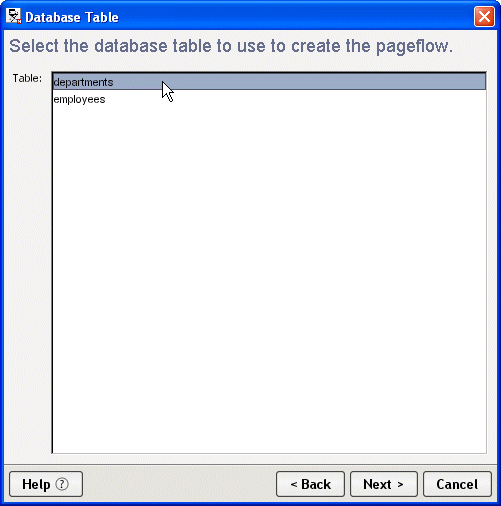
The Database Columns dialog displays, showing any tables directly related to the primary table, along with columns defined on these tables.
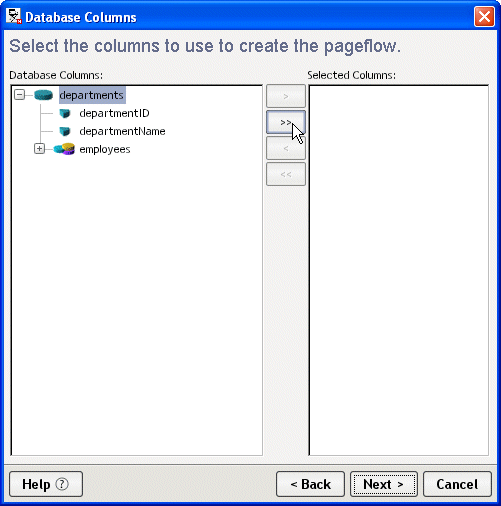
Select departments in the Database Columns box and add all columns for this table:
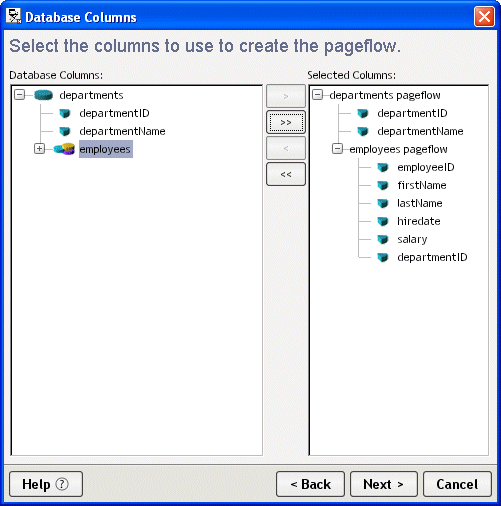
Select employees in the Database Columns box. Add all columns for this table just you did for the departments table.
The Selected Columns list should show all of the columns for both tables in the database:
Click Next to accept the default settings on the UI Options panel.
Click Next to accept the default selection on the Resource Set panel.
Click Next to accept the default settings on the Specify Formatting panel.
These settings control the appearance of controls on the Search, View Details, Edit Record, and New Record forms.
Click Next to accept the default settings on the Column Details panel.
Click Next to accept the default settings on the Update Strategy panel.
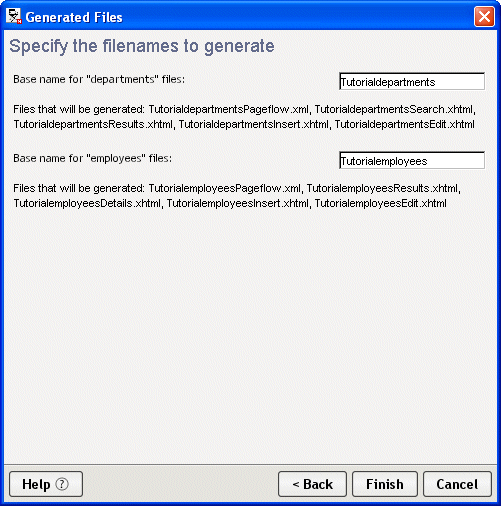
Type the prefix Tutorial in front of the words departments and employees on the Generated Files panel.
These strings will be used as the base names for the files that will be generated by the wizard. You need to specify a separate base name for each database table you select.
To create a personal page that displays the portlet for the pageflow:
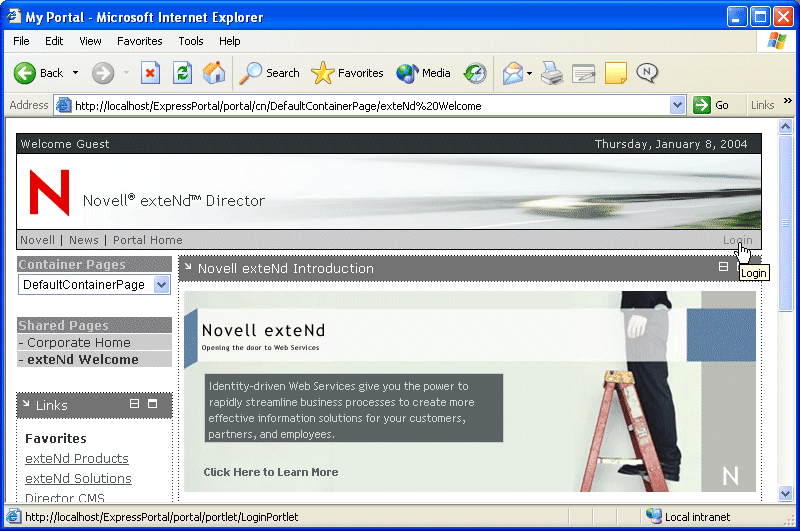
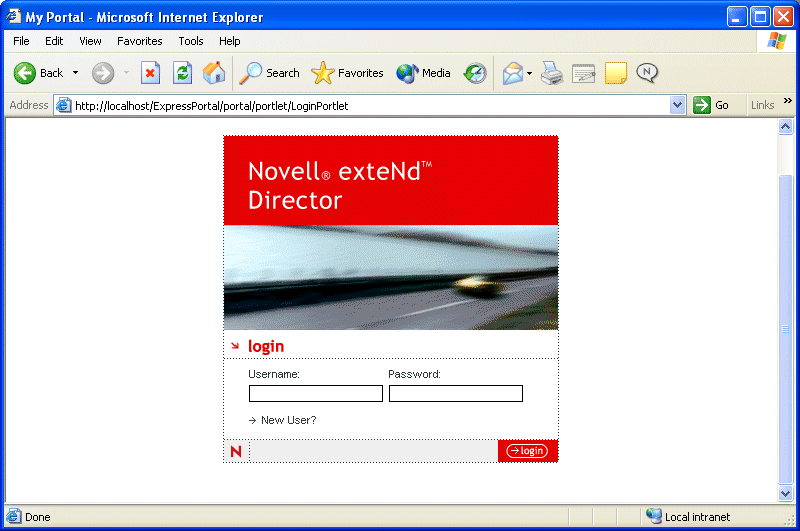
Log in as a portal administrator or as a user, then click login or the Enter key.
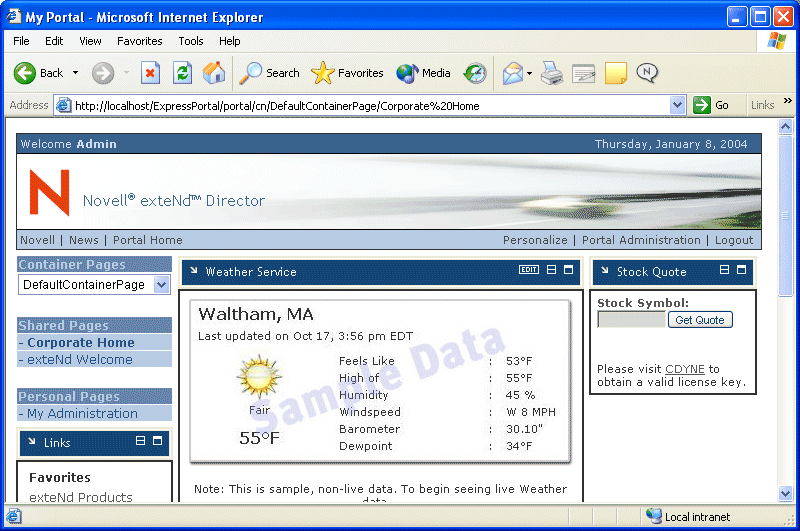
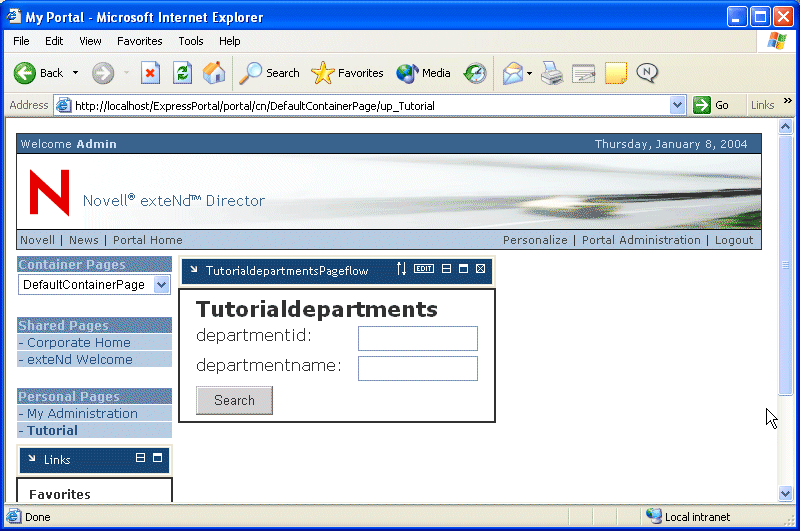
The default page for the user you specified opens in your browser.
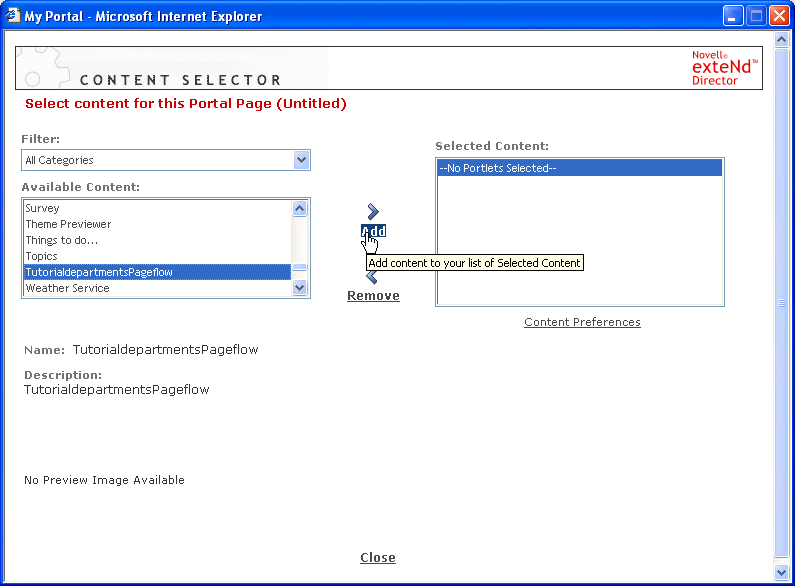
In the Available Content box, select the TutorialdepartmentsPageflow and click Add.
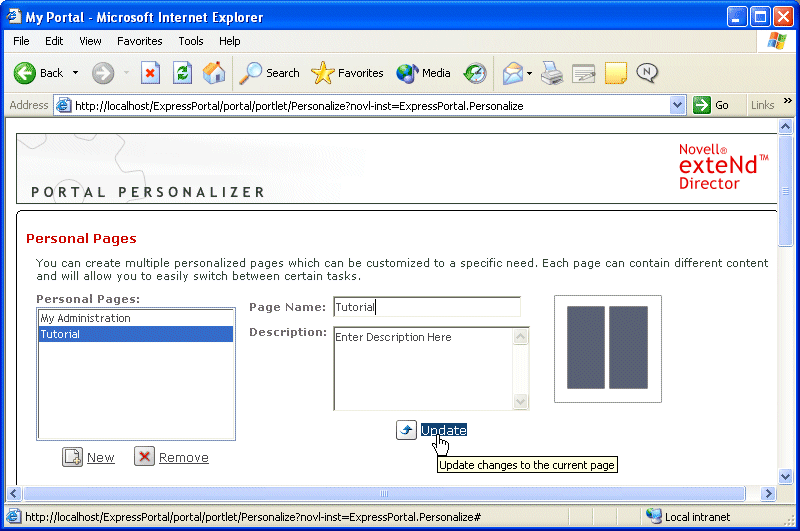
Under Personal Pages, select Tutorial.
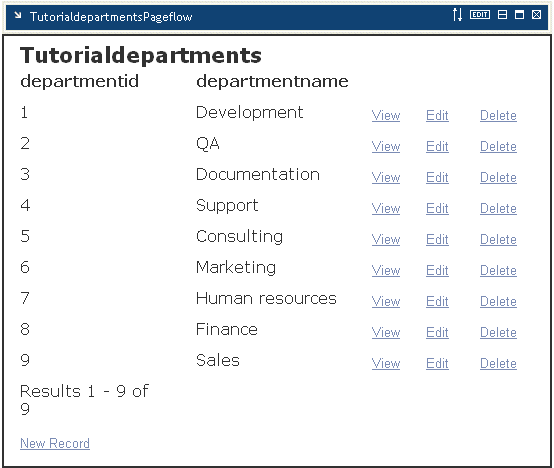
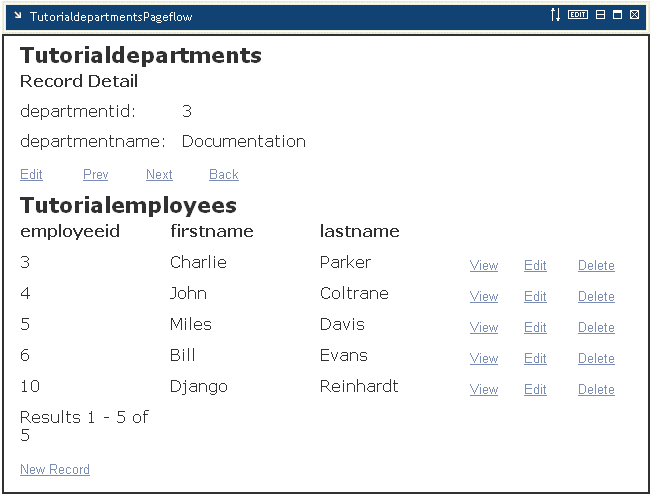
Click the Search button to see a list of all departments in the database.
TIP: You can also narrow the search by entering one or more characters in either
of the fields on the Search Form. For example, you might enter Doc to search for
the Documentation department.
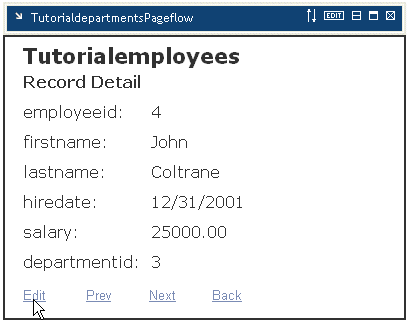
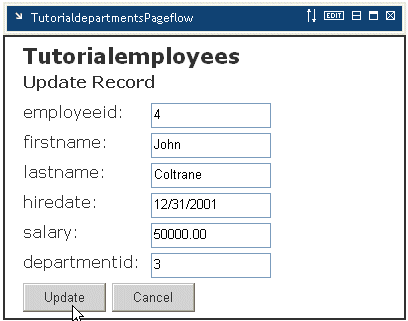
Change the salary for John Coltrane to 50000.00 and click Update.
Specify values for a new employee. When you're done, click Save.
TIP: To insert a new employee row, you need to specify a department ID that already exists in the database. Valid department IDs are 1 through 9.
Copyright © 2004 Novell, Inc. All rights reserved. Copyright © 1997, 1998, 1999, 2000, 2001, 2002, 2003 SilverStream Software, LLC. All rights reserved. more ...