Portal Guide
CHAPTER 24
This chapter describes how to move portal configuration state from one portal to another. It includes these sections:
Portal configuration state is not stored in exteNd Director projects and archives. To move it, you'll need to use the Portal Data Export/Import utilities available in the Administration tools section of the DAC.
Portal configuration state refers to portal data such as:
The following table describes the Portal Data Export/Import utilities:
Export/Import uses You can use the Portal Data Export/Import utilities to:
Move the portal configuration state of an exteNd Director Portal from a test (source) environment to a production environment (target).
Perform incremental updates of portal configuration data to an exteNd Director portal.
Optionally, overwrite the configuration state on the target portal.
Portal Data Export/Import utility requirements To use these utilities, make sure that:
The security realm specified on the source and target application servers are the same. It is not required that the user and group information be identical on the exporting or importing server. If a user does not exist on the target server, that user's pages and settings are not imported.
An exteNd Director portal containing the classes and resources associated with the portal configuration state is already deployed on the target server before you begin the import.
Portal Data Export/Import restrictions. You cannot use these utilities to:
The portals must both be the same version (beginning with Version 5.2). You cannot use this to migrate portal data from an earlier version to a later version.
Access rights Only the following users have access to these utilities:
Steps for moving portal data Follow these steps to move your data from one portal to another:
If you are performing an incremental update, backup the target portal.
From the source portal, export the portal data using the Export Portal Data utility.
 For more information, see Exporting Portal Data.
From the target portal, import the portal data using the Import Portal Data utility.
For more information, see Importing Portal Data.
Test the target portal to ensure that you imported the data that you expected.
Start the DAC, as described in accessing the DAC.
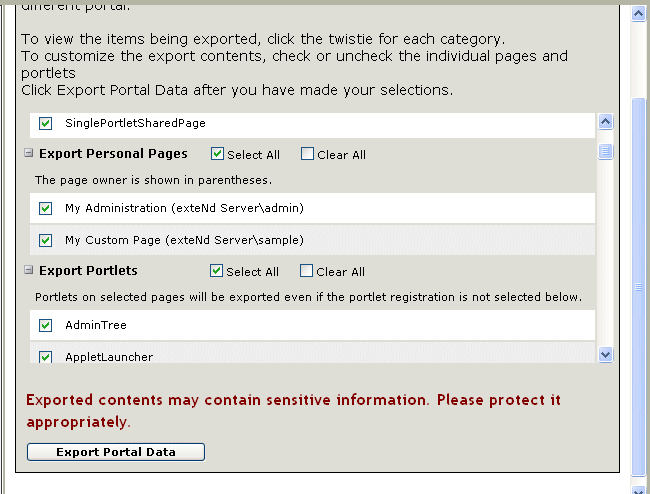
Click Export Portal Data (in the left pane).
Follow the instructions on the panel to choose the portal elements that you want to export.
NOTE: Some portlets that you have not selected for export might still be exported. If you export a page that contains a portlet, but do not select that portlet for export, the portlet is still exported to ensure that a runtime error does not occur for the exported page.
When you are done with your selections, click Export Portal Data.
You are prompted for a location to store the ZIP file that is exported.
Exit the Administration Console, or create another export file.
Start the DAC, as described in accessing the DAC.
NOTE: Server must be running but not servicing requests.
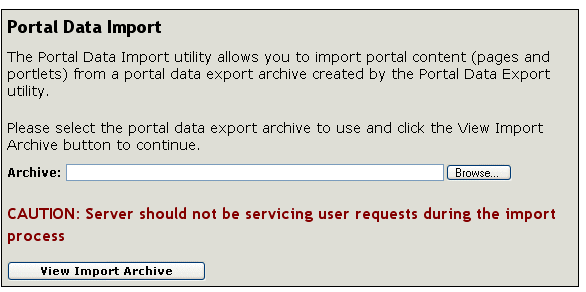
Click Import Portal Data (in the left pane).
Type the name of the Portal Data Export ZIP file, or click Browse to choose the file.
Click View Import Archive. The Portal Data Import panel below displays:
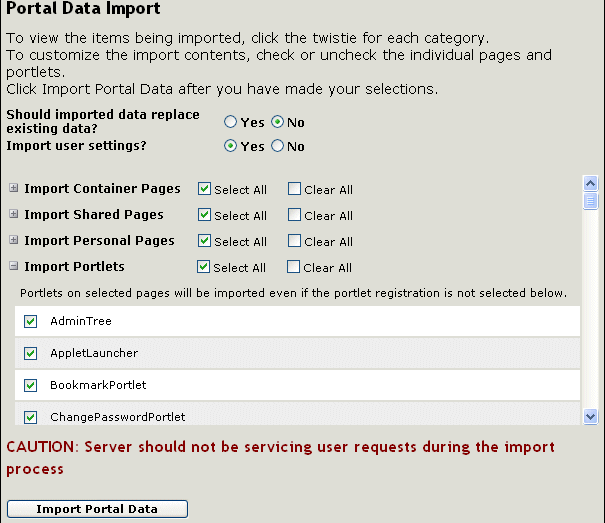
Complete the panel as follows:
Follow the instructions on the panel for selecting/deselecting the portal data that you want to import.
To initiate the import, click Import Portal Data.
NOTE: Some portlets that you have not selected for import can still be imported. If you import a page that contains a portlet, but do not select that portlet for import, the portlet is still imported to ensure that a runtime error does not occur for the page containing the portlet.
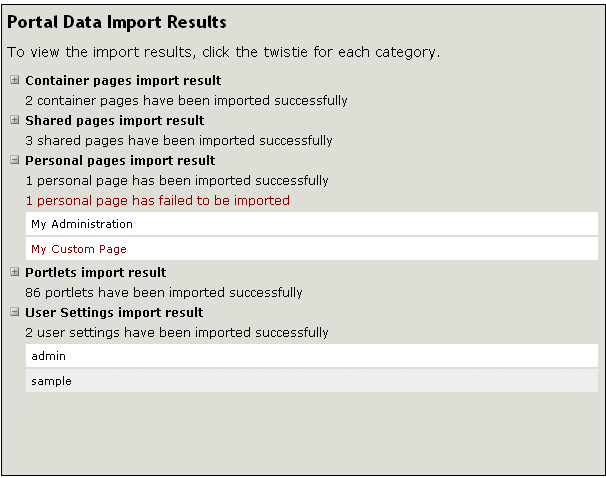
When the import completes, the Portal Data Import Results panel displays for your review. Unsuccessful imports are displayed in red as shown in the example below.
Copyright © 2004 Novell, Inc. All rights reserved. Copyright © 1997, 1998, 1999, 2000, 2001, 2002, 2003 SilverStream Software, LLC. All rights reserved. more ...