
This page describes SilverStream support for Dreamweaver, a third-party editor for creating and managing HTML-based Web sites. Dreamweaver provides a full suite of tools for developing Web pages.
This page includes the following topics:
SilverStream provides an extension to Dreamweaver that provides a simple user interface for deploying JavaServer Pages (JSPs) authored within Dreamweaver to a SilverStream server. The SilverStream interface is a command component that works with both Dreamweaver and Dreamweaver UltraDev.
The SilverStream extension to Dreamweaver has a form where you specify the information needed to load JSPs into SilverStream. Once you've completed the form, it performs these tasks for you:
To perform these tasks, the SilverStream extension to Dreamweaver executes the BuildJspJar SilverCmd utility, which combines the capabilities of the JSPCompiler and DeployJSP SilverCmd utilities into a single command.
The SilverStream extension to Dreamweaver uses the compiler preferences specified in the SilverStream Designer to determine which Java compiler to use and what flags to send to the compiler.
To use the SilverStream extension to Dreamweaver, you first need to install Dreamweaver or Dreamweaver UltraDev. Then you're ready to install the SilverStream extension to Dreamweaver.
 To install the SilverStream extension to Dreamweaver:
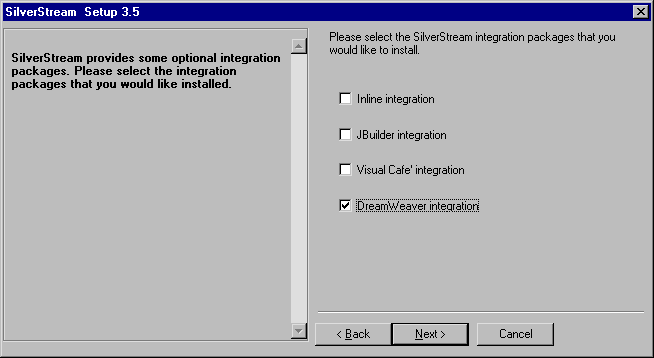
This dialog appears when you select Typical Install as your installation type. You can also install the SilverStream extension to Dreamweaver by selecting Custom Install. To do this, choose Dreamweaver integration in the list of options available for the Integration Packages component.

When you install the SilverStream extension to Dreamweaver, the install program performs these steps:
The SilverStream extension to Dreamweaver lets you deploy a Web site authored in Dreamweaver to a SilverStream server. When you're ready to deploy a site to SilverStream, you need to provide some deployment information for the site. You need to specify the target server and target database, as well as the name for the JSP JAR and the URLs for the JAR. (You do not need to list the files you want to deploy individually, because the SilverStream extension uses the root directory for the current site to determine which files will be deployed.)
NOTE If you deploy a file that is not part of the current site, you may get unexpected results because the root directory for the site does not apply to the page you're deploying.
To deploy JSPs from Dreamweaver to a SilverStream server:
Each URL you specify provides the root context for the JAR file. The complete URL required to access a JSP page in a JAR must specify the package name and JSP page as well. For example, suppose you deploy a JAR to the myDatabase database on your local machine and the JAR contains a page called test.jsp in the mypackage package. In this case, if you specify jsptests/jspurl as the URL for the JAR, the full URL required to access the page is:
http://localhost/myDatabase/jsptests/jspurl/mypackage/test.jsp

If the deployment operation causes any errors, these errors are displayed in an alert box.