6.11 Using a Policy to Manage Auxiliary Storage
Auxiliary storage allows administrators to create auxiliary storage folders when a new user is created. This auxiliary storage can even be invisible to the user for whom it was created.
For example, an organization's HR department might keep an individual folder for each user in the organization. With auxiliary user storage enabled, this folder can be created when the user joins the company and File Dynamics creates and provisions his or her home folder. The user never sees the auxiliary storage, because the policy gives Read and Write permissions only to the HR department.
Additionally, the auxiliary storage can be as large as the policy specifies. This means that even though the user's home folder might have 500 MB, the auxiliary storage could be as small as the HR department needs it to be for storing HR-specific documents about the user. In fact, the policy can dictate that the auxiliary storage is provisioned with needed HR documents at the time the auxiliary storage is created.
Of course, you can configure auxiliary user storage so that a user can access it. For example, you might want to have a separate storage folder for application-specific files. It is important to remember that auxiliary storage is simply another home folder for a user. To provide access to this storage, you need to provide some sort of mapping for the user to get automated access to it.
There is no limit to the number of auxiliary folders that can be created. Auxiliary folders can be created in shares that differ from the location of the user's home folder.
File Dynamics’ life cycle management capabilities easily manage auxiliary storage to the specific needs of the organization. For example, if a user transfers from one city to another and the user home folder is moved to a new Organizational Unit object as a result, the policy can dictate what becomes of the auxiliary storage including moving it, moving it and adjusting the quota settings, leaving it where it currently is, etc. For more information on moving Auxiliary storage, see Section 6.11.4, Establishing Auxiliary Purpose Mappings.
6.11.1 Creating an Auxiliary Storage Policy
-
In the Admin Client, click the tab.
-
Click .
-
In the menu, select .
The following dialog box appears:
-
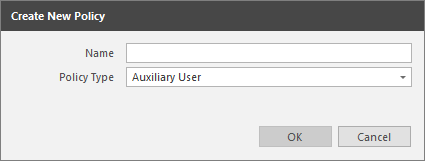
Specify a descriptive name in the field, such as “HR-AUX,” and click .
The Policy Options page appears.
-
Proceed with Setting Auxiliary Storage Policy Options.
Setting Auxiliary Storage Policy Options
-
Leave the check box selected.
-
Proceed with Enabling Auxiliary Storage Extended Options.
Enabling Auxiliary Storage Extended Options
Auxiliary storage extended options help other tools, such as the AuxMap utility, identify the auxiliary storage policy through additional attributes. For information on the AuxMap utility, see Section E.0, AuxMap.
-
In the left pane, click .
-
Click the check box.
-
In the field, enter a descriptive string for the auxiliary storage.
This field is used by the AuxMap utility to make auxiliary storage associations.
Micro Focus recommends that once you have made an entry in the field, that you do not change it. If the value of the field is changed after some users have already had their auxiliary storage provisioned via that policy, the new tag value does not automatically get propagated to those users. Only users who get storage provisioned after the change in the tag value will get the new tag value.
-
In the field, specify a description of the Auxiliary Storage policy.
-
Click to save your settings.
-
Proceed with Setting Auxiliary Storage Provisioning Options.
Setting Auxiliary Storage Provisioning Options
Before setting the provisioning options, you need to decide whether the user should have rights to auxiliary storage.
Additionally, if you are going to provision auxiliary storage folders with a certain structure or with specific documents, you need to place them somewhere in the file system so you can use them as a template. For example, if the HR department wants the auxiliary storage folder to have an Annual Reviews folder and an Insurance Forms folder, you need to set these up in the file system before proceeding.
-
In the left pane, click .
-
Do one of the following:
-
If you do not want the associated user to have access to the auxiliary storage folder, deselect all of the check boxes.
-
If you want the associated user to have access to the auxiliary storage folder, select the appropriate permissions from the check boxes.
-
-
In the region, click the button, and then specify the template path in the Path Browser dialog box.
-
Click to save your settings.
-
Proceed with Setting Additional Auxiliary Storage Options.
Setting Additional Auxiliary Storage Options
-
Select the additional options that you want to use in the Auxiliary Storage policy.
Target Path Options: You need to specify the location where the auxiliary storage folders are to be located. For example, if these were HR Department folders, they would probably be located on a network share specific to the HR Department.
The fields presented on the Target Path Options page are identical to those presented when you create a User Home Folder policy. For an explanation of the page along with procedures for setting target paths, see Section 6.5.4, Setting Target Paths.
Quota Options: You need to specify the quota for the auxiliary storage folder associated with a user. In many cases, such as the HR Department example, this folder can be much smaller that the home folder.
The fields presented on the Quota Options page are identical to those presented when you create a User Home Folder policy. For an explanation of the page, along with procedures for setting quota options, see Section 6.5.5, Setting Quota Options.
Move Schedule: The fields presented on the Move Schedule page are identical to those presented when you create a user home folder policy. For an explanation of the page, along with procedures for setting the move schedule, see Section 6.5.6, Setting the Move Schedule.
Cleanup Options: The fields presented on the Cleanup Options page are identical to those presented when you create a User Home Folder policy. For an explanation of the page, along with procedures for setting cleanup options, see Section 6.5.7, Setting Cleanup Options.
Vault: The fields presented on the Vault page are identical to those presented when you create a User Home Folder policy. For an explanation of the page, along with procedures for setting vault rules, see Section 6.5.8, Setting Vault Rules.
Groom: The fields presented on the Groom page are identical to those presented when you create a user home folder policy. For an explanation of the page, along with procedures for setting grooming rules, see Section 6.5.9, Setting Groom Rules.
-
Proceed with Section 6.11.2, Linking a User Home Folder Policy to an Auxiliary Storage Policy.
6.11.4 Establishing Auxiliary Purpose Mappings
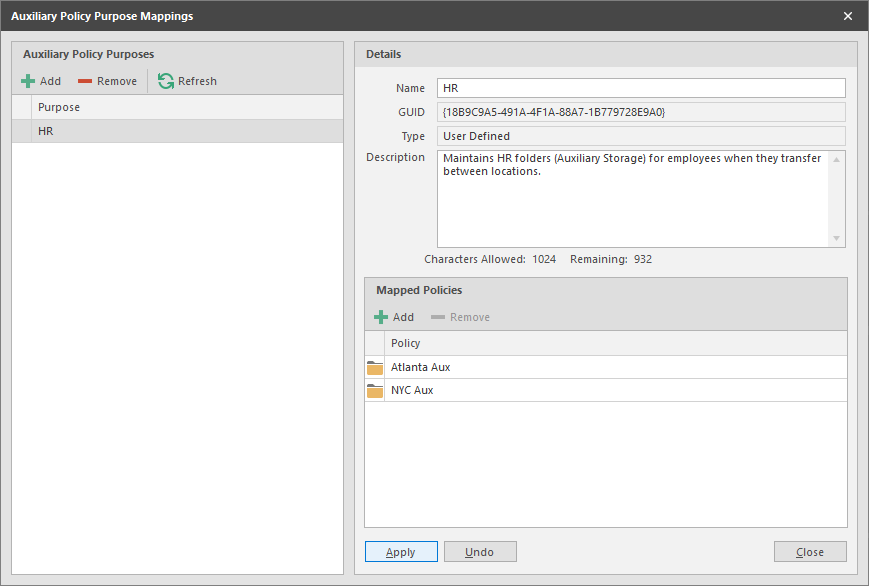
Auxiliary Purpose Mappings are the means of moving a user’s auxiliary storage when a user is moved in Active Directory. For example, if a user were moved from the Atlanta container to the Detroit container, and the two container’s Auxiliary Storage policies were part of the same Auxiliary Purpose Mapping, the user’s Auxiliary storage would move to the Detroit Auxiliary storage location.
WARNING:If there is no established Auxiliary Purpose Mapping between the source and destination container, the user’s Auxiliary storage is deleted once the user is moved.
-
In the Admin Client, click the tab.
-
Click .
-
From the drop-down menu, select .
-
Click .
-
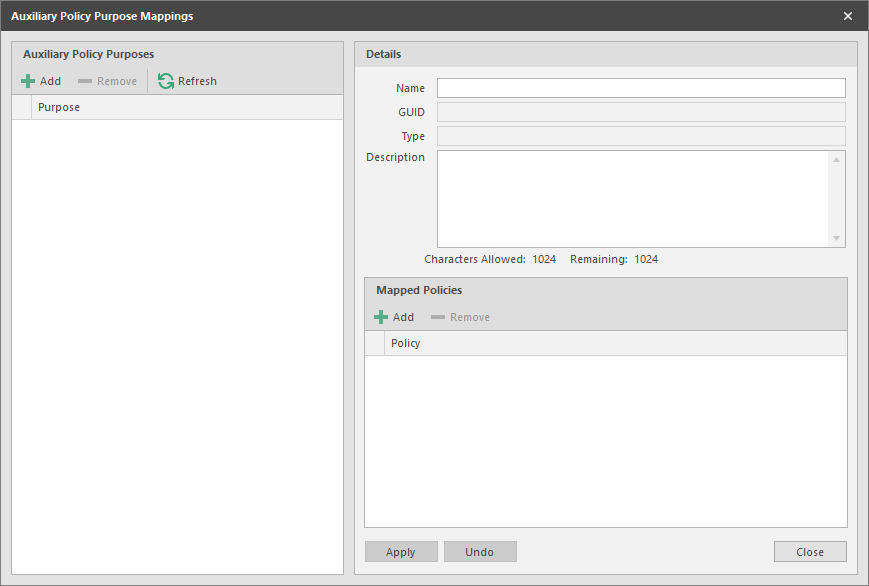
Give the new Auxiliary Purpose Mapping a descriptive name.
For example, “HR.”
-
Click .
-
In the region, click .
-
From the Policy Selector dialog box, hold down the Control key to select each of the Auxiliary storage policies you want associated with the Auxiliary Purpose Mapping.
You can hold down the Control key to select multiple Auxiliary Policy purposes.
Using the example above, you would select the Auxiliary storage policy for the Atlanta container, the Detroit container, and any others you want included.
-
Click .
-
In the field, specify the details of the Auxiliary Purpose Mapping.
-
Click .
-
Click .