10.9 Create a Security Fencing Policy
There might be some High-Value Targets on which you might not want to place the same level of restrictions as a Security Lockdown policy, but might nevertheless want to secure the access to only authorized users or roles.
Security Fencing policies let you set limits on how access permissions might change over time. Using a set of rules by creating inclusion and exclusion lists to define a “fence,” the policy specifies Active Directory containers, groups, users, and SIDs that might be given permissions to a High-Value Target in the future without an issue or should never be given rights in the future, as in restrictions specified in GDPR.
IMPORTANT:Security Fencing policies work by creating a set of rules that create a boundary around your storage against which any security will be evaluated. The security changes are then preserved or reverted based on the rules created. You should therefore create your rules carefully, potentially using tools like Micro Focus File Reporter to verify the permissions granted to subfolders of your target path.
WARNING:There is currently no path overlap protection between policies. While this is ideal for flexibility, it is not so when you have conflicting policies.
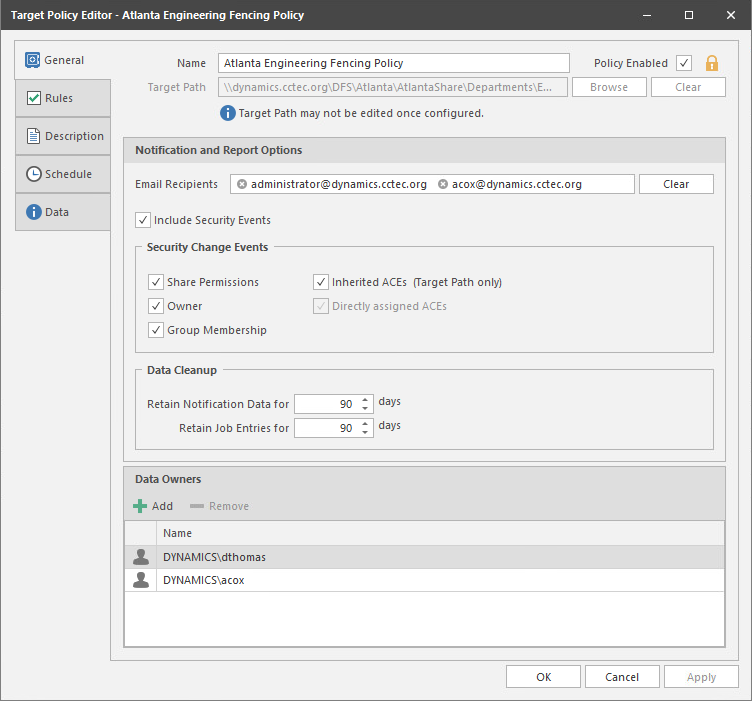
10.9.1 Creating a Security Fencing Policy
-
In the Admin Client, click the tab.
-
Click .
-
Select > .
-
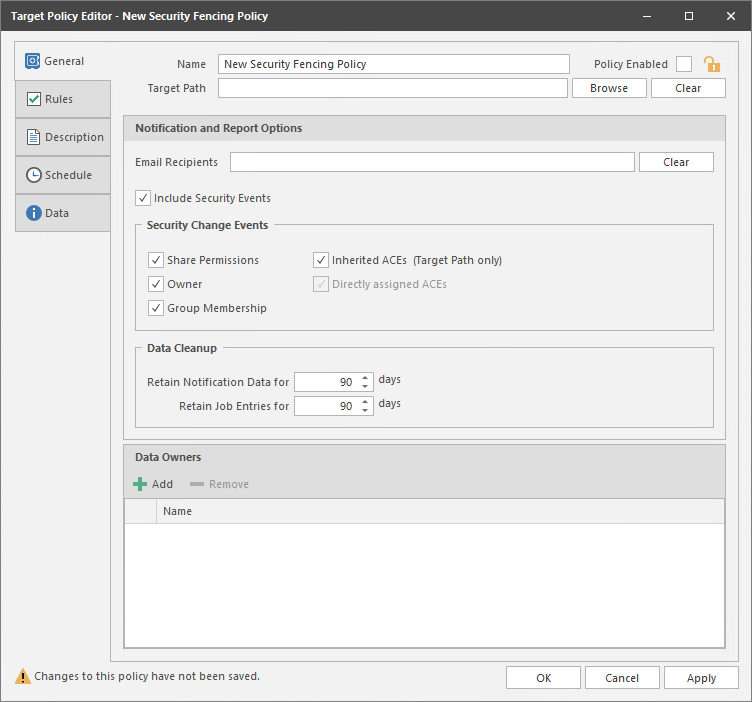
In the field, give the Security Fencing policy a descriptive name.
For example, Engineering Department Fencing Policy.
-
Click the button pertaining to the field and specify the share or folder for this policy.
-
(Conditional) If the currently established access permissions to the specified High-Value Target are the permissions you want enforced, select the check box.
Otherwise, come back and select the check box after you have updated the access permissions to the High-Value Target.
Once this option is selected, this becomes the baseline for comparison for all Security Scans.
-
In the field, specify the email addresses of each user you want notified when access permissions to the selected folder or share take place.
Email addresses can be separated by a comma, semicolon, or a space.
File Dynamics only reports on the changes in permissions between one scan and the next. Therefore, if there are no changes in access permissions between scans, no notifications will be emailed.
-
In the region, specify the event types for which this policy will email notifications.
-
In the region, specify how long you want scan job information to remain in the database.
For more information, see Security Fencing Policy.
-
In the region, click to specify the users or groups that will serve as Data Owners for this policy.
Data Owners assigned for a Security Fencing Policy will be enabled to view permitted changes in security, ownership, and group membership of folders in the High-Value Target via the Data Owner Client.
-
Click to save your settings.
-
Click .
-
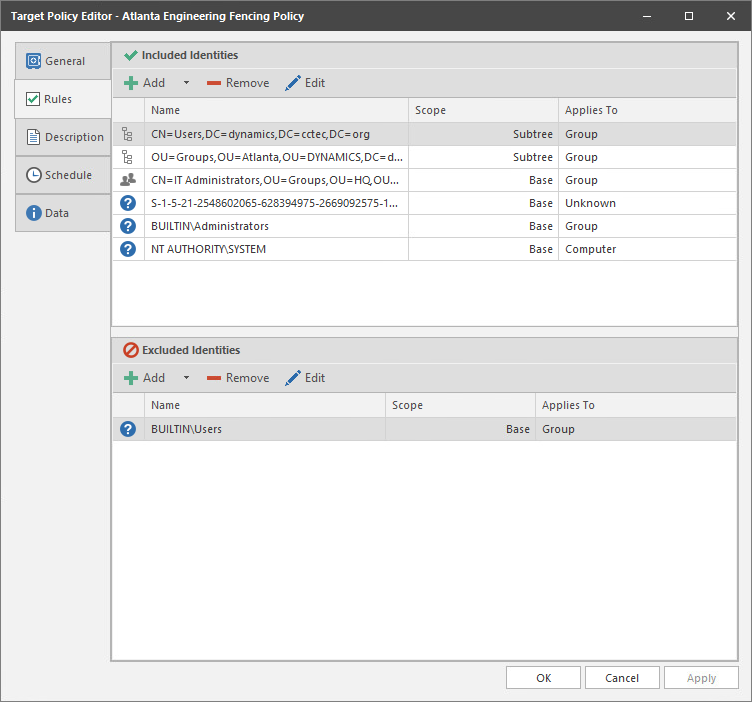
In the and regions, use the drop-down buttons to include and exclude groups, users, and SIDs for this Fencing policy.
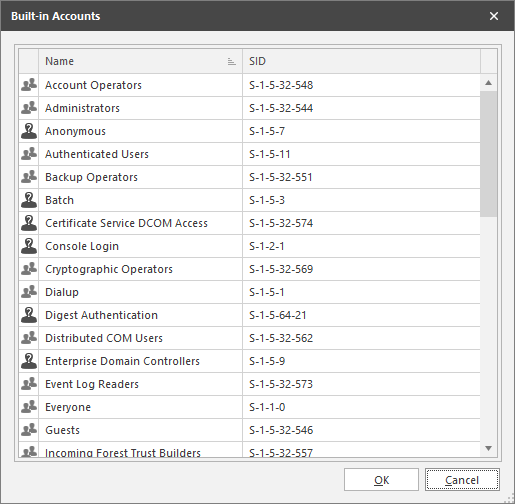
WARNING:Be sure to include any desired well known security objects such as BUILTIN\Administrators and NT Authority\SYSTEM appropriate to your environment, before you perform a Security Scan. If you do not include these objects, their access will be disabled following the initial Security Scan.
For more information on creating rules for a Fencing policy, including adding Built-in accounts and Security Identifiers, see Rules Tab.
-
Click the tab and in the field, specify any information you want to include pertaining to this policy.
-
Click .
-
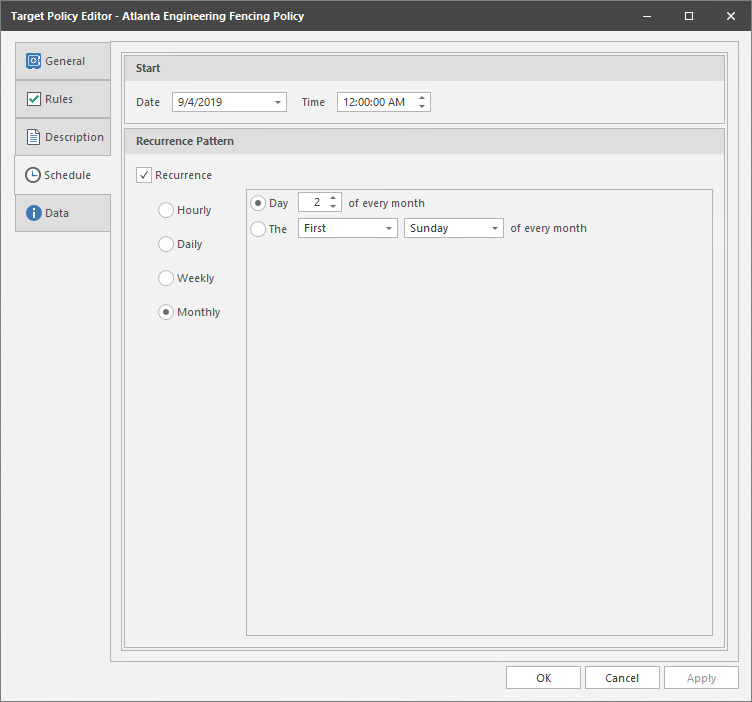
In the field, specify the date you want the policy to be initially invoked.
-
In the field, specify the time you want the policy to be initially invoked.
-
(Conditional) If you want the policy to run on a recurrent basis, select the check box and then select one of the options.
-
Click to save the schedule.
-
Click .
-
From the Target Policies page, highlight the Security Fencing policy and from the drop-down menu, select .
-
In the confirmation dialog box, click .
10.9.2 Editing a Security Fencing Policy and Resetting the Baseline
There might be times when you need to adjust the permissions assignments for a High-Value Target whose access permissions are managed through a Security Fencing policy.
-
In the Admin Client, click the tab.
-
Click .
-
From the list of policies, double-click the Security Fencing policy you want to edit.
-
Deselect the check box.
-
Click .
In the policy list, note the new warning icon indicating that the policy you are editing is now disabled.
-
In the network file system, make any needed security changes.
-
From the list of policies, double-click the Security Fencing policy you disabled previously.
-
Click the tab.
-
Preserve the security changes made in the network file system by making any needed updates in the and lists.
-
Click the tab.
-
Select the check box.
-
Click .
-
From the drop-down menu, select .
-
From the drop-down menu, select .
This creates the new baseline.