7.0 Starting and Configuring the Appliances

IMPORTANT:Filr 3.4 is available as an online update to Filr 3.0, MySQL 3.0, and Filr Search 3.0 appliances or later.

  • To Install a New Filr 3.4 Appliance: You must install and configure Filr 3.0, and then apply the 3.4 updates. To apply the Filr 3.4 updates, see Section 11.0, Updating to Filr 3.4.

After the VMs are deployed with the necessary disks added and other settings adjusted according to your plans, it is time to start and configure the appliance software on each appliance. When this step is completed, all of the appliances will be running and ready to be deployed as an integrated Filr infrastructure.

Figure 7-1 Starting and Configuring the Appliances

Table 7-1 Starting and Configuring the Appliances

Page, Dialog, or Option

Do This


NOTE:For Xen, after you have completed the instructions in Deploying a Xen VM, skip to 4 - Accept the license and specify the keyboard layout. in this table.

1 - Before you deploy the first VM.


  1. If you have not already done so, before you begin this process, you must set up shared storage for your Filr appliances by either:

    • Exporting an NFS directory

      or

    • Creating a CIFS share

    See the Network-Based Shared Disk Space for /vashare section of Worksheet 25 and complete the instructions in Section 4.0, Setting Up Shared Storage before continuing.


2 - Select an appliance.


  1. Choose one of the appliances that you deployed in Section 6.0, Deploying the Virtual Machines and refer to its planning worksheet as you start and configure it.

    IMPORTANT:You must set up your Filr deployment in the order specified in Section 8.0, Creating an Expandable Filr Deployment.


3 - Start the appliance.


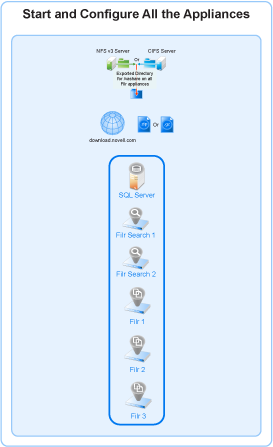
  1. After you have downloaded the Filr software and configured your appliances, you must start and configure each appliance in turn.

    • VMware: In the vSphere Client, power on the first appliance, then click the Console tab.

    • Hyper-V: In Hyper-V Manager, right-click the VM and select Start.

    • Citrix Xen: In XenCenter, right-click the appliance and select Start.


4 - Accept the license and specify the keyboard layout.


  1. After the appliance boots, the License Agreement screen displays.

License Agreement

  1. Select your preferred keyboard layout in the Keyboard Language drop-down.

  2. (Optional) use the License Language drop-down to change the license language.

  3. (Optional) use the Keyboard Language drop-down to change the keyboard layout.

  4. Accept the license agreement.

Passwords and Time Zone

  1. On the configuration page, specify the following information:

    IMPORTANT:Keep a confidential record of the passwords you set for the root and vaadmin users below.

    Root password and confirmation: The root password provides root access to the appliance terminal prompt. Do not access appliances as the root user unless specifically requested by Filr support personnel.

    Vaadmin password and confirmation: The preferred user for accessing the appliance as requested by Filr support personnel.

    Consider using a different password for each appliance for enhanced security.

    NTP Server: The IP address or DNS name of the reliable external Network Time Protocol (NTP) server for your network.

    Example: time.example.com.

    For the best results, set up NTP in accordance with the VMware best practices guidelines.

    Region: Your local region.

    Time Zone: The time zone of all file servers that Filr will provide access to.

  2. Click Next.

Network Settings

  1. Specify the following:

    Hostname: The fully qualified DNS host name associated with the appliance’s static IP address.

    Example: myFilr.mynetwork.example.com.

    IP Address: The static IP address for the appliance.

    Example: 172.17.2.3.

    Network Mask: The network mask associated with the appliance’s IP address.

    Example: 255.255.255.0.

    Gateway: The IP address of the gateway on the subnet where your Filr virtual appliance is located.

    Example: 172.17.2.254.

    IMPORTANT:Filr appliances do not tolerate latency and should be installed in the same subnet or a near-subnet.

    DNS Servers: The IP address of a primary DNS server for your network.

    Example: 172.17.1.1.

    Domain Search: The domain that is associated with the Filr host name.

  2. Click Next.

Additional LAN Card Configuration

  1. (Conditional) If you configured multiple network adapters for this appliance, select from the following options, then click Next:

    • Do Not Configure: Select this option to configure this network at a later time as described in Changing Network Settings in the Filr 3.4.1: Administrative UI Reference.

    • DHCP Dynamic Address: Select this option to have an IP address assigned dynamically on the secondary network.

    • Statically Assigned IP Address: Select this option to assign a static IP address on the secondary network. Then specify the IP address, network mask, and host name.

Data Store Location

  1. Hard Disk 2 is automatically detected and the disk designation is displayed in the hard drive drop-down.

    Accept the defaults for the other options on this page by clicking Next.

    WARNING:If you have not already created additional disks 2 and 3 for each of your VMs and prepared a shared storage location for your Filr appliances as described in early sections of this guide and in Recording Your Plan in the Filr 3.4 Planning Your Filr Deployment—Best Practices guide, power off the virtual machine and make sure you have the required disk space in place for your deployment before proceeding. Otherwise, there is a substantial risk that your deployment will not meet your organization’s needs.

Data Log Location

  1. Hard Disk 3 is automatically detected and the disk designation is displayed in the hard drive drop-down.

    Filr: Accept the defaults for the other options on this page by clicking Next.

    Filrsearch and MySQL: Accept the defaults for the other options on this page by clicking Configure.

Shared Storage Type (Filr only)

  1. If you are configuring a Filrsearch or MySQL appliance, this page doesn’t appear. Go to Configuring Password, Time, and Network Settings.

  2. If you are configuring a Filr appliance in an expandable deployment (the default for this guide)

    1. Select the option for the type of shared storage (Remote NFS or Remote CIFS) that you identified and configured in Section 4.0, Setting Up Shared Storage.

    2. Click Next and continue with the steps for the page matching your selection.

  3. If you are configuring a small or non-expandable deployment

    1. Select Do Not Configure Shared Storage.

    2. Click Next.

    3. Go to Configuring Password, Time, and Network Settings.

Shared Storage NFS Location

Referring to the work you did in Exporting an NFS Directory for the /vashare Mount Point, do the following:

  1. For the NFS Server Hostname field, click Browse and select the NFS server that you identified.

  2. For the Remote Directory field, click Browse and select the directory that you exported.

  3. Click Configure.

  4. Go to Configuring Password, Time, and Network Settings.

Shared Storage CIFS Location

Referring to the work you did in Creating a CIFS Share for the /vashare Mount Point, do the following:

  1. Type the UNC path to the share that you created.

  2. Type the user name of the CIFS user that you identified or created.

  3. Type the password of the CIFS user.

  4. Click Configure.

Configuring Password, Time, and Network Settings

  1. The settings you have specified are configured, storage is verified, and the appliance starts.

    Continue as indicated for your deployment type:

    Expandable Deployment: Repeat the above steps starting with 2 - Select an appliance. until all of your appliances are started, configured, and running. Then go to Section 8.0, Creating an Expandable Filr Deployment.

    All-in-one (Small) Deployment: Return to Section B.0, All-in-One (Small) Deployment—Creating.

    Non-expandable Deployment: Repeat the above steps starting with 2 - Select an appliance. until all of your appliances are started, configured, and running. Then return to Section D.0, Non-Expandable Deployment—Creating.