7.2 Single User Mode
To use Single User Mode, select the mode button along the toolbar at the top of the program window and select a user to view or edit. Here we have selected a user and are looking at the user properties, which is the default view when a user is first selected.
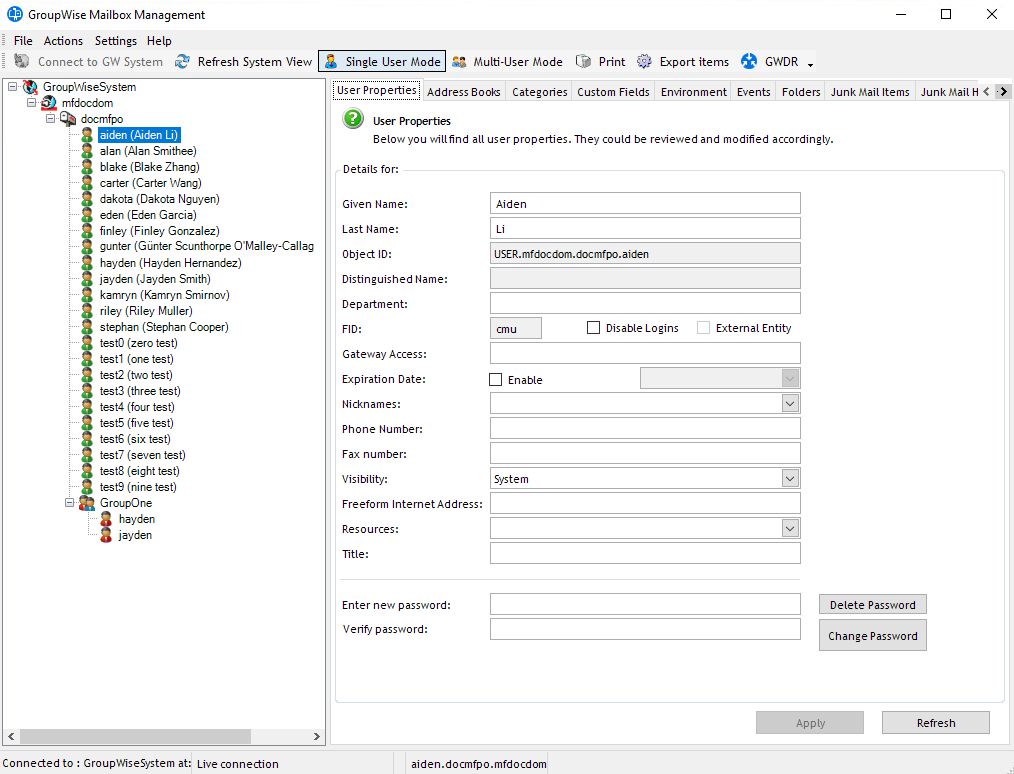
The different configuration tabs listed across the top of the information field allow access to the different facets of the GroupWise system. You may need to use the scroll buttons along the tab bar to access all of the tab functions.
7.2.1 User and Object Creation
GroupWise Mailbox Management supports Object creation and Distribution list management as well as User management.
To create a new user or object:
-
Select the Post Office where the user is to be created and right-click on the post office or in the user tree below the selected Post Office.
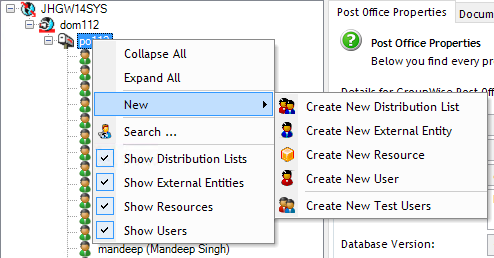
-
From the right-click menu, select the object type you wish to create, (User, Distribution list, Resource, or External Entity).
-
Depending on the type of object you wish to create, you will be confronted with a different properties window.
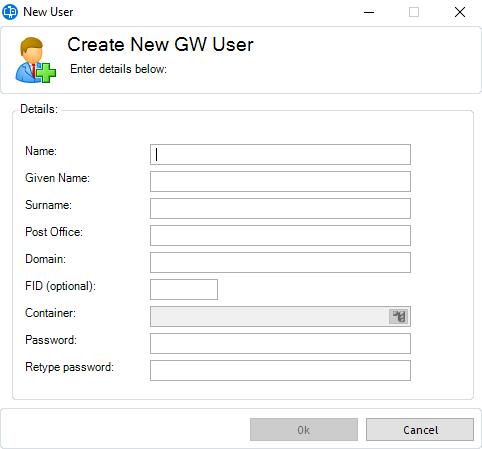
-
To complete creation, you must fill out all the required information, (the FID is optional for User creation), and select the container for the object.
-
The NDS selector window requires you to double-click on objects to expand them.
-
After you have selected the container and filled-out the required information, the object will be created.
-
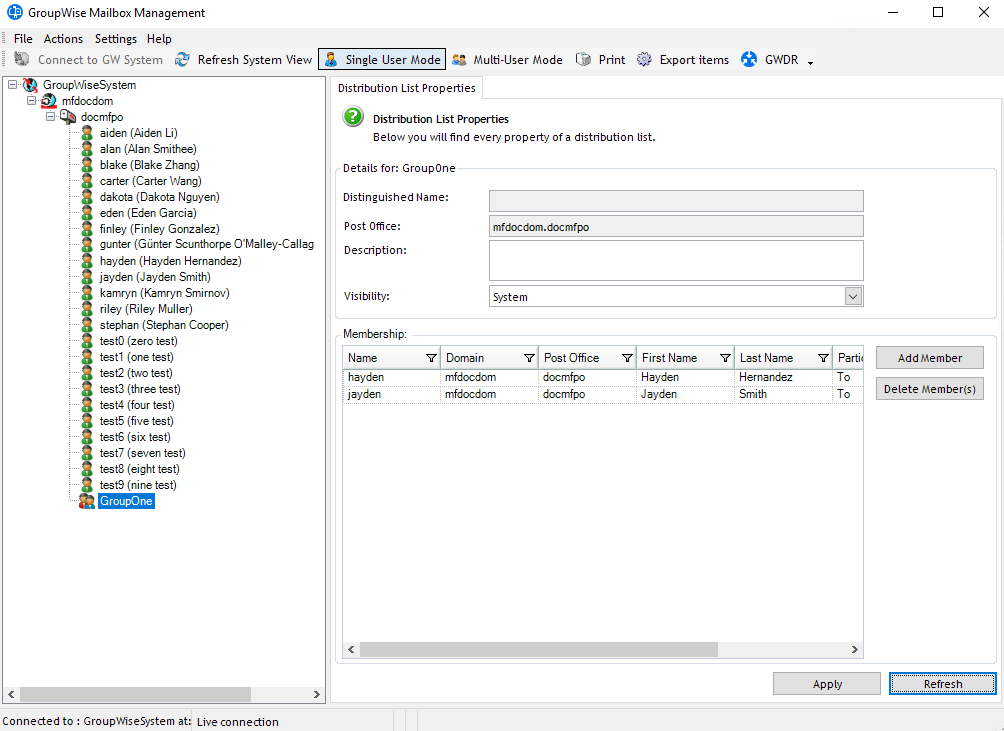
To set the password or change other settings for the object, (like adding members to a Distribution list), select them from the GroupWise tree to bring up the properties of that object, and modify the appropriate setting in the information window. (This will be handled later in the guide.)
-
To add members to a distribution list highlight the list from the tree view, select Add Member, and choose the desired members from the address book list.
7.2.2 User Properties
The Admin user has no nicknames, no expiration date, and is missing contact information which can be added from this program as well as changing password and other properties. The other user properties can be accessed and modified by selecting a different tab. The grayed-out information fields cannot be changed or populated, but the blank, white fields are quickly manipulated from the GroupWise Mailbox Management interface.

For example, to change a password, select the desired user from the tree view, enter the new password and verify in the dialog provided at the bottom of the info screen, and click Change Password.
To change other options, populate the applicable fields with information for the specific user and select the Apply button to write the changes to the domain database. Changes not applied before browsing off of the current configuration page are not saved and must be reentered and saved to the database to become effective.
7.2.3 Address Book
The Address Books tab shows which address books are owned or shared by which users, to how many and who. It also shows how many users, access, ownership and location of any selected address book.
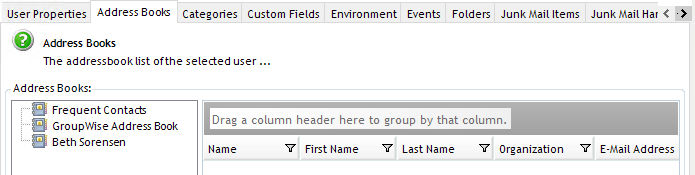
You can edit, view, and create reports on address books through the right click menu.
7.2.4 Categories
This view displays the color and settings for the different categories of mail that can come into their respective mailbox. The colors are represented by their code number.
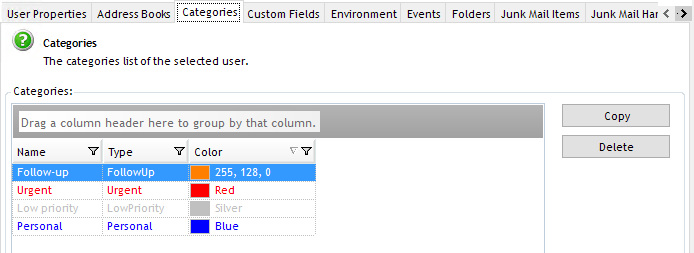
If a company has specified colors to dictate the type of mail in a user’s system, it can be copied through the rest of the system. To copy this client setting through the system, follow the same procedure you did for the Address book; select the desired setting, select copy, and then designate the users you wish to have the rule propagated to. You may specify multiple users at the same time.
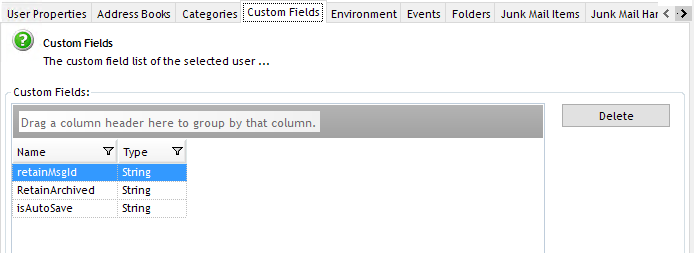
7.2.5 Custom Fields
This reports on the selected users custom fields in their address book. This will be blank unless the users in your system have set these fields in their client options. Currently, this is not an editable setting.
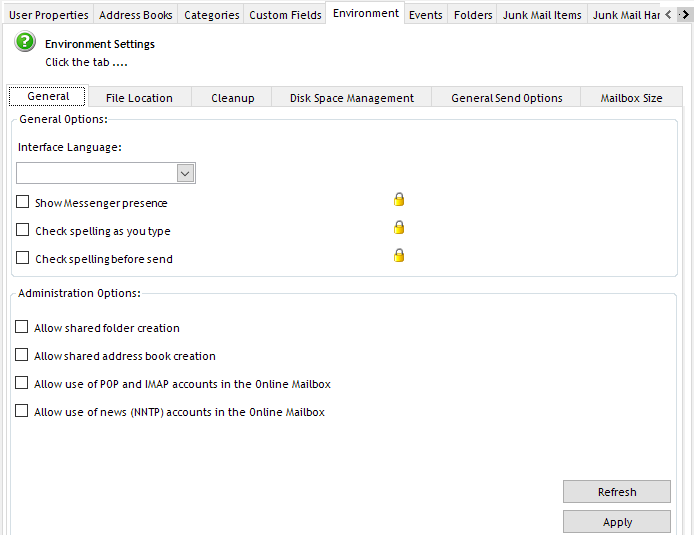
7.2.6 Environment
This setting has its own set of sub-tabs. These sub-tabs are explained below.
General
The general tab shows the language and settings for POP and NNTP as well as messenger and spell check. Unless the setting is locked in GW Admin, you can modify these settings here.
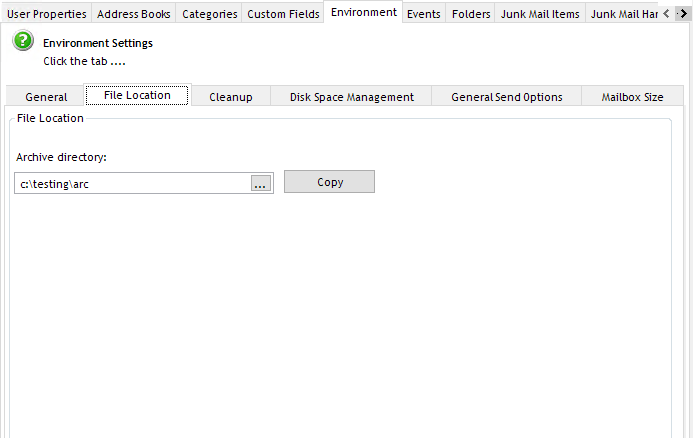
File Location
The location of the Archive directory can be viewed here for each user in your system.
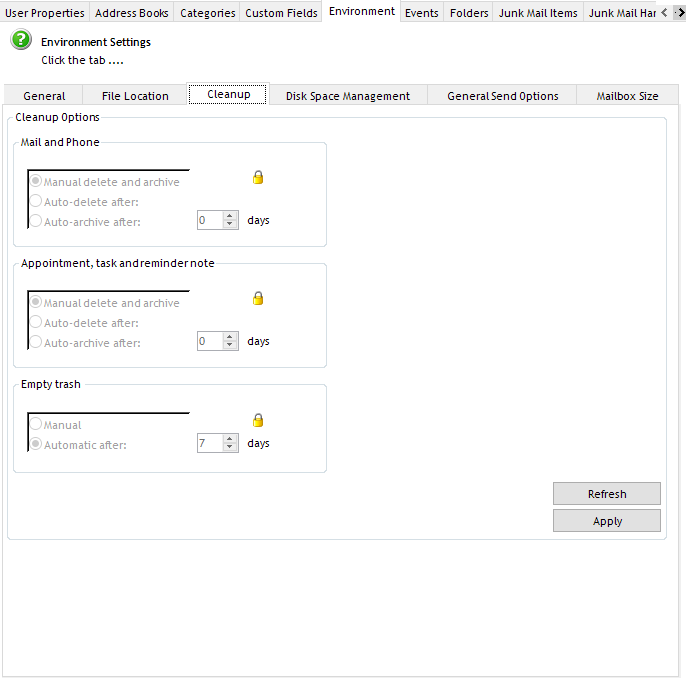
Cleanup
The cleanup tab reveals the deletion and archiving settings for each user in the system. You can change the settings here by modifying the settings and clicking apply. Unless the setting is locked in GW Admin, you can modify these settings here.
Disk Space Management
Size limit restrictions are reported here for the different users.

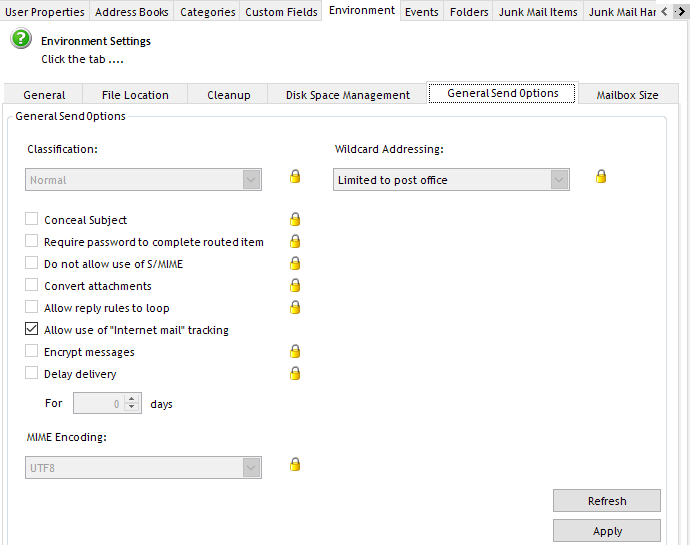
General Send Options
This tab lets you set the send options for the selected user’s mailbox. Unless the setting is locked in GW Admin, you can modify these settings here.
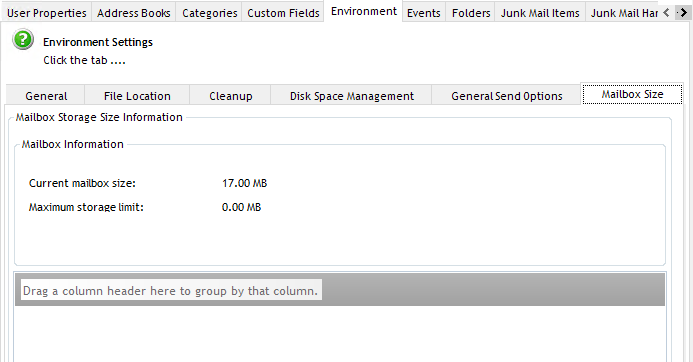
Mailbox Size
This tab polls the post office for the physical size of the selected user’s mailbox. This is a demanding and intensive process for the post office, but allows immediate reporting on the disk usage of each individual user. This is purely an informational tab. You can specify what is displayed for the mailbox, (all, sent, received, trash, or posted/draft items), to simplify the view. Remember, even though GroupWise Mailbox Management may look like it is not working, this is a POA intensive task, it takes a bit of time to show-up. If you have GroupWise Disaster Recovery, Blueprint reports this information.
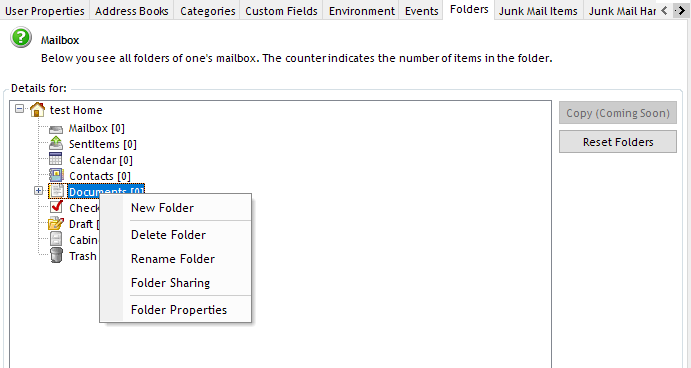
7.2.7 Folders
This reveals all the folders, and the item count of each, in a user's mailbox in order to deliver immediate and effective reporting on mailbox population without viewing any actual messages. Right clicking on a folder lets you do the following: Create a new subfolder, delete the folder, rename the folder, share the folder, and access folder properties.
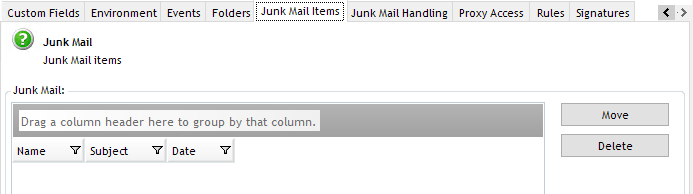
7.2.8 Junk Mail Items
Lists the contents of the Junk Mail mailbox. This allows general monitoring and also provides identification of any good mail which has been erroneously tagged as junk and placed in the Junk mail folder by the system.
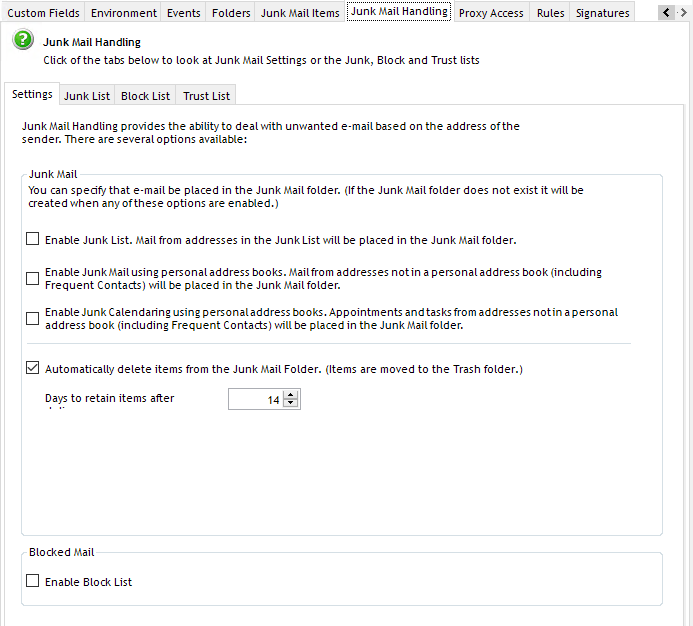
7.2.9 Junk Mail Handling
It has always been a challenge to populate the black lists while still receiving all the valid mail. The junk mail handling tab allows quick access to change and view the Junk, Block, and Trust lists and the active settings of any mailbox.
The settings tab allows the activation of the Junk Mail Handling system. Changes can be applied by selecting the Apply button.
The individual lists, Junk, Block, and Trust lists, can be accessed through the sub tabs, and allow full editing, creation, and removal of any particular domain or address. It also displays the count to indicate effectiveness in the list.
7.2.10 Proxy Access
This list shows the users that are allowed to proxy into the selected user's mailbox, and which rights they can exercise as proxy. The proxy list can be completely managed from this window.

To add a proxy rights to a user:
-
Select the user you wish to proxy to from the tree view on the left.
-
Select the Proxy Access tab.
-
Click add user.
-
Select the user or users you wish to grant proxy rights to. (The users in the add user window will not be selected unless they are selected with the mouse, even if they are highlighted already.)
-
Click Ok.
After the users are added to the Access list, you can modify the rights they are granted.
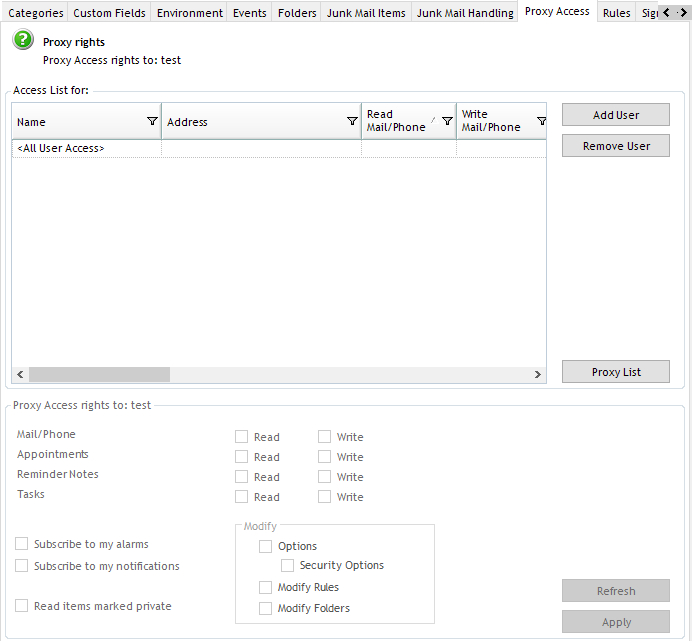
Right clicking next to the rights allows you to select or deselect all.
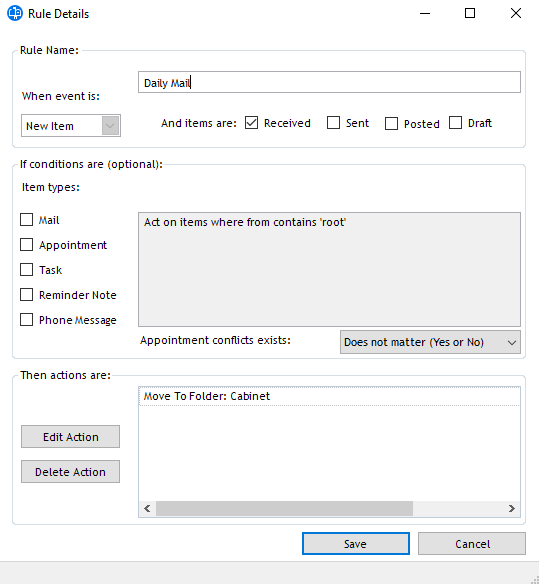
7.2.11 Rules
Rules can be viewed and manipulated from this area.
NOTE:The checkbox only selects items. Clicking on the checkbox will not toggle the active status of a rule. To disable a rule, select it and then select the disable button on the right side.
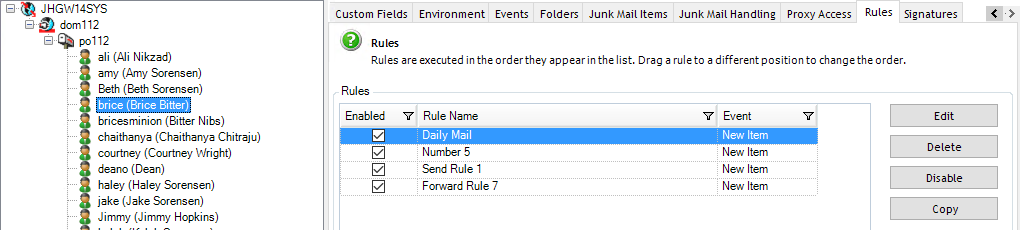
Viewing a rule is simple; select the rule and then the view button to see all the properties of that rule.
The recommended use for rule sets is to create a dummy resource account to hold or create rules with through the client and ensure they are working, and then use GroupWise Mailbox Management to propagate those rules to other users. To keep things organized, a resource for rules, address books, and signatures, could be created for each department or group desired.
For example, a resource called 'sales' could be created to hold all the rules for the sales team members, which could be used to make and then propagate all of the rules to the other users in the GroupWise system.
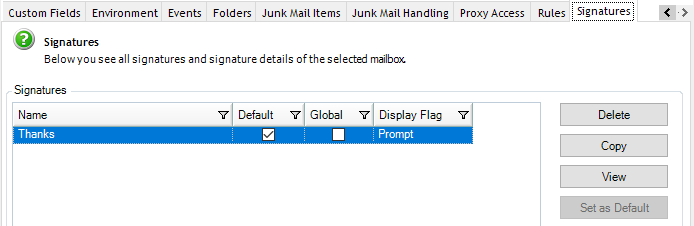
7.2.12 Signatures
The signature can be copied to some or all the users in the system, like rules can:
-
Select a Signature.
-
Click Copy.
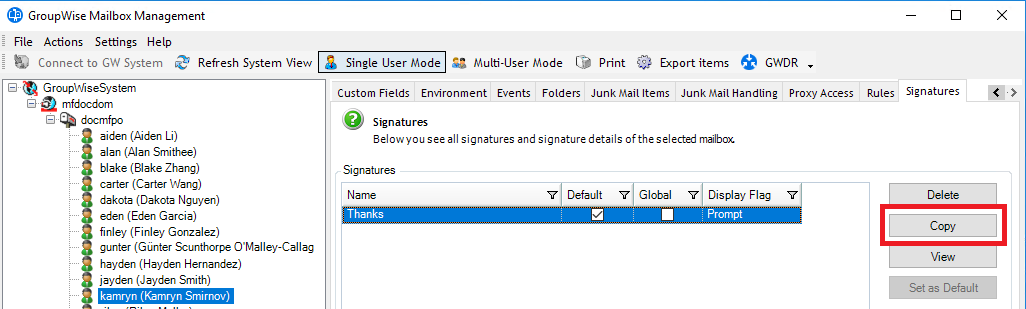
-
Select the users desired from the address book. Use Shift (contiguous) or Control (discontiguous) + Click to select the users you wish to have the signature.
-
Confirm by selecting Ok.
Using NGW Variables with Signatures
Signature settings support variables to insert user-specific data into signature text. You may add these variables into the text box and copy them to all accounts. Using the NGW variables can help in replacing signature values to a list of users without having to create a unique signature for each user. This can save time, and can easily be done using GroupWise Mailbox Management.
Configure NGW Variables
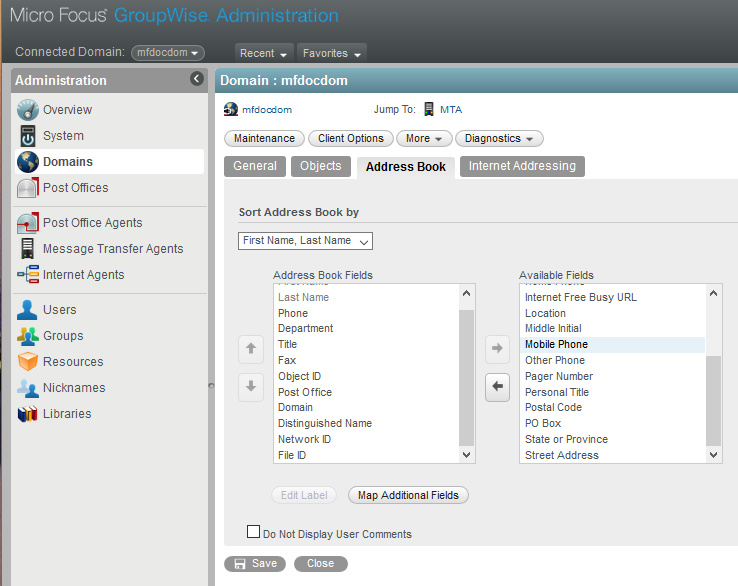
Address Book Fields are configured in GroupWise Administration under Domains | <particular domain> | Address Book tab.
The default supported variables are:
-
[[NGW-FullName]]
-
[[NGW-GivenName]]
-
[[NGW-Surname]]
-
[[NGW-Department]]
-
[[NGW-Title]]
-
[[NGW-PhoneNumber]]
-
[[NGW-FaxNumber]]
-
[[NGW-Name]]
-
[[NGW-NetID]]
-
[[NGW-Domain]]
-
[[NGW-PostOffice]]
-
[[NGW-PrefEMailID]]
-
[[NGW-StreetAddress]]
-
[[NGW-PostalCode]]
-
[[NGW-MobilePhone]]
-
[[NGW-City]]
Configure Source Signature
Login to a GroupWise client for a user you wish to create the signatures for. An account created just for the sole purpose of signatures can be a great way to store signatures ready to copy using GroupWise Mailbox Management.
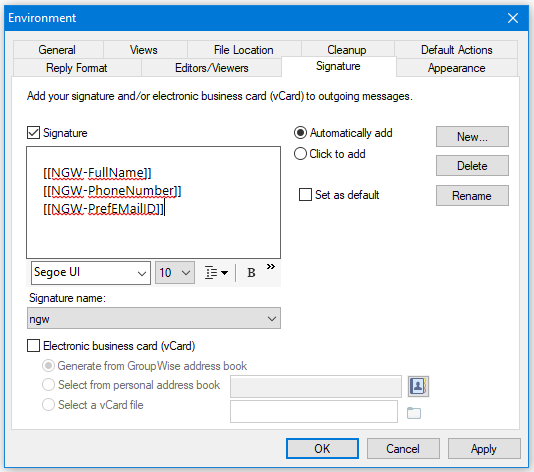
Edit the signatures within the GroupWise client: Tools | Options | Environment and click on the Signature Tab.
Add in the NGW variables to whichever values you would like in the signature. You must type them exactly or they will not work. Make sure to begin with open double braces: [[ followed by NGW in capital letters. Then use a hyphen (-) and type in the value you wish to use. Finally end with double closed braces. ]]. It will look something like this: [[NGW-FullName]]
NGW Variable Signature Example
A signature text that reads:
Sincerely,
-
[[NGW-GivenName]] [[NGW-Surname]]
Will produce a signature that bears the name of each individual user.
For example, if the users given name is Steve and surname is Cooper the signature will look like:
Sincerely,
-
Steve Cooper
Copying Source Signature to Other Users
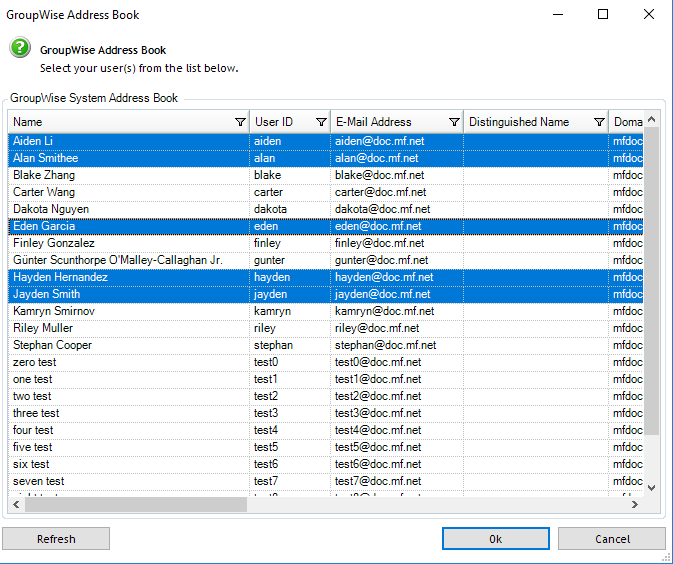
After you have typed in the variables to the signature and saved that within the GroupWise client open up GroupWise Mailbox Management.
-
Select the user that contains the newly created signature.
-
Click on the signature tab.
-
Select the signature.
-
Click the Copy button on the right. This will pull a list of all the users in your GroupWise system.
-
Use Shift (contiguous) or Control (discontiguous) + Click to select the users you wish to have the signature.
-
Once done click on OK.
This will assign the signature to each of the users. The variables will be replaced by the actual values you have entered.
Troubleshooting NGW Variable Signatures
NOTE:Note: If the variables don't appear to be working check the variable to make sure it is correct. Make sure that the variable you typed is exactly correct as stated above, and that the variable is also valid within GroupWise.
Within the Net Trace log for GroupWise Mailbox Management you will see that GroupWise Mailbox Management will try and take the values and replace them. If you do a search for SearchAndReplace you will be able to see that GroupWise Mailbox Management is taking the admin defined fields and trying to replace the values.
If the actual variable name does not show up in the log it is a good indication that the variable cannot be used by GroupWise Mailbox Management.
Below is the sample log where you can see the start of the Search and replace for the NGW variables:
29.06.2015 11:20:35: Start searchAndReplaceGroupWiseVariablesInHTMLbodypart() 29.06.2015 11:20:35: Going to fetch the email addresses of the user to read the preferred email address 29.06.2015 11:20:35: Connected domain is NOT primary, so loop through all domains. 29.06.2015 11:20:35: Given name: John 29.06.2015 11:20:35: Surname: Doe 29.06.2015 11:20:35: Phone: 29.06.2015 11:20:35: Dept: 29.06.2015 11:20:35: Title: 29.06.2015 11:20:35: End searchAndReplaceGroupWiseVariablesInHTMLbodypart()