Configuring the WebPublisher Application
During installation, the WebPublisher Application is set up with a default configuration. However, you can use the information in the following sections to optimize the WebPublisher Application configuration:
- Modifying the WebPublisher Application Environment Settings
- Controlling WebPublisher Application Logging
- Adding or Removing Service Providers
- Modifying WebPublisher Application Template Settings
- Controlling Availability of WebPublisher Features
Modifying the WebPublisher Application Environment Settings
Using ConsoleOne®, you can modify the WebPublisher Application's environment settings. The environment settings determine such things as the location where ConsoleOne stores the WebPublisher Application's configuration file.
To modify the environment settings:
-
In ConsoleOne, right-click the WebPublisher Application object (GroupWiseWebPublisher), click Properties.
NOTE: The WebPublisher Application object is not available in the GroupWise View. To locate the WebPublisher Application object, you must use the Console View.
-
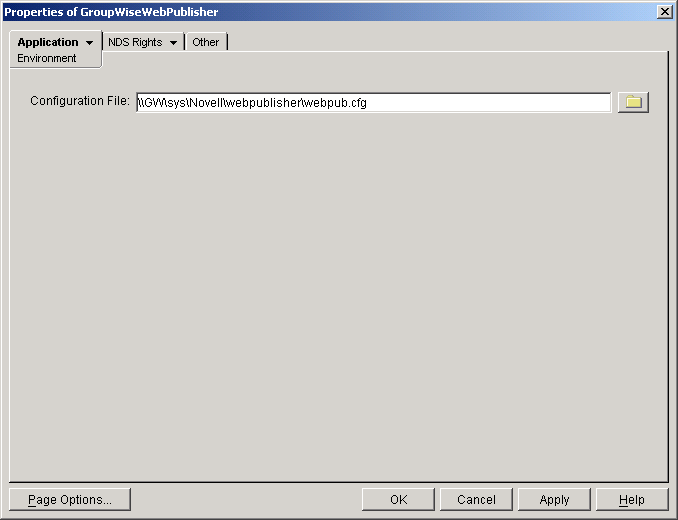
If necessary, click Application > Environment to display the Environment page.
-
Modify any of the following fields:
Configuration File: The WebPublisher Application does not have access to Novell® eDirectoryTM or the GroupWise® domain database. Therefore, ConsoleOne writes the application's configuration information to the file specified in this field. By default, this is the webpub.cfg file located in the WebPublisher Application's home directory (novell\webpublisher on the Web server or /opt/novell/groupwise/webpublisher on Linux).
In general, you should avoid changing the location of the file. If you do change the location of the file, you need to make sure to modify the webpub.cfg path in the Java servlet engine's properties file. If you do not, the WebPublisher Application will continue to look for its configuration information in the old location.
-
Click OK to save the changes.
Controlling WebPublisher Application Logging
The WebPublisher Application logs information to log files on disk. You can control the following logging features:
- The type of information to log
- How long to retain log files
- The maximum amount of disk space to use for log files
- Where to store log files
The WebPublisher Application creates a new log file each day and each time it is restarted (as part of the Web server startup). The log file is named mmddwps.nnn, where mm is the month, dd is the year, and nnn is a sequenced log file number (001 for the first log file of the day, 002 for the second, and so forth).
To modify the log settings:
-
In ConsoleOne, right-click the WebPublisher Application object, then click Properties.
-
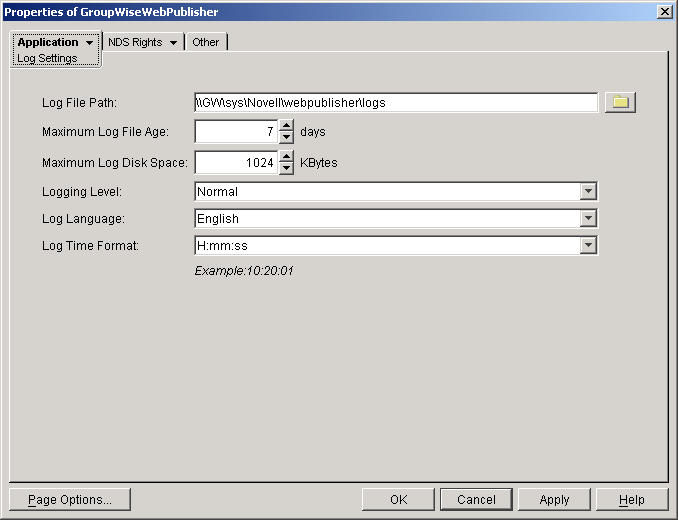
Click Application > Log Settings to display the Log Settings page.
-
Modify any of the following properties:
Log File Path: Specify the path to the directory where you want to store the log files.
On NetWare and Windows, the log files are stored in the novell\webpublisher\logs directory on the Web server by default. On Linux, the log files are stored in /opt/novell/groupwise/webpublisher/logs.
Maximum Log File Age: Specify the number of days you want to retain the log files. The WebPublisher Application will retain the log file for the specified number of days unless the maximum disk space for the log files is exceeded. The default age is 7 days.
Maximum Log Disk Space: Specify the maximum amount of disk space you want to use for the log files. If the disk space limit is exceeded, the WebPublisher Application will delete log files, beginning with the oldest file, until the limit is no longer exceeded. The default disk space is 1024 KB.
Logging Level: There are four logging levels: None, Normal, Verbose, and Diagnostic. None turns logging off; Normal displays warnings and errors; Verbose displays Normal logging plus information messages and user requests; and Diagnostic displays all possible information. The default is Normal logging. Use Diagnostic only if you are troubleshooting a problem with WebPublisher.
The verbose and diagnostic logging levels do not degrade WebPublisher Application performance, but log files saved to disk consume more disk space when verbose or diagnostic logging is in use.
Log Language: Select the language in which you want information written to the log files. The list contains many languages, some of which the WebPublisher Application might not support. If you select an unsupported language, the information will be written in English.
Log Time Format: Choose from the following formats to use when the WebPublisher Application records dates and times in the log files: HH:mm:ss:SS, MM/dd: H:mm:ss.SS, or dd/MM: H:mm:ss.SS. H and HH represent hours, mm represents minutes, ss and SS represent seconds, MM represents months, and dd represents days.
-
Click OK to save the log settings.
Adding or Removing Service Providers
The WebPublisher Application receives requests from users and then passes the requests to the appropriate service provider. The service provider fills the requests and returns the required information to the WebPublisher Application. The WebPublisher Application merges the information into the appropriate template and displays it to the user.
To function properly, the WebPublisher Application must know which service providers are available. By default, WebPublisher includes one service provider, the GroupWise Document service provider (GroupWiseDocumentProvider). The GroupWise Document service provider communicates with the WebAccess Agent to fill WebPublisher requests.
The GroupWise Document service provider is installed and configured at the same time as the WebPublisher Application. You can disable the GroupWise Document service by removing the GroupWise Document service provider. If you've created new service providers to expose additional services through GroupWise WebPublisher, you must define those service providers so that the WebPublisher Application knows about them.
To define service providers:
-
In ConsoleOne, right-click the WebPublisher Application object, then click Properties.
-
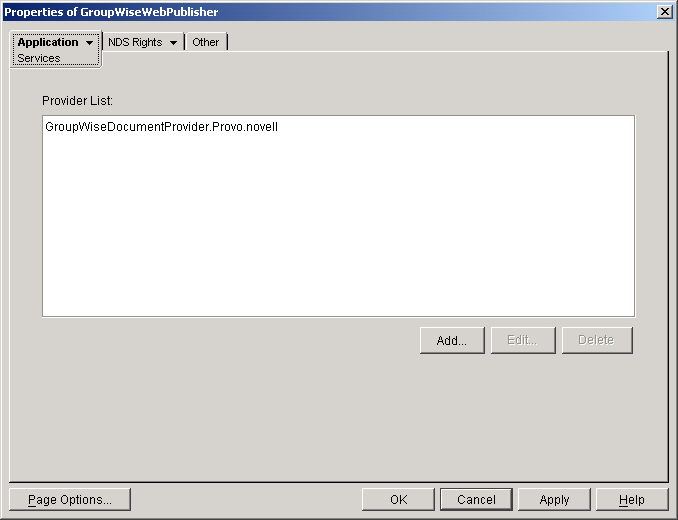
Click Application > Services to display the Services page.
The Provider List displays all service providers that the WebPublisher Application is configured to use.
-
Choose from the following options:
Add: To add a service provider to the list, click Add, browse for and select the service provider's object, then click OK.
Edit: To edit a service provider's information, select the provider in the list, then click Edit. For information about the modifications you can make, see Configuring the GroupWise Document Service Provider.
Delete: To remove a service provider from the list, select the provider > click Delete.
-
Click OK to save the changes.
Modifying WebPublisher Application Template Settings
When the WebPublisher Application receives information from a service provider, it merges the information into the appropriate WebPublisher template before displaying the information to the user. Using ConsoleOne, you can modify the WebPublisher Application's template settings. The template settings determine such things as the location of the templates, the maximum amount of server memory to use for caching the templates, and the default template language.
-
In ConsoleOne, right-click the WebPublisher Application object, then click Properties.
-
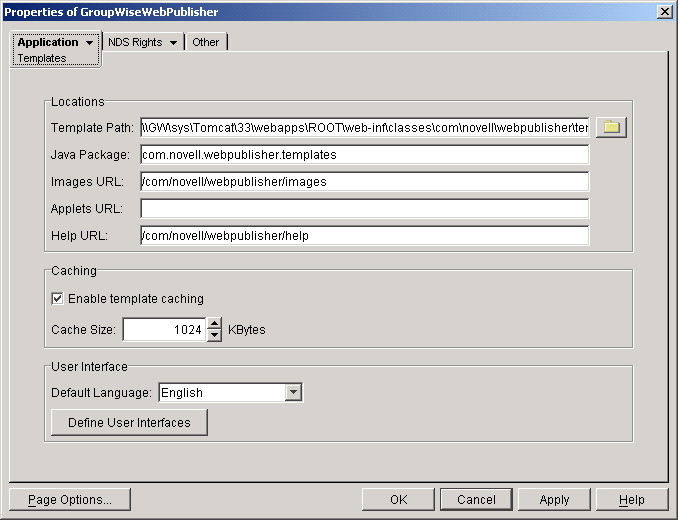
Click Application > Templates to display the Templates page.
-
Modify any of the following fields:
Template Path: Select the location of the template base directory. The template base directory contains the subdirectories for each of the templates provided with GroupWise WebAccess. Currently, only one template is provided for WebPublisher. This is an HTML template that uses frames; the template files are stored in the FRAMES subdirectory. If you create your own templates, you need to place the templates in a new subdirectory in the template base directory.
On a NetWare® server with the Novell Servlet Gateway, the default installation directory is java\servlets\com\novell\webpublisher\templates.
On a Windows server with the Novell Servlet Gateway, the default installation directory is novell\java\servlets\com\novell\webpublisher\templates.
On a NetWare or Windows server with Tomcat, the default installation directory is tomcat_dir\webapps\ROOT\web-inf\classes\com\novell\webpublisher\templates.
On a Linux server with Tomcat, the default installation directory is /var/opt/tomcat/webapps/gw/WEB-INF/classes/com/novell/webpublisher/templates.
Java Package: Specify the Java package that contains the template resources used by the WebPublisher Application. The default package is com.novell.webpublisher.templates.
Images URL: Specify the URL for the GroupWise WebPublisher image files. These images are merged into the templates along with the GroupWise document information. This URL must be relative to the Web server's document root directory. On NetWare and Windows, the default relative URL is /com/novell/webpublisher/images. On Linux, the default relative URL is /gw/com/novell/webpublisher/images.
Applets URL: GroupWise WebPublisher does not include any applets. If you create GroupWise WebPublisher applets, you need to specify the URL for the applets. To mirror the storage location of the GroupWise WebAccess applets, you can store the applets in a com\novell\webpublisher\applets directory under the Web server's document root directory. The applets URL would then be relative to the Web server's document root directory (for example, /com/novell/webpublisher/applets on NetWare or Windows, and /gw/com/novell/webpublisher/applets on Linux).
Help URL: Specify the URL for the GroupWise WebPublisher Help files. This URL must be relative to the Web server's document root directory. On NetWare and Windows, the default relative URL is /com/novell/webpublisher/help. On Linux, the default relative URL is /gw/com/novell/webpublisher/help.
Enable Template Caching: To speed up access to the template files, the WebPublisher Application can cache the files to the server's memory. Select this option to turn on template caching.
Cache Size: Select the maximum amount of memory, in kilobytes, you want to use when caching the templates. The default cache size, 1024 KB, is sufficient to cache all templates shipped with GroupWise WebPublisher. If you modify or add templates, you can turn on Verbose logging (WebPublisher Application object > Application tab > Log Settings page) to view the size of the template files. Using this information, you can then change the cache size appropriately.
Default Language: Select the language to use when displaying the initial GroupWise WebPublisher page. If users want the GroupWise WebPublisher interface (templates) displayed in a different language, they can change it on the initial page.
-
Click OK to save the changes.
Defining User Interfaces
-
From the WebPublisher Application object's Templates page, click Define User Interfaces to display the Define User Interfaces dialog box.

The dialog box includes three tabs:
User Interfaces: The User Interfaces tab lets you add, modify, and remove user interfaces, as well as determine whether or not GroupWise data added to an interface should be cached on proxy servers. Each interface consists of template files that support a specific content type. For example, the predefined Standard HTML interface uses frame-based HTML templates, located in the frames directory, that support the text/html content type.
Browser User Agents: The Browser User Agents tab lets you associate a user interface with a Web browser. The association is based on the browser's User Agent information (signature, platform, version, and so forth).
Browser Accept Types: The Browser Accept Types tab lets you associate a user interface with a Web browser. The association is based on the content type the browser will accept.
-
To add, remove, or modify user interfaces, click the User Interfaces tab.
The User Interface list displays all available user interfaces. The list includes the following information:
User Interface: This column displays the name assigned to the user interface (for example, Standard HTML).
Template: This column displays the directory in which the template files are located. Only the directory name is shown. You can append this directory name to the template path shown on the Templates page to see the full template directory path.
Content Type: This column displays the content type required by the templates (for example, text/html, text/x-hdml, or text/vnd.wap.wml).
Logout URL: By default, when a user logs out, he or she is returned to the standard login page. When adding or editing the user interface, you can use the logout URL to define a different page. If you do so, this column displays the URL. This URL overrides the logout URL specified on the WebPublisher Application object's Environment page (see Modifying the Speller Application Environment Settings).
Choose from the following options to manage the user interfaces:
Edit: Select a user interface in the list, then click Edit to edit the interface's name, template directory, content type, or proxy caching setting.
Default: Select a user interface in the list, then click Default to make that interface the default interface. The WebPublisher Application will use the default interface only if it can't determine the appropriate interface based on the browser's User Agent (Browser User Agent tab) or the browser's accepted content types (Browser Accept Types tab).
Delete: Select a user interface in the list, then click Delete to remove the interface. This only removes the entry from the list. It does not delete the template files from the template directory.
-
To associate a user interface with a Web browser based on the browser's User Agent information, click the Browser User Agents tab.
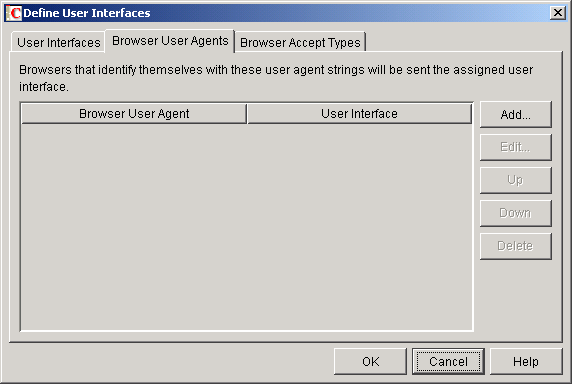
The Browser User Agents tab lets you associate a user interface with a Web browser. The association is based on the browser's User Agent information (signature, platform, version, and so forth). For example, if a browser's User Agent information includes "Windows CE" and you've created a specialized Windows CE user interface (templates), you could associate the User Agent and user interface so that Windows CE users would see your specialized Windows CE user interface.
If a browser's User Agent information matches more than one entry in the list, the application uses the first entry. If the browser's User Agent information does not match any entries in the list, the WebPublisher Application tries to select an interface based on the content types the browser will accept (Browser Accept Types tab). If no match is made based on the Accept Types information, the WebPublisher Application uses the default user interface listed on the User Interfaces tab.
Choose from the following options to manage the associations:
Edit: Select an entry from the list, then click Edit to edit the entry's information.
Up: Select an entry from the list, then click Up to move it up in the list. If two entries match the information in a browser's User Agent header, the WebPublisher Application uses the interface associated with the first entry listed.
Down: Select an entry from the list, then click Down to move it down in the list.
Delete: Select an entry from the list, then click Delete to remove the entry.
-
To associate a user interface with a Web browser based on the content type that the browser will accept, click the Browser Accept Types tab.
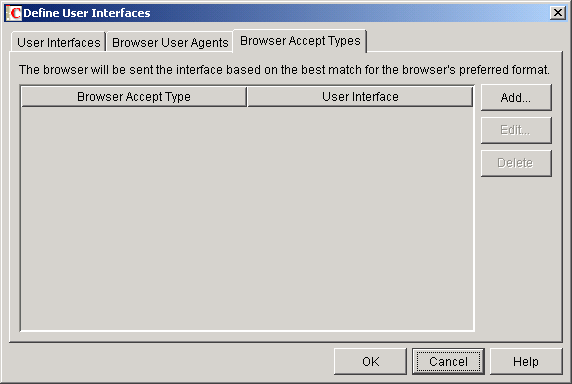
The Browser Accept Types tab lets you associate a user interface with a Web browser. The association is based on the content type the browser will accept.
Many browsers accept more than one content type (for example, both text/html and text/plain). If the list contains more than one acceptable content type, the WebPublisher Application uses the browser's preferred content type, which is the type that is listed first in the browser's Accept Type header.
If no interface can be determined based on the entries in the list, the WebPublisher Application uses the default user interface listed on the User Interfaces tab.
Choose from the following options to manage the associations:
-
Click OK to save your changes and return to the WebPublisher Application object's Templates page.
Controlling Availability of WebPublisher Features
WebPublisher users can:
- View documents in HTML format.
- Open documents in native format.
All users who access WebPublisher through a single Web server will have the same feature access. You cannot configure individual user settings. However, if you have multiple Web servers, you can establish different settings for the Web servers by completing the following steps for each server's WebPublisher Application.
To configure the WebPublisher Application's user settings:
-
In ConsoleOne, right-click the WebAccess Application object, then click Properties.
-
Click Application > Settings to display the Settings page.
-
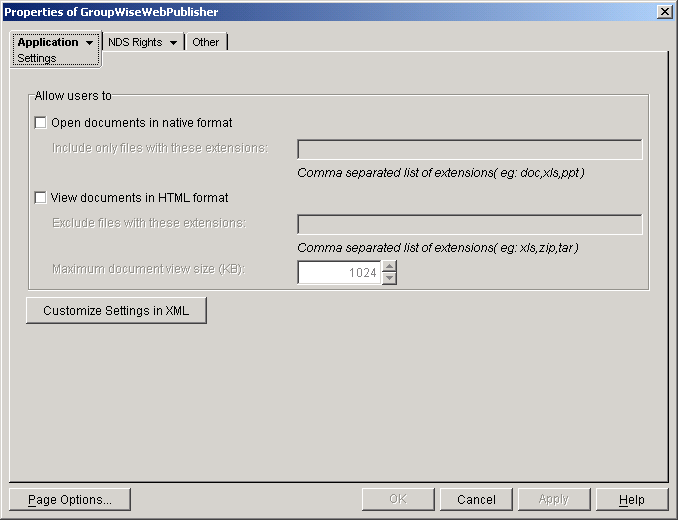
Configure the following settings:
Open Documents in Native Format: By default, the Save As option enables user to save library documents to their local drives and then open them in their native applications. You can turn on this option to enable the Open option. The Open option enables users to open documents directly in their native applications without first saving the files to the local drive.
This option requires that 1) each user's Web browser knows the correct application or plug-in to associate with the document, according to its file extension or MIME type, and 2) the application or plug-in is available to the user. Otherwise, the user will be prompted to save the file to disk or specify the application to open it.
This option and the View Documents in Native Format option can both be enabled at the same time. Doing so gives users both the Open option and the View option, which means they have the choice of opening a document in its native application or viewing it as HTML.
Include Only Files With These Extensions: If you want only certain file types to be have the Open option, enter the file types in the Include Only Files With These Extensions field. Include only the extension and separate each extension with a comma (for example, doc, xls, ppt). The Open option will not be available for any file types not entered in this field.
View Documents in HTML Format: Enable this option if you want users to be able to view library documents in HTML format. Disable this option to require users to save a document to a local drive and view it in its native application. WebAccess uses Stellent Outside In HTML Export to convert files to HTML format.
For a list of the supported file format conversions, download the following document from the Stellent Web site:
OutSide In Supported Platforms and File Formats
This option and the Open Documents in Native Format option can both be enabled at the same time. Doing so gives users both the View option and the Open option, which means they have the choice of viewing a document as HTML or opening it in its native application.
Exclude Files With These Extensions: If you want to exclude certain file types from having the View option, enter the file types in the Exclude Files With These Extensions field. Include only the extension and separate each extension with a comma (for example, doc, xls, ppt). The View option will be available for any file types not entered in this field.
Maximum Document View Size: Specify the maximum size file that can be viewed in HTML format. If a file exceeds the maximum size, it must be opened in native format (if allowed) rather than viewed in HTML format. The default maximum size is 1024 KB.
-
Click OK.