Setting Up GroupWise WebAccess
Setting Up GroupWise WebAccess on NetWare or Windows
Complete the following tasks to set up GroupWise WebAccess and WebPublisher:
- Installing the WebAccess Agent
- Installing the WebAccess Application and WebPublisher Application
- Starting GroupWise WebAccess
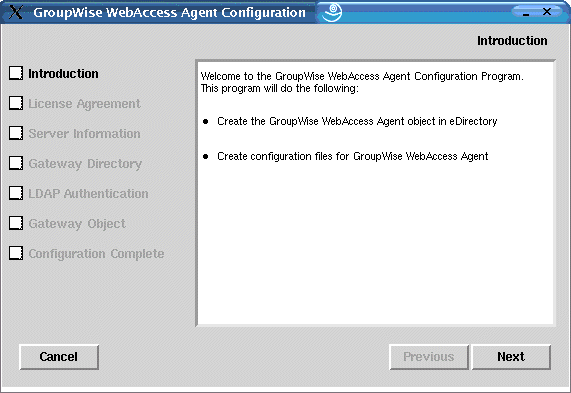
Installing the WebAccess Agent
The following steps provide instructions for installing the WebAccess Agent. For information about installing the WebAccess and WebPublisher Applications to a Web server, see Installing the WebAccess Application and WebPublisher Application.
-
Make sure you install from the appropriate Windows workstation/server:
- If you are installing to a NetWare server, you can run the WebAccess Installation program on any Windows workstation.
- If you are installing to a Windows server, you must run the WebAccess Installation program on that server.
-
Make sure the Windows workstation/server from which you will perform the installation has the Novell ClientTM installed.
The WebAccess Installation program creates GroupWise objects in eDirectory. The Novell Client is required to access eDirectory. If necessary, you can download the Novell Client from the Novell Product Downloads site.
-
Make sure you have the file system and eDirectory access required to install the WebAccess Agent:
- You need full file system rights to the GroupWise domain directory where the WebAccess Installation program will create the WebAccess Agent's gateway directory. See Item 5: Gateway Directory in the GroupWise WebAccess Installation Worksheet.
- You need full file system rights to the server where the WebAccess Installation program will install the WebAccess Agent. If you are installing to a Windows server, you must run the WebAccess Installation program on that server. See Item 2: Server Platform and Installation Directory in the GroupWise WebAccess Installation Worksheet.
- The WebAccess Installation program creates the WebAccess Agent object below the GroupWise Domain object in eDirectory. For it to do so, you must have Admin rights (or Admin equivalent rights) to the eDirectory container where the GroupWise Domain object resides.
-
Shut down any other GroupWise agents (MTA, POA, or Internet Agent) running on the server.
This allows the WebAccess Installation program to properly install the agents' common files (also referred to as the agent engine files). The WebAccess Installation program will attempt to shut down the GroupWise agents on a NetWare server. We recommend, however, that you shut down these agents yourself before starting the installation.
-
Insert the GroupWise 6.5 Administrator CD into the CD drive to start the WebAccess Installation program, click Install Products, click GroupWise WebAccess, then click Install GroupWise WebAccess. If the Installation program does not start automatically, run setup.exe from the root of the CD.
or
If you've already copied the GroupWise WebAccess software to a software distribution directory, run internet\webacces\setup.exe.
-
Click Yes to accept the license agreement and display the GroupWise WebAccess: Components dialog box.
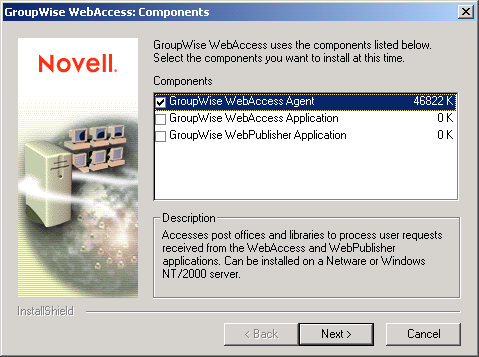
-
Select GroupWise WebAccess Agent. Deselect the GroupWise WebAccess Application and GroupWise WebPublisher Application options.
NOTE: You can also install the WebAccess Application and WebPublisher Application to your Web server at this time provided that 1) you have the appropriate Web server file system access and eDirectory access (see Installing the WebAccess Application and WebPublisher Application) and 2) you are running the WebAccess Installation program on that Web server, if it is a Windows Web server and you are installing the Novell Servlet Gateway.
-
Click Next, then follow the installation prompts, using the information you recorded on the GroupWise WebAccess Installation Worksheet.
-
Continue with Installing the WebAccess Application and WebPublisher Application.
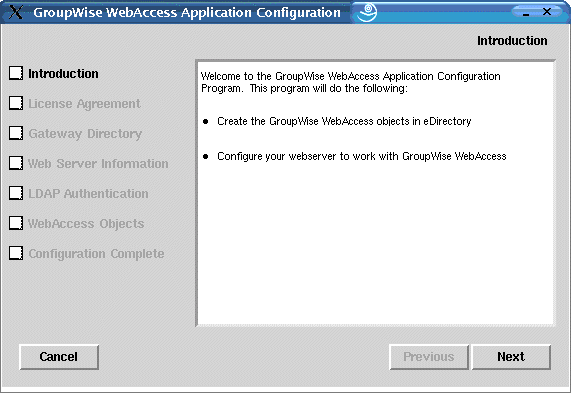
Installing the WebAccess Application and WebPublisher Application
The following steps provide instructions for installing the WebAccess Application and WebPublisher Application. For information about installing the WebAccess Agent, see Installing the WebAccess Agent.
-
Make sure you install from the appropriate Windows workstation/server:
- If you are installing to a NetWare Web server, you can run the WebAccess Installation program on any Windows workstation.
- If you are installing to a Windows Web server, you must run the WebAccess Installation program on that server.
-
Make sure the Windows workstation/server from which you will perform the installation has the Novell Client installed.
The WebAccess Installation program creates GroupWise objects in eDirectory. The Novell Client is required to access eDirectory. If necessary, you can download the Novell Client from the Novell Product Downloads site.
-
Make sure you have the file system and eDirectory access required to install the WebAccess Application and the WebPublisher Application:
- You need full file system rights to the GroupWise domain directory. See Item 5: Gateway Directory in the GroupWise WebAccess Installation Worksheet.
- You need full file system rights to the Web server. If your Web server is on a UNIX server, the WebAccess Installation program copies tar files to a location you specify; this can be the UNIX server if you have access to it from the Windows workstation where you are performing the installation, or another location from which you can then copy the tar files to the UNIX server. See Item 13: Web Server Type and Root Directory in the GroupWise WebAccess Installation Worksheet.
- The WebAccess Installation program creates the WebAccess Application and WebPublisher Application objects (and their associated provider objects) in a container you specify (worksheet item 19). Make sure you have Admin rights (or Admin-equivalent rights) to the container. The default container is the GroupWise Domain object.
-
Shut down the JVM and the Web server.
When installing the WebAccess Application and WebPublisher Application to a NetWare or Windows Web server, the WebAccess Installation program will attempt to shut down the Web server and the JVM. We recommend, however, that you manually shut down the Web server and the JVM yourself before starting the installation.
-
Insert the GroupWise 6.5 Administrator CD into the CD drive to start the WebAccess Installation program, click Install Products, click GroupWise WebAccess, then click Install GroupWise WebAccess. If the Installation program does not start automatically, run setup.exe from the root of the CD.
or
If you've already copied the GroupWise WebAccess software to a software distribution directory, run setup.exe from the internet\webacces directory.
-
Click Yes to accept the license agreement and display the GroupWise WebAccess: Components dialog box.

-
Select GroupWise WebAccess Application and GroupWise WebPublisher Application (if you plan to use WebPublisher). Deselect the GroupWise WebAccess Agent option.
-
Click Next, then follow the installation prompts, using the information you recorded on the GroupWise WebAccess Installation Worksheet.
-
After installation is complete, you might need to do the following:
- If you kept your Web server's default home page, create a link from your home page to the Novell Web Services page (novell.htm file) in the document root directory.
- If you chose to use an existing Java servlet engine rather than installing the Novell Servlet Gateway, modify the Java servlet engine's servlet properties files to include the settings shown in the sample WebAccess servlet.properties file. This sample file is located in the internet\webacces\other directory on the CD.
- If you chose to use an existing JVM on Windows rather than update to the one included with GroupWise WebAccess, edit the servletgateway.properties file and change the java.base setting to point to the existing JVM (for example, c:\jdk1.1.8). The servletgateway.properties file is located the novell\java\servlets directory.
- If you are installing to an Apache Web server on UNIX Solaris, continue with Completing the Installation on a UNIX Apache Web Server.
Completing the Installation on a UNIX Apache Web Server
The WebAccess Installation program copies the following files to the location you specified: webaccess.tar, webaccessdocs.tar, webaccessjars.tar, webaccessservlets.tar, index.html, servlets.properties, and commgr.cfg. It also creates a palm subdirectory for the Palm Query Application (PQA) file it creates.
To complete the installation and configuration process:
-
Using the tar -xvf command, extract the following tar files to the specified locations:
webaccess.tar: Extract to the root of the UNIX server. A /novell directory is created for the files.
webaccessdocs.tar: Extract to the Apache document root directory (for example, /usr/local/apache/htdocs).
webaccessservlets.tar: Extract to the Tomcat ROOT/WEB-INF/classes directory (for example, /usr/local/tomcat/webapps/ROOT/WEB-INF/classes).
webaccessjars.tar: Extract to the Tomcat ROOT/WEB-INF/lib directory (for example, /usr/local/tomcat/webapps/ROOT/WEB-INF/lib).
-
Modify the Tomcat web.xml file to include the following information. The web.xml file is in the Tomcat ROOT/WEB-INF directory.
<web-app>

<servlet>
<servlet-name>webacc</servlet-name>
<servlet-class>com.novell.webaccess.WebAccessServlet</servlet-class>
<init-param>
<param-name>Config</param-name>
<param-value>/novell/webaccess/webacc.cfg</param-value>
</init-param>
<load-on-startup> </load-on-startup>
</servlet>

<servlet>
<servlet-name>spellchk</servlet-name>
<servlet-class>com.novell.collexion.spell.servlet.SpellServlet</servlet-class>
<init-param>
<param-name>Config</param-name>
<param-value>/novell/webaccess/spellchk.cfg</param-value>
</init-param>
<load-on-startup> </load-on-startup>
</servlet>

<servlet>
<servlet-name>webpub</servlet-name>
<servlet-class>com.novell.webpublisher.WebPublisherServlet</servlet-class>
<init-param>
<param-name>Config</param-name>
<param-value>/novell/webpublisher/webpub.cfg</param-value>
</init-param>
<load-on-startup> </load-on-startup>
</servlet>

</web-app>
NOTE: If you will not use WebPublisher, do not include the webpub servlet definition.
-
Modify the webacc.cfg and webpub.cfg files, located in the /novell/webaccess and /novell/webpublisher directories at the root of the UNIX server, to change the Templates.path setting to point to the templates.
For example, change the following line in webacc.cfg:
Templates.path=/java/servlets/com/novell/webaccess/templates
to
Templates.path=/usr/local/tomcat/webapps/ROOT/WEB-INF/classes/com/novell/webaccess/templates
-
Copy the commgr.cfg file to the /novell/webaccess directory. If you installed GroupWise WebPublisher, you also need to copy the file to the /novell/webpublisher directory.
-
In the webacc.cfg file, verify that the paths for the following settings point to valid directories. Typically, these directories reside in the /novell/webaccess directory, but you can relocate them if desired. Refer to the comments in the webacc.cfg file for explanations of each of these settings.
Log.path=/novell/webaccess/logs
Security.Timeout.path=/novell/webaccess/users
File.Upload.path=/novell/webaccess/temp
Verify that the paths for the following settings are correct.
Provider.GWAP.Config.file=/novell/webaccess/commgr.cfg
Provider.LDAP.Config.file=/novell/webaccess/ldap.cfg -
In the webpub.cfg file, verify that the paths for the following settings point to valid directories. Typically, these directories are reside in the /novell/webpublisher directory, but you can relocate them if desired. Refer to the comments in the webpub.cfg file for explanations of each of these settings.
Log.path=/novell/webpublisher/logs
File.Upload.path=/novell/webpublisher/temp
Verify that the path for the following setting is correct.
Provider.GWDOC.Config.file=/novell/webpublisher/commgr.cfg
-
Copy the index.html file to the Apache document root directory (for example, /usr/local/apache/htdocs). You can replace your Web server's current default home page with this file, or you can rename the file and link to it from your current default home page.
Starting GroupWise WebAccess
If you did not have the WebAccess Installation program start the WebAccess components, complete the following steps:
-
Restart the JVM, Java servlet engine, and Web server. This loads the WebAccess Application (and WebPublisher Application if you installed it).
-
To start the WebAccess Agent on a NetWare server, enter strtweb.ncf at the system console.
or
To start the WebAccess Agent as an application on a Windows server, click the Start menu > Programs > Novell GroupWise WebAccess > GroupWise WebAccess.
or
To start the WebAccess Agent as a service on a Windows server, open the Services window (from the Control Panel or the Administrative Tools window), right-click the WebAccess service, then click Start.
If you need to stop the NetWare WebAccess Agent, press F7-Exit at the WebAccess agent console or enter stopweb and the NetWare server console.
If you need to stop the Windows WebAccess Agent and it is running as an application in its own window, close the window. If it is running as a Windows service, open the Services window, right-click the WebAccess service, then click Stop.
-
If you shut down other GroupWise agents to install the WebAccess Agent, make sure you start the agents again.
Setting Up GroupWise WebAccess on Linux
Complete the following tasks to set up GroupWise WebAccess and WebPublisher. These tasks are designed to help you get Linux WebAccess up and running as quickly as possible and to help you manage the WebAccess Agent in the future.
- Installing the Linux WebAccess Agent
- Configuring the Linux WebAccess Agent
- Installing and Configuring the WebAccess Application and WebPublisher Application
- Starting the Web Server
- Starting the Linux WebAccess Agent for the First Time
- Monitoring the Linux WebAccess Agent from Your Web Browser
- Starting the Linux WebAccess Agent on System Startup
- Stopping the Linux WebAccess Agent
- Configuring WebPublisher on Linux
Installing the Linux WebAccess Agent
-
Make sure you have set up a basic GroupWise test system, described in Installing a Basic GroupWise System.
-
Make sure that LDAP is running on your eDirectory server and that it is configured to accept login from the WebAccess Agent Installation program (worksheet item 11)
The Installation Advisor requires eDirectory access in order to create the WebAccess Agent object in eDirectory. The Installation Advisor uses LDAP to gain the required access.
-
Open a new terminal window, then enter the following command:
xhost + localhost
If you cannot execute this command because the X Window System is not running on the Linux server, see Installing the GroupWise Agents Using the Text-Based Installation Advisor. Similar steps can be used to install the WebAccess Agent without needing the X Window System.
-
In the same window, become root by entering su and the root password.
-
Change to the root of the GroupWise 6.5 for Linux Administrator CD.
-
Enter ./install.
-
Select the language in which you want to run the Installation Advisor and install the WebAccess software, then click Next.
-
In the Installation Advisor, click Install Products > GroupWise WebAccess > Install WebAccess Agent.
The WebAccess Agent software is installed to the bin and lib subdirectories of /opt/novell/groupwise/agents.
-
When the installation is complete, click OK.
-
Continue with Configuring the Linux WebAccess Agent.
Configuring the Linux WebAccess Agent
-
After the WebAccess Agent files have been installed, click Configure WebAccess Agent.
The WebAccess Agent installation and configuration steps are separate so that you can install updated agent software without needing to repeat the agent configuration steps.
-
Review the Introduction, then click Next.
-
Accept the License Agreement, then click Next.
-
Specify the IP address or DNS hostname of the Linux server where you are installing the WebAccess Agent (worksheet item 3), then click Next.
The default port number of 7205 is typically acceptable, unless another program is already using that port.
-
Browse to and select the domain directory for the domain where you are installing the WebAccess Agent (worksheet item 5), then click Next.
The default WebAccess Agent subdirectory (webac65a) is typically acceptable. It is created as a subdirectory of the domain/wpgate directory.
-
Fill in the LDAP information (worksheet item 11), then click Next.
-
Fill in the domain and agent information (worksheet item 6), then click Next.
On the Configuration Complete page, Launch WebAccess Agent on System Startup is selected by default.
-
If you do not want the WebAccess Agent to start automatically when the server restarts, deselect Launch WebAccess Agent on System Startup.
-
Click Exit to complete the configuration.
-
Continue with Installing and Configuring the WebAccess Application and WebPublisher Application.
Installing and Configuring the WebAccess Application and WebPublisher Application
-
After installing and configuring the WebAccess Agent, click Install GroupWise WebAccess Application with Apache and Tomcat.
This installs a version of Apache and Tomcat specifically for use with GroupWise. Apache files are installed under /var/opt/novell/http and /etc/opt/novell/http. Tomcat files are installed under /var/opt/novell/tomcat4 and /etc/opt/novell/tomcat4.
In addition, a self-signed certificate is generated, enabling users to use WebAccess and WebPublisher using an SSL connection.
or
If you want to use an existing Apache and Tomcat installations, click Install GroupWise WebAccess Application.
-
When the installation is complete, click OK.
-
Click Configure WebAccess Application.
-
Review the Introduction, then click Next.
-
Accept the License Agreement, then click Next.
-
Browse to and select the WebAccess subdirectory (typically webac65a) under domain/wpgate (worksheet item 5).
-
Click Next to accept the default Apache and Tomcat locations that were established in Step 1.
or
Specify the locations of Apache and Tomcat installations on your system, then click Next.
-
Fill in the LDAP information (worksheet item 11), then click Next.
-
Browse to and select the eDirectory context where you want the WebAccess Application objects to be created. (worksheet item 19), then click Next.
The GroupWise WebAccess objects are GroupWiseWebAccess, GroupWiseProvider, LDAPProvider, and NovellSpeller.
-
On the Configuration Complete page, click Exit to complete the configuration.
-
Continue with Starting the Web Server.
Starting the Web Server
If you installed Apache and Tomcat along with the WebAccess Application, follow the instructions below to start the Web server. If you did not install Apache and Tomcat along with the WebAccess Application, restart Apache and Tomcat on your system.
-
Make sure you are logged in as root.
-
If you have other instances of Apache and Tomcat running on this server, bring them down before you start the new versions you just installed.
-
Change to the /etc/init.d directory.
-
Start Tomcat.
./novell-tomcat4 start
-
Wait until Tomcat is all the way up.
-
Start Apache.
./novell-httpd start
-
Continue with Starting the Linux WebAccess Agent for the First Time.
Starting the Linux WebAccess Agent for the First Time
You can choose to start the WebAccess Agent with or without a user interface.
- Starting the Linux WebAccess Agent with a User Interface
- Starting the Linux WebAccess Agent as a Daemon
Starting the Linux WebAccess Agent with a User Interface
-
Make sure you are logged in as root.
-
Make sure that the MTA for the domain is running.
-
Change to the /opt/novell/groupwise/agents/bin directory.
-
To start the WebAccess Agent, enter the following command:
./gwinter --show --home domain_directory/wpgate/webac65a &
The WebAccess Agent --show switch does not display an agent console interface like the other GroupWise agents. Instead, WebAccess configuration and status information displays in the terminal window where you start the WebAccess Agent.
The --home startup switch specifies the domain directory and is required to start the WebAccess Agent.
The ampersand (&) causes the WebAccess Agent to run in the background, so that the terminal window you started it in is again available for use.

Status messages for the WebAccess Agent are written to the WebAccess Agent log file (mmddlog.nnn) in the /var/log/novell/groupwise/domain.webac65a directory. The log file name includes the month and day when it was created, along with an incrementing extension to accommodate multiple log files on the same day.
-
Skip to Monitoring the Linux WebAccess Agent from Your Web Browser.
Starting the Linux WebAccess Agent as a Daemon
-
Make sure you are logged in as root.
-
Make sure that the MTA for the domain is running.
-
Change to the /etc/init.d directory.
-
To start the WebAccess Agent, enter the following command:
./grpwise-wa start
-
To confirm that the WebAccess Agent has started, enter the following command:
ps -eaf | grep gwinter
This lists all of the WebAccess Agent process IDs.
-
Continue with Monitoring the Linux WebAccess Agent from Your Web Browser.
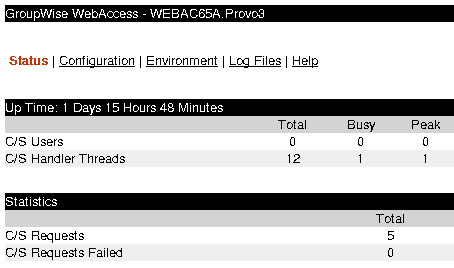
Monitoring the Linux WebAccess Agent from Your Web Browser
Before you can monitor the Linux WebAccess Agent from your Web browser, you must configure its HTTP port and, if desired, provide a username and password to prevent unauthorized access.
-
In ConsoleOne, right-click the WebAccess Agent object, then click Properties.
-
Click GroupWise > Network Address to display the Network Address page.
-
In the HTTP Port field, enter a port number. We recommend that you use port 7211 if it is not already in use on the WebAccess Agent's server.
By default, any user who knows the WebAccess Agent's IP address (or hostname) and the HTTP port number can use the Web console. If you want to restrict Web console access, you can assign a username and password.
-
Click GroupWise > Optional Gateway Settings to display the Optional Gateway Settings page.
-
In the HTTP User Name field, enter an arbitrary username (for example, webacc).
-
Click Set Password to assign a password (for example, monitor).
-
Click OK to save your changes.
-
To monitor the WebAccess Agent from your Web browser, view the WebAccess Agent Web console by supplying the IP address and port number of the WebAccess Agent. For example:
http://172.16.5.18:7211
Starting the Linux WebAccess Agent on System Startup
If you selected Launch WebAccess Agent on System Startup in the WebAccess Agent Installation program, the WebAccess Installation program configured your system so that the WebAccess Agent would start automatically each time you restart your server. The WebAccess Installation program always creates a grpwise-wa startup script in /etc/init.d for starting the WebAccess Agent. To enable automatic startup, the WebAccess Installation program also creates symbolic links named S99grpwise-wa in the rc3.d and rc5.d directories so that the WebAccess Agent can load on startup into runlevel 3 or 5, depending on the configuration of your Linux system.
When the grpwise-wa script runs and starts the WebAccess Agent, it reads the WebAccess Agent configuration file (webaccess_agent_object.cfg) in /opt/novell/groupwise/agents/share to check for configuration information provided by startup switches. Because the WebAccess Agent does not have a user interface like the MTA, POA, and Internet Agent, the --show switch can be used in the configuration file. However, the information is directed to standard output, which might not be readily available to you.
Stopping the Linux WebAccess Agent
When you start the WebAccess agent with the grpwise.wa script, you can also use the script to stop it.
-
Make sure you are logged in as root.
-
Change to the /etc/init.d directory.
-
To stop the WebAccess Agent, enter the following command:
./grpwise-wa stop
-
To confirm that the WebAccess Agent has stopped, enter the following command:
ps -eaf | grep gwinter
The only gwinter process ID you should see listed is the one for the grep command.
When you start the WebAccess Agent manually (without using the grpwise-wa script), use the standard Linux kill command to stop it.
-
Make sure you are logged in as root.
-
Determine the process ID (PID) of the WebAccess Agent:
ps -eaf | grep gwinter
The PIDs for all gwinter processes are listed.
-
Kill the first gwinter process in the list:
It might take a few seconds for all gwinter processes to terminate.
-
Repeat the ps command to verify that the WebAccess Agent has stopped.
Configuring WebPublisher on Linux
After installing and configuring WebAccess, as described in Setting Up GroupWise WebAccess on Linux, if you want to enable WebPublisher as well, you must perform some manual configuration.
-
In ConsoleOne, connect to the domain where the WebAccess Agent object was created during installation.
-
In a convenient context, create a new user specifically for use with WebPublisher.
-
Add the new user to a post office and provide a GroupWise password for the WebPublisher user.
-
Browse to and right-click the WebAccess Agent object (by default, WEBAC65A), then click Properties > WebPublisher.

-
In the GroupWise Mailbox ID field, specify the WebPublisher user you created in Step 2 above.
-
Click Add, then select the library for WebPublisher to access for documents.
-
Select Assign General User Access to WebPublisher Users.
-
In the Disk Cache Path field, specify /opt/novell/groupwise/webpublisher/cache.
-
Click OK to save the WebPublisher configuration information.
-
Restart your Web server, as described in Starting the Web Server
-
Restart the WebAccess Agent, as described in Starting the Linux WebAccess Agent for the First Time.
In order the add documents to the library so that they can be viewed on the Internet, WebPublisher user must use the GroupWise Windows client. See "Publishing Documents to the Web with WebPublisher" in "Creating and Working with Documents" in the GroupWise 6.5 Windows Client User Guide. This functionality is not currently available in the GroupWise Cross-Platform client.
Testing GroupWise WebAccess and WebPublisher
To test GroupWise WebAccess and WebPublisher, complete the steps in the following sections:
- Testing WebAccess on a Workstation
- Testing WebAccess on a Wireless Device
- Testing WebAccess on a Palm OS Device (NetWare and Windows WebAccess)
- Testing GroupWise WebPublisher
Testing WebAccess on a Workstation
-
To access the WebAccess client when the WebAccess Agent is running on NetWare or Windows, in a Web browser, enter the IP address or hostname of the Web server.
http://web_server_address
or
To access the WebAccess client when the WebAccess Agent is running on Linux, in a Web browser, enter the IP address or hostname of the Web server plus the directory where the Novell Web Services page is located:.
http://web_server_address/gw
-
On NetWare and Windows, if the Novell Web Services page is not the Web server's default page, click the link you created to the page.
-
Select a GroupWise WebAccess language, then click Go to display the Login page.
You can bypass the Novell Web Services page to go directly to the Login page by using the following URL:
NetWare/Windows: http://web_server_address/servlet/webacc
Linux: http://web_server_address/gw/webaccwhere web_server_address is the IP address or DNS hostname of your Web server. If the Web server uses SSL, you'll need to use https rather than http.
-
Type your GroupWise user ID or GroupWise full name in the Name box and your GroupWise mailbox password in the Password box.
-
Click Login to display the GroupWise WebAccess main window.
-
Click Help for more information about using GroupWise WebAccess.
Testing WebAccess on a Wireless Device
-
Enter the following URL:
NetWare/Windows: http://web_server_address/servlet/webacc
Linux: http://web_server_address/gw/webaccwhere web_server_address is the IP address or DNS hostname of your Web server. If the Web server uses SSL, you'll need to use https rather than http.
Follow the instructions in your wireless device's documentation to add this URL to your Favorites or Bookmarks so you don't need to type the URL every time you log in.
-
Enter your GroupWise user ID and GroupWise mailbox ID.
Testing WebAccess on a Palm OS Device (NetWare and Windows WebAccess)
-
Add the GroupWise Web Clipping Application (groupwise.pqa) to your Palm OS device. The groupwise.pqa file is located in the Web server's doc_root_directory\com\novell\webacces\palm\en directory.
The GroupWise Web Clipping Application is not created by Linux WebAccess.
-
Open the GroupWise Application. To do so, tap the Applications icon, tap the pick-list in the upper-right corner of the screen, select Palm.Net, then tap GroupWise.
-
Enter your GroupWise user ID and password, then log in.
Testing GroupWise WebPublisher
GroupWise WebPublisher only supports access through a Web browser on a computer. Wireless devices are not supported.
-
To use WebPublisher when the WebAccess Agent is running on NetWare or Windows, in a Web browser, enter the IP address or hostname of the Web server.
http://web_server_address
or
To use WebPublisher when the WebAccess Agent is running Linux, in a Web browser, enter the IP address of hostname of the Web server plus the directory where the Novell Web Services page is located.
-
On NetWare and Windows, if the Novell Web Services page is not the Web server's default page, click the link you created to the page.
-
Select a GroupWise WebPublisher language, then click Go to display GroupWise WebPublisher.
You can bypass the Novell Web Services page to go directly to WebPublisher by using the following URL:
Linux: http://web_server_address/gw/webpub
NetWare and Windows: http://web_server_address/servlet/webpubwhere web_server_address is the IP address or DNS hostname of your Web server. If the Web server uses SSL, you'll need to use https rather than http.
-
To search for a specific document, enter the search words, then click Search.
or
To browse the documents in a library, click Document Browse, then click the library you want to browse. When you browse a library, the first 10 documents are listed. You can list additional documents if desired.
-
Click Help for more information about using GroupWise WebPublisher.