Setting Up Your Messenger System in a Cluster
You should have already reviewed Planning Your Messenger System in a Cluster and filled out the Messenger Clustering Worksheet and the "Novell Messenger System Worksheet" in the Messenger 1.0 Installation Guide. Follow the instructions for the installation location you have chosen:
Installing to Each Node in the Cluster
There are two methods of installing the Messenger agents to each node in the cluster:
- Run the Messenger Installation program multiple times in order to install the agent software and to create the agent startup files on each node in the cluster.
- Run the Messenger Installation program, then copy the Messenger agent software and startup files to each node in the cluster.
Use whichever method you prefer, following the steps provided in "Starting the Messenger Installation Program" and "Creating Your Messenger System" in "Installing a Novell Messenger System" in the Messenger 1.0 Installation Guide. Make each node in the cluster active to make sure that the Messenger agents start successfully.
Installing to a Messenger Volume
Complete the following tasks to set up your Messenger system on a Messenger volume:
- Preparing the Cluster for Messenger
- Running the Messenger Installation Program
- Configuring the Messenger Volume Resource to Load and Unload the Messenger Agents
- Copying LDAP and QuickFinder Files to Each Node
- Testing Your Clustered Messenger System
Preparing the Cluster for Messenger
Cluster preparation for Messenger is the same as cluster preparation for GroupWise. Review Preparing the Cluster for GroupWise before running the Messenger installation program.
Running the Messenger Installation Program
The Messenger Installation program walks you through setting up your Messenger system and installing the Messenger agents.
-
If necessary, map a drive to the Messenger administration volume (Messenger Clustering Worksheet item 7).
-
Map a drive to the Messenger volume (Messenger Clustering Worksheet item 9).
The Messenger volume name will be cluster_volume. For assistance with mapping a drive to a cluster-enabled volume, see Configuring Short Name Resolution.
-
Run the Messenger Installation program at an administrator workstation to set up your Messenger system, following the steps provided in "Starting the Messenger Installation Program" and "Creating Your Messenger System" in "Installing a Novell Messenger System" in the Messenger 1.0 Installation Guide. Keep in mind the following cluster-specific details:
- When you specify the Messenger installation directory, be sure to browse to the location through the Messenger volume accessed in Step 2 above.
- When you specify the ConsoleOne directory, be sure to browse to the location through the Messenger administration volume accessed in Step 1 above.
- On the Start Copying Files page, the server object name should be the virtual server name, not a physical server name.
-
When you have finished creating your Messenger system, continue with Configuring the Messenger Volume Resource to Load and Unload the Messenger Agents.
Configuring the Messenger Volume Resource to Load and Unload the Messenger Agents
The properties of the Volume Resource object define how the Messenger volume functions within the cluster, how the Messenger agents are loaded and unloaded, and how failover and failback situations are handled.
-
In ConsoleOne, browse to and select the Cluster object.
If necessary, click View > Console View to display its contents.
-
Right-click the Volume Resource object (volume_SERVER), then click Properties > Load to display the default volume resource load script for the Messenger volume.
The volume resource load script executes whenever the Messenger volume comes online.
-
Add the following lines to the load script:
load volume:\novell\nm\ma\nmma.nlm @volume:novel\nm\ma\strtup.ma
load volume:\novell\nm\aa\nmaa.nlm @volume:novel\nm\aa\strtup.aawhere volume is the name of the Messenger volume (Messenger Clustering Worksheet item 9).
For example:
load gwmsgr:\novell\nm\ma\nmma.nlm @gwmsgr:novel\nm\ma\strtup.ma
load gwmsg:\novell\nm\aa\nmaa.nlm @gwmsgr:novel\nm\aa\strtup.aa -
Click apply to save the load script.
-
Click Unload.
-
Add the following lines to the unload script:
unload nmma.nlm
unload nmaa.nlm -
Click Apply to save the unload script.
-
Click Nodes to display the default failover path for the Messenger volume.
-
Arrange the nodes in the cluster into the desired failover path for the Messenger volume (Messenger Clustering Worksheet item 10).
-
Click Apply to save the failover path.
-
Click Policies to display the default start, failover, and failback policies.
By default, a volume resource:
- Fails over automatically if the node it is running on fails
- Starts automatically on the net node in its failover path
- Continues running at its failover location even after its most preferred node is again available
-
Change the policies if necessary, then click OK.
-
Continue with Copying LDAP and QuickFinder Files to Each Node.
Copying LDAP and QuickFinder Files to Each Node
During installation of the Messenger agents, some files were copied to sys:\system of the node where the Messenger volume was mounted. These files must be copied to sys:\system on each node of the cluster. Copy the following files from the Novell GroupWise Messenger CD to sys:\system on each node in the cluster:
\server\nlm\ldap\ldapsdk.nlm
\server\nlm\ldap\ldapssl.nlm
\server\nlm\ldap\ldapx.nlm
\server\nlm\qf\qfind215.nlm
If you are running in a language other than English, copy the following files from the CD to sys:\system\nls\language on each node in the cluster:
\server\nlm\language\*.msg
\server\nlm\language\*.hlp
where language is a two-letter language code.
Continue with Testing Your Clustered Messenger System.
Testing Your Clustered Messenger System
After you have configured the Messenger volume resource, you can test the load and unload scripts by bringing the Messenger volume online and taking it offline again.
-
In ConsoleOne, select the Cluster object, then click View > Cluster State.
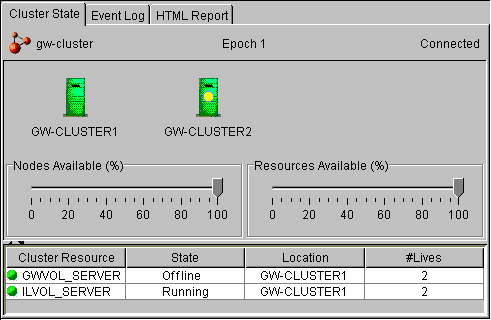
The new Messenger volume resource shows Offline in the State column.
-
Click the new Messenger volume resource, then click Online.

The State column for the volume resource now displays Running.
-
Observe the server console where the Messenger agents are loading to see that they start and run correctly.
-
Click the new Messenger volume resource, then click Offline.
The State column for the volume resource returns to Offline.
-
Observe the server console where the Messenger agents are unloading to see that they shut down correctly.
-
Repeat Step 2 whenever you are ready to bring the new Messenger volume resource online permanently.
On NetWare 6.x, these actions can also be performed from your Web browser. See Using NetWare Remote Manager on NetWare 6.x.